Add actions to take after a visitor submits the form (for example, opening or closing a popup, sending an email notification, connecting to a third party like MailChimp, Redirect, etc.)
Para obtener más información sobre la integración de servicios, visite este link.
Para obtener más información sobre la API de formularios, visite el Elementor Developers section on our site here.
Después de que un Username envía un formulario, ¿entonces qué?
A common question from novice form designers is: » I have set up my Elementor form, but nothing happens when it is submitted. Why?«
The answer is usually » You have not yet configured the "After Submit" actions.«
Once an Elementor form is submitted, you'll want one or more actions to take place, with each of those actions requiring a small amount of setup. Some common actions include:
- Email the form results to one or more email addresses.
- Redirect the user to a "Thank you" page.
- Agregar información de subscriber a un servicio de respuesta automática de boletines
- Agregar información de usuario a un CRM
- Enviar datos de formulario a un channel from Slack o Discord
- Open or close a pop-up window.
Las acciones de formulario de Elementor le brindan opciones poderosas. Puede conectarse con servicios de terceros como Mailchimp, Drip, Hubspot, Slack o Convertkit para procesar la información del formulario. Elementor tiene estas y varias integraciones de servicios más integradas, pero no está limitado a conectarse solo con las integraciones integradas. Sus formularios también pueden conectarse con servicios como Zapier, a través de la acción Webhook. Zapier se conecta a más de 1000 servicios y actúa como un puente entre su formulario y esos servicios. Read our extensive guide on using Elementor with Zapier here.
The list of Elementor form actions currently available includes: Email, Email2, Mailchimp, Redirect, Webhook, Drip, ActiveCampaign, GetResponse and Convertkit, MailerLite, Slack, Discord, and Popup. For more information on service integration, visit this link.
Content
Actions after submitting
Add new actions by clicking inside the Add action field. A list of actions available to choose from will appear.

Email results to site administrators
Elija la acción de correo electrónico. Esto agregará una pestaña de correo electrónico. La pestaña Correo electrónico se utiliza para enviar los resultados del formulario al usuario administrador de su sitio Web. Si también necesita enviar un correo electrónico adicional al usuario que envió el formulario, consulte la opción Correo electrónico2 a continuación.
Click on the Email tab to open your options.
- TO: The email addresses to which the results of the form submission will be sent. Add additional email addresses separated by commas.
- Email subject: The subject of the email
- Email content: The body of the email. By default, all form fields are submitted via the shortcode: [all-fields]. Do you want to customize which fields are sent? Copy the shortcode that appears inside the fields you want to submit and paste it here.
- From the e-mail: The email address "sent from"
- By name: The name "shipped from"
- Answer to: The email address to send responses to
- DC: Email addresses to CC
- BCC: Email address to BCC
- Metadata: Available metadata is included by default. Click the "x" for each to remove the ones you don't want to include in the email.
- Send as: Seleccione el formato en el que enviar el correo electrónico, ya be HTML o simple

Important! Solo se pueden usar los códigos cortos ubicados en la pestaña avanzada del widget de campos de formulario. No puede usar códigos cortos de ningún otro lugar aquí. Agregar otros códigos cortos de otros complementos o de otro lugar provocará un mensaje de error del server. El código abreviado debe escribirse exactamente como aparece en la pestaña avanzada del campo del formulario, con una excepción. Si el shortcode en la pestaña avanzada tiene el formato [field id=email], debe envolver el nombre del campo entre comillas, por lo que deberá cambiar [field id=email] a [field id=»email»].
Send confirmation by email to the user who submitted the form
Configure Email2
Email2 it is very useful. For example, you might want to send a confirmation email to the visitor who completed the form. Email2 is the action to use for this.
To create one, follow the same process above for email.
Note: In the 'To' field you must enter the short code located in the advanced tab of the email field [field id = »email»].
Tip: You can customize the confirmation email using the sender's name ('Hello [field id = »name»]').
Here is an example of how to create all email content using HTML:
<p>
     <p>You got a new message!</p>
</p>
<p>
     <p>Username: [field id="name"]<br />
</p>
<p>
     <p>Email:  [field id="email"]<br />
</p>
<p>
     <p>Phone:  [field id="tel"]<br />
</p>
<p>
     <p>Message: [field id="message"]</p>
</p>
<p>
     <p>Don’t forget to call them back soon :) </p>
</p>
Important! Only shortcodes located on the advanced tab of the form fields widget can be used. You cannot use shortcodes from anywhere else here. Adding other shortcodes from other plugins or elsewhere will cause a server error message. The shortcode must be entered exactly as it appears in the advanced tab of the form field, with one exception. If the shortcode in the advanced tab has the format [field id = email], you must wrap the field name in quotation marks, so you must change [field id = email] to [field id = »email»].
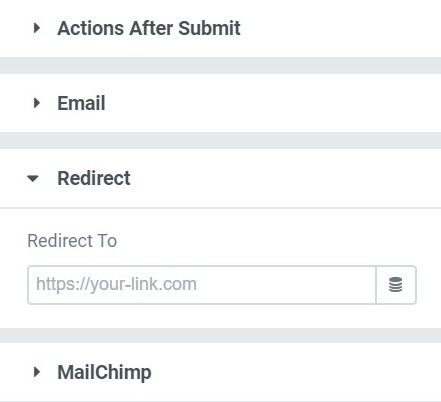
Redirect to a thank you page
Choose the Redirect action. This will add a Redirect tab.
Click the Redirect tab to open your options.
- redirect to: Ingrese la Url de la página para redirigir al usuario después del envío del formulario.
Add subscriber to a newsletter email marketing service or user information to a CRM
Choose any of the third party services. This will add a new tab for that service.
Click on the tab of the chosen service to open its options.
- API key: Enter your API key for the chosen service here. You must first configure your API credentials in the Integrations Configuration. You can also set different API credentials by selecting "Custom".
- List / Account: Select the list or account to send the form information to.

Use Zapier to connect your form to any of the thousands of other services
Choose the Webhook action.
Click on the Webhook tab to open your options.
- Webhook url: Enter the integration URL (such as Zapier) that will receive the submitted form data.
- Advanced data: Slide to YES to send advanced data to the webhook, which will include metadata such as date and time, remote IP, etc. It will also send the data as an array, like: ['Name' => 'John Doe', 'Email' => '[email protected]', 'Message' => 'Contact me'] If Advanced data is set to NO , the data will be sent in simple form, which will send the form fields to the webhook as a text message, such as: “Name: John Doe, email: [email protected], Message: Please contact me «.

Submit form data to a Slack channel
Choose Loose Action. This will add a new Slack tab.
Click on Slack to open your options.
See the Slack integration documentation for more details.
Open or close a pop-up window
Pop-up windows can be opened or closed after submitting a form.
Choose Popup Action. This will add a popup tab.
Click Popup Window to open your options.
- Please select Open popup window to choose a pop-up window to open after submitting the form. Enter one or more characters to generate a drop-down selection of available pop-ups to choose from.
- Please select Close popup to close the current popup after submitting the form. You can also configure the pop-up window to Not reappear.
More form options
This page describes the form Actions after submitting options. For other form options, click on one of the links below:
CONTENT
- Form fields
- Submit button
- Actions after submitting
- Additional options
STYLE
- To form
- Field
- Button
- Messages