


Improving the performance of our WiFi adapter is not too complicated. We have a way to get it on our Windows 10 computer. Even though it is not something that many users know about. But thanks to this we can modify the power with which it works. Thus, we are going to improve the connection to the computer.
Next we explain the steps to follow to achieve it in Windows 10. You will see that it is not complicated and that is available to all users operating system. What steps do we have to follow in this case?
First we must enter the control panel. Therefore, we write this term in the search bar, and it will appear directly in the list, so we basically have to click. Once there, we click on the network and Internet chapter and access the option "have access to networks and shared resources."
(*10*)
It will be within this option where we will find a text that says «Change adapter settings ». We must click on it and a new window opens. It will be in this window where we will be able to configure the Windows 10 WiFi adapter precisely and get more out of it.
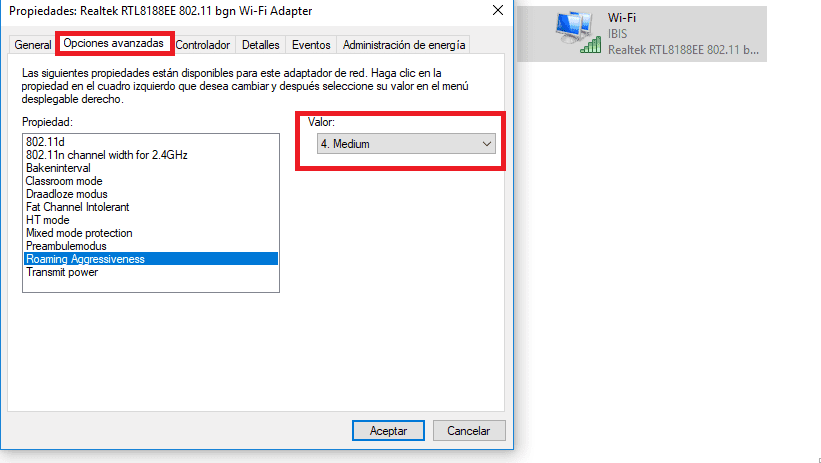
Right-click the adapter and enter its properties. Within them, we get a configuration button, we must click on it. By doing this, it will show us a list of alternatives. We have to search and click on the option called Potency of transmission. Subsequently, a drop-down list appears, where we must configure it to the maximum value.
We give him to accept and we go now. From this dynamic, what we have done is that the WiFi adapter of our Windows 10 PC go to work at full power. Something that will be very useful if the connection is weak. That is why it can help us on many occasions.


