

Today we are going to focus on learning how to use WP Super Cache on the WordPress blog. There are two great plugins that can be used for the purpose of caching plugins: WP Super Cache and W3 Total Cache. Depending on your needs one of them must be enabled on your blog, but today we are only going to discuss how to use WP Super Cache on the WordPress blog.
What WP Super Cache does is it takes your blog's dynamic WordPress PHP files and converts them to static HTML files. The benefit of this file is that it is less heavy than the actual PHP file and increases the page loading speed, which ultimately makes the visitor happy, as no one likes to wait. With increasing page loading speed, search engines are more likely to index your pages and show them to potential visitors.
Well, most of the above is true, but there is a catch, the static HTML file will be served to most users except those who are connected to your website or have left a comment on your blog. This bias is due to the fact that when the user is logged in or has left a comment on their blog it is shown with their name instead of the static file, so they are handled by the legacy caching engine.
Introduces the WP Super Cache:
- Allow you to use the Content Delivery Network (CDN) in conjunction with the caching system.
- Compressed web pages to reduce loading time.
- Caching available for PHP pages too
- Caching is also available for mobile devices and tablets.
How to use WP Super Cache on WordPress blog
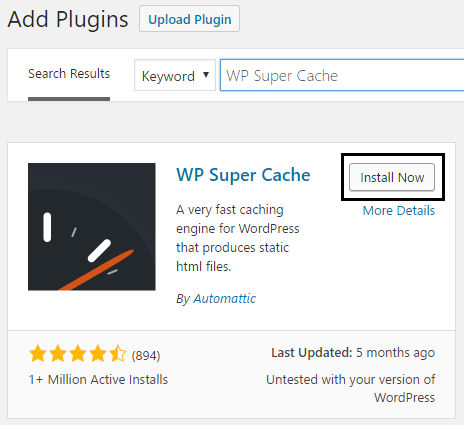
To use WP Super Cache on the WordPress blog, you must first install the plugin. Let's see how to do it, go to your administrator account and from Plugin> Add New, search for WP Super Cache and then install and activate the plugin.
Once the plugin is installed, it will display the following message:
WP Super Cache is disabled. Please go to the plugin administration page to enable caching.

You need to enable the WP Super Cache plugin before you can use it, just click on "admin page plugin" and you will be directed to the WP Super Cache settings.
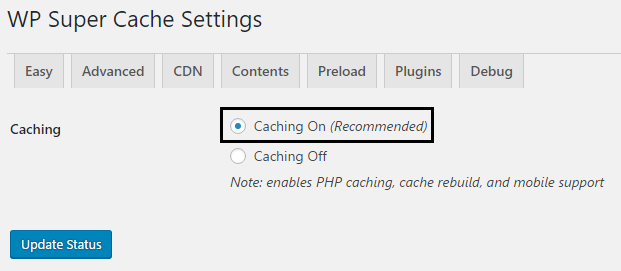
Configure WP Super Cache
Check the box next to Caching On (Recommended) to enable WP Super Cache and click the Update Status button to save the changes.
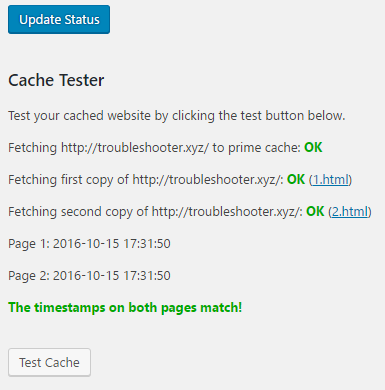
Now we are going to check if the plugin works or not by clicking the test cache button under Cache Tester. If everything goes accordingly, then you would see something like this:
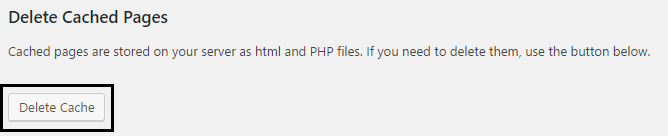
If for some reason you want to clear your cached pages, click the Clear Cache button and you're done.
In the Advanced Options these 4 settings are made:
- Caching
- Miscellany
- Advanced
- Cache location
Let's talk about each of them and see how to use the Wp Super Cache settings to the fullest.
Caching
Check the Cache hits to this website for quick access (Recommended) box to enable caching.
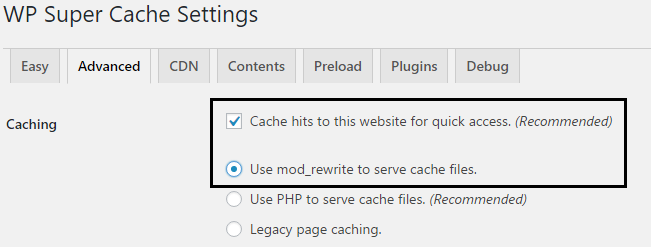
There are three options available for caching below and by default PHP will be used to serve the cache files, but we don't want to involve PHP as this will increase the page load time. So, click on the radio button next to "Use mod_rewrite to serve cache files" which is the fastest method to deliver your HTML files without involving the PHP engine.
Miscellany
In Miscellaneous enable the Compress pages options since this option is disabled by default. This option helps reduce the overall page load time.
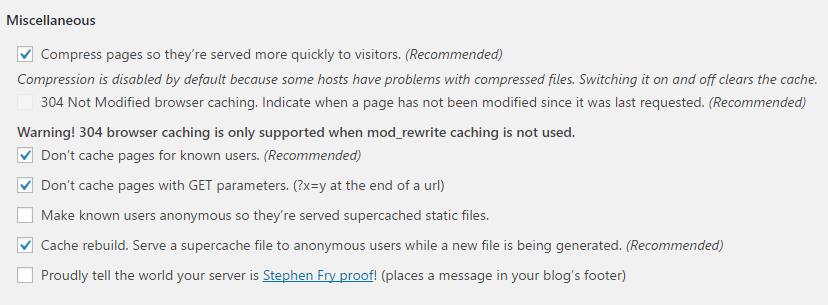
Enable option 304 no Modified browser caching that indicates whether or not a page has been modified since the last request. Enable option Don$0027t cache pages for known users as it allows the administrator and users to see the real pages without any caching.
Enable the No Cache option with GET parameters because these requests are processed through PHP engines and then enable the rebuild cache option.
Advanced
Enable mobile device support which obviously makes Wp Super Cache compatible on mobile devices. Then enable the option Clear all cache files when an entry or page is published if it has a long cache expiration date, or leave this option as is.
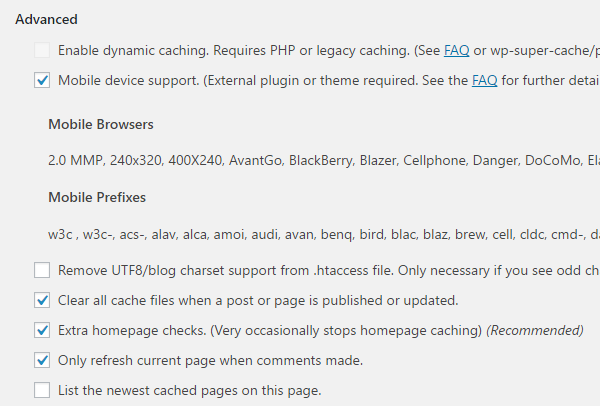
Enables additional home page checks so that the home page cache stops unexpectedly to check if it is working properly. Also, enable the Only refresh current page when comments are made option to show the PHP page to the user again when they comment.
Cache location
Good news, you don't even need to touch this option, leave it as is.
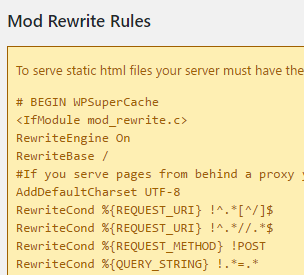
Once you are done with all the above settings, just click the Update Status button. After the page refreshes, you'll see some modes rewrite the rules just below the advanced settings, like this:
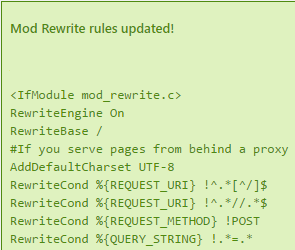
Just click on the Mod_rewrite rules update and once completed you will see something like this:
Well I guess you have learned all about the advanced settings and can teach others how to use the WP Super Cache plugin efficiently. But there are still a few more settings you need to know before you go.
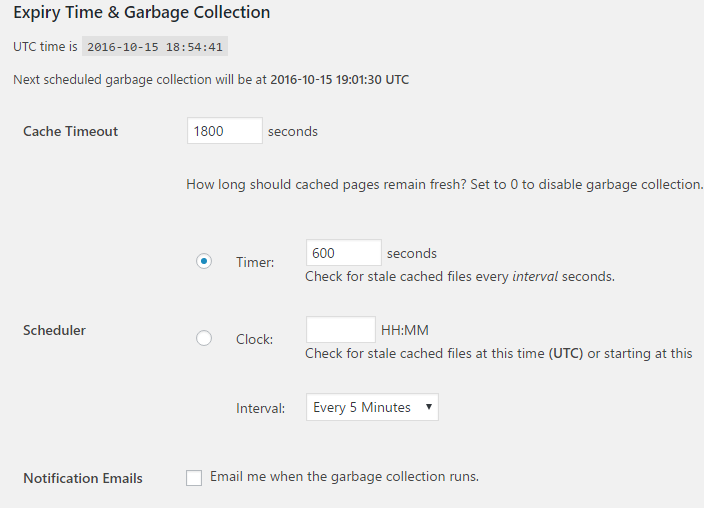
Expiration time and garbage collection
Here you set the time and frequency of validity of the data stored on your server. By default, the cache timeout is set to 1800 seconds, but if you have a large number of articles on your site, then set a shorter time.
The following is Accepted filenames and Rejected URIs, here you can disable the following types of pages for caching according to your need:
- Individual posts
- Search Pages
- Author Pages
- First page
- Category
- Records
- pages
- Food
- Home
- Tags
Well, you don't have to mess with this busy scene.
Enable CDN support
To enable CDN support with the WP Super Cache plugin, you need to check the Enable CDN support box (Make sure you have selected the CDN tab next to advanced settings).
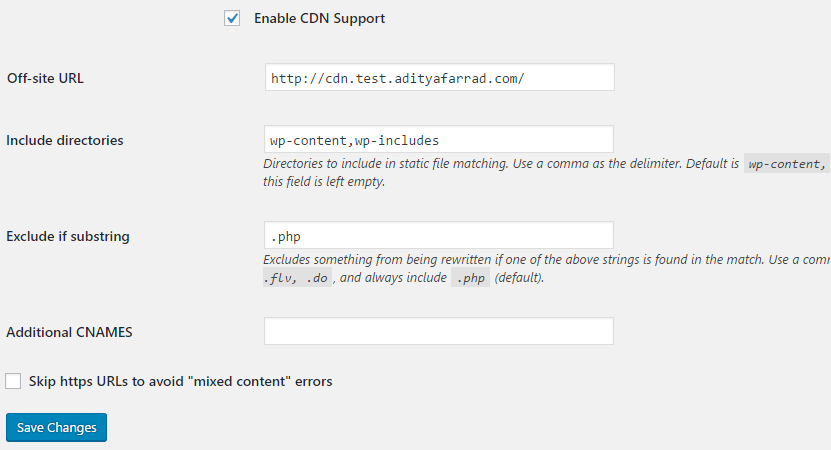
Then enter your local URL or external URL like http://cdn.test.adityafarrad.com/wp-includes/js/prototype.js and click Save Changes.
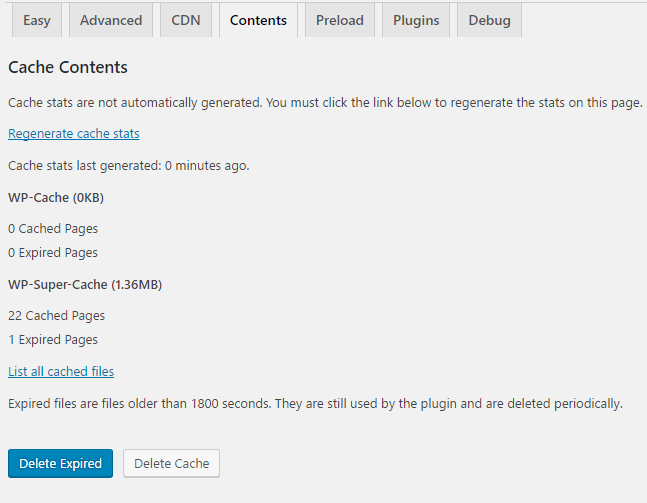
Content
The next tab is "Content", which is adjacent to the CDN. Here you can regenerate the cached statistics as they are not generated automatically. You can also clear expired pages and cache.
Preload
The preload option caches all the pages and posts on your website and then serves the static version to all visitors. This option defaults to 0, which is actually a disabled state. The minimum time required is 30 minutes and you also have to enable all the preload options to really benefit from this plugin.
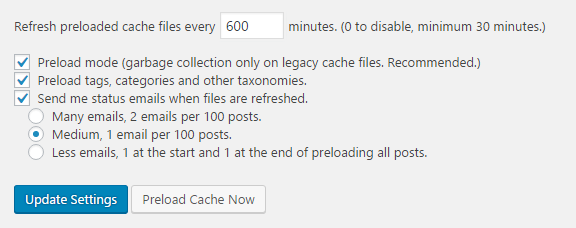
Next, click Refresh settings and after the page refreshes, click the Preload cache now button. You'll see a drastic improvement in your page loading speed once the cache starts building for your site.
We hope this article has been useful to you and that you have learned how to use the WP Super Cache plugin on the WordPress blog. Once you've implemented the above settings, your site's loading speed will dramatically increase. If you still have any questions regarding this post, feel free to ask them in the comments.
Do you have any suggestions to add here? Do you have a secret trick to increase page loading speed? Suggestions are always welcome here!


