

- 1. Beginner's guide to knowing the internal functions of WordPress
- 2. What is WordPress caching and why is it important?
- 3. How does WordPress caching work?
- 4. Today reading: Cómo instalar y configurar el almacenamiento en cache from WordPress con WP Super Cache
- 5. How to configure WordPress caching with W3 Total Cache (W3TC)
- 6. MaxCDN Review: The Best CDN for WordPress?
Hello everyone. Welcome to a new chapter in the WordPress caching series, where in conclusion we will learn how to put WordPress caching to work. I hope you have read about the previous topics where I have explained how WordPress works (internally), what is caching, and how WordPress caching works. Today, in conclusion, you can transform that theoretical knowledge into practical use! Then let's get started.
The preliminaries
El almacenamiento en caché de su instalación existente de WordPress es un factor variable y depende de su entorno actual de WordPress. Este tutorial describe una de las formas más sencillas de poner en práctica el almacenamiento en caché de WordPress. Si está en un host compartido, VPS o incluso en un dedicated server, este tutorial debería adaptarse a sus necesidades. Si desea subirlo un poco, eche un vistazo a Pro WordPress Caching with W3 Total Cache + APC (próximamente).
Tenga en cuenta que para las persons que utilizan servicios de alojamiento administrados de WordPress como WPEngine, este tutorial no les será de mucha utilidad, ya que WPEngine emplea sus propios algoritmos de almacenamiento en caché súper complejos y (súper) efectivos, llamados tecnología Evercache. Me arriesgaría aquí y diría que WPEngine es probablemente el proveedor de alojamiento de WordPress mejor administrado que encontrará. De este modo abróchense el cinturón, es hora de irse.
Startup
We will be using one of the most popular free WordPress caching plugins available - WP Super Cache. It's one of the oldest plugins out there and I clearly remember using it on my first WordPress caching attempt. This is what I am using for the tutorial.
- WordPress revision: 3.8.2
- Entorno de alojamiento: server de alojamiento compartido con servidor Web LiteSpeed (alternativa a Apache)
- Super Cache version: 1.4
Installation
As with any plugin, there are two ways to install it.
The DEUA way: download, extract, load and activate
The DEUA way is the slowest possible way to extract any WordPress plugin. For those of you who are new, it goes something like this:
- Download the WP Super Cache plugin from the WordPress plugin repository
- Extract the file on your computer
- Sube lo extraído a tu carpeta wp_content / plugins / vía FTP usando un client FTP como FileZilla
- Then go to the Plugins page in your WordPress dashboard and activate the plugin
I do not recommend this method. 😉
The easy way: find and install

Installing WP Super Cache
The much easier way is to just find and install the plugin like this:
- Go to Plugins> Add New page in WP dashboard
- Search for "wp super cache"
- Click Install
- Press Activate
- Done!
Now that was easy, right?
Plugin initial configuration
Okay, let's do it step by step from now on. We will cover each plugin page one by one with relevant screenshots. As soon as we activate the plugin we get a message like this:

Post installation message
Haga clic en el hipervínculo para visitar la página de configuración de WP Super Cache. Si recibe un mensaje que le pide que cambie su link structure permanentes, diríjase a Configuración> Enlaces permanentes en su panel de WP y elija cualquier otro que no be el primero. Para mi sitio de demostración, elegí la opción de enlace permanente numérico.

Para sitios que usan la opción de link permanente predeterminado

List of permalink options available in WordPress
Now that we have it sorted, let's open the WP Super Cache configuration panel. You can find it in Settings> WP Super Cache. So the first thing you will notice is this yellow box with a message saying:

.Htaccess file modification notification
This is good. Regardless, this yellow message box shouldn't appear every time you open the WP Super Cache settings; it is a unique message. If it appears every time, follow the FAQ link. At the same time you will notice that caching is disabled. Let's just leave it like that and cover each lash one by one.

WP Super Cache with disabled cache
WP Super Cache: advanced settings tab
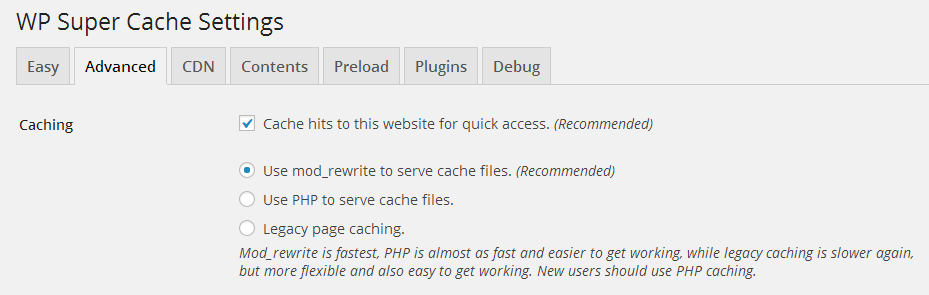
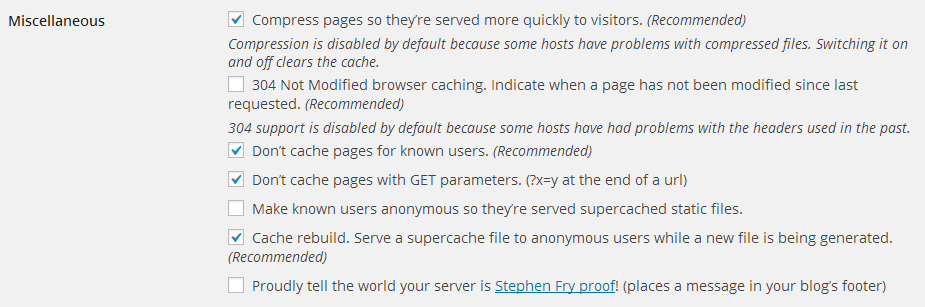
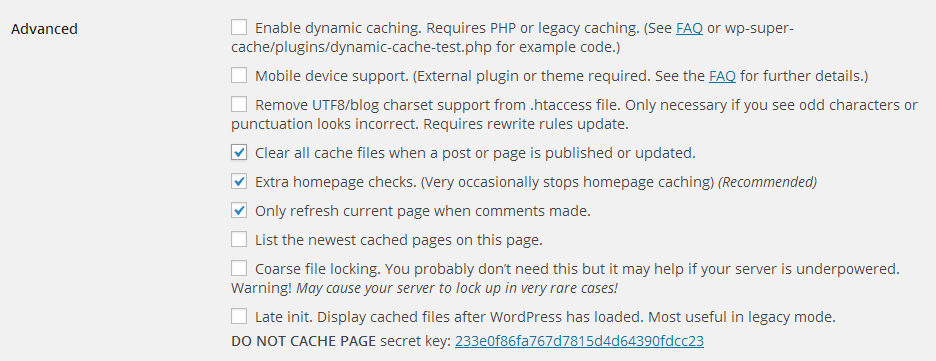
The first tab we long to cover is the Advanced Settings tab. It contains three groups of settings:
- Caching
- Diverse
- Advanced
The options are self explanatory - I have checked the optimal settings for each group in the three screenshots shown below. These will work in most hosting, shared or dedicated environments.
Once you have checked these options, click the Update Status button to store your changes. You should immediately see a fairly long yellow box that contains a lot of text.
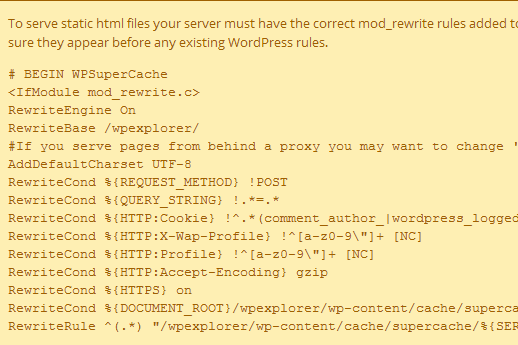
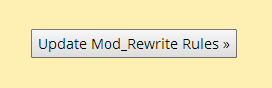
Well these settings are for your server's .htaccess file. Just scroll down and you will find the "Update Mod_Rewrite Rules >>" button.
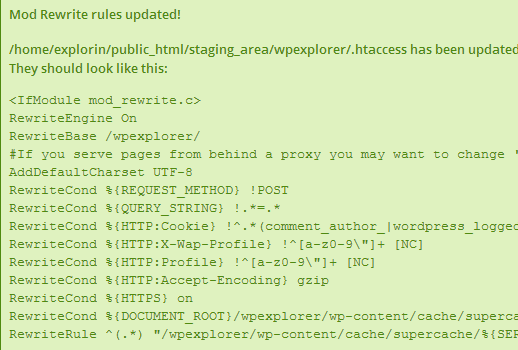
If your .htaccess file is writable, you should see a green box indicating that the modification was successful:
Okay, now it takes care of the Advanced tab. We go to the configuration of the preload tab.
WP Super Cache: Preload Settings tab
The preload setting essentially causes the plugin to cache all the posts and pages on your site on a regular basis. You can set the time interval between each cache update. This time interval is a very important scenario.
In shared hose environments, you should optimally set it to at least once a day, in other words, every 1440 minutes. If you update your site twice a day, you can set the time interval between each cache update to 720 minutes. In the last configuration, the preload cache will be updated twice a day. This would put an additional load on the server. I would recommend not using a lower value in shared hosting environments as it could (and probably will) be counted as excessive use of server resources.
A pesar de todo, si está en un VPS o en un servidor dedicado, puede configurar la frecuencia de actualización tan baja como 60 minutos. Cabe destacar saber que la cantidad de publicaciones y páginas que tiene en su sitio afecta los recursos necesarios para cada operación de actualización de caché de precarga. Un tiempo de actualización óptimo para un servidor dedicado en un sitio de alto traffic sería de 2 horas.
I have checked the relevant checkboxes and have set the cache refresh interval to 1440 minutes. You are free to choose any value!

Haga clic en «Actualizar configuración». Si desea que el proceso de almacenamiento en caché comience de inmediato, haga clic en el botón «Precargar caché ahora» después de haber actualizado la configuración antes mencionada. La creación de la caché de precarga es una tarea que consume mucho tiempo y recursos, y depende de la cantidad de publicaciones y páginas que tenga, de este modo espere un momento, digamos 10 minutos y luego visite la pestaña Content
WP Super Cache: content settings tab
La pestaña Contenido en WP Super Cache le muestra la cantidad de páginas almacenadas en caché en su sitio de WordPress. Recuerde que aprendimos que, en última instancia, WordPress genera páginas HTML. Bueno, esta pestaña le muestra cuáles de esas páginas están almacenadas en caché y su antigüedad, medida en segundos. Estos datos deben correlacionarse con el intervalo de actualización de la caché de precarga que ha establecido en la pestaña Precarga. Hemos seleccionado 1440 minutos, dicho de otra forma, 86,400 segundos. Esta es la antigüedad máxima de cada página almacenada en caché. Técnicamente, ninguna de las edades de la página almacenada en caché debería superar este valor.
Sometimes you may not find current / accurate cache statistics. To view the most recent / accurate cached page statistics, press the "Regenerate Cache Statistics" button.

Una vez actualizado, debería ver que se actualizan las estadísticas de caché. Recuerde que estoy usando los datos de demostración del tema Free Blogger de R Digital marketing. Así es como se ven las estadísticas de la caché:

For an even better sneak peek and a better understanding of WordPress caching - testing that HTML files are actually cached, click the "Show all cached files" option. This is what mine looks like:

List of all cached files
A blessing in disguise
This option is very useful if you want to delete a single cached page. Suppose you have updated an old page and need the cache to reflect the change. Instead of regenerating the cache, which can be server intensive and time consuming, you can quickly remove the cached version of the file from this menu. When a visitor visits the original link, the page is regenerated from scratch and cached for future requests. Fast and efficient, like Agent 47.
Is everything working? I think so!
Now that WP Super Cache is properly configured, let's test the cache. Go to the default tab, in other words, Easy Settings tab in WP Super Cache and click the "Test Cache" button. If everything is configured correctly, you should see something like this:

Testing the cache
Bingo! It works! Congratulations, you have successfully implemented caching on your WordPress site. Your site should be considerably faster now! You do not believe me? No problem. Take a look at these demo site benchmark results before and after putting WordPress cache to work.
The before

And the after

conclusion
Now that you've seen how caching works and how real its benefits are, I'm sure you're more than convinced to give it a try, in other words, if you haven't already. In the next post in the series, I'll explain how to integrate MaxCDN with your existing WordPress site. MaxCDN with combined caching will have a profound effect on the performance of your site. Stay tuned!
As always, I hope you were able to learn something new today. If you have any questions or suggestions, we look forward to hearing from you!


