
- 1. Today reading: Cómo instalar WordPress en Microsoft Azure
- 2. How to install WordPress on Google Cloud
- 3. Install WordPress on AWS - Amazon Web Services
- 4. Introduction to cloud computing with WordPress
- 5. How to install WordPress on DigitalOcean
Microsoft Azure es uno de los principales proveedores de computación en la nube en las filas de Google and Amazon. Previamente, habíamos cubierto de qué se trata la computación en la nube y cómo configurar WordPress en una gota de DigitalOcean. Today we will see how to implement WordPress in the cloud using Microsoft Azure cloud computing services.
Introduction
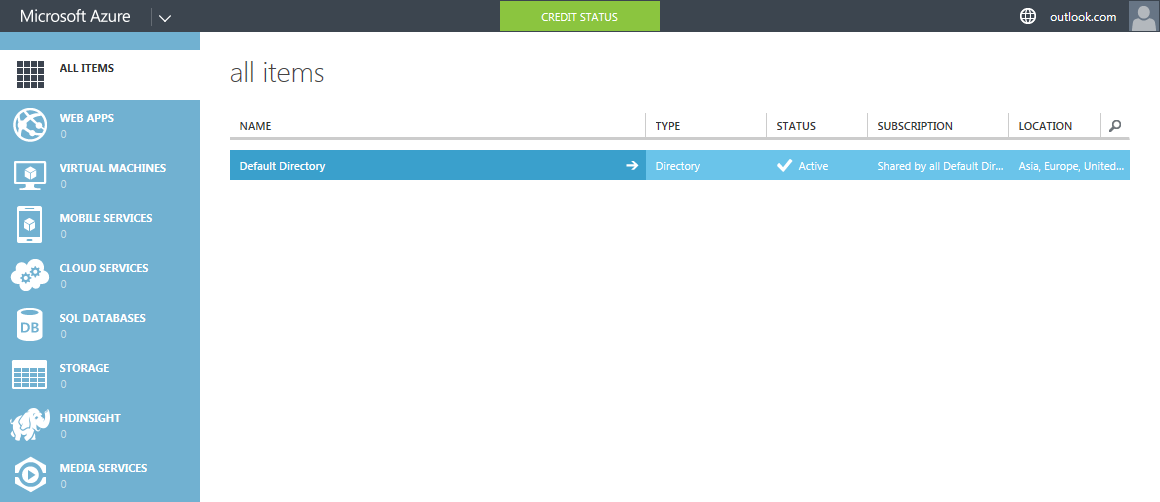
Cloud computing is much bigger than we speculated in our introductory post. Once you sign up for Microsoft Azure, you can take a look at countless possibilities cloud computing has to offer. Here's a look at the Microsoft Azure dashboard:
Here is the sequence of events:
- Sign up for a free Microsoft Azure account
- Poner en práctica una nueva aplicación Web WordPress
- Configure WordPress installation
Phase n. # 1: register a Microsoft Azure account
Microsoft Azure offers a 30-day trial account, with $ 200 worth of cloud computing resources. This is a free account and requires a valid credit or debit card to function. The card is used for verification purposes only. Prepaid credit cards and virtual credit cards are not accepted.
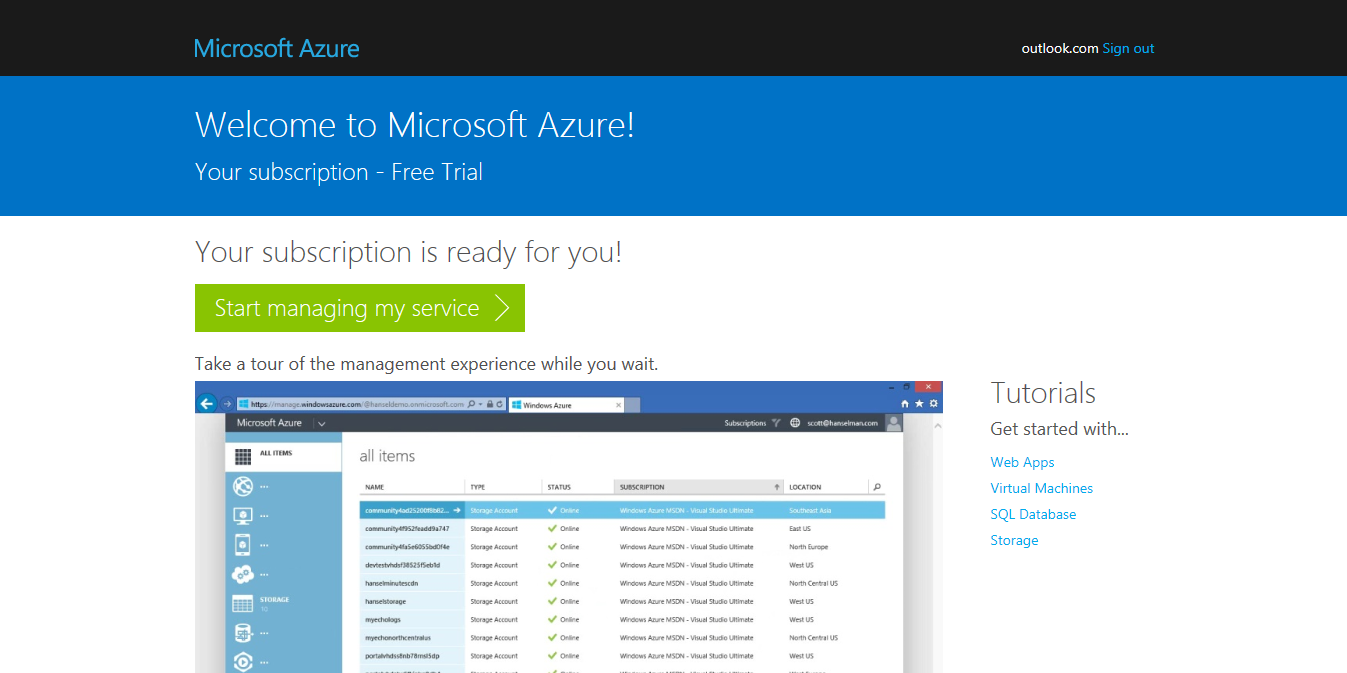
NOTE: I personally signed up for the Microsoft Azure service with a credit card. One dollar was charged and the amount was refunded within two business days.
One of the fundamental characteristics of cloud computing is the pay-per-use model. This means that you only have to pay for what you use. Some of us like to be very careful about the charges on our cards. After all, credit cards do conllevan cierto riesgo. Una vez una vez dicho esto, existe la posibilidad de que si hay una gran carga de traffic en nuestro sitio de WordPress, Azure escale automáticamente los recursos asignados a nuestra aplicación (WordPress) para equilibrar la carga adicional. Esto daría lugar a un aumento de la factura mensual, por tanto, facturas variables.
Azure spend limit and peace of mind
Microsoft Azure has a smart solution - they called it the Spending limit. As the name suggests, with the active spending limit, Azure will not allow you to spend more than the fixed amount. You can set this limit to the amount you want, starting at zero dollars.
As an example, let's say you've set a spending limit of $ 20 per month. Once you consume $ 20 cloud computing resources, your resources will be suspended for the rest of the month, or until you update the spending limit.
the Good news: When you sign up for a free route account, The zero dollar spending limit is created automatically.. This gives you complete peace of mind - your credit card will not be charged unless you specifically increase the limit.
Fase # 2 – Instalar la app web de WordPress
Once you have registered a Microsoft Azure account, go to the Azure Admin Panel. Does it look like this:
Pretty cool, huh? It gets even cooler. Thanks to the popularity of WordPress, cloud providers thought it would be better if they offered ready-made templates for WordPress. This step would relieve customers of having to go through the hassle of installing WordPress in a cloud computing environment. We saw the same in DigitalOcean's 1-click WordPress installer.
Let's count the number of steps required to install WordPress. Clever? Let's go.
Step 1
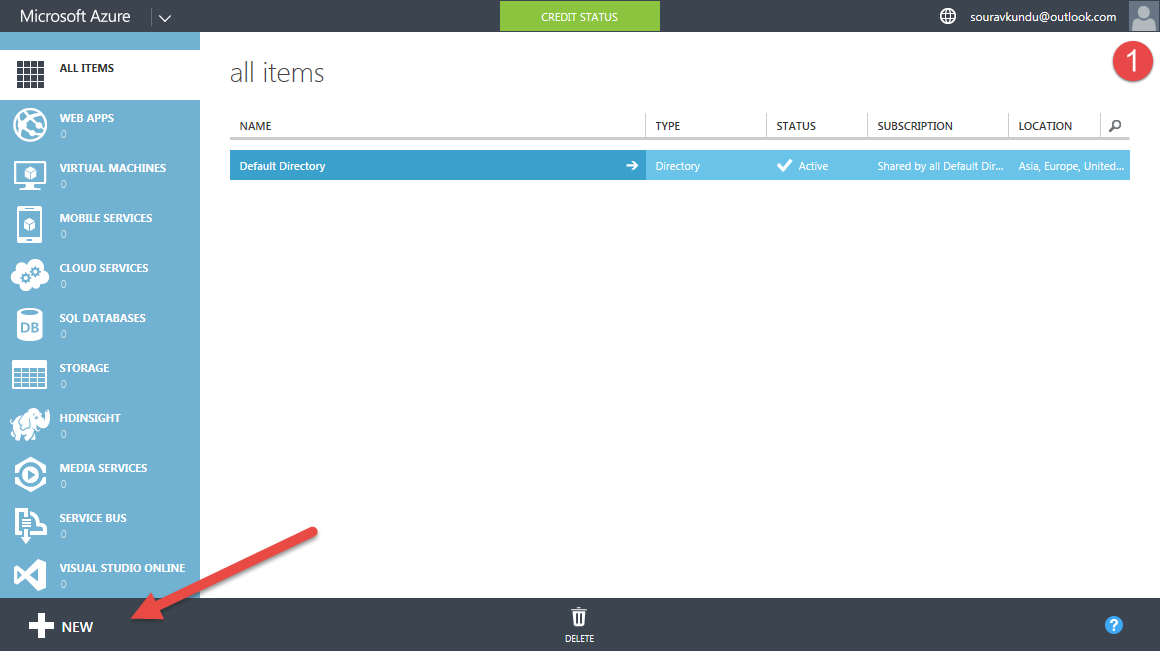
Sign in to your Azure admin panel.
Step 2
Navigate to the menu bar at the bottom of the screen and press New.
Step 3
Please select Calculate > Web Application > From the gallery. A new window would open.
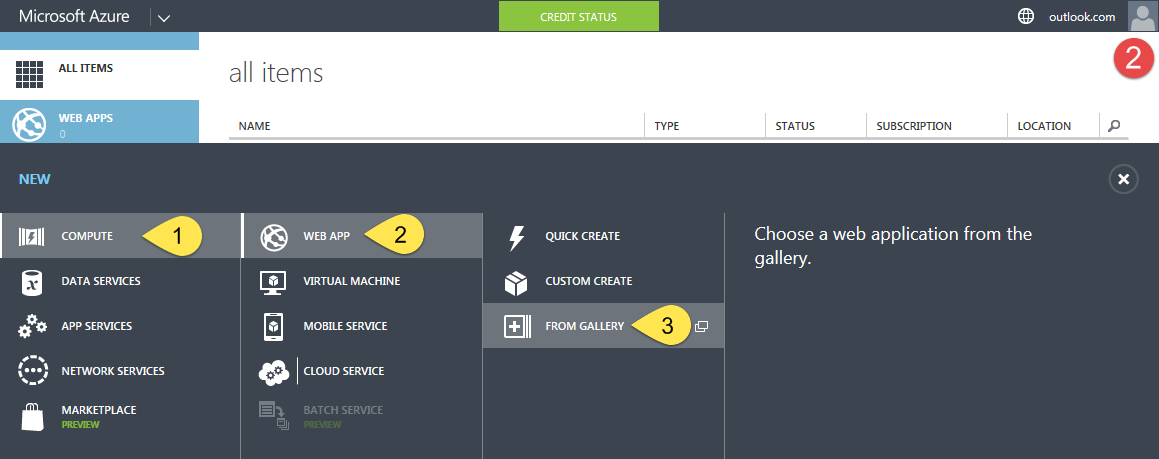
Step 4
The gallery shows all the apps available for 1-click installation. They have been tested to work seamlessly with the Azure cloud computing environment. In the menu on the left, select CMS. On the right, scroll down to find WordPress. Please select WordPress and click the next arrow.

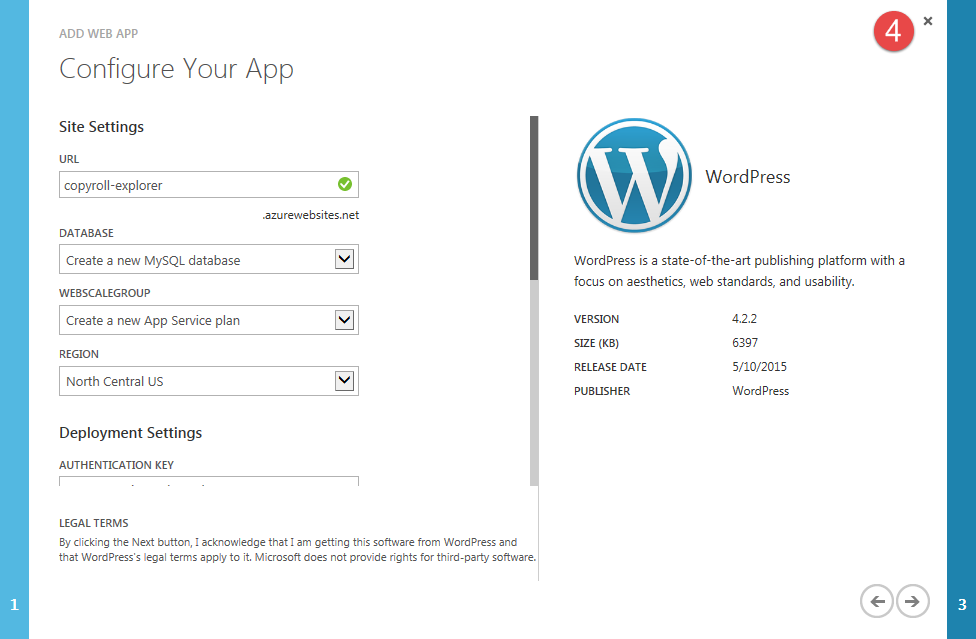
Step # 5
Below Site settings, just enter the name of your site. Leave the rest of the settings, along with Deployment configuration How is it. You can choose a Region a pesar de todo, según su público target. Continúe con el siguiente paso haciendo clic en el next arrow.
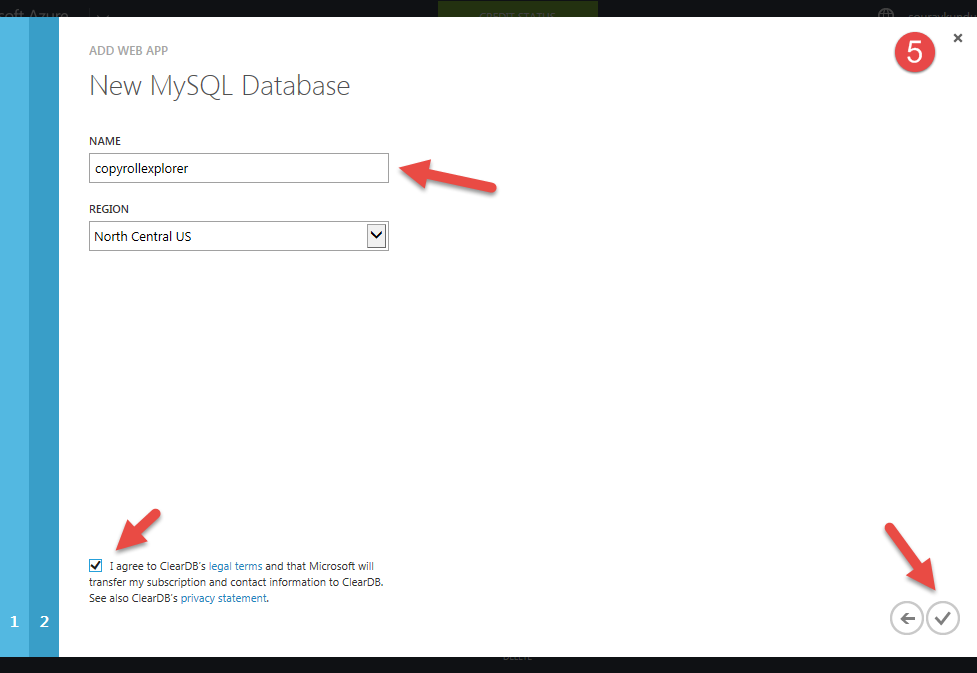
Step # 6
Now how do we know WordPress needs a database para guardar el contents del sitio. En este paso, le daremos un nombre a la base de datos utilizada por nuestro sitio de WordPress. Haga clic en el botón de verificación y Azure comenzará a crear la app web para usted.
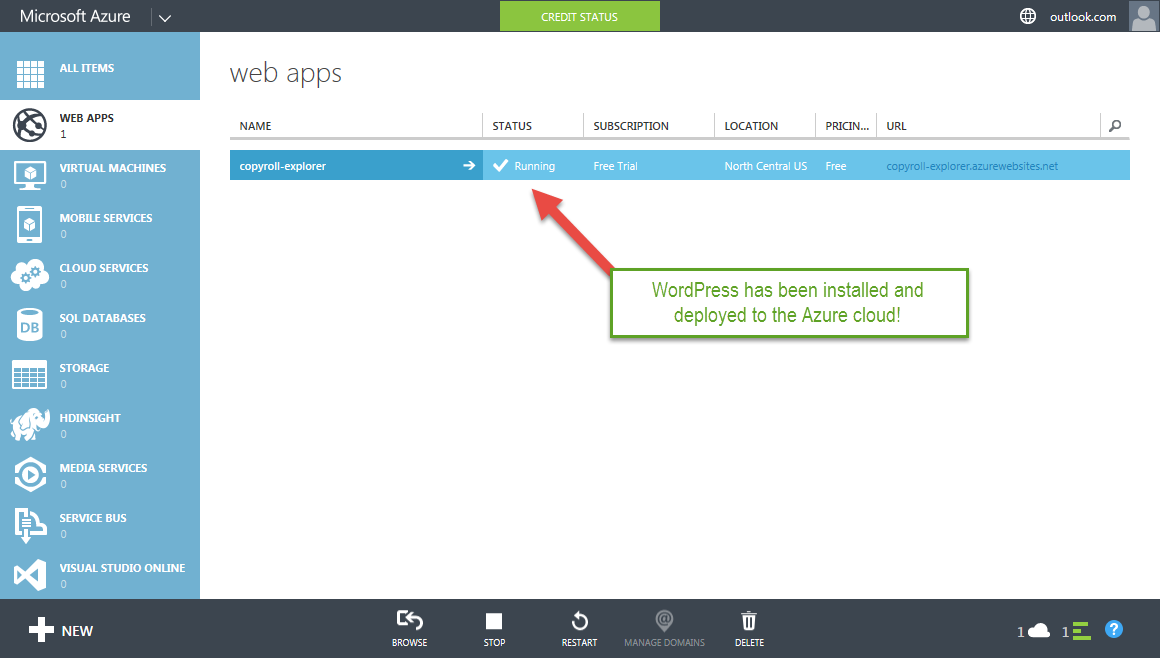
Step # 7
Una vez creada, encontrará una nueva entrada en apps web con el nombre que eligió en el paso 4. Eso es todo WordPress está creado y funcionando. Haga clic en la Url para iniciar su sitio de WordPress en la nube. Azure le ofrece un subdomain gratuito para all your hosted apps.
Step # 8
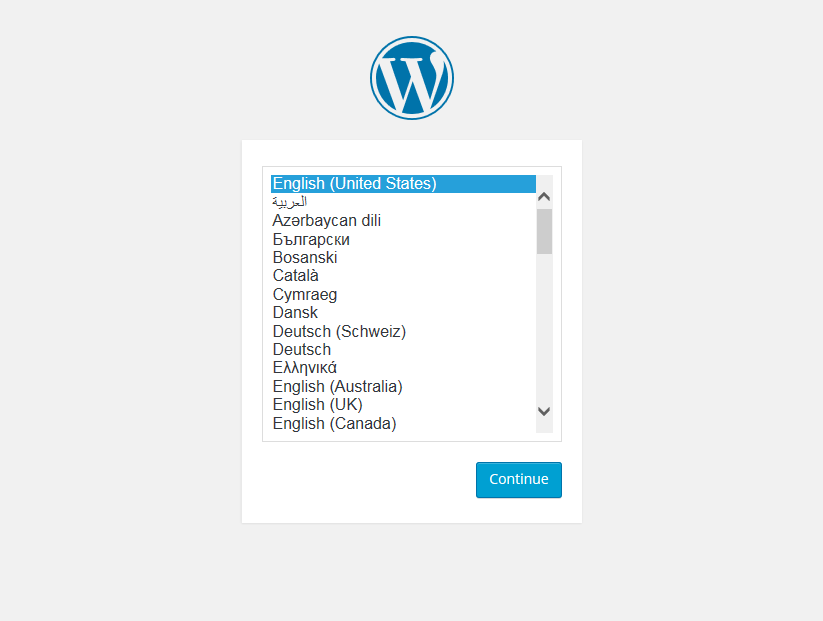
As of now, it is the famous 5 minute installment. Select the language you want and click Follow, continue.
Step # 9
Fill in the necessary information and remember do not use Management como nombre de Username. I have disabled the Privacy setup since this is a test site. Click on Install WordPress continue.

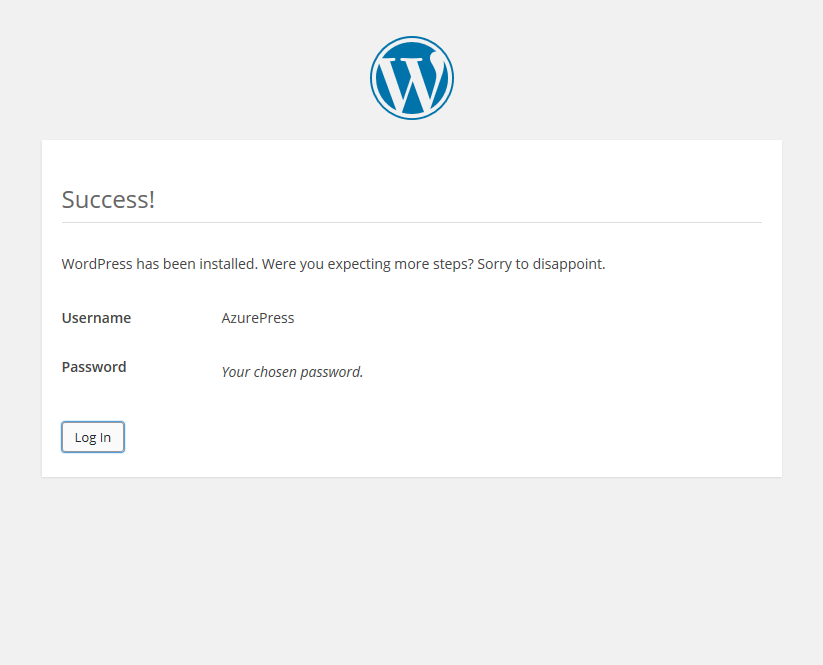
Step # 10
Yes, WordPress has been installed. You can now proceed to log into the WordPress dashboard.
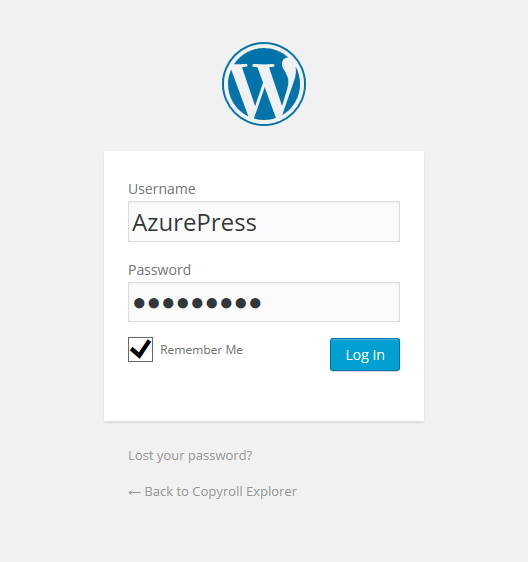
Step # 11
Enter the login details you set in Step # 9 and click Log in.
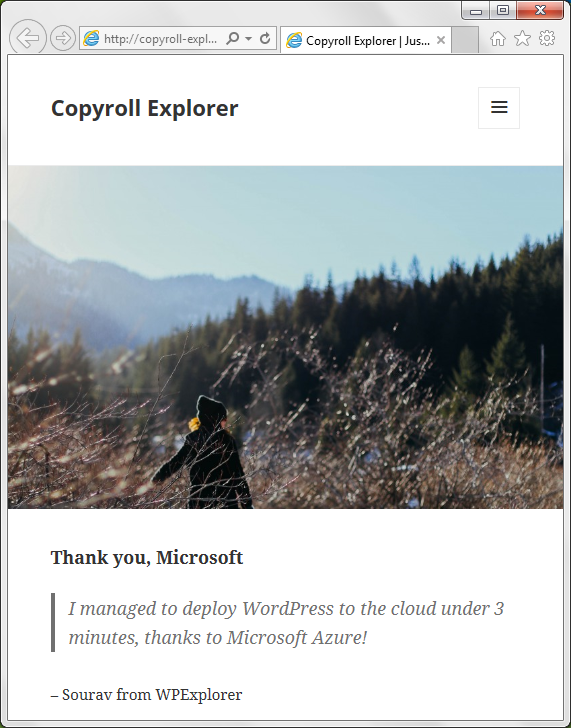
Boom: your WordPress dashboard is ready. Now you can install your favorite multipurpose WordPress theme, add some plugins (maybe Symple Shortcodes 2.0.0?) and add your content.
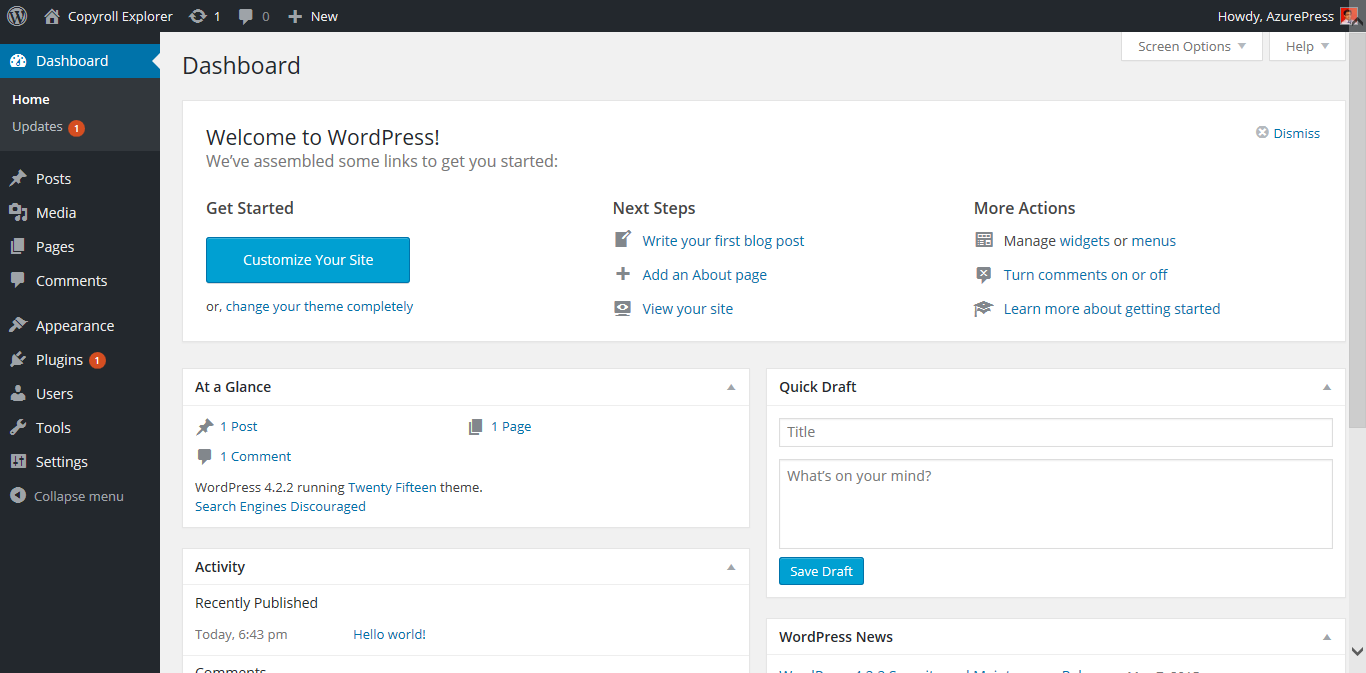
And here is your interface. It works great!
Advanced configuration in Microsoft Azure
I'll be honest with you: there are so many protected features in the Azure admin panel that I hardly know about the 30% of them. Of the few that I understand, I found them quite interesting and am sharing them with you.
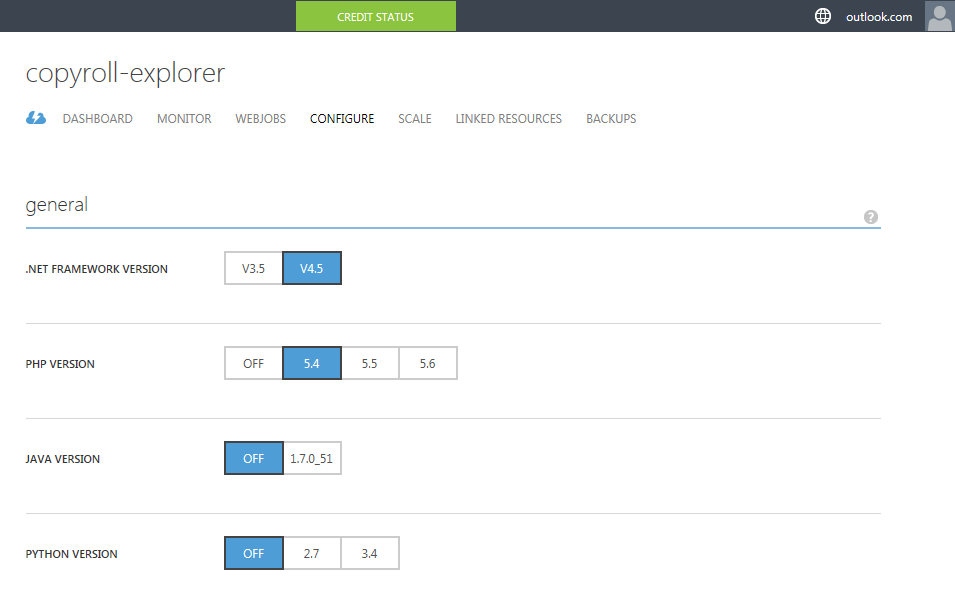
To access these settings, you will need to click on the entry for your WordPress web application. This will launch the Board. Under the Setting pestaña, encontrará una gran cantidad de software: .NET, PHP, Java, python, etc., ¡todos los cuales puede habilitar / deshabilitar con un interruptor! ¡Eso es conveniente! No hay necesidad de preocuparse por instalar Java (aquellos que lo hayan hecho antes lo sabrán). Encienda el interruptor y Java estará listo para trabajar.
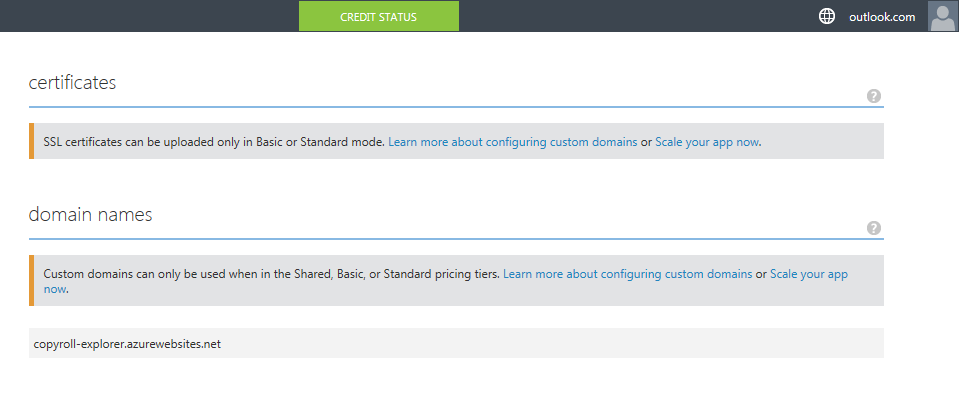
Desafortunadamente, la asignación de nombres de domain no está permitida en la ruta gratuita. Le sugiero que actualice a Pay what you consume membership para habilitar nombres de dominio personalizados.
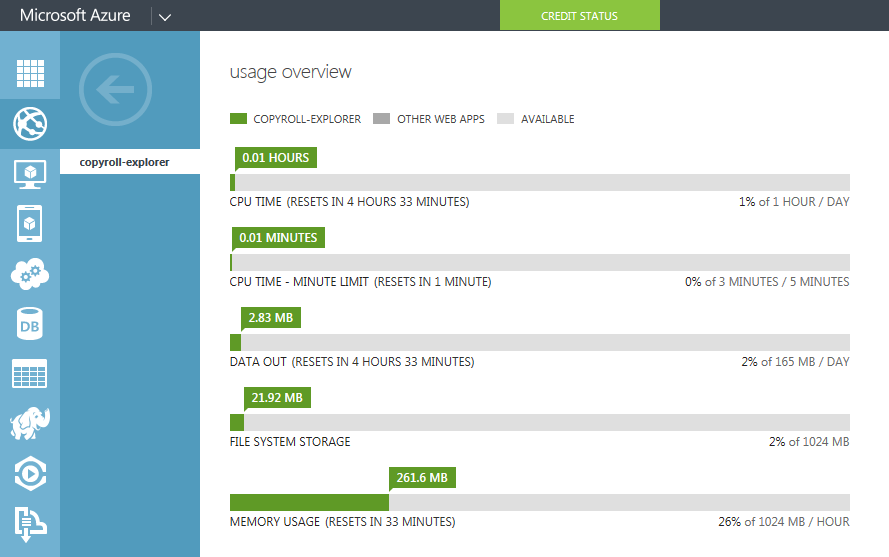
You can get a bird's eye view of the resources consumed by WordPress, relative to a fixed unit of time. The default is one hour and you can change it according to your requirements.
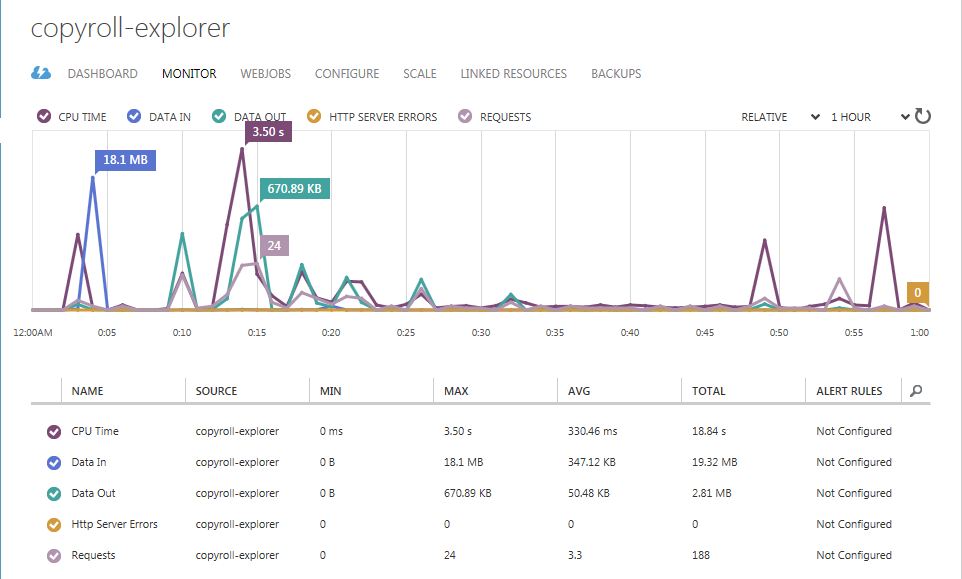
The Usage Summary shows the amount of resources consumed by WordPress. Each of these resources has a restart time. As an example, CPU time is limited to 1 hour every 24 hours. Data egress (or outgoing traffic) is limited to 165MB per day and RAM is limited to 1GB per hour.
conclusion
Installing WordPress on the Microsoft Azure cloud computing platform gives us a glimpse of the amazing things that cloud computing has in store for us. Not just WordPress, you can experiment with multiple instances of all the web apps in the gallery. If you like what you see, give Microsoft Azure a try and let us know what you think!


