
Ganar dinero con un sitio de WordPress a menudo implica affiliate marketing, anuncios o comercio electrónico. A veces, incluso implica vender membresías, crear bolsas de trabajo o organizar eventos.
Mucha gente piensa que los anuncios son noticias viejas en el mundo de hacer dinero, pero eso no podría estar más lejos de la verdad. Los anuncios son particularmente útiles para monetize revistas, blogs y sitios Web en línea donde no vende directamente un producto físico.
Dado que los usuarios a menudo consideran que las publicaciones patrocinadas son sucias, y el affiliate marketing al mismo tiempo puede generar señales de alerta dependiendo de cómo se presente, seguimos volviendo a los anuncios. Y al ver cómo herramientas como AdSense hacen que su implementación be mucho más fácil de lo que solía ser, no es de extrañar que los anuncios no vayan a ninguna parte pronto.
Lo más interesante es que la implementación de AdSense no le cuesta dinero, por lo que al menos puede probar las aguas y ver si puede ganar dinero con él. A la vez, esto le brinda la oportunidad de ver si sus usuarios piensan que los anuncios son molestos. Para asegurarse de que sus usuarios no se molesten, es importante aprender a usar AdSense de manera efectiva para WordPress. Pero antes de hablar sobre cómo configurar anuncios, aprendamos un poco sobre Google Adsense y veamos cómo registrarse.
What is Google AdSense?

A popular website monetization program, Google AdSense is a great option for both beginners and professionals.
Google AdSense is a Google program that enables marketers (called publishers within the program) to seamlessly display ads on their websites and blogs. Its main purpose is monetization, and you can use it to make money from WordPress simply by placing specialized ads on your website.
If you are a marketer, there are some similar programs that you can choose instead. However, AdSense offers a couple of unique benefits:
- Credibility: As a world-renowned company, you can't be more credible than Google.
- Versatility: AdSense offers a range of types of ads, including text, images, rich media, video, and audio.
- Flexibility: Este programa funciona con una gama de plataformas y otras herramientas, incluidos WordPress y Blogger.
Before you start, AdSense has a number of politics you will want to review. At the same time there are some requirements for your advertisers. As an example, you must have a well-established website (at least six months old) and you must be 18 years of age or older.
If you're ready to get started with AdSense, you'll be happy to know that the process is simple. In fact, it can be completed in just three steps.
Step 1: Sign up for Google AdSense
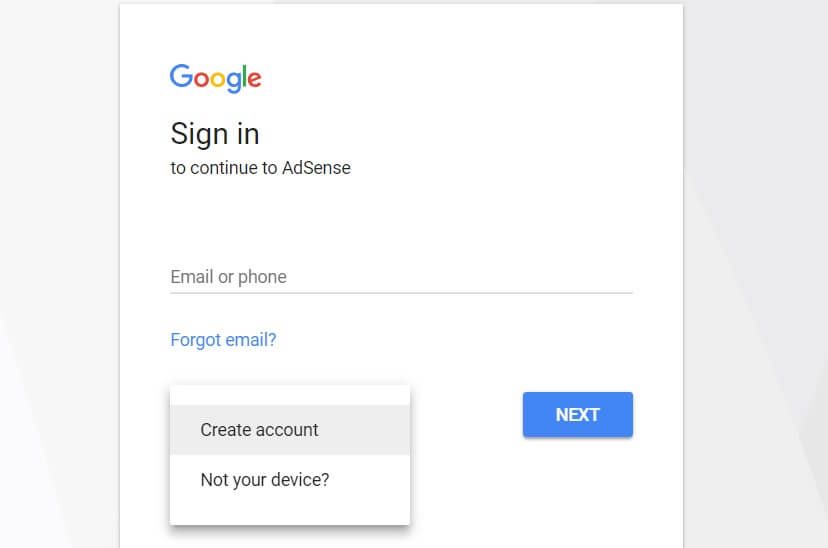
Since AdSense is a program on the Google platform, all you need is a Google account to start using its variety of features. When sign up for Google AdSense, you have two options. You can sign in with an existing Google account or you can create a new account.
Both actions can be done from the login page. If you have an existing account, simply add your login credentials and click Check in. If you need to create an account, click More optionsand select Create an account in the pop-up menu:
Once you have logged in (or completed the registration process), you will proceed to the next step of the program.
Step 2: complete your application for the AdSense program
As with any affiliate program, you will be asked to complete an application. Luckily, the process is straightforward and can be completed in minutes.
We recommend that you start by reading and understanding AdSense Policies and Terms. While this is a step you may be tempted to skip, it is important to know exactly what Google expects of its users. This is because you will be required to follow all policies and guidelines if you are approved as a publisher.
A continuación, puede completar la solicitud de tres partes. Primero deberá ingresar información básica, como la Url de su sitio web. Luego, se le pedirá que proporcione los detalles de su dirección de pago (para que AdSense pueda enviarle pagos e información importante de la cuenta). Finalmente, se le pedirá que verifique su número de teléfono.
Una vez que se hayan completado esas tres páginas de solicitud, solo queda un paso más antes de que Google revise su sitio. Se le pedirá que agregue un código HTML a su sitio web, que se proporcionará en el formato que se muestra a continuación:
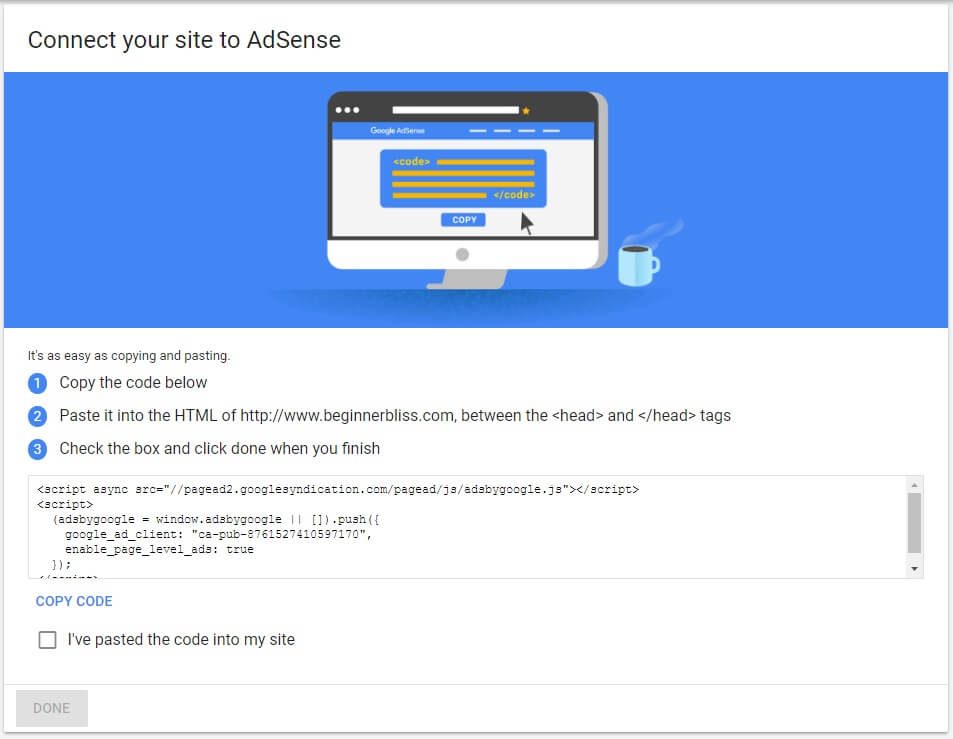
Once the code is added to your site, check the box confirming that the action has been completed and click Done. Now all you can do is wait patiently. It can take 48 hours to two weeks to review your application, and you will receive an email once the decision has been made.
Step 3: create Google AdSense ads
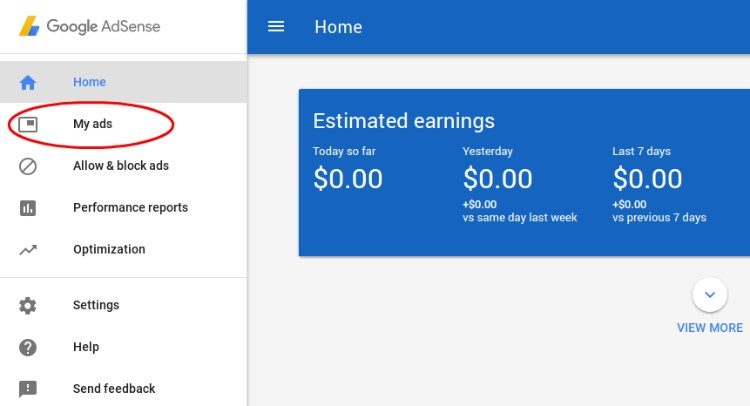
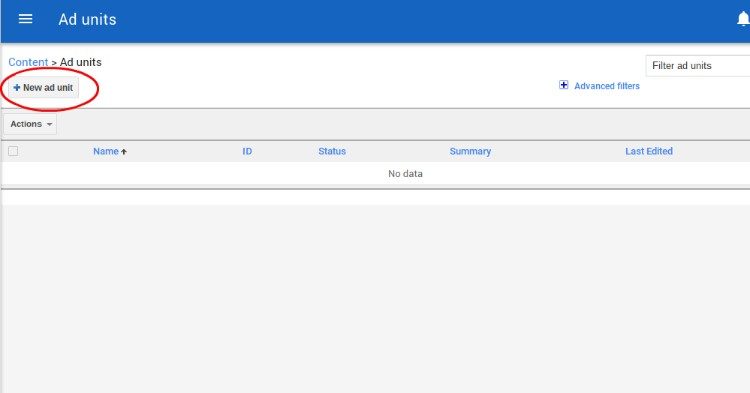
After the application is complete, you can log into AdSense to start rolling. The AdSense dashboard shows multiple tabs on the left side, but the only one you need to worry about now is the My Ads tongue. Click on this to continue.
If you've never created an ad before, you'll see an empty page. Click on the New ad unit to generate an ad and edit it to fit your website.
The first step is to name your ad. This will not appear on your site, so you will primarily name it for your own reference. After that, they show the recommended sizes for your ads. Feel free to choose the one you think is most appropriate.
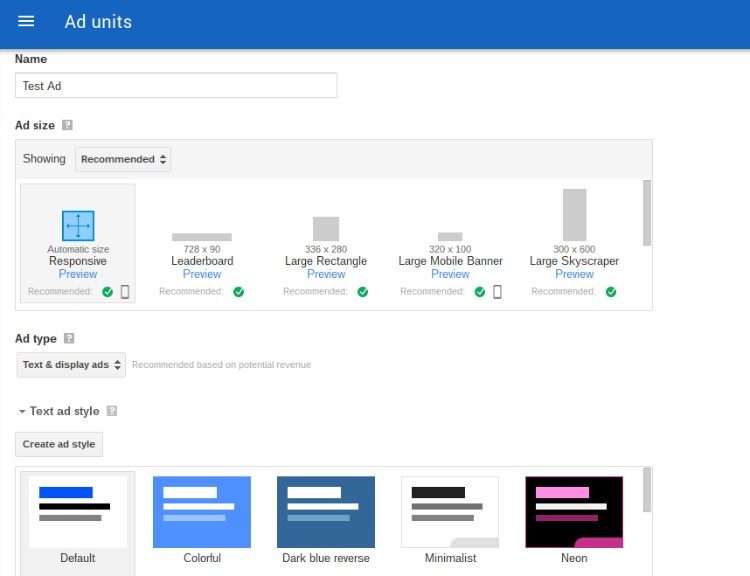
Al mismo tiempo debe especificar si desea un anuncio de texto y gráfico o solo uno u otro. Los anuncios de texto no tienen imágenes incluidas, por ende elija con cuidado.
Next, you will be asked how you would like the design to look. In general I go for the default style as it is known to convert quite well. However, some of the other colors and designs may be better seen on your own website. The good thing is that they have a Preview button to see how it will look.
Google AdSense offers several predesigned styles, but you can still adjust each design element in an ad, as seen in the screenshot below. As an example, it enables you to change the title color, URL color, border, and font family.
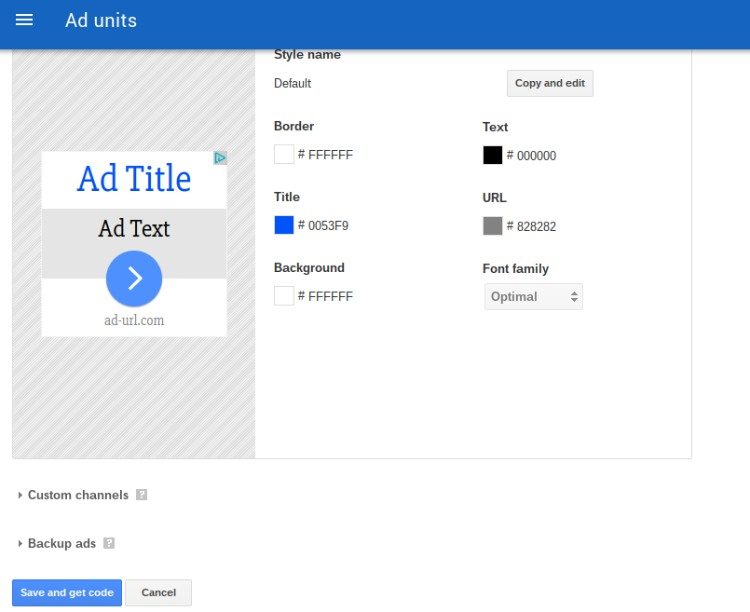
If you want to group multiple ad units (for tracking purposes), feel free to open the Custom Channels area to make that happen. At the same time you have the option to create backup ads. Basically, this refers to the fact that AdSense shows a blank ad if something relevant does not come up with it. If you'd rather see a default endorsement ad, this is the place to create it.
After this operation, click the Save and Get code button.
Professional advice: Google AdSense ahora tiene la opción de elegir un módulo de anuncios totalmente receptivo, lo que facilita que sus anuncios respondan a dispositivos móviles y pantallas de diferentes tamaños. Personalmente, iría con eso cada vez. Sin embargo, al mismo tiempo se sabe que las dimensiones 336 × 280 y 300 × 260 funcionan bien en términos de adaptación a su sitio y conversion.
Step 4: implement AdSense on your site
Although there may be other less efficient ways, there are essentially three ways to add your Google Adsense ads to your WordPress site:
- Insert ads by copy and paste el código de su bloque de anuncios en widgets, páginas y publicaciones.
- Buy a WordPress theme which is compatible with Google AdSense.
- Downloading and activating a plug that integrates Google AdSense.
Ideally, the two seconds are the easiest, since many themes and plugins don't require you to keep copying and pasting code in widgets. Not only that, but some themes have pre-set modules that make ads look beautiful and are more likely to be clicked. But let's take a look at each one.
Method 1: copy and paste your Google Adsense code into a widget
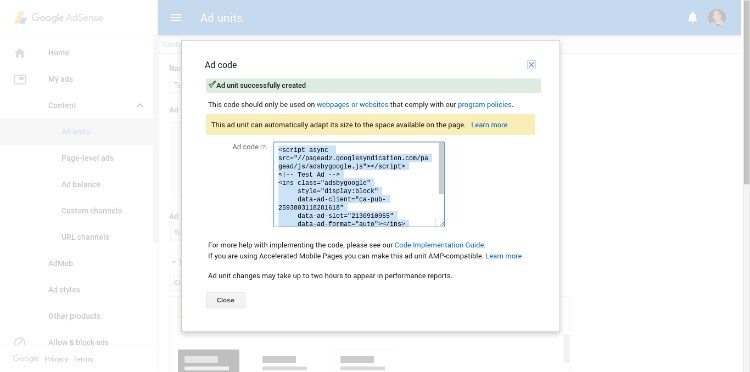
The first method is copy and paste. The code revealed in the previous section is used for copying on your website, so spie by copying that AdSense code.
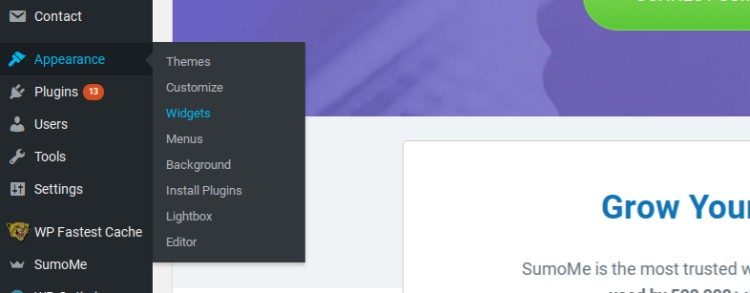
Next, open your WordPress dashboard. To go Appearance> Widgets.
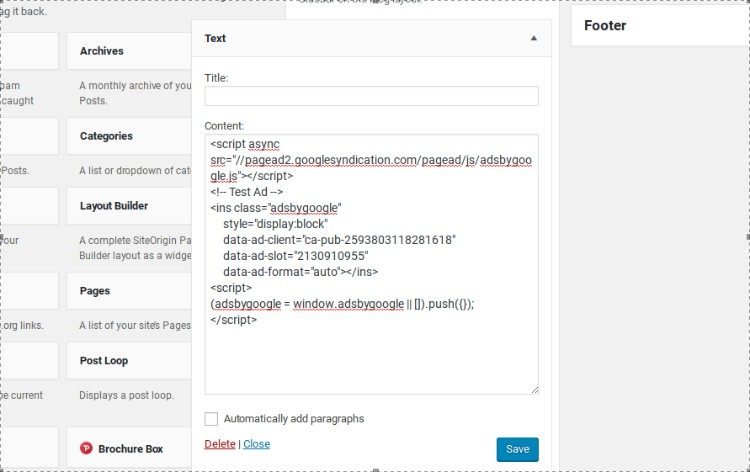
Most likely, you will insert an ad in the sidebar or above the header. For this example, I want to put the ad in the sidebar. Hence, you can drag the text widget to that area of the sidebar and paste the code you copied earlier.
There is no reason to fill in the Title field as it is an advertisement.
After that, you can update your website to see new and relevant AdSense ads displayed on your site.
Method 2: use a theme with Adsense areas

Although I'm not going to recommend specific topics, you can start by searching for «AdSense themes for WordPress"In the ThemeForest library.
At the same time you will get luck in the following places:
- MHThemes
- MyThemeShop
- StudioPress
- Thematic forest
Although you could only our Total theme, de todos modos. Está optimizado para SEO y ofrece toneladas de excelentes funciones de creación de páginas que puede usar para insertar Google Ads en sus publicaciones y páginas. E incluso hemos desarrollado un fragmento útil para insertar un banner publicitario encima o debajo de las publicaciones del Blog (Total documents).
Method 3: install a Google Adsense plugin
Using a widget for AdSense is the most basic of all methods, and a theme won't give you much flexibility when placing your ads. However, a plugin can serve as a better solution if you want additional features for your ads. As an example, some of the plugins eliminate the need to copy and paste code, while others generate reports and have settings for things like time period selection.
Many Google AdSense plugins have come and gone in the past, but let's take a look at today's most promising ones.
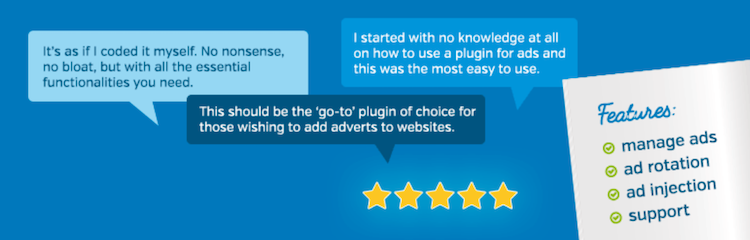
Ads Pro
Si desea la mayor cantidad de herramientas para crear, administrar y rastrear sus anuncios, el complemento Ads Pro es su mejor opción. Este complemento premium ofrece toneladas de funciones para estilos de anuncios, ventanas emergentes, incorporación social, programming, campañas publicitarias con orientación geográfica, estadísticas en línea y más. Por ende, no solo puede monetizar su sitio web con Adsense, sino que al mismo tiempo puede vender su mejor conversión de espacios publicitarios a clientes específicos a un precio más alto.
Advanced Ads (Free)
The advanced ads plugin works great for grouping ads in a slider, selling ads on your website, and setting dates to post new ads. AdSense integrates seamlessly with the plugin.
WP Pro ad system

Here's a plugin that supports all kinds of advertising tools. It has a multitude of placements to place your ads, along with pop-up ads that integrate with AdSense.
WP Simple AdSense Insertion (free)

This plugin certainly lives up to its name as it makes WordPress AdSense push ads simple and painless. This plugin saves one to three Google AdSense codes and spreads them throughout your site, allowing you to focus on just a few ads. Its main feature is its shortcode functionality, which enables you to insert ads by copying and pasting plugin-generated shortcodes almost anywhere on your site.
WP QUADS AdSense (free)

A plugin with some more advanced features, this is a great option for anyone looking to fully customize their ad placement. Notable features include full responsiveness and the option to set visibility conditions.
Whether you choose to use an add-on or not is based on your preferences. Anyway, it won't hurt to try one of the above add-ons!
Mastering the effective use of AdSense for WordPress doesn't take a lot of time. In fact, the AdSense interface is extremely easy to use, and the plugins, themes, and widgets are easy to manage.
Have a question about using or embedding AdSense on your WordPress site? We will do our best to help in the comments below.


