
Activate the búsqueda personalizada de Google you Blog es una buena forma de mejorar la user experience. Aprende como activar un motor de search personalized.
This tutorial is part of the tutorial series on:
Cómo integrar las herramientas de Google en tu WordPress
How to activate Google custom search in WordPress
It sounds very complex but it is not.
Activate custom search for Google your blog is a four-phase process:
- Sign up for Google custom search
- Configure our engine search personalized
- Set up WP Google Search
- Add the Widget with the search bar.
We get down to work.
Activating custom Google search in WordPress
To have all the searching power of Google on our blog, the first step is sign up for Google Custom Search.
1. How to sign up for Google Custom Search
To sign up for the service Google custom search we must enter the link below:
Once there we will see the typical welcome of Google services where they explain what it is about:
Con la Búsqueda personalizada de Google, puedes añadir un cuadro de búsqueda a tu página principal para facilitar las búsquedas en tu sitio Web.
- We click on the button:
Iniciar sesión en Search Engine personalizado.
To log in to the custom search engine all we need is an account Gmail active.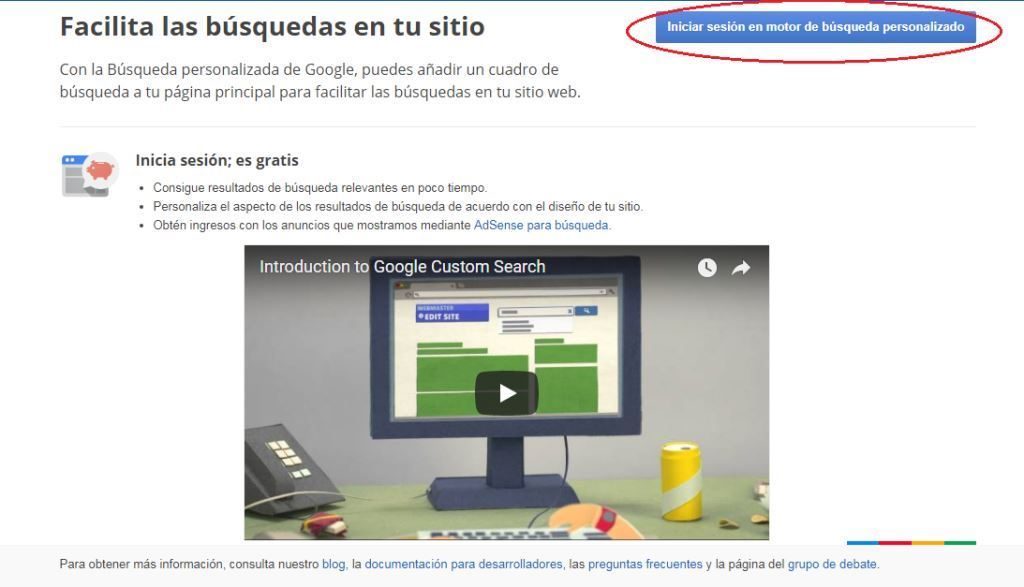
The next step is configure engine search of our website. To do this, we follow the following steps:
2. How to configure our custom search engine
Starting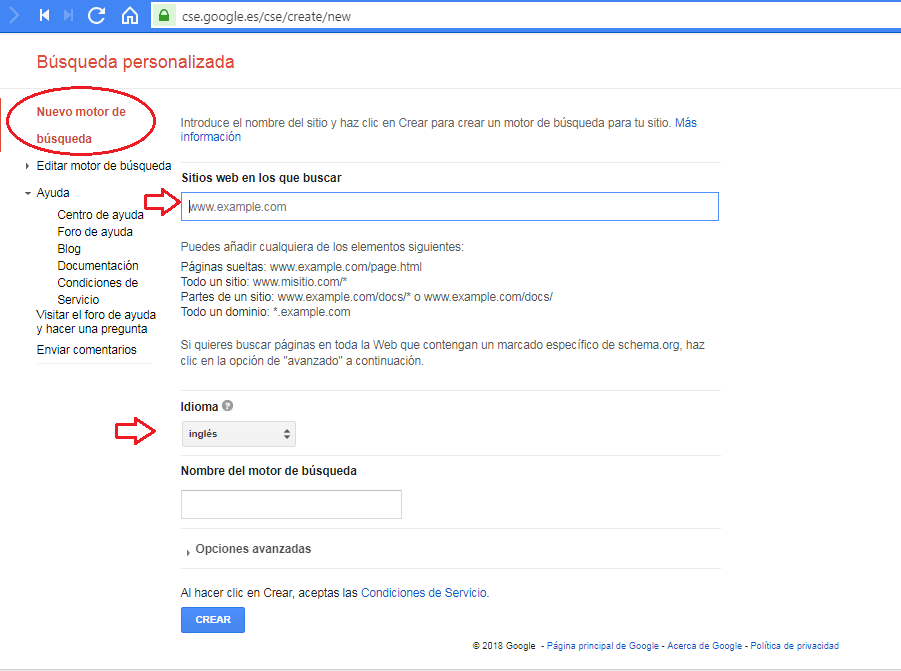
- In the upper left part of the screen we will see a column with options. We will make sure to select the option New search engine.
- There we will enter the following information:
- Address of our website con tres W: direcciondeejemplo.com
- Language of our site.
- The Name que usaremos para nuestro buscador. Por default el sistema crea un nombre basado en el domain de nuestra web. Podemos dejarlo tal cual aparece si nos gusta.
Editing our search engine
- Now we must edit our search engine. To do this we press the option Edit search engine. The edit section is divided into four tabs:
- Basics: Where we have the possibility to add the description that best represents our search engine. Keywords, where we can enter terms related to your our website. At the same time we can choose whether we want users to be able to do image searches.
- Advertisements: There we have the possibility to select if we want the results of our search button to show advertising of Google. To do this we must connect our account Google AdSense. Who Said Monetization?
- Management: What makes possible add users as administrators who can manage the search engine account except for the advertising section and the creation of new users.
- Advanced Options: In this tab they explain that:
Your custom search engine consists of annotations and context. Annotations specify which sites are included or excluded from your search engine. The context specifies the entire search engine, from the layout to how the annotations should be used.
Note that
The options that your search engine brings up default well they serve to activate the personalized search engine.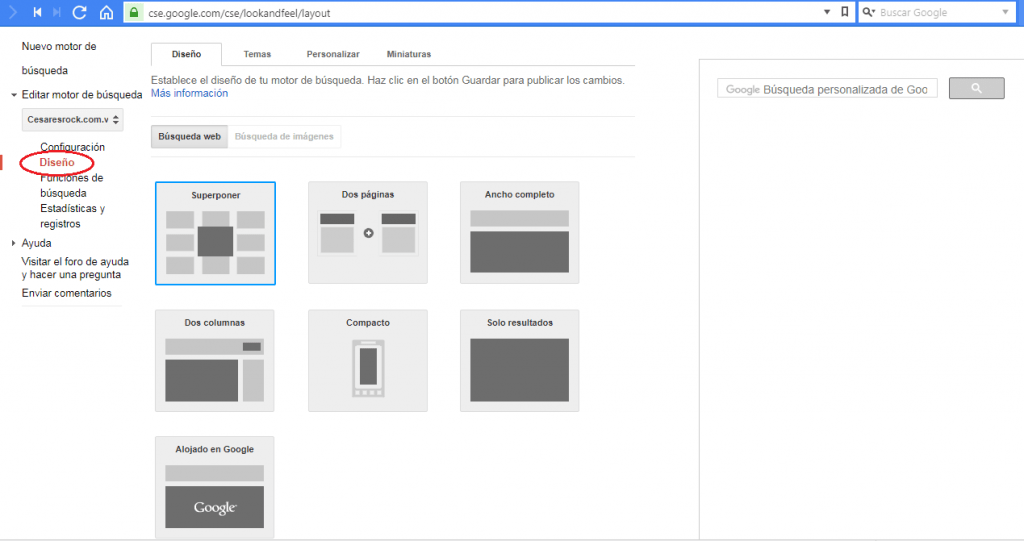
- At the same time we have the option of choose design from our search engine. We choose the design that we like the most and save the changes.
- Important: Once the search engine is configured we must take note of the: Search Engine ID.
Configuration> Finder ID.
3. How to configure WP Google Search
The first. WP Google Search is a plugin que nos permitirá instalar el Widget from our custom search on the blog.
We can find it in the official plugin repository of WordPress. To install it, we just have to follow the steps that we show you in detail in this tutorial:
Plugins in WordPress: what they are and how to install them
Once installed it we activate.
I know will create a new tab in our management panel WordPress, in the settings section. You can follow the following route:
Settings> WP Google Search
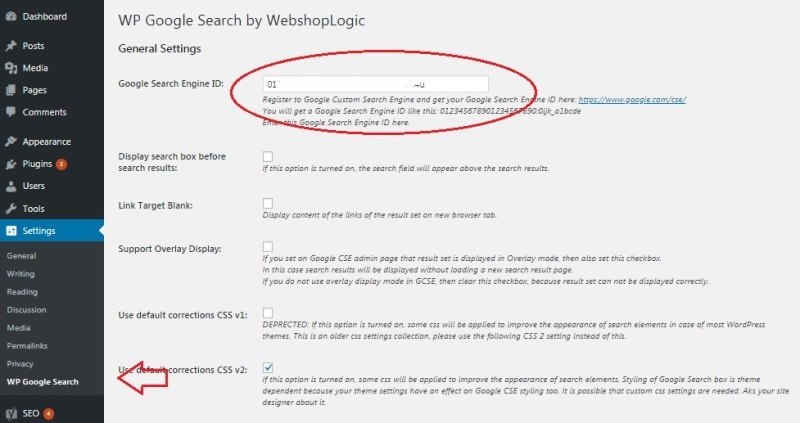
In the settings of the WP Google Search We copy the ID of the Finder.
We keep the changes.
Now we just have to add the Widget on our site that will enable our custom search engine.
4. How to add the Widget with the custom search bar
This is the easiest step. And to complete it we follow the following route:
Apariencia > Widgets

Must drag the WP Google Search (WGS) Widget to the section of our website that we want. We save the changes. And ready.
Now we have a motor Google custom search on our WordPress-based blog.
Remember that if you want to be a expert in Web development and everything related to the world of WordPress and blogs sign up for the best online course and in Spanish from the best content manager: WordPress.org


