What is Theme Builder on Elementor?
Elementor Theme builder le permite personalizar cada parte fundamental de su sitio de WordPress sin codificación, incluido su Header, Footer, Global Pages and Posts, Global files and Productos y archivos de productos de WooCommerce.
the Theme builder proporciona una descripción general visual de los elementos del sitio de su sitio, lo que lo ayuda a guiarlo a través de cada una de las partes del sitio que necesita crear para lograr un sitio Web full.
Using the Theme creator, You can add new parts of the site (for example, add a new header), edit existing parts of the site, or delete parts of the site. Existing parts of the site include a visual indicator to inform you if a condition applies to that part of the site. For example, a global publishing site part template might have a condition to display only for a particular category. A green indicator will allow you to see at a glance that this part of the site has a condition. A gray indicator is an indication that a part of the site does not have any set conditions.
How to access the theme generator
Hay varias formas de acceder al Theme Builder. Elija el que be más conveniente para usted.
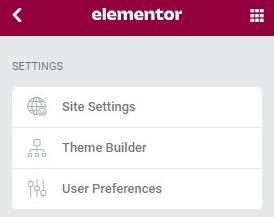
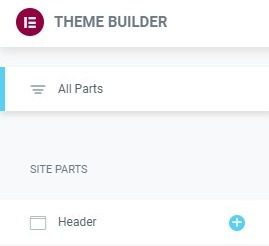
METHOD ONE: To go Elementor> Theme Builder from the WordPress administration menu.
METHOD TWO: From the Elementor Editor screen of any page or post, click the burger menu in the upper left corner of the Panel de widgets, then select Theme builder on the Settings tab.

METHOD THREE: Get quick access to Theme builder from any screen using your keyboard hotkey combination. On a Mac, click CMD + SHIFT + E to immediately jump to Theme builder. In Windows, click CTRL + SHIFT + E to immediately jump to Theme builder.
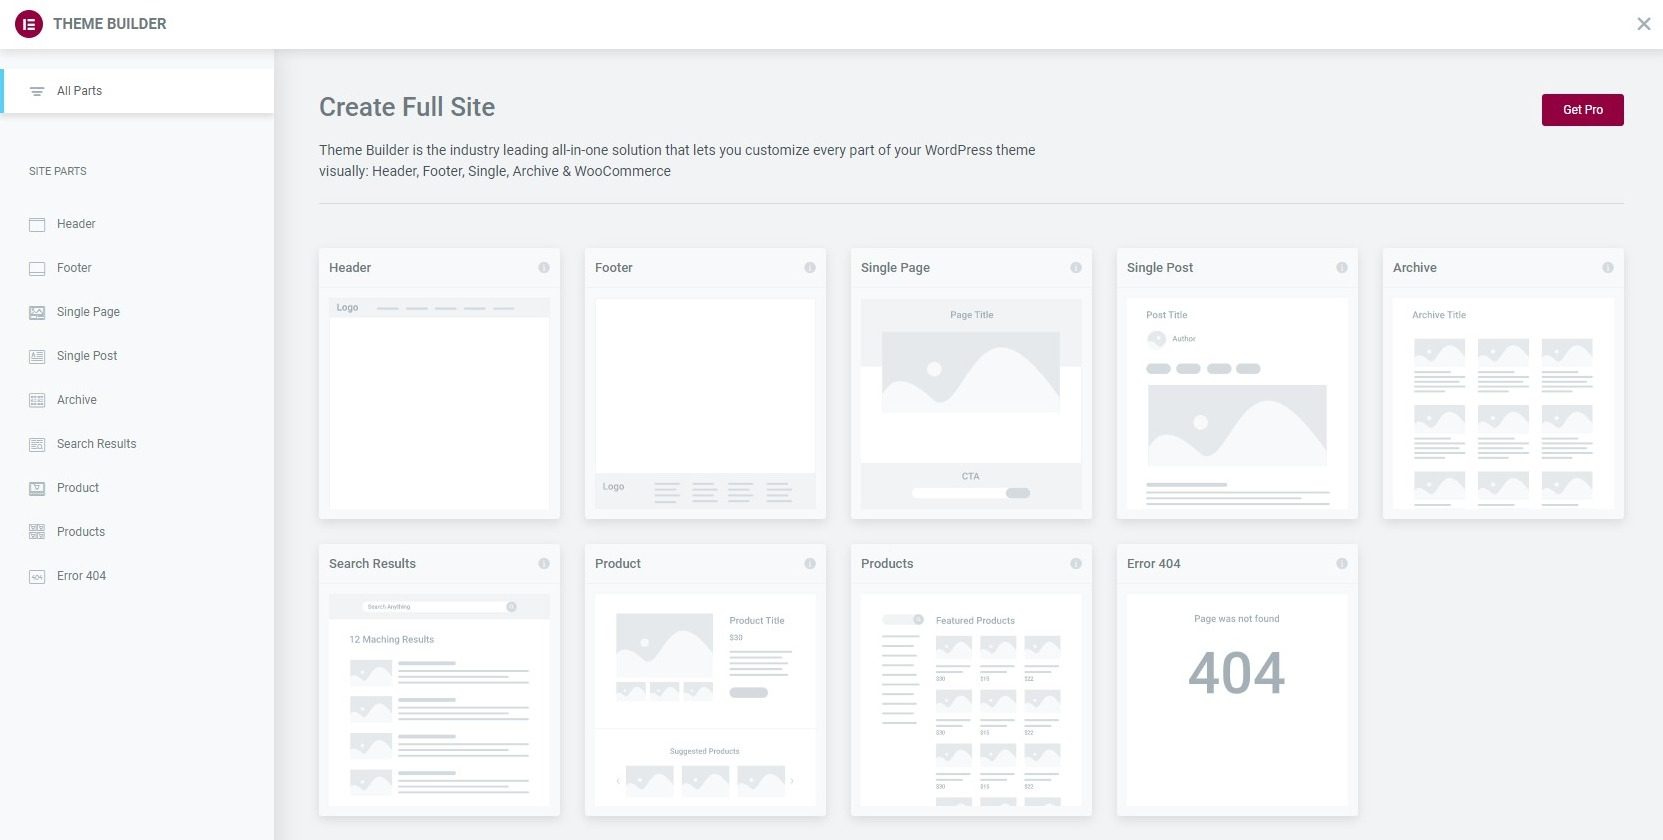
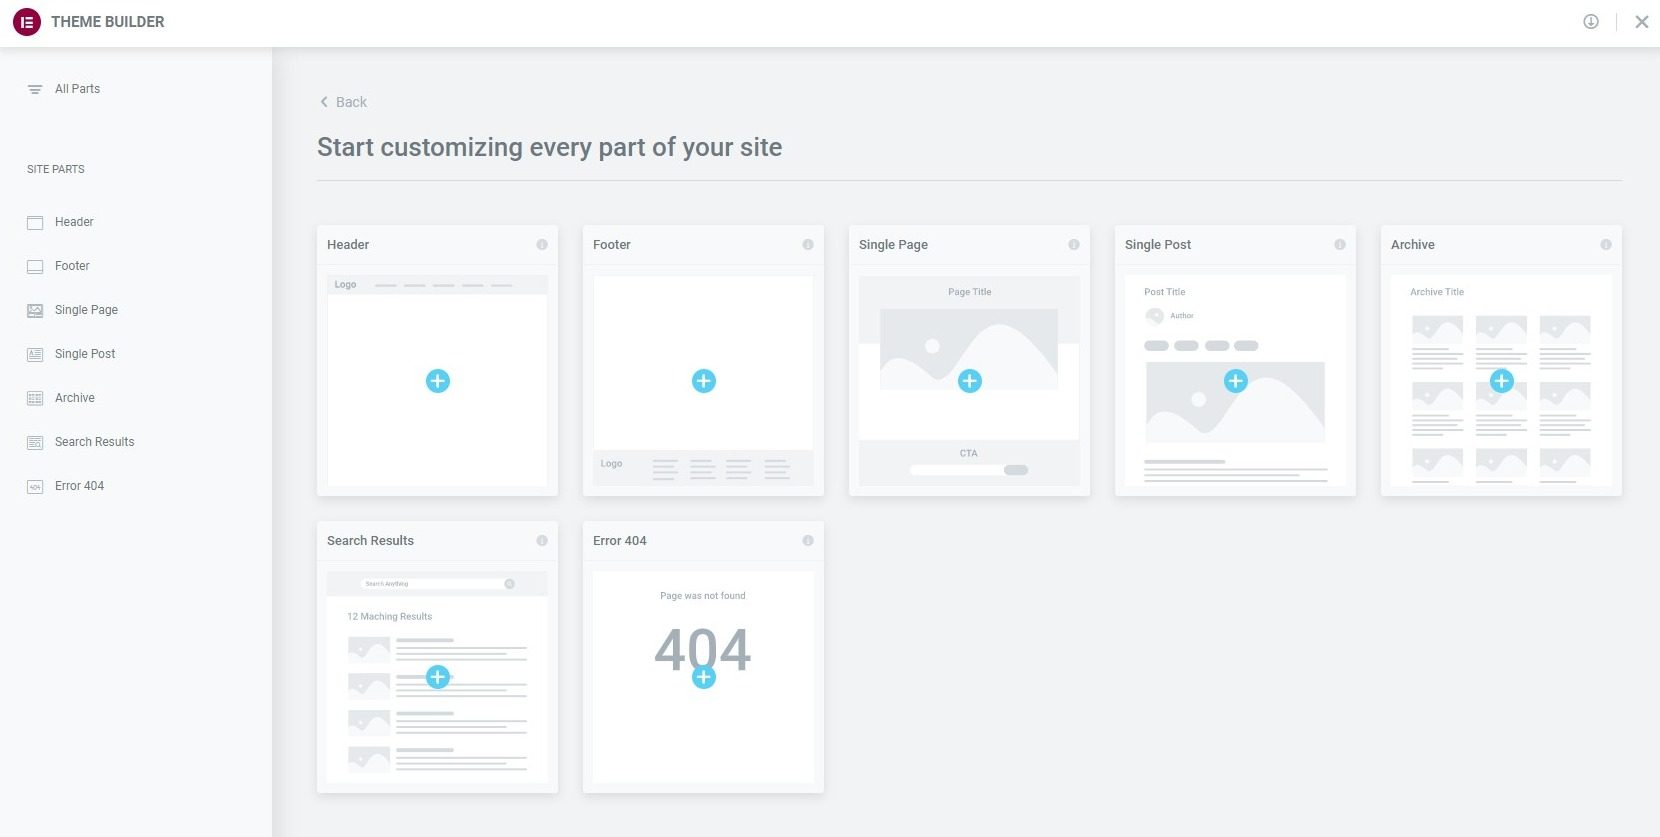
Theme Builder main panel
For free users, you can see what parts of the site would be available with Elementor Pro.
For Pro users, existing site parts will be displayed, if created. Thumbnails will be automatically generated for each part of the site.
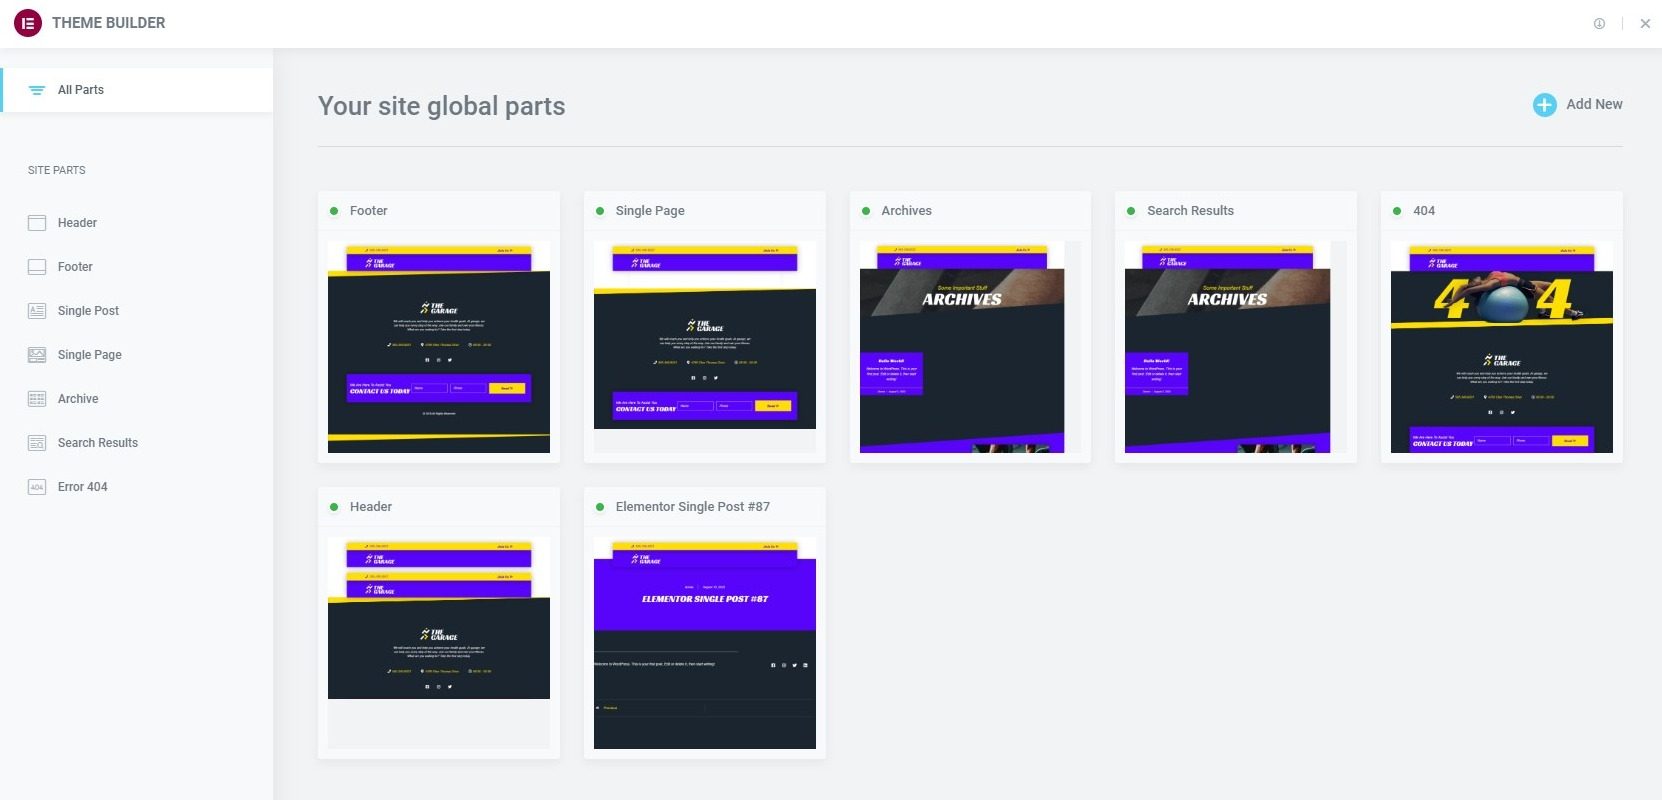
Note: Any featured image assigned to a part of the site will be used as a screenshot of the part of the site. This allows you to use a thumbnail of your choice, rather than an auto-generated thumbnail, if you prefer.
If parts of the site have not yet been created, the default thumbnails for all available parts of the site will be displayed.
Add a new part of the site
- To add a new Part of the site, click on the Add new en la esquina superior derecha del dashboard, o el signo MÁS que aparece al pasar el cursor sobre la etiqueta de la barra lateral de una parte del sitio, o el signo MÁS en su miniatura.
Alternatively you can add a new part of the site import a template.
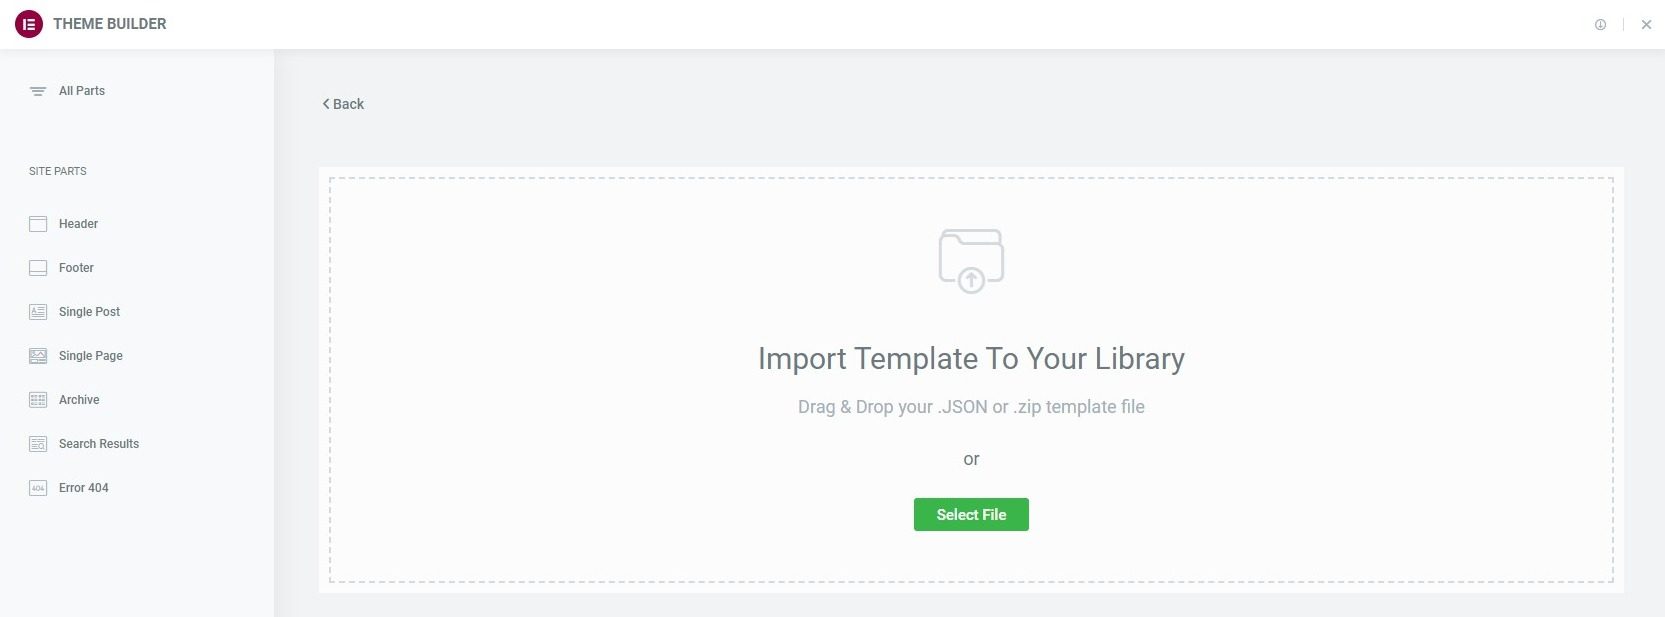
- Click on the Import icon in the upper right corner of the Theme Builder.

- Drag and drop or select a .JSON or .zip file that contains the template you want to import.
- The template will now be added to your site parts panel.
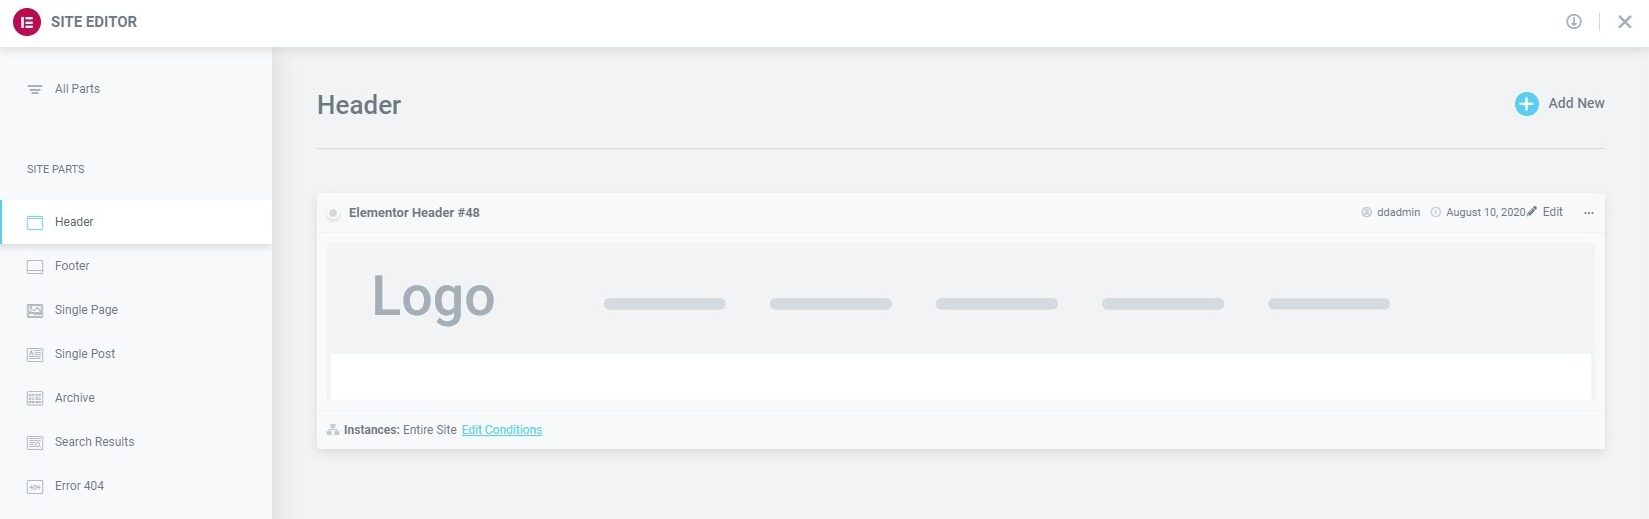
Edit the layout of an existing site part
- To edit an existing Part of the site, click on the Site Part Label in the sidebar. This will open the details panel for the site part.
- Click on the Edit link en la esquina superior derecha de la parte del sitio que desea editar. Esto abrirá el editor de Elementor para esa parte del sitio.
Edit the conditions of an existing site part
- Click on the Edit conditions link in the lower left corner of the part of the site you want to edit. This will directly open the Display conditions editor for that part of the site.
Note: The Dot display in the upper left corner of the Part of the site indicates which parts of the site are Live (It has Display conditions assigned), and that are simply erasers (Do not Display conditions have been assigned). A Green Point indicates a Live part of the site, while a Gray dot indicates a drought part of the site.
Note: The Instances label in the lower left corner of the Part of the site shows the specific instances where this template is being used on the site.
Export a part of the site
- Click on the Three horizontal points in the upper right of the part of the site that you want to export.
- Choose To export to open a Save dialog that will save a .json file to your computer.
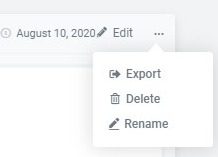
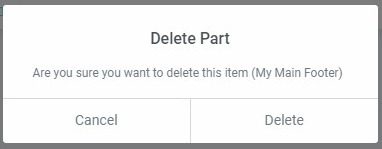
Delete a part of the site
- Click on the Three horizontal points at the top right of the part of the site you want to remove.
- Choose Remove that will open a Delete part confirmation dialog.
- Click Cancel if you change your mind and decide you don't want to remove the part from the site, or click Remove to confirm that you want to remove this part of the site.
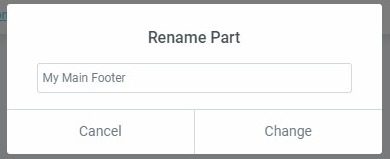
Rename a part of the site
- Click on the Three horizontal points at the top right of the part of the site that you want to rename.
- Choose Rename that will open a Rename part dialog box.
- Enter the new name and click Change to complete the renaming process, or click Cancel if you change your mind and decide that you do not want to change the name of this part of the site.