

Aprende en este tutorial de CursoWpress.com a vincular Google analytics with Google Tag Manager y sácale provecho a las herramientas de Google.
Welcome to yet another installment in the Google Tools tutorial saga.
If you already installed Google Tag Manager how we teach you in our tutorial:
Cómo instalar Google Tag Manager en WordPress
Maybe it's time you started linking some tool with the Tag Manager.
The first thing we will do is link Google analytics with Google Tag Manager.
In case you missed our article on how to install the GTM in WordPress you can well take a pass through it full tutorial.
However. If you already have the Google Tag Manager ready it's time to roll up our sleeves and get down to business.
Link Google Analytics with Google Tag Manager
To link Google Analytics with Google Tag Manager we have to:
- Create a Google Analytics tag
- Configure the Google Analytics tag
- Create a trigger for our GA tag.
Creating a Google Analytics tag with Google Tag Manager
Starting
- We log in in our Google Tag Manager account.
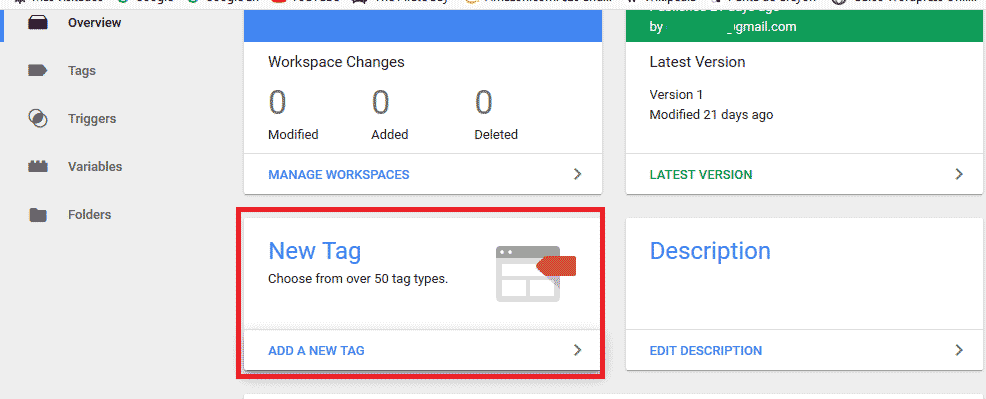
- We locate the box New Label and click on the button: Add New Label.
- A new window. In it we will give Name to our new label. It can be anything that helps you remember what specific function that tag does.
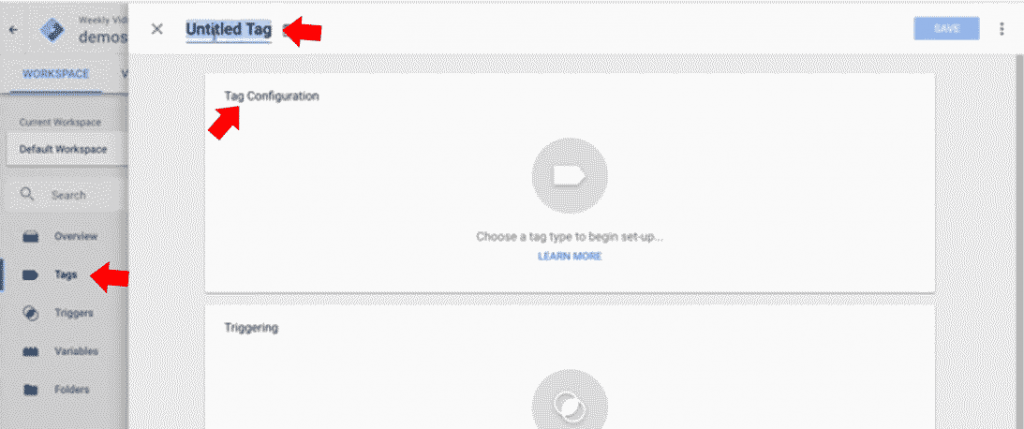
- Now we have to configure the tag that we just created. For that we click on the button: Label Settings.
Choosing the Analytics version
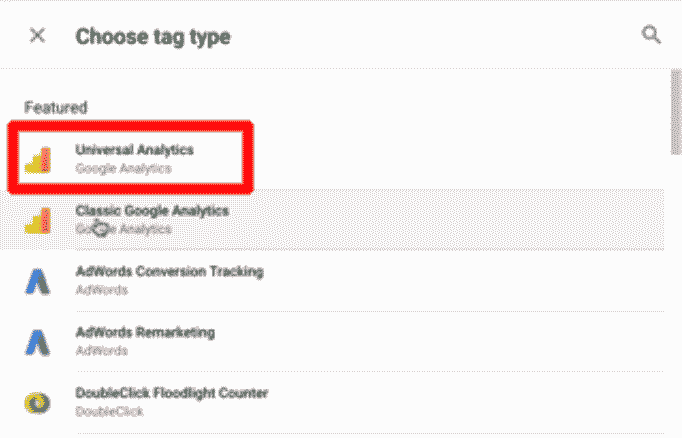
- In the section for choose the type of label we have several options. What concerns to Google analytics we will meet:
- Universal Analytics
- Classic Google Analytics.
- It's our turn choose an option. How do you know which one to choose?
We have to select the form of Analytics with which we work in nuestra Web. If it is a new Analytics property, most likely it is Universal Analytics. There is a way to understand and be sure:
- Go into: Google com/
- Log in with your account
- Look for the option of: Manage
- Follow the following route:
Property> Tracking Information> Tracking Code.
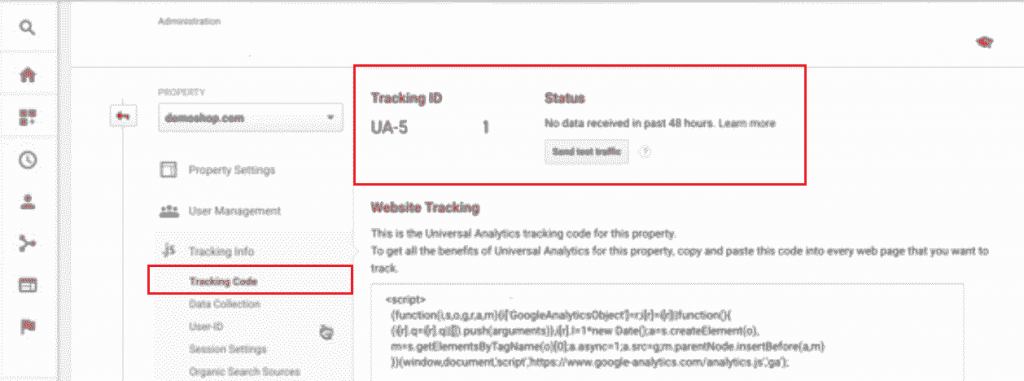
In tracking code we will meet our Tracking ID who will tell us if we are working with Universal Analytics. How? Easy. If our tracking ID begins with UA it means that we do work with Universal Analytics.
Upgrading to Universal Analytics
In case your property is not working with Universal Analytics it's easy to update.
You just have to follow the following route in your account Analytics:
Properties> Universal Analytics Update
Setting up our GA tag in GTM
Now we come back to the Tag Manager. To configure our label, which in our case is Analytics.
- In label settings An option will appear that says: Tracking type. There we select the option: Page view.
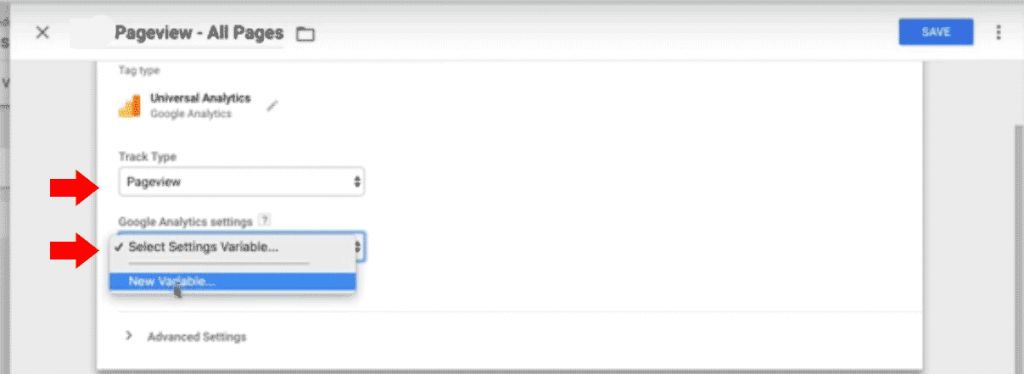
- After in Google Analytics settings we select: New variable.
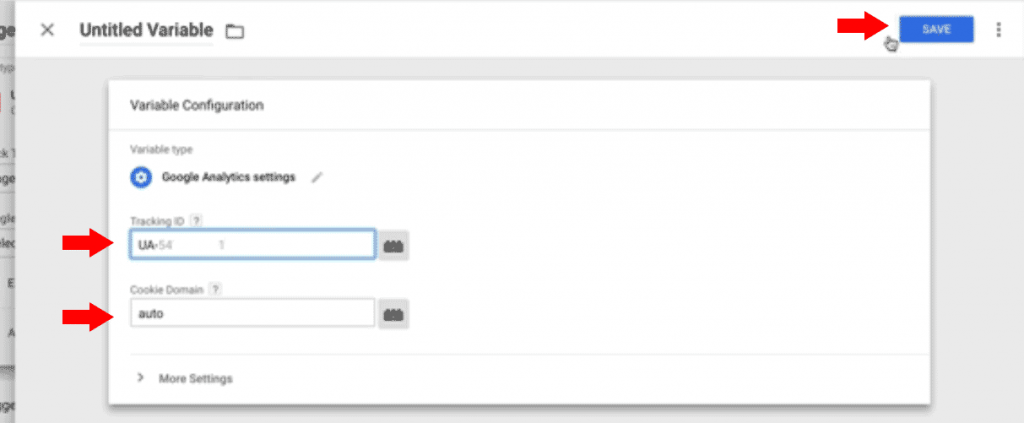
- A new window will appear, it is the window of the new variable. There we enter our Tracking ID.
Setting cookies
- Once our Tracking ID The next data to configure has to do with the cookies. The idea is to be respectful of the law (yes, the GDPR) and their privacy policies. To do this in the section domain of the cookie we place the option car. Now we click on: more options and in fields to configure we define the following parameters:
- We save the changes.
- We give the variable a name. We click the Save button.
Create a trigger for our GA tag
Once our tag is created and configured in conclusion of linking Google Analytics with Google Tag Manager we must create a trigger. Too easy.
- We click on the button activation.
- We will find an activator that comes by default. It is a page view activator.
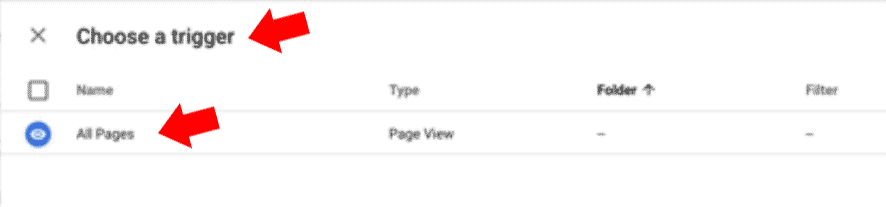
- We select the option: All pages.
- We click on the button: Keep.
- Ready, we already achieved link Google Analytics with Google Tag Manager.
We already link Analytics with Google Tag Manager and now what?
We can test the state of our label. To do this in the Google Tag Manager we place the button: Preview.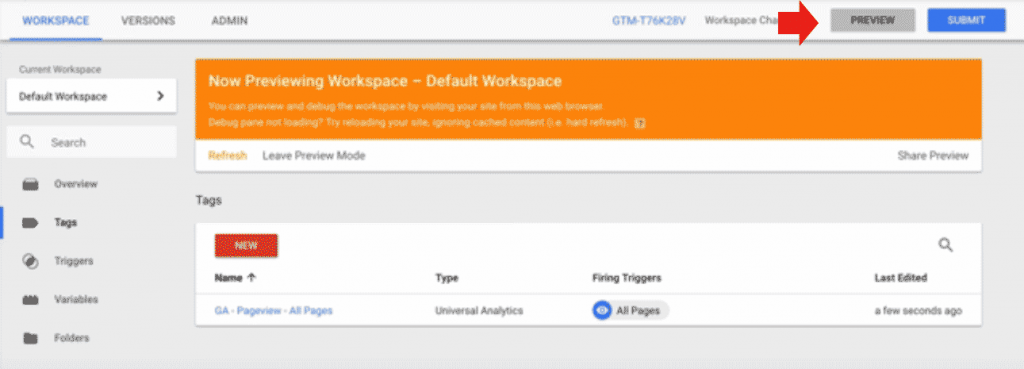
Now open your website in otra pestaña del mismo browser where do you have the Session of Tag Manager open. Look at footer of your website: You will see a panel that indicates the tags that are running.
If you followed each of the steps in the tutorial you will find that the label of Universal Analytics.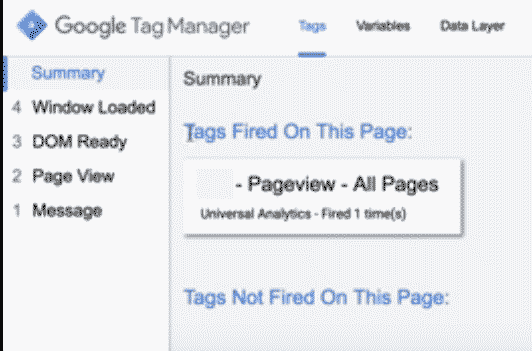
So in conclusion we just have to exit preview mode. And press: To post.
Hey, this is just the beginning, you can go on learning with us. For this we have prepared the best online WordPress course in Spanish. What are you waiting for to sign up?


