

![]()
![]()
A few years ago, Internet Explorer was essential in many cases to be able to correctly enter certain websites and navigate the network correctly. However, times have changed a lot, and today for many it is not even necessary to be aware that it is installed in Windows 10 despite its age.
Thus, If you are absolutely sure that you don't need it and don't want it to take up unnecessary storage space on your computer, it may be a good idea to uninstall it.. Of course, it is highly recommended that before continuing with this you make sure that no program uses its API libraries or needs it to function, since if this is the case, you will be facing an obstacle.
How to uninstall Internet Explorer on any Windows 10 computer
As we already mentioned, first of all you need to make sure you don't want Internet Explorer installed on your PC. You have to keep in mind that there are programs that can make use of their API libraries to work, or that, for example, the Live Tiles in the Start menu depend on their cache, so they will not work if you uninstall it.
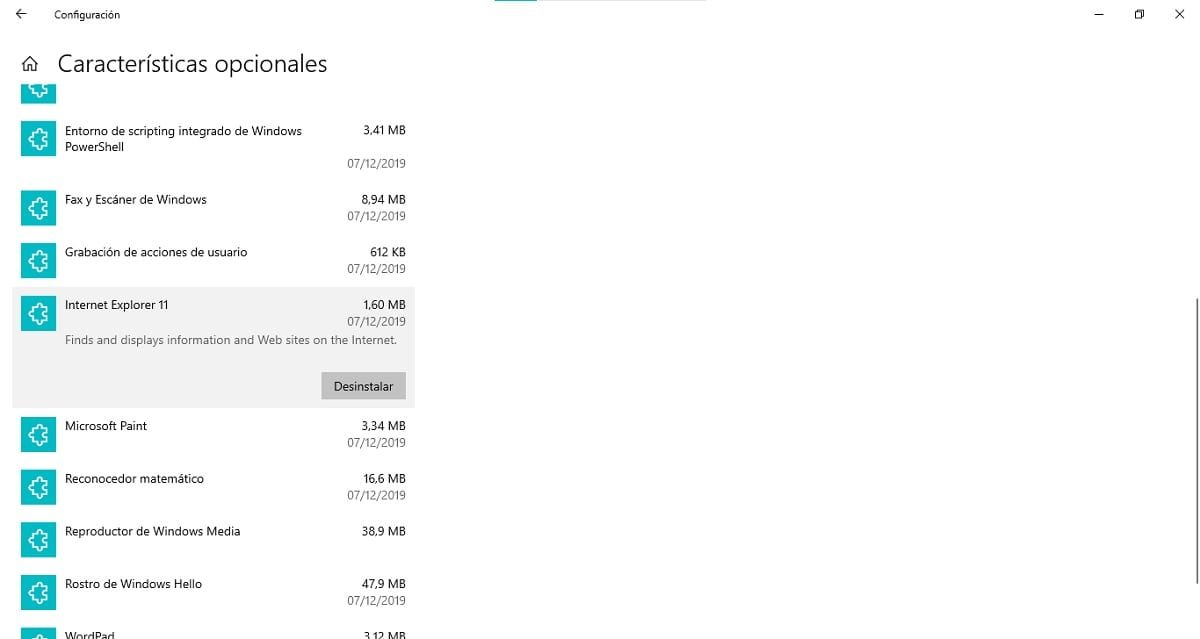
Once you have made sure of this, if you are willing to remove Internet Explorer, you should enter your computer settings, something that can be achieved both from the Start menu and by pressing Win + I on the keyboard. Then, on the main screen, select «Applications» and then in "Applications and functions", choose "Optional Features". Finally, you should only find Internet Explorer within the list, and click uninstall button.


Related post:
What to do if Internet Explorer prevents file downloads
Once you have completed the steps, directly Windows may begin to uninstall the version of Internet Explorer that you have installed on your team. Similarly, if in the future you regret it or need it again, from that same location you will be able to obtain it again and reinstall it on your computer.


