
WordPress es una plataforma muy segura pero debemos admitir necesita algunos ajustes para que su nivel de protección be más completo. Es aquí donde entra en acción un plugin que ha sido valorado como uno de los mejores en esta área. Sin más, a continuación te presentamos otro módulo en este interesante curso de WordPress online para que aprendas a how to configure Wordfence y proteger tu Blog al máximo.
![]()
Advantages of installing Wordfence
- Realiza bloques inmediatos ante ataques masivos, significa que por una cierta cantidad de horas el Username no podrá tener acceso hasta que el programa lo crea conveniente.
- You can configure your access to the WordPress dashboard using your mobile device phone and personalized password.
- You have the option for both the administrator and other access ranges to create strong passwords.
- Scan files related to plugins and themes is able to make a comparison with the clean codes of WordPress.org to detect if something has been modified.
- It incorporates a functionality known as "firewall" that is capable of deleting threats from fake Googlebots or other malicious code.
- Fully block all types of malicious IP, inclusive detecta si éstas usan códigos modificados y lo hace activando su firewall.
- It is constantly monitoring exclusive WordPress.org files to warn if any have been modified and they threaten security.
- It has a database of more than 44,000 malware (harmful viruses) that are being updated to prevent malicious attacks.
- Cuida la seguridad de tus DNS para que no hayan cambios sin previas autorizaciones.
Configure Wordfence
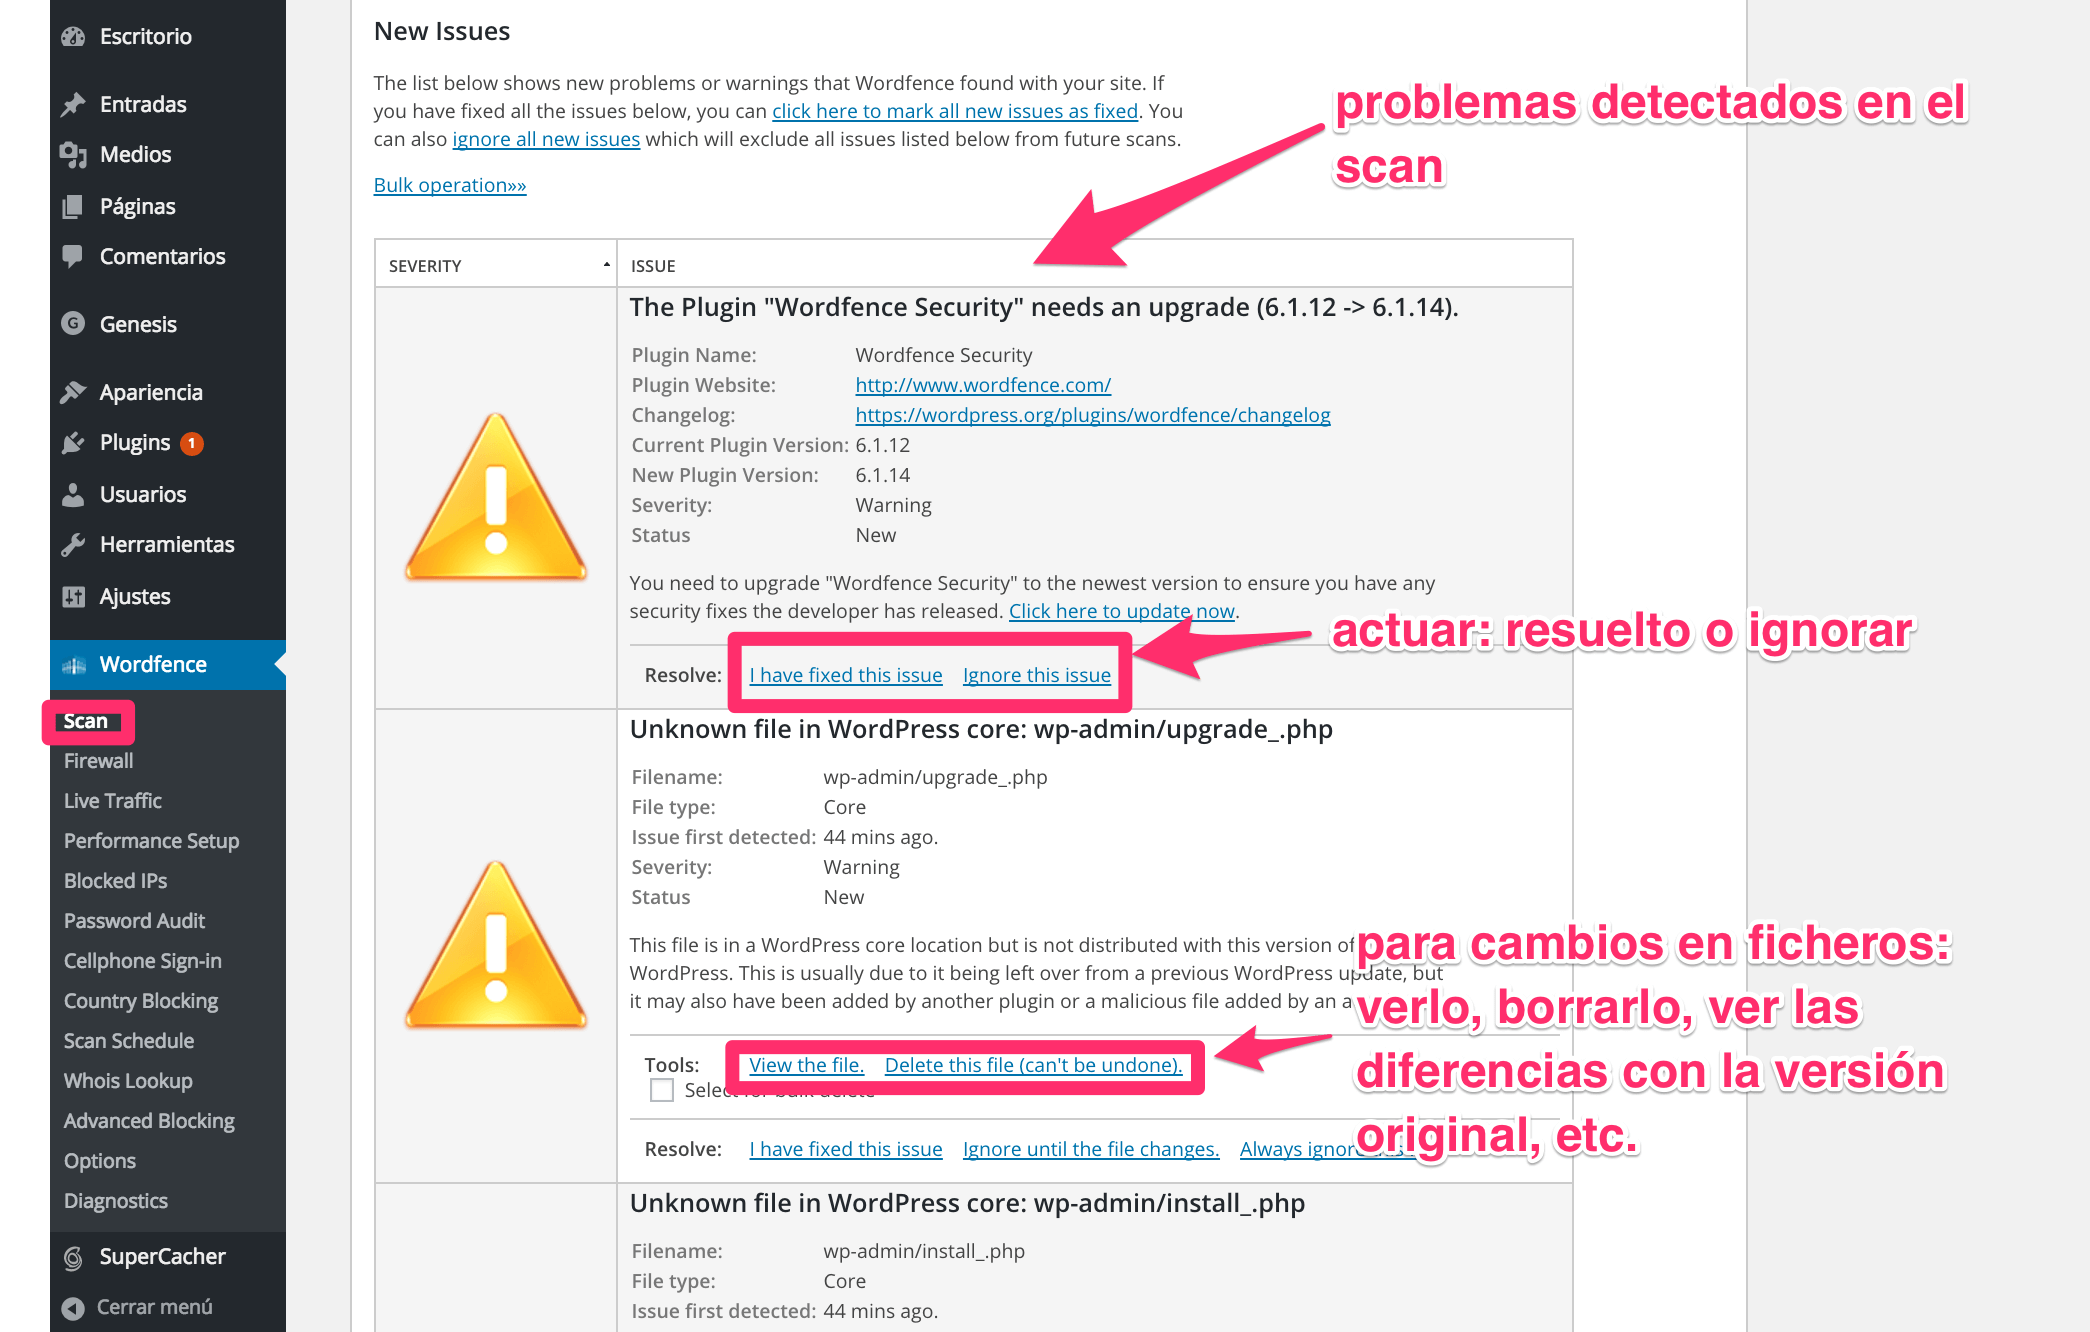
Step No. 1: when the plugin has been installed you will see an option added to the sidebar that says Wordfence, click there to take off all the alternatives to customize.
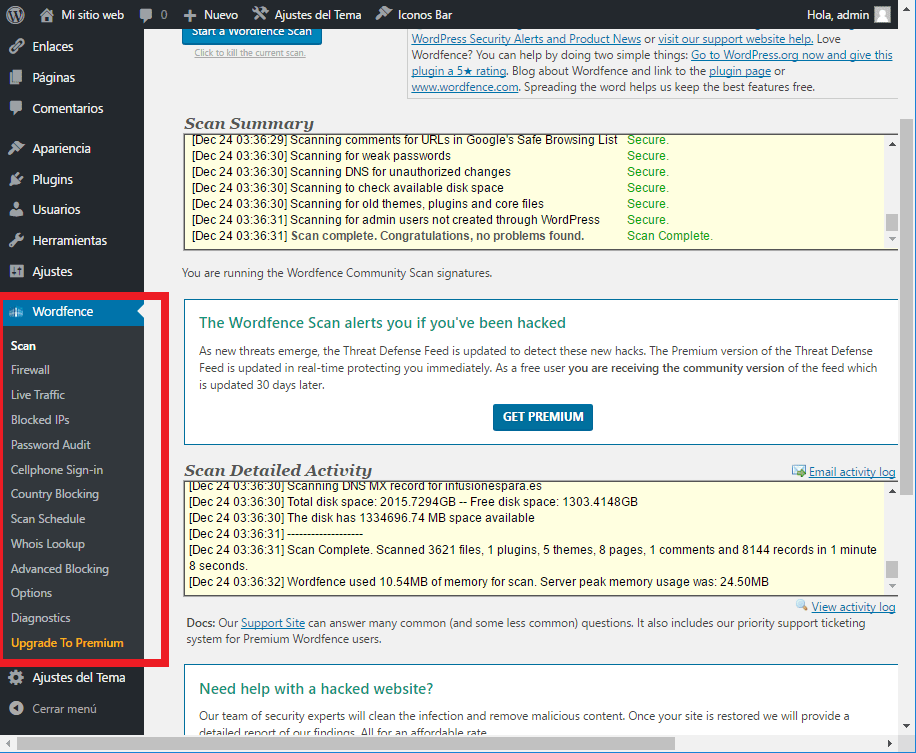
Step No. 2: activar el escaneo, esta opción permite una revisión completa de toda tu Web y busca errores y códigos maliciosos. Para activar esta opción debes ir a Options > Enable automatic scheduled scans.
Step No. 3: the time has come for your Firewall for it to work perfectly you must make a few small adjustments. Even if you do not intend to touch anything, you can leave it like that since its basic protection level is capable of repelling almost any attack. Before you activate the option Activated and protecting, try to start with the Learning mode, this way you will avoid false positives, that is, false notifications.
Step No. 4: enter the section of Live Traffic, this is useful to block forced access attemptsLeave the Learning mode, when it is finished you will be able to activate the full option to observe all the data of the IPs that it has blocked.
Step No. 5: configure Wordfence and protect your blog It has an addition and that is that it consumes CPU data, but this can be improved by following these instructions. Get the most out of it by selecting one of three options:
- Disable all performance enhancements: speed will not be improved,
- Enable Basic Caching: will increase the speed by 2 and up to 3 times.
- Enable Wordfence Falcon Engine: here the speed can increase up to 30 and 50 times.
Step No. 6: now we go to Options> Basic options. In this circumstance we suggest that they be left as they are since this way you will not consume more browsing data.
Step No. 7: you must go to advanced options, at this point we suggest you activate almost all the boxes since that way you will be alerted to almost all the anomalous actions that the plugin finds.
Configure WordFence es una alternativa que te ahorrará muchos dolores de cabeza, simplemente hace el trabajo de mantenimientos constante en WordPress. Procura no instalar más plugins similares para que no se relentice la solución de contents al visitante.


