
Ha leído que el contents Web sólido, más que cualquier otro factor, determina el éxito de su portal web. Pero, ¿qué determina si ha escrito o no un Okay ¿entrada en el Blog?
It's impossible to say objectively, but there are a number of generally agreed-upon items that can contribute to the effectiveness of your blog posts. Incorporate them into every post you publish and it will come in handy.
Con lo anterior en mente, en este post comenzaremos explorando la anatomía de una publicación de blog, posteriormente mostraremos cómo puede incorporar las partes constituyentes mencionadas en una lista de verificación generada por complementos que puede ejecutar cada vez que produce una publicación de blog dentro de WordPress. ¡Pongamos vamos a ello!
The Anatomy of a High-Quality Blog Post
So what should go into a typical blog post? Let's go with a medical metaphor. If the outline of a blog post were a skeleton, its structure would be made up of ten key points. Here's a look at each of them:
- A solid theme and a focus keyword. Elija un tema de publicación de blog que be de alguna manera beneficioso para sus lectores, posteriormente busque una keyword relacionada que ayude a anclar su tema y ayude tanto a los humanos como a las arañas de los search engines a saber de qué se trata su publicación de blog.
- Compelling headlines and subtitles. It takes time to learn how to write headlines that grab your readers' attention, but it's an essential skill, because your headline is often the difference between a click or a swipe. And since most site visitors scan blog posts, the same concept applies to captions.
- Proper formatting. Depending on the type of blog post you write, what is considered a "proper" format will vary. Having said that, in general, you will want to use subtitles (h2, h3, etc.) and incorporate bold font, italics, lists and other similar items to provide variety within your blog posts.
- Meta descriptions. These are summaries that appear in search engine results; they are also used on social media and social bookmarking websites. Yours shouldn't be longer than 159 characters (incluidos los espacios). Las meta descripciones no son tan importantes en términos de SEO, pero les permiten a sus lectores saber qué esperar cuando se encuentran con su página en los motores de búsqueda o en los sitios web de redes sociales.
- Media. Cada publicación debe incluir al menos una imagen y, si es factible, otras formas de medios. Los videos, las infografías, los podcasts y los archivos de audio mejoran la experiencia de lectura y fomentan el intercambio social. Al mismo tiempo, no todos los visitantes de su sitio podrán leer todas las publicaciones; algunos pueden necesitar escuchar un podcast mientras hacen ejercicio o viajan al trabajo. A medida que conozca a su audiencia, su elección de medios debería ser más específica.
- A conclusion and a call to action. Conclusions help readers digest your blog content and choose what to do next, and a call to action encourages readers to engage with your blogging community.
- Proper relationship. While making it look unprofessional, broken links can lead search engine crawlers to believe that your web portal is untrustworthy, which can cause your site's ranking to plummet. WordPress plugins like Broken link checker puede escanear su portal web para asegurarse de que los backlinks internos y externos funcionen correctamente.
- Categories and tags. Al mismo tiempo de ayudarlo a estructurar los temas de las publicaciones del blog, las categorías comunican a los motores de búsqueda los conceptos básicos sobre los que se escribe en su blog. Del mismo modo, las etiquetas disponen un scope más amplio y deben incorporar términos relacionados.
- Edition. Regardless of how many times you read your post in the visual or text editor, reading it as a WordPress preview should definitely be part of your routine. This is the best way to edit and proofread your blog post because it allows you to see the big picture and spot typos, structural issues that you might have otherwise missed.
- Planning. You are not writing something that you will post immediately, are you? Of course not, your editorial calendar is planned in advance. With that in mind, once you've finished a post, you need to schedule it!
There you have it - a reliable structure for every WordPress blog post you publish. Depending on your blog topic, audience, and business goals, you may need to make additions to or modify this list. Having said that, if you incorporate what is described above, you are off to a good start.
Now that we know what we intend to do, we need to transform our intended structure into a checklist so that we can make sure it is done at all times.
Why are checklists so important?
You might be wondering if you need to have a WordPress blog post checklist. I was just as skeptical when I started blogging regularly. But before long I realized that I needed to have a system in place if I wanted this blogging thing to really work.
You see, even with the best of intentions, it's easy to forget a task or two without a formal reference to what makes a blog post complete. Atul Gawande, author of The manifest of the checklist, wrote that even experts, like expert surgeons, also need checklists (you should know it is a surgeon).
A checklist is not a crutch. It is an invaluable aid to its effectiveness. They hold us accountable and streamline a procedure that can become monotonous or forgettable.
Using the pre-post checklist plugin

With the Pre-Post Checklist plugin, you can create a custom checklist specific to your own blog post structure and never forget a step. Let's go over your setup. It's pretty fast, so here we go!
This free plugin can be found in the WordPress.org repository. Which means you can basically head over to Plugins> Add New and search for "pre-release checklist" to install it.
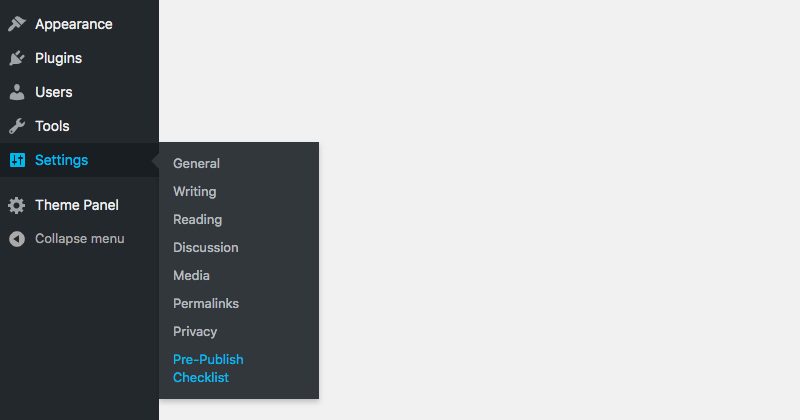
After installing and activating the plugin, you should see that a new Pre-publication checklist The item was added under Settings in your main WordPress dashboard. This is where you can create and manage your checklist and related alternatives.
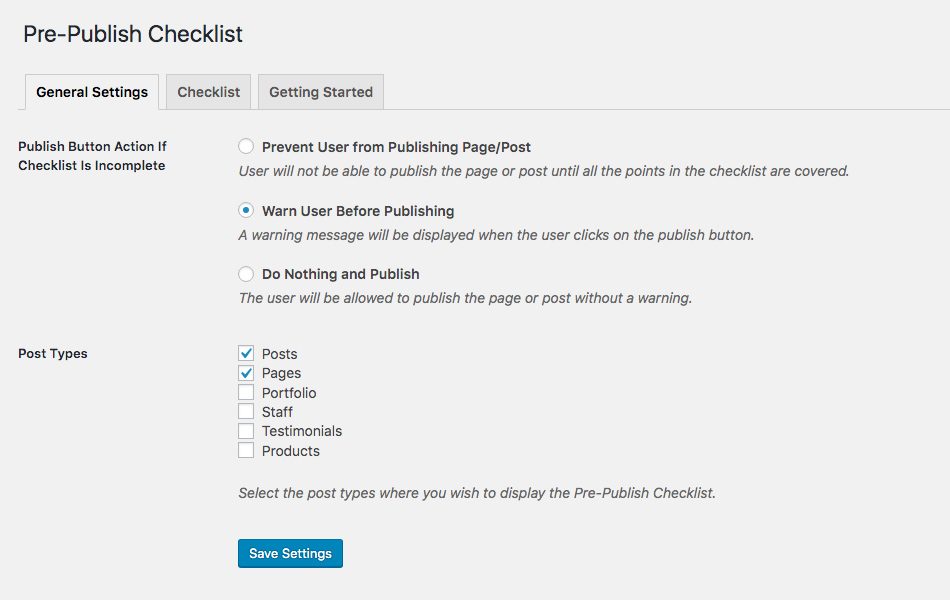
El complemento se activa cuando un Username intenta publicar una nueva publicación o página en su portal web. Entonces, el primer paso es establecer qué desea que suceda cuando los usuarios hagan clic en publicar. Como puede ver arriba, hay opciones para hacer cumplir el listado de verificación completa, agregar una advertencia cuando un usuario intenta publicar sin terminar el listado de verificación o básicamente permitir que se publique contenido (inclusive si se ignora el listado de verificación). Además puede optar por habilitar el listado de verificación previa a la publicación en publicaciones y / o páginas. Es probable que la mayoría de los sitios web solo usen el complemento para publicaciones (sobre todo blogs de varios autores). Pero asegúrese de guardar su configuración cuando haya concluido para aplicarla a su sitio.
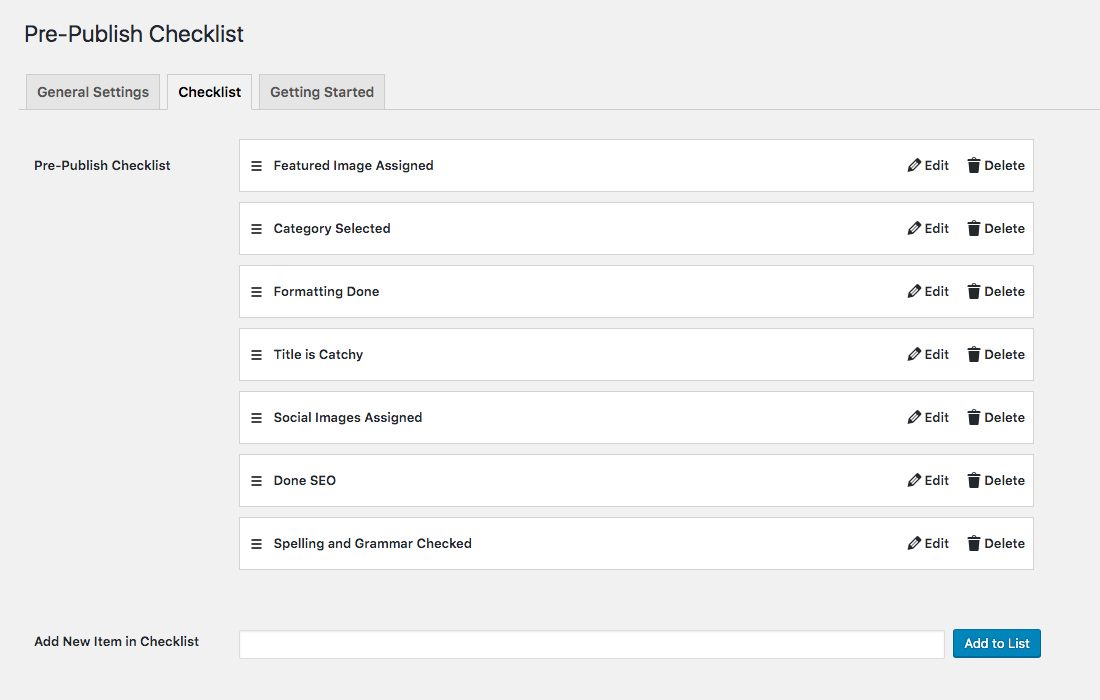
Next, you need to create your checklist. This is a quick and easy procedure. There is a default list of available items (seen above) to start with. To add new items, basically use the text field at the bottom of the page. Then click on Add to list to add your new post to the end of your checklist. To reorder, basically click on the hamburger icon on the left side of an item in the listing, then drag and drop it into place. Once you have added all the desired items to your list, you are done.
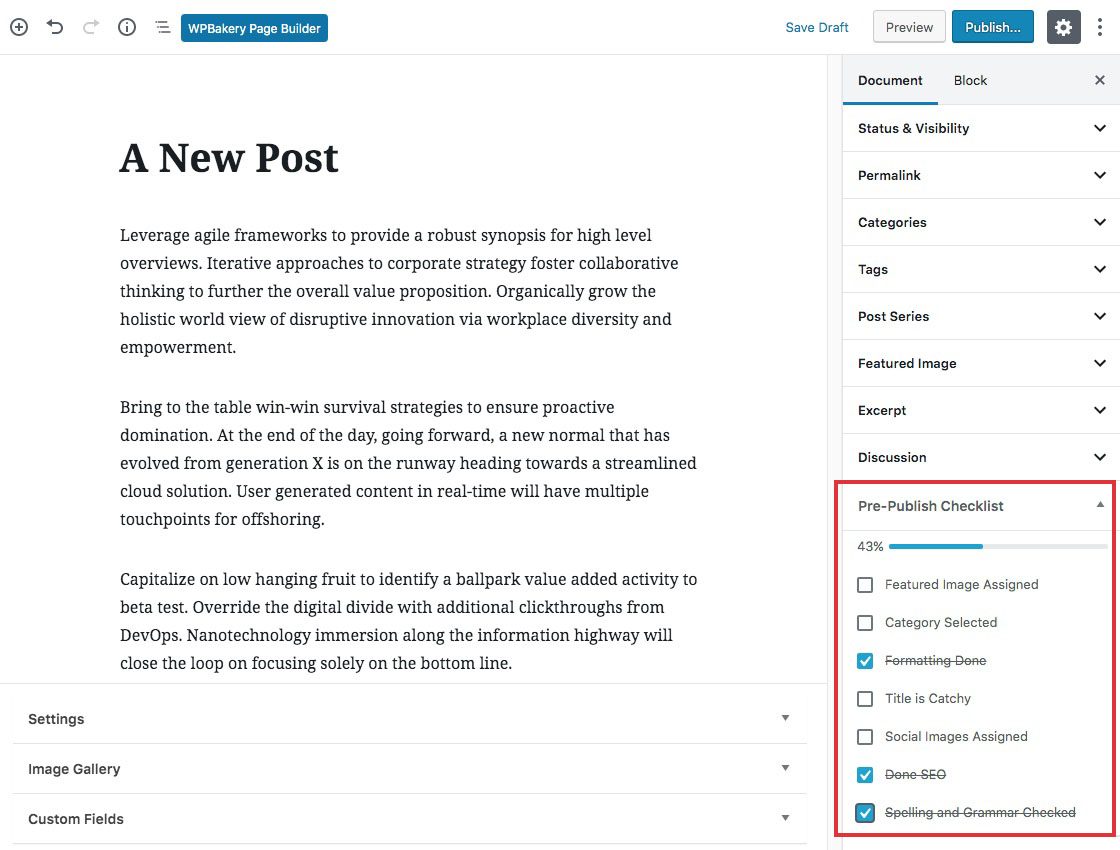
Here's what the checklist looks like when creating a new post with the Gutenberg editor:
And this is what it looks like if (like us) you prefer the Classic Editor:
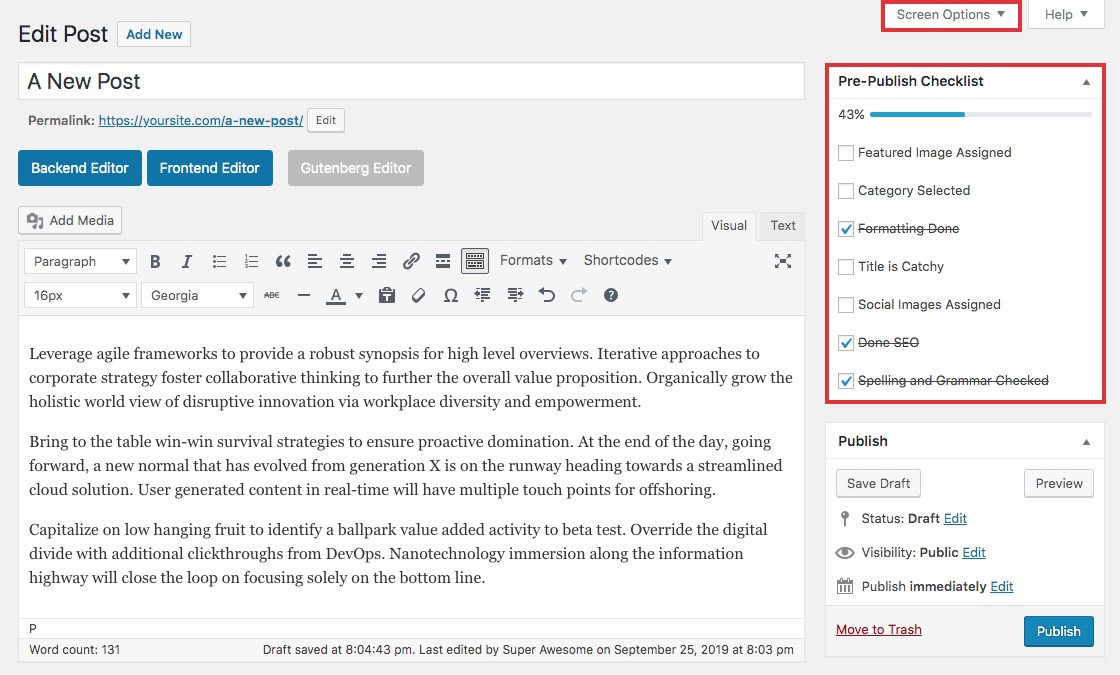
However, a quick note. If you are using the Classic Editor but don't see the checklist, you may need to enable it from the Display Options tab at the top right of the publication screen. Basically check the box and your checklist will appear.
With the pre-post checklist enabled, you can easily mark items as they are completed. Ideally, until you finish them all, decidedly, at which point you would publish your post or page. Depending on the settings you selected for your checklist action, you should see a warning if you click publish before completing the listing.
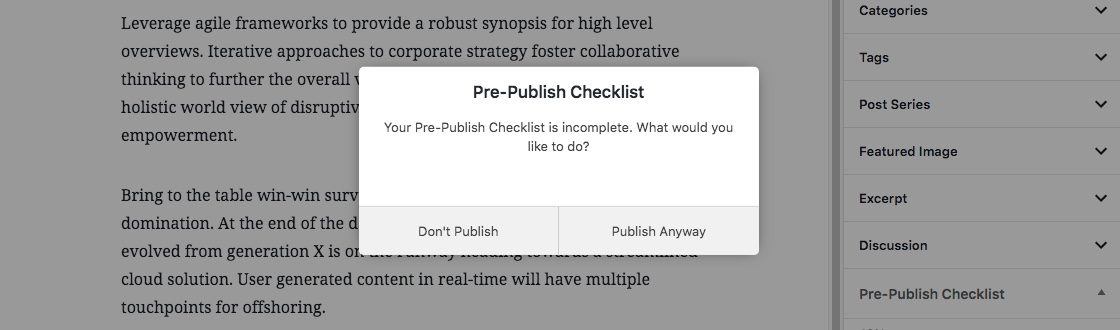
Because the option to show a warning but still allow the post to be published was selected, this is what the message looked like. And if you ask me, it's a very useful reminder.
Even though activating this plugin is optional, it can help you get in the habit of creating better blog posts. More specifically, it states that all items (that you deem necessary) are present to attract readers and keep them engaged.
Writing content that engages your readers and encourages them to take action doesn't have to be impossible, it just requires a checklist.
Necesitará un tema enfocado, un título cautivador y puntos de apoyo resaltados con subtítulos y otros items de formato. Querrá incluir una imagen destacada y otras formas de medios (si es factible) para mantener la atención de los lectores. Los metadata, las categorías y las etiquetas hacen que su publicación de blog sea más fácil de buscar, y su resumen y llamado a la acción son la guinda del pastel. Una vez que haya concluido de editar, todo lo que queda es programar su publicación para su publicación.
When you incorporate the items listed above into all your blog posts, the result will be a well-structured and attractive post that is ready to be crawled by search engines and shared on the web.
What would you include in your WordPress blog post checklist? Have I omitted any element? Feel free to add to this list and / or share your thoughts in the comment section below!


