

There have been a lot of changes to this plugin since we made this review, so we've created a completely new one! Check out our new review of iThemes Exchange, one of the fastest ways to start selling online with WordPress!
Exchange is the brand new (and completely free) eCommerce plugin created by iThemes to sell digital products through your WordPress website. We're going to walk you through how to use the plugin and maybe convince some of you to give it a try. Take a look at our video overview or, if you prefer, simply read the text below.
Installation and configuration
Install on pc
Exchange is a plugin, just grab it from the plugin repository and install it directly from your control panel. Or you can download the zip file from the iThemes website and upload it by selecting “Add New” under Plugins in your dashboard, click upload and select the zip file. Easy!
Download iThemes Exchange
It's time to set up your store. Click the “Quick Settings” button in the notification bar at the top of your dashboard. If you don't have the notification bar, go to Plugins > Installed Plugins and search for “iThemes Exchange”. Verify that you have activated the plugin, then click the “Quick Setup” link to open the setup wizard.
General information
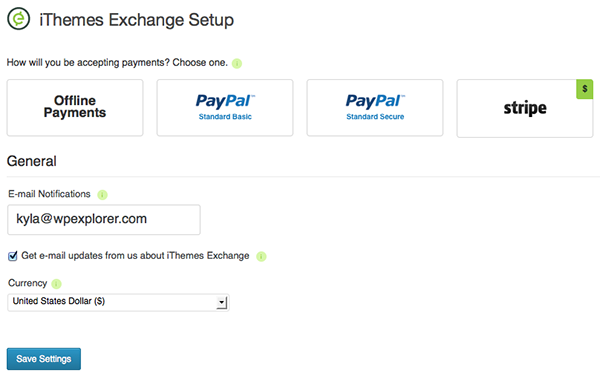
Exchange has made it easy. Simply select the payment method your store will use. Choose from offline (checks or cash), PayPal or Stripe. Make sure you've already signed up for PayPal or Stripe if you're going to use one of these two options, and to use Stripe there is a required add-on (but you can buy it for the introductory price of just $ 10 – which will amount to $ 97, for (which I suggest you get it now if you think this might be the method you'll use). If you choose to use offline payments, there is a section you can fill out with more payment instructions for customers (such as where to send the payment). Then update your notification email address if you don't want to use the administrator email by default, select your currency and save the changes.
Configurations
You can add a little more information by clicking this menu item within Exchange.
The first tab covers your company's basic information. Name, tax ID, primary email and address. At the same time you can choose a currency symbol, its position and the separators of your currency (as an example, in the US we use a decimal point between dollars and change, but many Latin countries use a comma instead: Exchange allows you to add your currency as it should be). Finally, on this tab, you can choose how you want users to sign up (using Exchange to sign up through the plugin or using the main WordPress function to sign up through your website).
On the second tab, you can customize the email you receive when you make sales, as well as the email customers receive as a receipt for their purchase. Using iThemes Exchange shortcodes, you can add information such as the customer's username, purchase date, or total purchase amount to the email. Add information that you think is relevant to you and/or your clients.
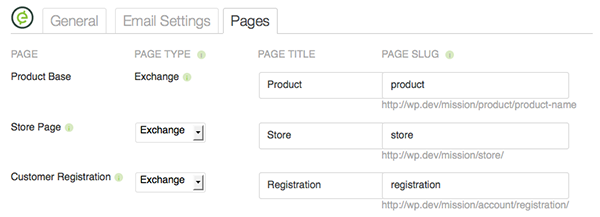
The third and final tab allows you to organize your online store however you want. For the various pages associated with the store (such as the store page, customer registration, customer shopping cart, purchase confirmation, etc.), you can choose to use the default Exchange page, use codes shortcuts to insert related information into a WordPress page or disable the page completely. This is also where you can add custom page titles and slugs.
Accessories
From here, you can verify that you have all the features enabled that you want and disable those that you don't. Some of the options included are a product category dashboard or widget product tags and the option for multi-item carts.
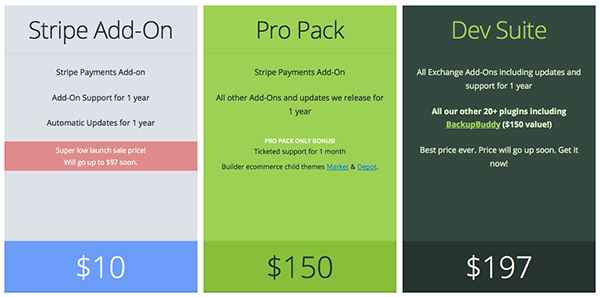
After purchasing, you will simultaneously see the Stripe plugin or any other premium plugin you have access to.
Get Exchange Add-ons
Add products
To add products, go to Exchange > Add Product.
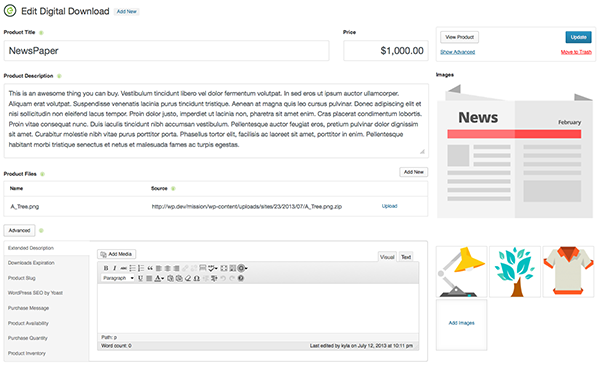
Give your product a name, price and description. You can upload as many product images as you like, as well as upload digital files themselves (check that the Digital Downloads plugin is enabled by navigating to Exchange > Plugins). At the same time, there are advanced options such as an extended description, categories, tags, product-specific purchase message, availability dates or quantity and limit per person. Be sure to post your product and it will be instantly added to your store.
Create coupons
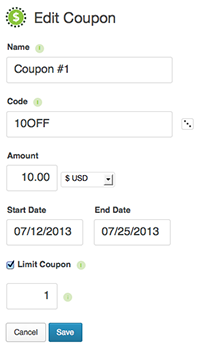 Who doesn't love a lot? With Exchange you can create all types of coupons for your clientele. Go to Exchange > Add-ons and make sure the Coupons add-on is activated. Once active, the Coupons menu item should appear within the Exchange menu in your WordPress Dashboard. Now go to Exchange > Coupons. Give your coupon a name (like Grand Opening), add a coupon code (like 10OFF or random), set the amount (like $10 or 10 percent), and add the usage period. With coupons you can run a range of holiday or consumer-specific sales, email campaigns, or even giveaways.
Payments
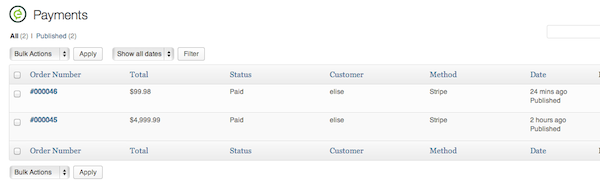
Take a look at what your customers have purchased. Go to Exchange > Payments; You can see each and every transaction in your store here. To see who bought what, simply hover over a transaction and click the “Payment Details” link.
View customer information
In the “Payment Details” of a transaction, you will see a link to “View Customer Data.” This will take you to a screen that shows a specific customer's purchase history, a list of all transactions (a useful tab if you ever need to issue a refund or resend a confirmation email), and a section where you can take notes about the customer (perhaps billing information or a record of coupons you issued them).
Dashboard report
Exchange at the same time includes a great dashboard widget to give you a snapshot of how your online store is doing. To enable the add-on, go to Exchange > Add-ons and activate the basic reporting dashboard widget.
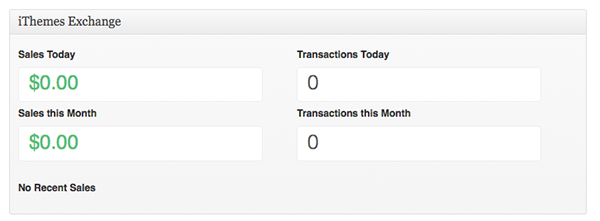
From now on, when you log in to the website, you will see a summary of today, this month, and a list of recent transactions. This is a quick and easy way to see if your products are selling and if your daily sales are on track.
Help and documentation
To learn more about all the features of Exchange, click the Help item in the menu, or take a look at the impressive documentation on the iThemes website. It covers each and every feature of Exchange often with helpful images so you can better understand how the plugin works. At the same time there are plenty of great video tutorials if ours didn't give you enough information on a particular Exchange topic.
Overall, this is a great plugin that you should definitely check out, or even try it on your localhost like we did. It's very easy to use, quick to set up, and has all the key features any eCommerce plugin should have. But if you can think of something that Exchange is missing, just fill out the Feature Request form in iThemes. They are open to suggestions and want feedback!
Let us know what you think of Exchange, or what your suggestions are for the plugin, in the comments section below.
More about iThemes

We love iThemes and couldn't be more excited about the recent release of their free plugin. Home of the renowned BackupBuddy plugin and the almighty Builder WordPress Theme Framework, you know that anything that comes from iThemes is sure to be high-quality code with amazing features and support. If you want to check out some of the other cool products from iThemes, just click the button.
Visit iThemes


