

When you finish reading this complete WordPress course, you will get the ability to create your own website, but in this article we will explain how to configure menus in WordPress. We are going to go step by step so that you understand the relevance of the menus. In previous versions of WordPress, complicated programming was required, now everything is simpler and more effective for the editor.
What are menus in WordPress?
They are sections that are at the top or bottom of a web page. They can be displayed to show three types of access:
- Buttons to access internal pages: when you create a menu you have this option, which is used to link to an internal page that you have created for a specific purpose such as what your blog or contact information is about. Simply select the name and add it to the menu to be created.
- Buttons for blog posts: in this case you will be shown the complete list of the entries that you have created on your website. Just choose the ones you want to appear in the main menu. We recommend that you choose the ones with the most visits or conversions (you can see this data in Google Analytics).
- Buttons to address url: here you can customize the button so that when they click it they can go directly to a specific url address. This can be for the same blog or for a different site.
- Categories: one of the most used options at the time of create a menu. If you have mother categories and subcategories at your disposal, you can order them here. In this module we explain the relevance of the categories within a blog.
Recommendations before creating a menu
- Do not repeat addresses: if you are going to create a menu, make sure that it is shown only once on the web. You often see the error that it is duplicated in the header and footer part, the problem here is that it can confuse the user when browsing.
- Value content: It is not about sending a visitor a page or category just to fill in or make the menu look nice. The idea is that they can go to a content that serves them and that shows relevant content in relation to your topic.
How to create menus in WordPress
- The first thing you should do is enter the WordPress dashboard and go to Appearance> Menus. At this point, a screen will appear showing several sections that will help you to create and configure a menu within your blog.
In the left column you will see four options, they are the same as described above: Pages, Posts, Custom links, Categories. On the right side you will see an option that says Menu name, here you must enter the name with which you want the new menu to be identified. When you've written it, click Create menu and you're done.
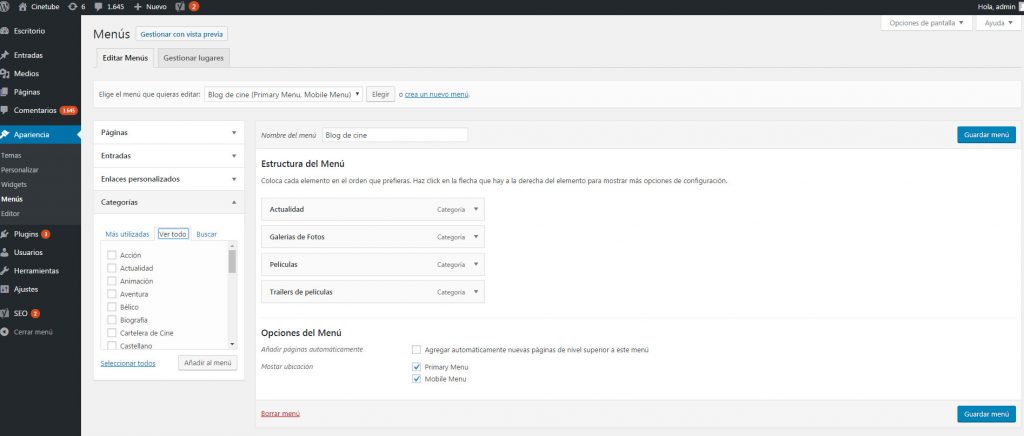
- Step # 2: If you already have the name of the menu, now you have to add the respective tabs. This is where you must be clear about where you are going to direct your visitors. If you choose pages then make sure that they are only pages, in the same way with categories, links, entries and permanent links.
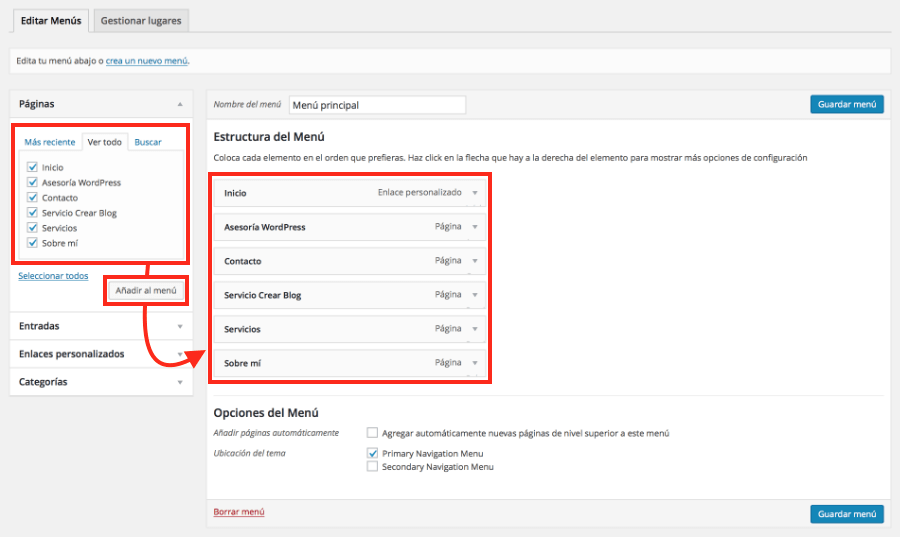
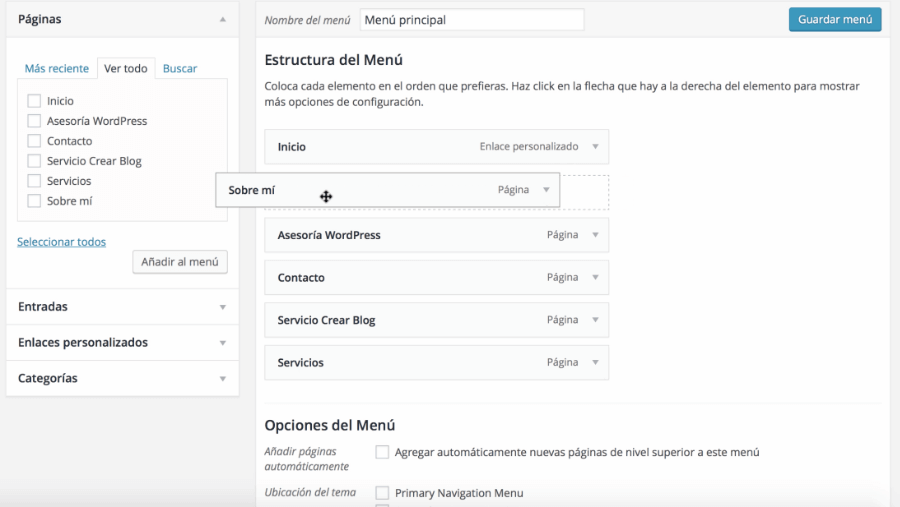
- With your WordPress menu already done now you have modify its structure. You can change their order by simply dragging the category from top to bottom. For it to unfold, you just have to drag a little to the right, that way it will look like a drop-down and you won't take up much space at the top.
When you have defined the order it is time to determine its location, in most cases there are two options: Primary Menu Navigation or Secondary Navigation. If you want it to appear in the upper part choose the first one, if you need its location to be lower choose the second option. After this you go to the bottom and click on Save Menu.
You can create so many menus on WordPress.org as you wish but remember to place them strategically, so the visitor will be able to locate the greatest amount of information easily. At the same time you can modify the menu created as many times as you want, that is one of the advantages of this platform.


