

Tan pronto como configure su nuevo sitio Web from WordPress, querrá comenzar a agregar contents. Este es un primer paso crucial, ya be que esté creando un perfil de una página o un Blog de varios autores. A pesar de todo, si es nuevo en la plataforma, es viable que no sepa por dónde empezar.
Luckily, WordPress makes creating and customizing original content for your site a breeze using pages and posts. The former are static pages perfect for author contact information and biographies, while the latter are dated blog posts that can be organized and archived.
In this article, we'll explain the key differences between pages and posts, and discuss when and why you might want to use them. Then we'll show you how to create and organize your content. Let's start with some definitions!
The difference between WordPress posts and pages
Posts are an easy way to show your visitors new content.
WordPress offers two main solutions for filling your site with content: pages and posts. While both allow you to add text and media to your site, there are some key differences in the way that content is presented and organized.
pages
Primero, hablemos de las páginas, que son secciones estáticas de su sitio web. Por lo general, están vinculados desde un menú principal y contienen información que no es probable que cambie habitualmente. Ejemplos de este type of content incluyen una página de inicio o página de destino, una página de contacto y una biografía del autor.
Freelancers or companies at the same time can have pages showing their services and testimonials. Alternatively, a photographer or artist can use one or more pages to showcase their best work. Each site will be different, but ultimately the pages are ideal for information and media that should be relatively permanent. Typically, you'll want to select what your main pages will be up front, even before your site goes live.
Publications
Apart from this, posts are a more dynamic format that get their name from their most common use: blog posts. They are dated and categorized, and are generally listed in chronological order on a dedicated archive page. For this reason, publications are the best format to obtain new and timely information.
If you are running a blog, this is what you will use to provide your readers with a constant stream of content. Regardless, posts at the same time can be great for news, company updates, and whatever else you want to post without changing your static pages. It's a good idea to select early on whether you want to use posts and, if so, where you want them to display, generally on your site's main page or on a separate page that appears in your main menu.
Now that you know how to differentiate between pages and posts, let's take a look at how to create and organize them. We will start with the pages!
How to create your first WordPress page
To create a new page, navigate to Pages> Add New in your WordPress dashboard:

You can access your page title in the first field and your content in the larger section below. Just type in the box to add text or select Add media para insertar una imagen, video u otro archivo multimedia. Si se siente cómodo con HTML, al mismo tiempo puede utilizar el Text tab to switch to a code-based editor:
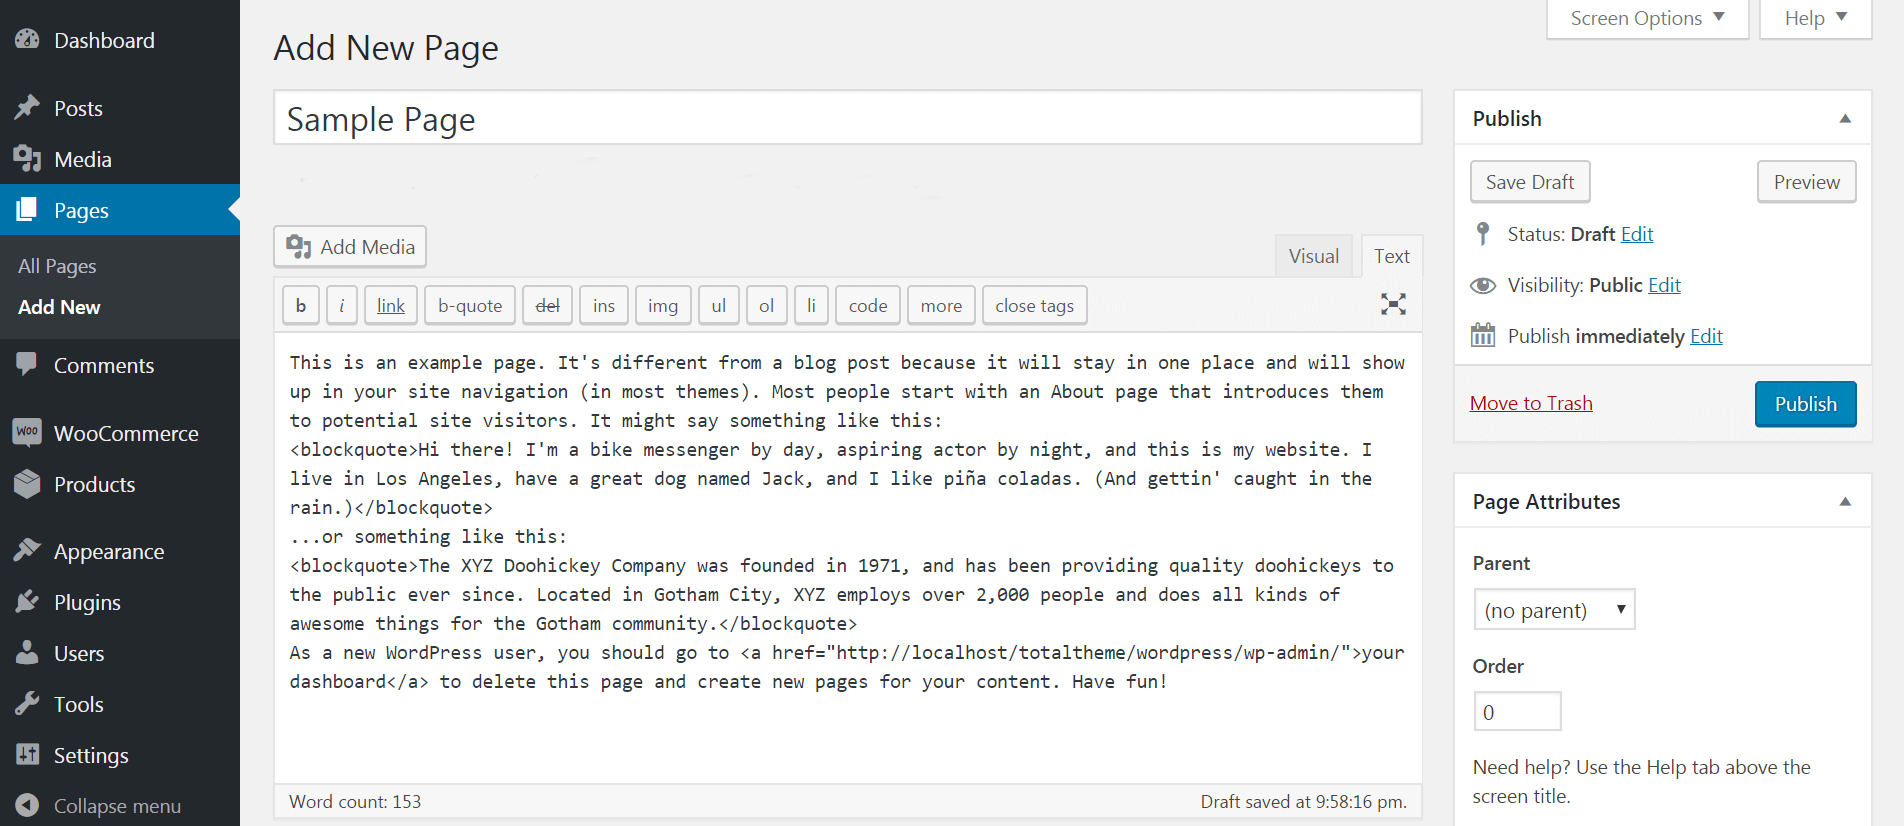
On the right side, you will see a few more buttons. Click on Save draft to store all changes to your page without publishing it, or use Advance to see how your page will look to visitors before it goes live. While creating a page, no one except you (or anyone else with access to the back-end) can see it. To make the page visible to users, select the To post button. Regardless, don't worry: you can still make changes to your page after it has been broadcast.
In conclusion, the main photo The box enables you to upload a main image for your page. It will generally appear at the top of the page or in the header, depending on your topic.
Organize your WordPress pages
Pages are generally organized in a menu at the top of your website.
Creating your pages is a piece of cake, but organizing them requires a bit more thought. Ultimately, you want to make it easy for your visitors to find what they want.
To create a hierarchy for your pages, see Page attributes meta box on the left side of the page edit screen. Here the Dad The drop-down menu allows you to "nest" pages to organize them in a hierarchy. At the same time you can use the Order field to determine in what order your pages will appear in your menu. To learn more about this, click on the Help tab in the upper right corner of the editing screen.
In conclusion, WordPress sets the home page of your site as a list of recent posts by default. Regardless, you can direct visitors to a static page when setting up your WordPress home page if you wish.
How to create your first WordPress post
Now that we've covered the pages, it's time to talk about posts. Go to Publications tab on the back end of your site and select Add new:
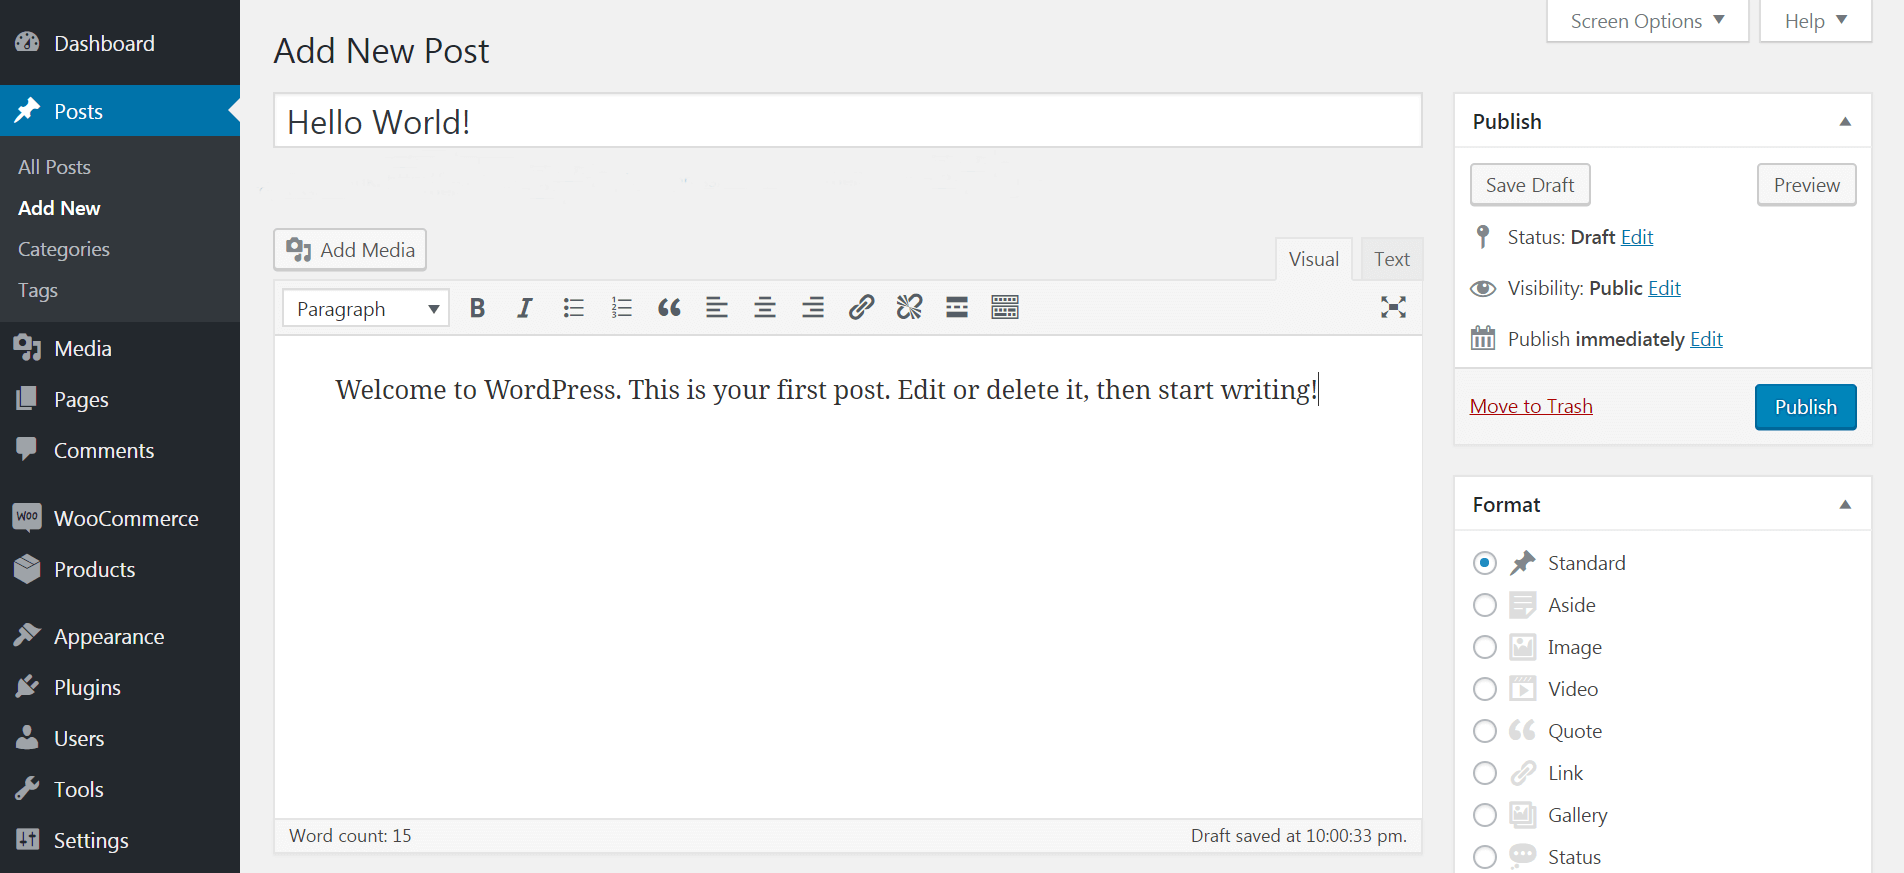
The layout and options here are similar to the page edit screen. In spite of everything, instead of a Page attributes screen, you will see the Format meta box. This section can be a useful way to set different appearances for various types of posts, although for the purposes of this tutorial, we recommend sticking with Standard.
At the same time you will notice that there are two more new meta boxes: Categories and Tags. These are essential to keep your posts organized.
Categorize and tag your WordPress posts
If you plan to create a lot of posts, you'll want to make it easier for readers to navigate between them. Luckily, WordPress offers categories and tags to help. Simply put, categories are high-level descriptors that you can use to organize your posts, much like the chapter titles in a book. Apart from this, tags are words or phrases that are attached to each publication and describe it in more detail (like an index at the end of a book).
El uso de categorías y etiquetas para organizar sus publicaciones mantiene su sitio menos desordenado y al mismo tiempo ayuda a los search engines a entender su contenido e indexarlo correctamente. A continuación, se ofrecen algunas sugerencias clave para utilizar estas herramientas:
- Keep the names and phrases you use clear, simple, and easy to understand.
- Limit the number of categories and keep them broad and general.
- Use tags to list words and phrases that describe the specific topics of each post in a category.
- Limit yourself to one category per post and around 3-5 tags.
Using categories and tags effectively may take some practice, but you'll soon get comfortable with them. At the same time, there is a great deal of additional reading available on the web if you are looking to organize your posts more effectively.
Building a website and filling it with content can seem intimidating, but with the right platform it doesn't have to be difficult. WordPress simplifies your work by providing two formats (posts and pages) that can handle just about anything you want to create.
It's very easy to add your first pages and posts to WordPress, then fill them with text, images, and other media. At the same time it is crucial to keep your content organized and easy to navigate by assigning hierarchies to your pages and creating menus, as well as categorizing and tagging your posts.
Have a question about creating pages and posts in WordPress? Ask in the comment section below!


