
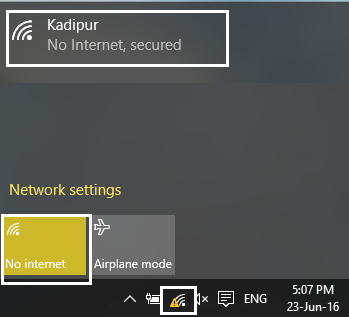
If a WiFi network has the 'limited connectivity' firmar junto a él, significa que está conectado a la red pero no tiene acceso a Internet. El motivo principal de este problema es que el server DHCP no responde. Y cuando el servidor DHCP no responde, la computadora se asigna de forma automática una IP adress a sí misma debido a que el servidor DHCP no pudo adjudicar la dirección IP. Por ende, la "No connectivity or limited connectivity" error.
Troubleshoot limited access or no WiFi connectivity
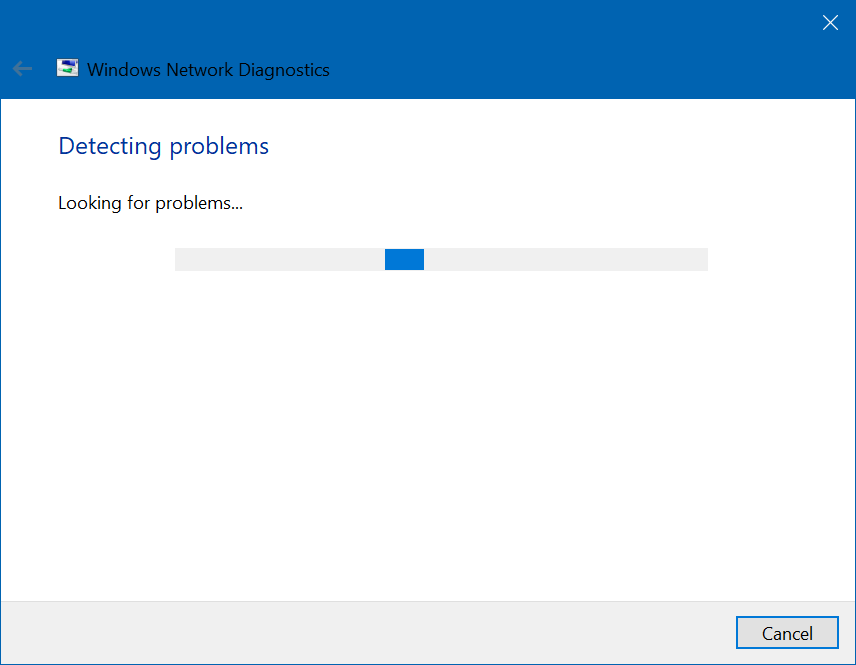
Method 1: run the network troubleshooter
1. Right-click on the network icon on the taskbar and click Solve problems.
![]()
2. The network diagnostic window will open. Follow the instructions on the screen to run the troubleshooter.
Method 2: reset TCP / IP
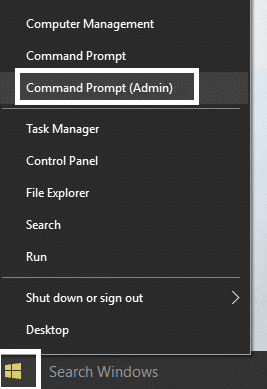
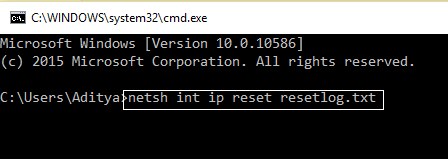
1. Right-click the Windows button and select "Command Prompt (Administrator)".
2. Enter the following command: netsh int ip reset c: resetlog.txt
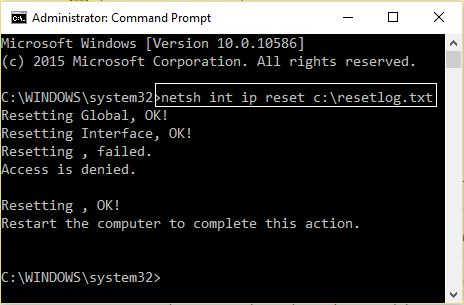
3. If you don't want to specify the directory path, use this command: netsh int ip reset resetlog.txt
4. Restart the computer.
Method 3: change the Bitdefender firewall settings (or your antivirus firewall)
1. Open Bitdefender Internet Security Settings and choose Firewall.
2. Click «Advanced settings" button.
3. Make sure that «Enable Internet Connection Sharing" It is checked.
NOTE: If you don't have the above settings, uncheck «Block shared internet connectionInstead of above.
4. Click the OK button to save the changes.
5. Y si no funciona, intente inhabilitar su Firewall antivirus y enabling Windows Firewall.
Para el máximo de persons, cambiar la configuración del firewall corrige el limited access or no WiFi connectivity problem, But if it didn't work for you, don't lose hope that we still have a long way to go, so follow the next method.
Method 4: change adapter settings
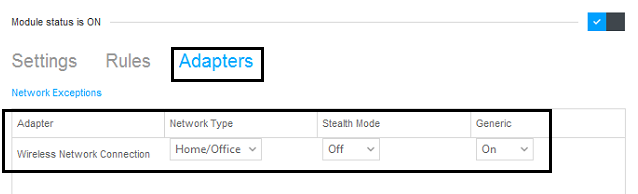
1. Open Bitdefender, then select Protection module and click the Firewall function.
2. Make sure the Firewall is ON and then go to Adapters tab and make the following changes:
Set Network type to "Home / Office" Set Stealth Mode to "Off" Set Generic to "On"
3. Restart your computer to apply these changes.
Method 5: activate your Wi-Fi adapter
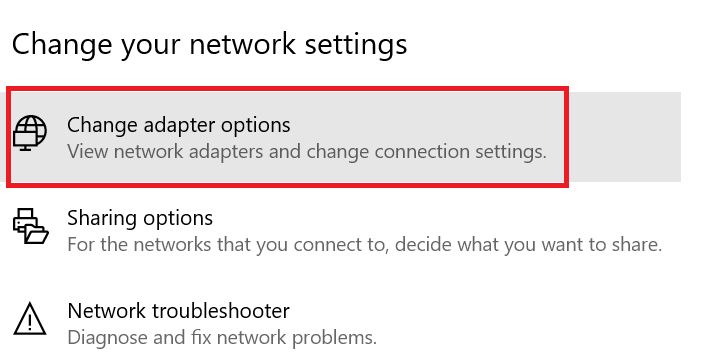
1. The right button of the mouse on the network icon in the notification area and select Opened Network and Internet configuration.

2. Low Change your network settings, click on Change adapter alternatives.
3. Click your Wi Fi network and select Properties.
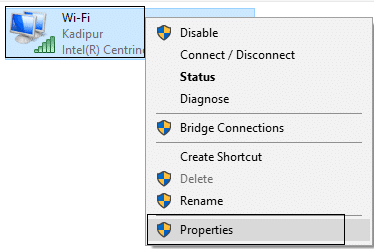
4. Now in WiFi Properties click on Configure.
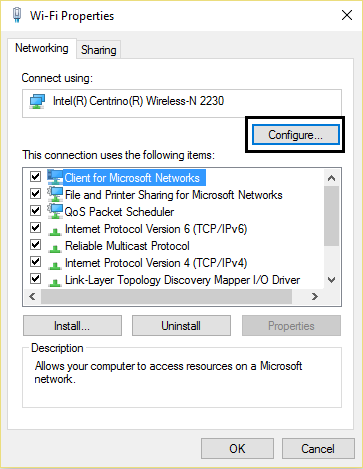
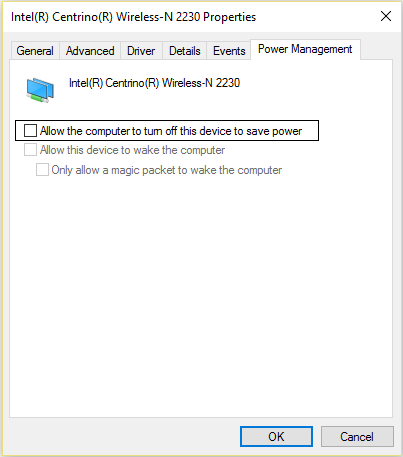
5. Go to the Power Management tab and uncheck «Allow the computer to turn off this device to save power.«
6. Restart your computer.
Método 6: usar DNS from Google
1. Go back to your Wi-Fi properties.
2. Now select Internet Protocol version 4 (TCP / IPv4) and click Properties.

3. Check the box that says «Use the following DNS server addresses”And enter the following:
Preferred DNS server: 8.8.8.8
Alternate DNS server: 8.8.4.4
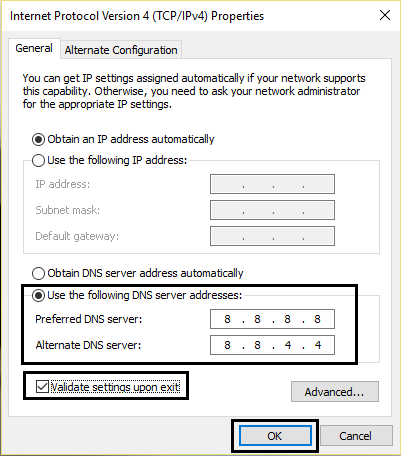
4. Click OK to store, then click close and restart your computer.
Method 7: Reset TCP / IP Auto Tuning
1. Right-click on the Windows key and select «Command prompt (administrator).«
2. Enter the following commands:
netsh int tcp set heuristics disabled netsh int tcp set global autotuninglevel = disabled netsh int tcp set global rss = enabled
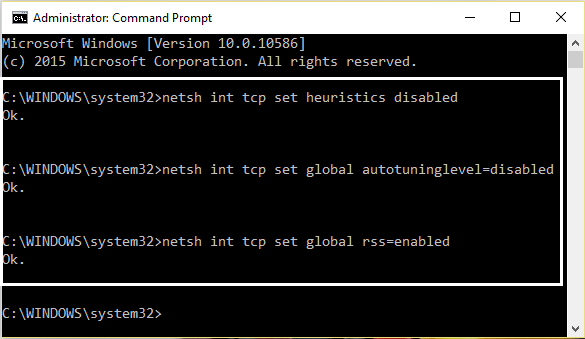
3. Restart your computer.
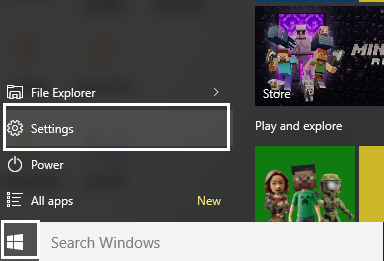
Method 8: enable download over metered connections
1. Click the Windows key and select Settings.
2. Now, in the settings, click Network and Internet.
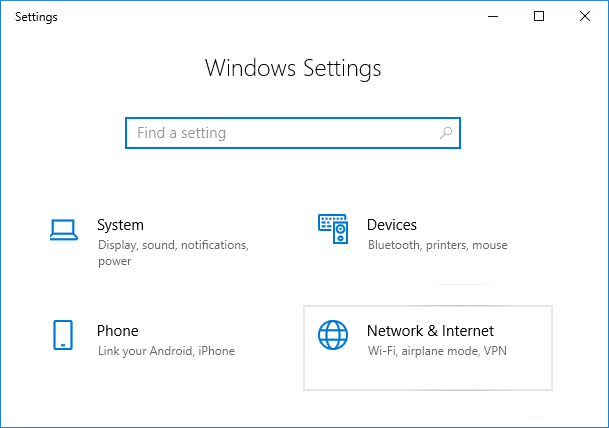
3. Here you will see Advanced Options, Haz click en eso.
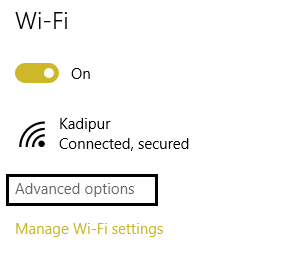
4. make sure your The measured connection is set to ON.

5. Restart to apply changes.
Yes I admit this is a stupid step but hey for some people it worked so why not give it a try and who knows your limited access issues or no WiFi connectivity can be arranged.
Method 9: set roaming aggressiveness to the max
1. The right button of the mouse on the network icon in the notification area and select Opened Network and Internet configuration.
2. Low Change your network settings, click on Change adapter alternatives.
3. Now select your Wifi and click Properties.
4. Within the Wi-Fi properties, click Configure.
5. Navigate to the Advanced tab and find the Roaming aggressiveness setting.
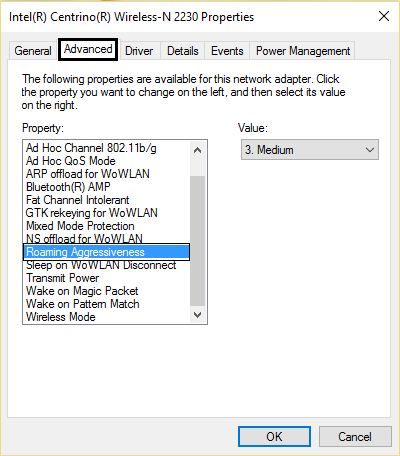
6. Change the value of Medium to high and click OK.
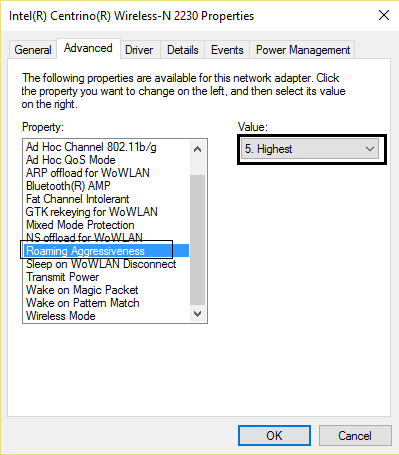
7. Restart to apply changes.
Method 10: Update Drivers
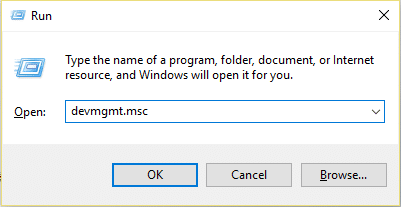
1. Press Windows Key + R and type «devmgmt.msc«In the Run dialog box to open the device administrator.
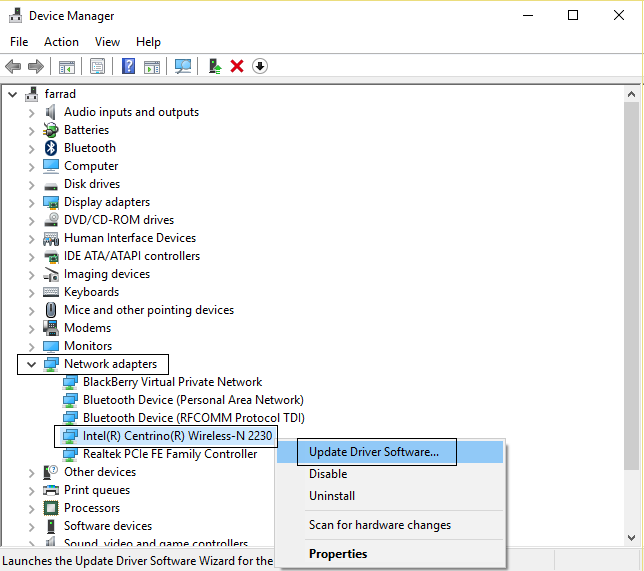
2. Expand Network adapters, then right-click on your Wi-Fi controller(Broadcom or Intel for example) and select Update the drivers.
3. En Windows Update Driver software, seleccione «Search my computer for driver software.«
(*10*)
4. Now select «Let me select from a list of device drivers on my computer.«
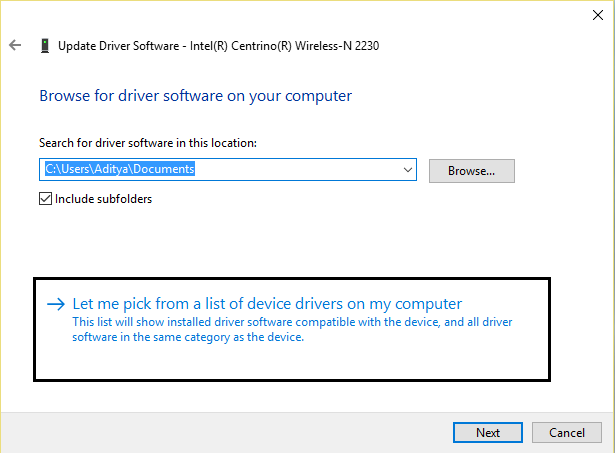
5. Try update the drivers for the versions listed.
6. If the above did not work, go to portal Web del fabricante to update drivers: https://downloadcenter.intel.com/
7. Restart to apply changes.
It may also be of interest to you:
Hope by now some of the methods have worked for you to fix it limited access problems or no WiFi connectivity. If you still have any questions regarding this guide, feel free to ask in the comments.


