The Power BI Conditional column generates a new column based on the condition we specify, for example, creating an evaluation column based on employee performance, etc. Let me show you how to add a conditional column in Power BI with an example.
How to add a conditional column in Power BI
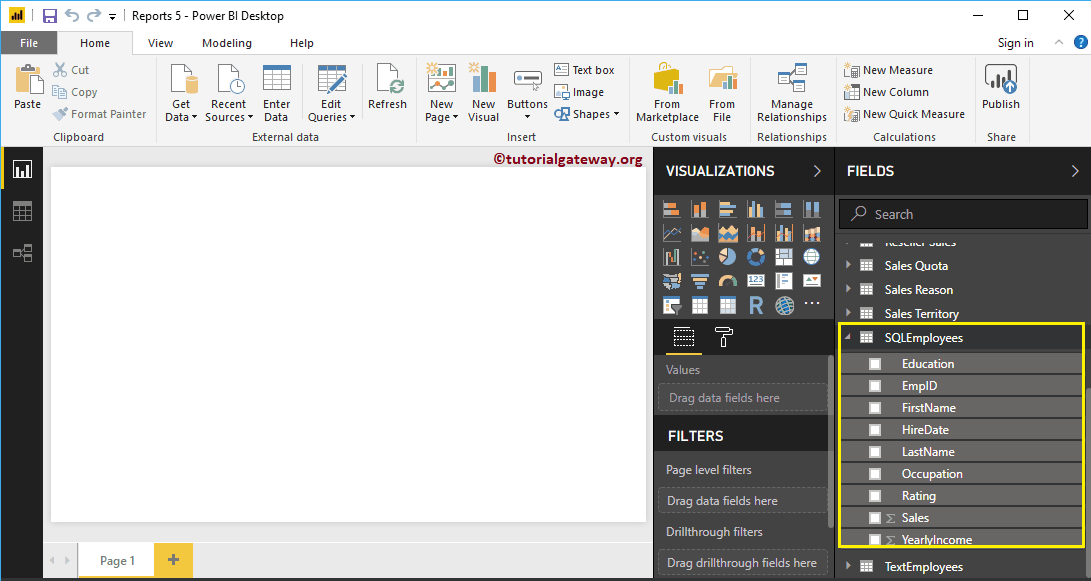
To demonstrate this conditional column from Power BI, we will use the SQL table that we imported in the Enter data article.
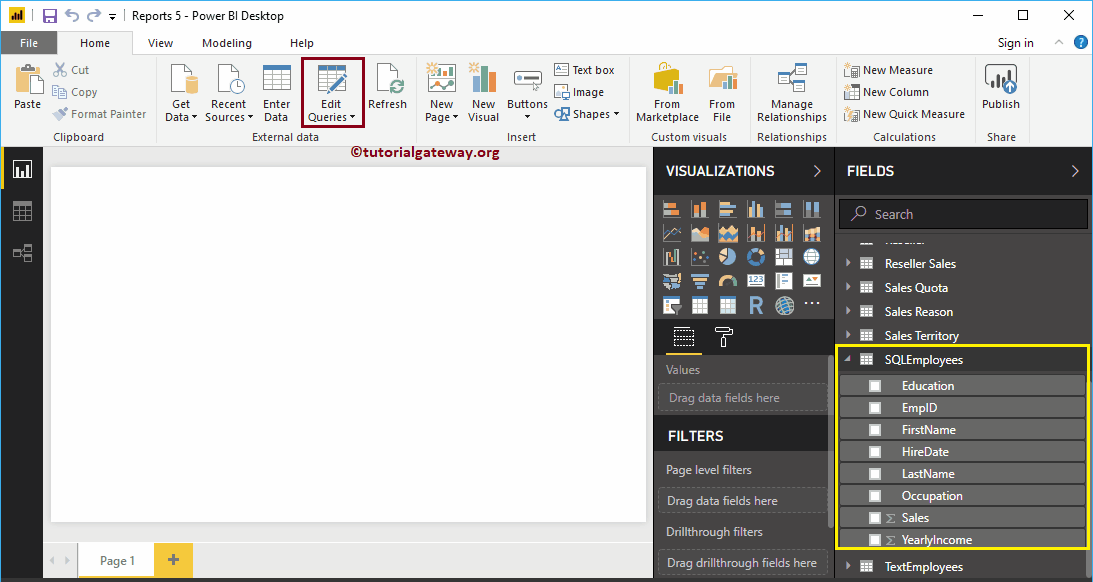
To add a conditional column, click the Edit queries option under the Home tongue.
 <noscriptNoScript es un complemento del navegador para Mozilla Firefox, que impide que se cargue en las páginas web contenido como JavaScript, Flash o iFrames. Su objetivo es incrementar la seguridad durante la navegación y quitar la promoción comercial más molesta al cargar sitios web. El términoNoScript tiene un significado distinto en la programación HTML. Cuando JavaScript está desactivado, la etiqueta <noscript> o </noscript> asegura que el usuario pueda ver el plus>
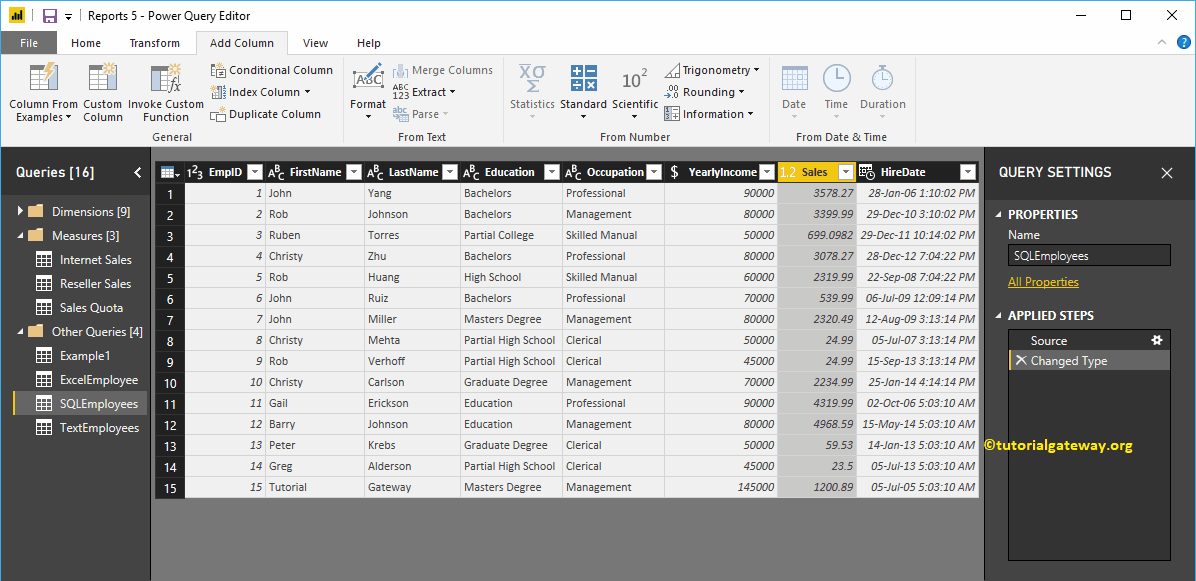
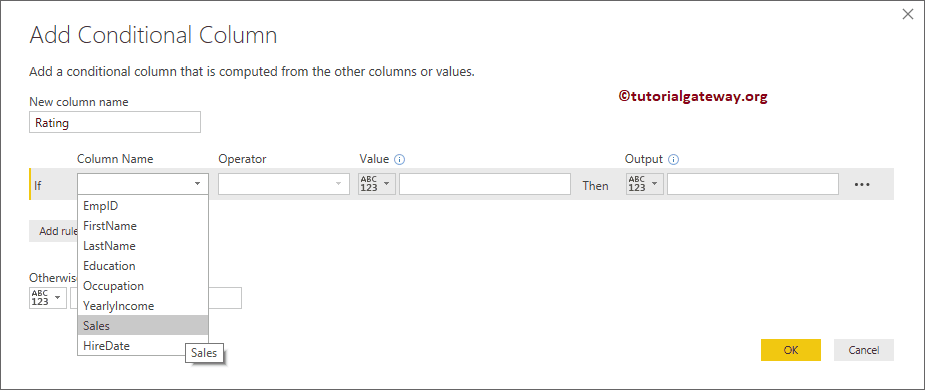
By clicking on the Edit queries The option opens a new window called Power BI Editor de Power QueryConcepto de Query¿Qué es una Query?Una query, en inglés, es una definición que significa pregunta. Trasladando este concepto al marketing digital y a internet, se traduce como el concepto que un usuario escribe en un buscador, véase Google, cuando desea realizar una búsqueda usando keywords o palabras clave. Es la serie de términos reales que se utilizan al momento de ir en busca de información en estos portales.Cuando un consumidor plus. In this example, we will use the Sales column.
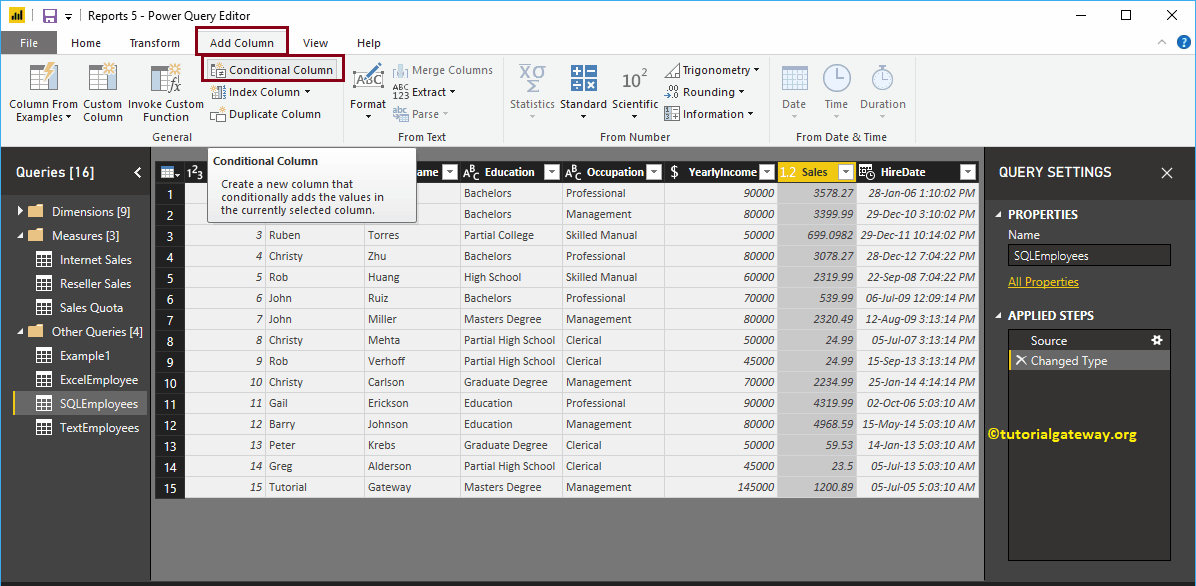
First, go to Add column Tongue. Under this tab, you can see the Conditional Column button. You can use this button to add the conditional column to this table.
Clicking the Conditional Column button in Power BI opens the following window.
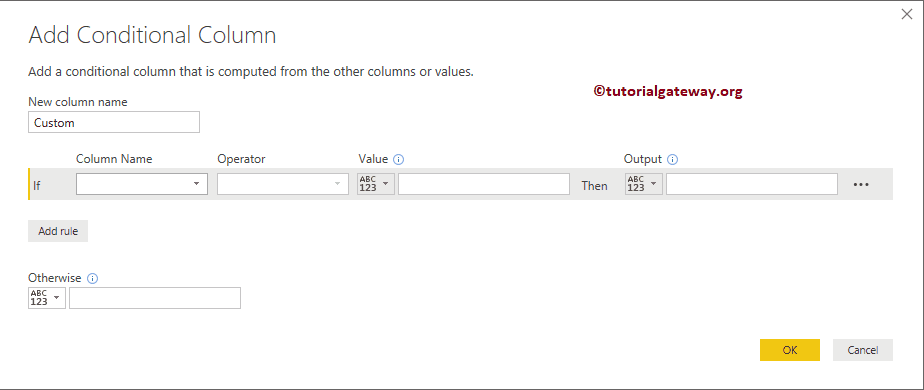
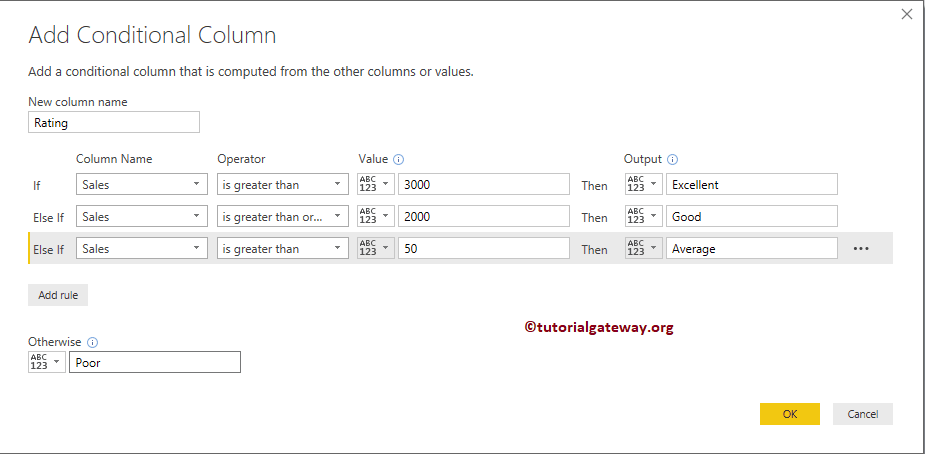
We change the name of the column to Classification. Next, we select the column name as Sales
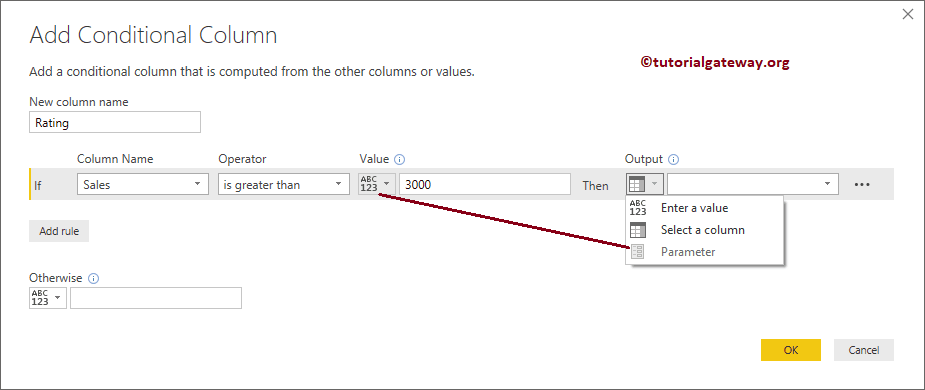
Next, we select the Operator as greater than and the value as 3000. Within the Values or Output text box, you can give the static values or you can select the column.
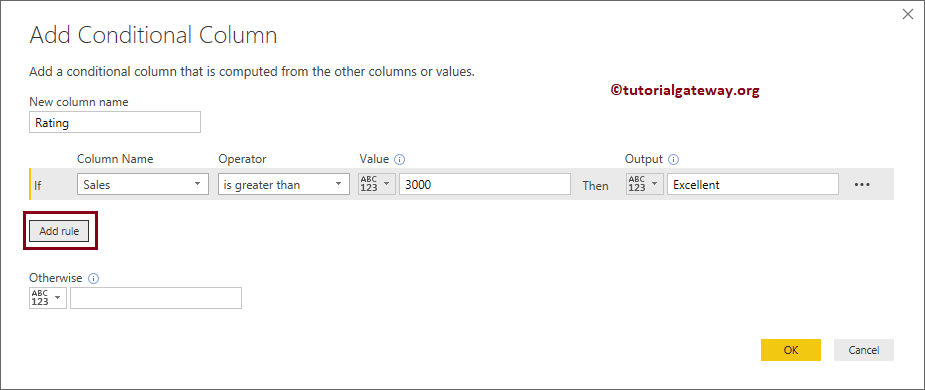
We added the first rule: if sales are over 3000, return Excellent within the grade column. Then click the Add Rule button to add a new rule.
As you can see in the screenshot below, we added two more rules. Remember, this is the same as the Else If statement in SQL.
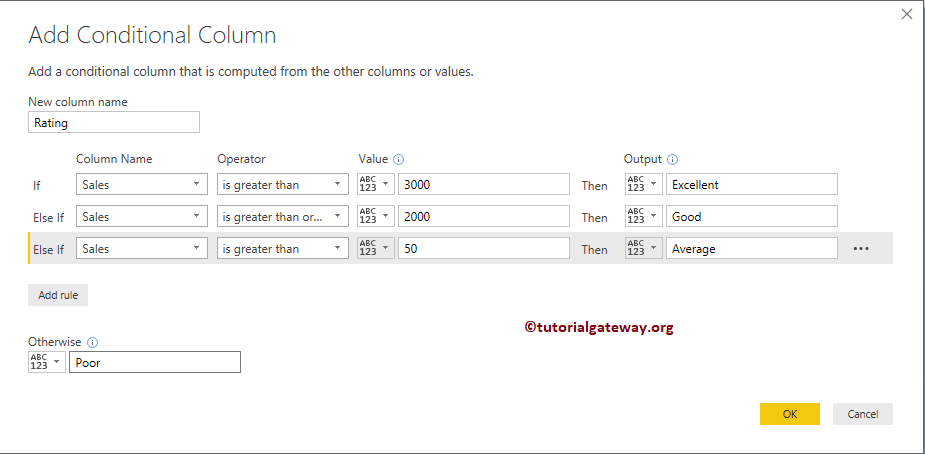
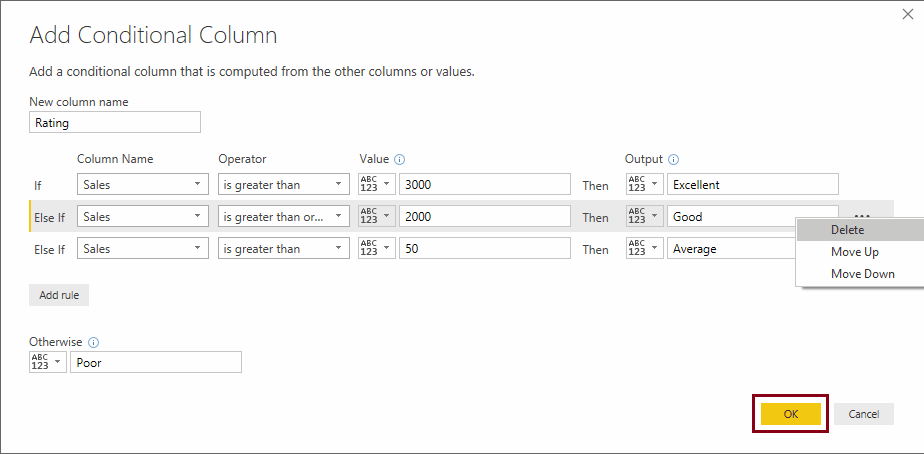
You can use the… .. button to move the selected rule up and down, or you can also delete it. For now, we leave it as is and click the OK button
From the screenshot below, you can see the new column with the information we specified in the conditional column. Then press the Close and apply option under the Home tab to apply these changes.
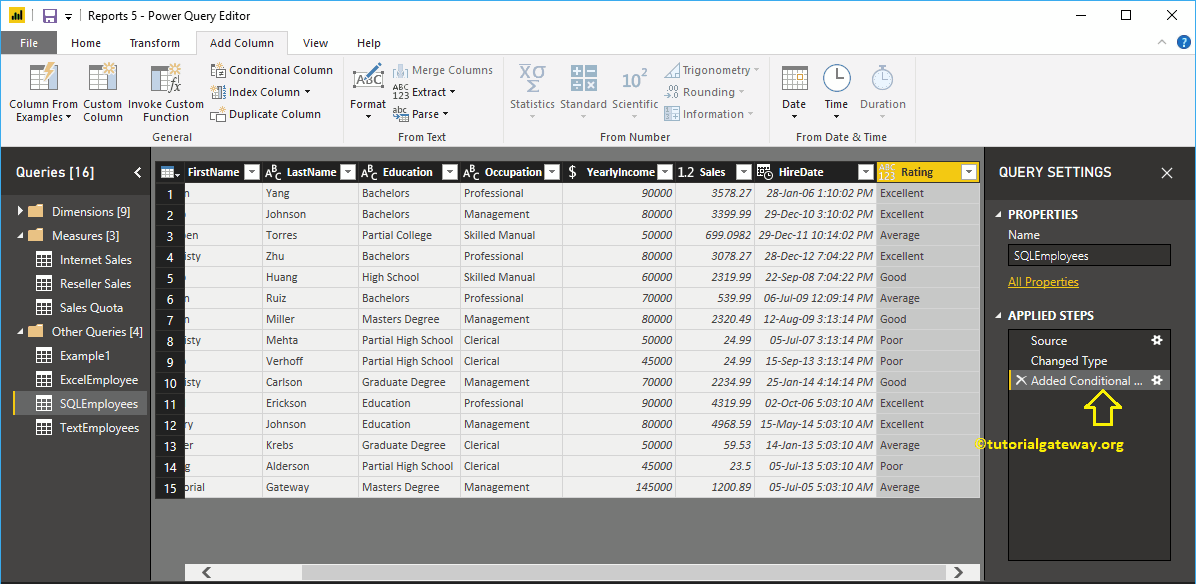
You can now see the new Power BI conditional column named Grade in the SQL Employees table.