¿Es su cuenta de Facebook segura? Si no es así, te arriesgas a perder tu cuenta por los hackers. Si no quieres que esto suceda, debes asegurarte de que tu cuenta de Facebook es más segura siguiendo este artículo.
Social media mangoes have become an important part of everyone's life and all of us show more than half of our lives on social media. Social platforms like Facebook have always dominated the market with their presence. But there are several cases where user accounts are hacked due to slight negligence.

Facebook ha proporcionado una variedad de características de seguridad a sus usuarios para evitar el robo de datos. Estas características garantizan la seguridad de la información del Username e impiden el fácil acceso a sus datos. Con los siguientes pasos, puedes proteger tu cuenta de Facebook de algunas amenazas comunes.
Cómo hacer que tu cuenta de Facebook be más segura
Below are the different methods you can use to secure your Facebook account against theft or to prevent the theft of your personal and private information:
Step 1: Choose a strong password
When you create a Facebook account, you are asked to create a password so that the next time you access your account again, you can use the registered email identifier and password created earlier to access your account.
Therefore, setting a strong password is the first step in making your Facebook account more secure. A strong password must meet the conditions mentioned below:
- Must be at least 2-14 characters long
- Must contain mixed characters such as alphanumeric
- Your password should not have any personal information
- It would be best if you use a new password and not the one you have used before for any other account
- You can take the help of a password generator or manager to choose a strong password.
Therefore, if you are creating an account and want to set the password, please follow the steps mentioned below:
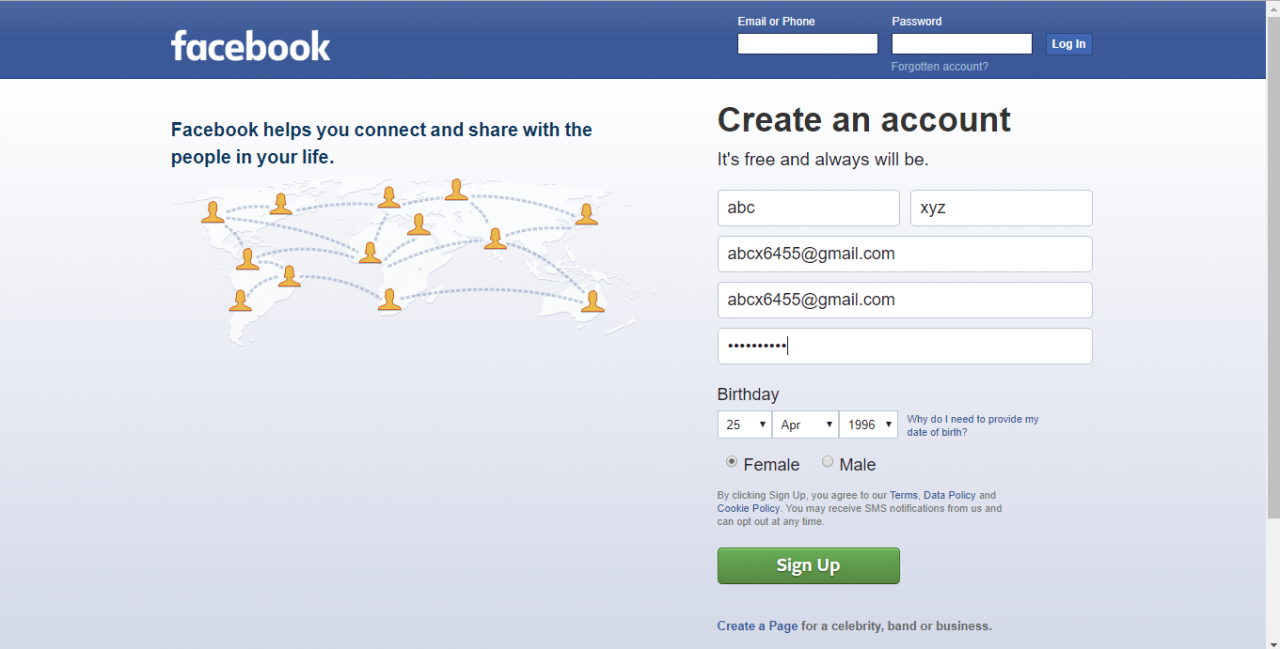
1.Abrir Facebook usando el link facebook.com. Se abrirá la página que se muestra a continuación:
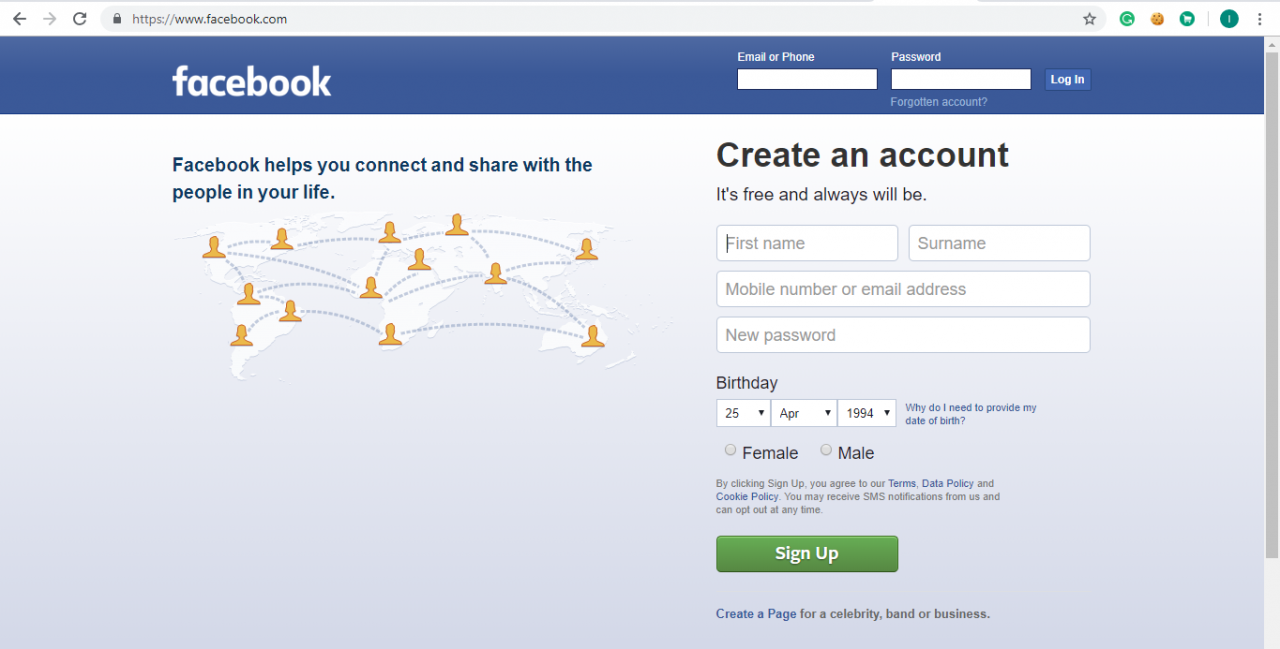
2.Enter the details like First Name, Last Name, Mobile Number or Email Address, Password, Birthday, Gender.
Note: Create a new password following the conditions mentioned above and make a strong and secure password.
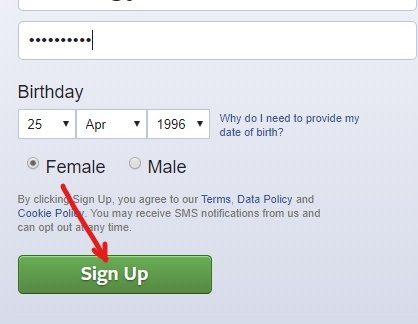
3.After filling in the details, click the register button.
4.The security check dialog will appear. Check the box next to I am not a robot.
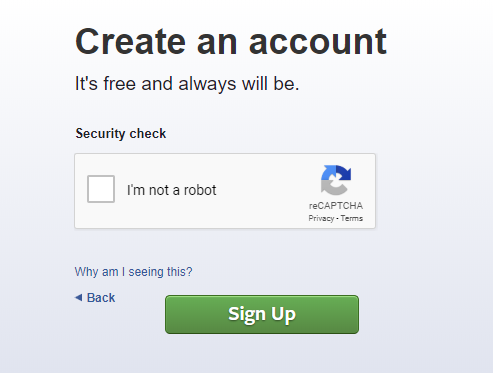
5.Click the register button again.
6.You will be asked to confirm your email address.
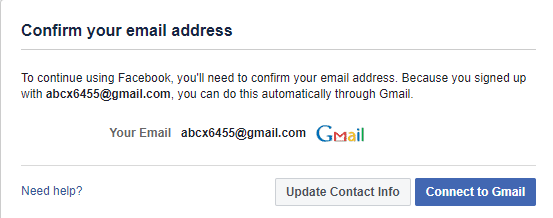
7.Abre tu cuenta de Gmail y confírmalo.
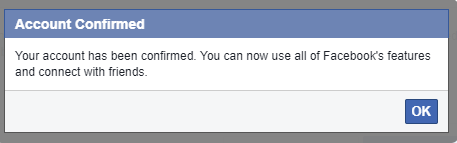
8.Your account will be verified and click the OK button.
After completing the steps mentioned above, your Facebook account is created with a strong password.
But, if you already have a Facebook account and want to change your password to make it more secure, follow the steps mentioned below:
1.Open Facebook using the link facebook.com, the page shown below will open.
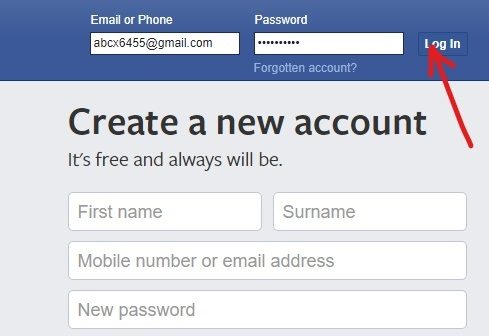
2.Log in to your Facebook account by entering your email address or phone number and password and then click the login button next to the password box.
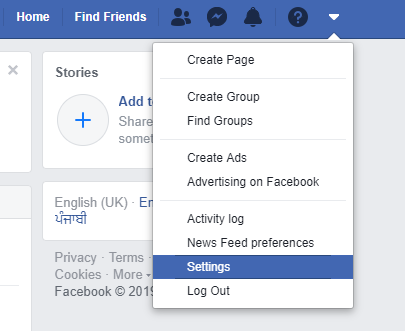
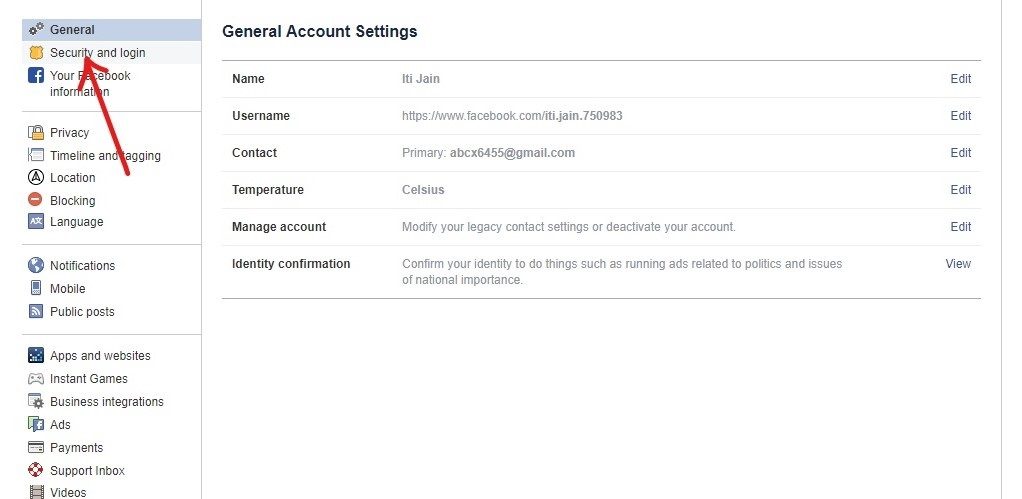
3.Your Facebook account will open. Choose the Settings option from the drop-down menu in the upper right corner.
4.The settings page will open.
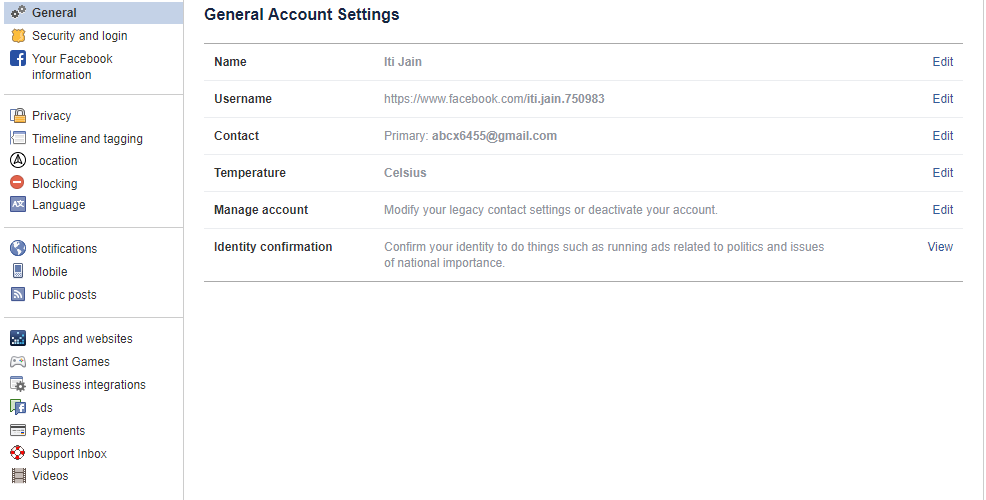
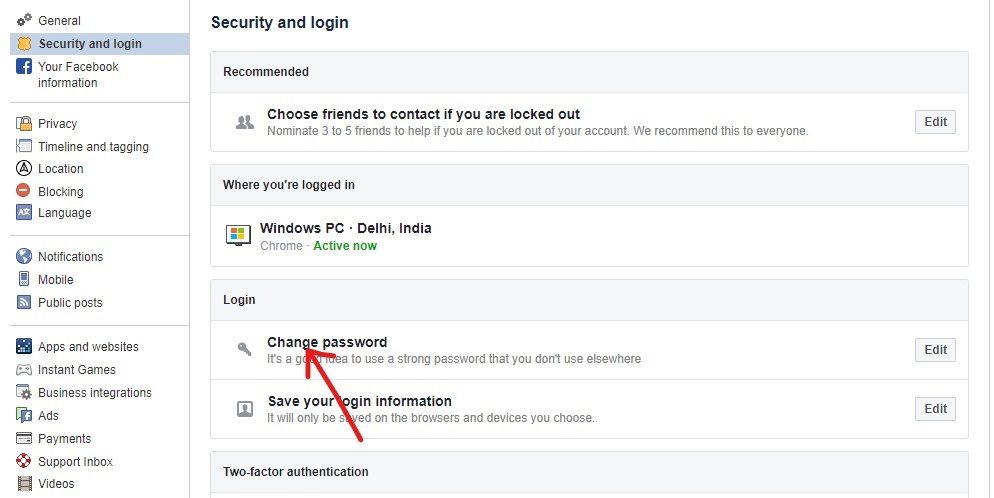
5.Click on the Security & Login option in the left panel.
6.Under Login, click Change Password.
7.Enter the current password and the new password.
Note: The new password you are going to create must be strong, so you must create a password that follows the conditions mentioned above and make a strong and secure password.
8. If you get a yellow sign under your new password, it means your password is strong.
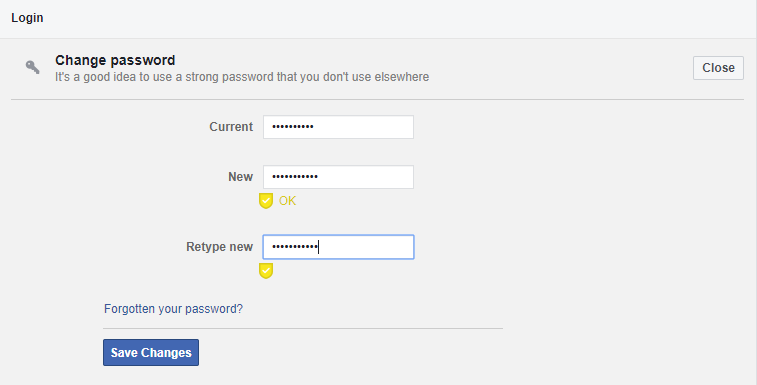
9. Click Save Changes.
10.You will receive a dialog box confirming that the password has been changed. Choose any option from the box and then click the Continue button or click the X button in the upper right corner.

After completing the steps, your Facebook is now more secure as you have changed your password to a more secure one.
Also read: Hide your Facebook friends list from everyone
Step 2: Use Login Approvals
Setting or creating a strong password is not enough to make your Facebook account more secure. Facebook has added a new two-step authentication feature, called "Login Approvals," and it can be beneficial for a more secure Facebook account.
You need to enable this feature if you want your Facebook account to be more secure. You can enable this feature by following the steps mentioned below:
1.Open Facebook using the link facebook.com. The page shown below will open.
2. Log in to your Facebook account by entering your email address or phone number and password. Now click on the login button.
3.Your Facebook account will open. Select the Settings option from the drop-down menu.
4.The settings page will open.
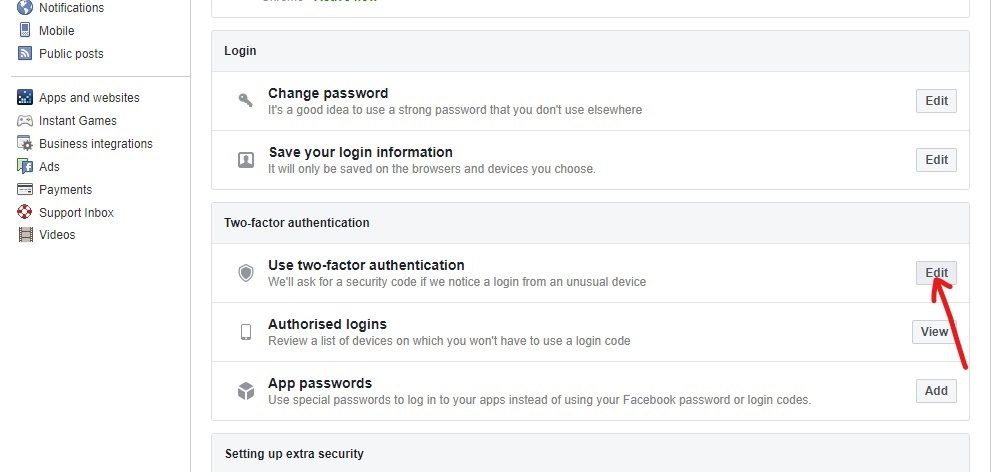
5.Click on the Security & Login option in the left panel.
6. Under Two-Factor Authentication, click the Edit button next to the Use Two-Factor Authentication option.
7.Click on "Get Started".
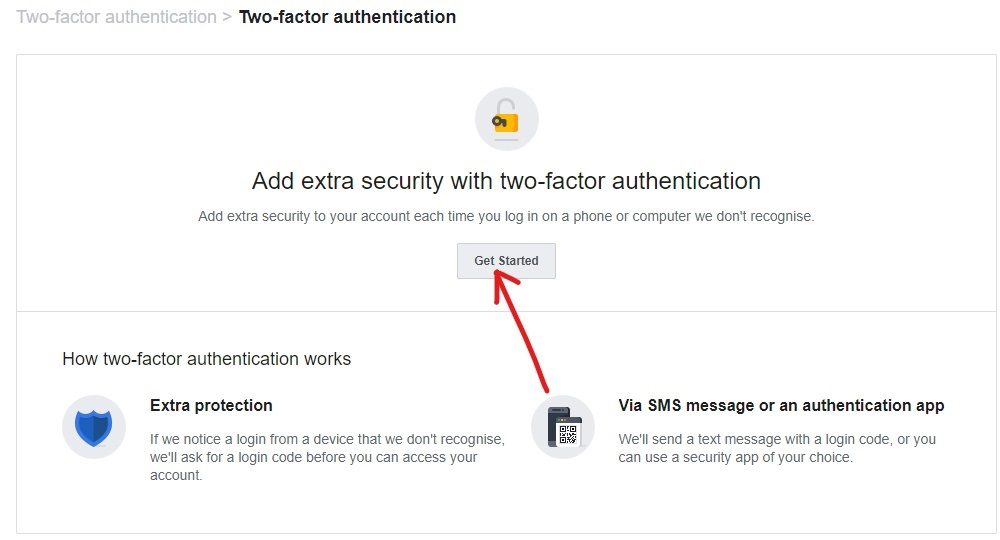
8.The dialog will appear asking you to choose a security method, and you will be given two options: by text message or by authenticating application.
Note: If you don't want to add your phone number on Facebook, then choose the second option.

9.After choosing an option, click the Next button.
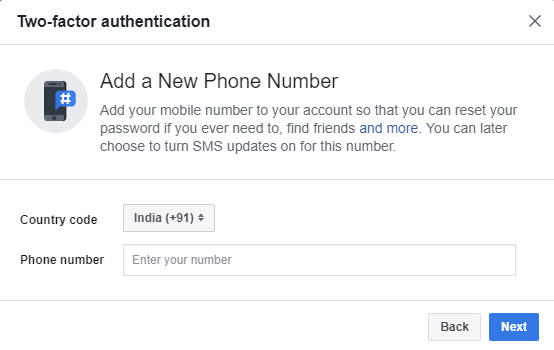
10.In the next step, you need to provide your phone number if you have chosen the text message option. Enter the phone number and click the Next button.
11. A verification code will be sent to your phone number. Insert it in the space provided.
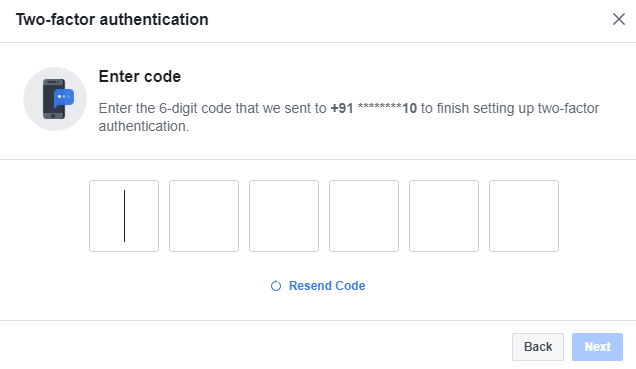
12.After entering the code, click the Next button, and your two-factor authentication will be activated. Now every time you log into Facebook, you will always get a verification code on your verified phone number.
13.But if you have chosen authentication app instead of text message, you will be prompted to set up two-factor authentication using any third party app. Scan the QR code using a third party application that you want to use as an authentication application.
Note: If your third party app is not available to scan the QR code, then you can also enter the code that appears in the box next to the QR code.
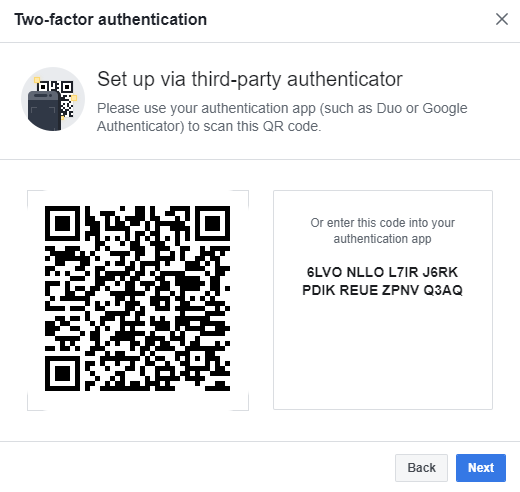
14.After scanning or entering the code, click the Next button.
15. You will be asked to enter the code received in your authentication application.
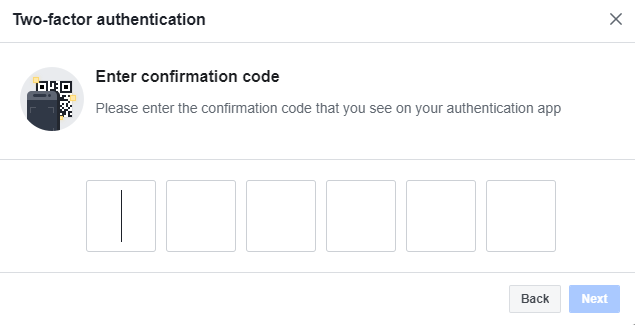
16.After entering the code, press the Next button and your two-factor authentication will be activated.
17.Now every time you log in to Facebook, you will get a verification code in your selected auth app.
Step 3: Enable access alerts
Una vez que habilite las alertas de inicio de sesión, se le notificará si alguien más intenta iniciar sesión en su cuenta utilizando un dispositivo o browser no reconocido. Además, le permite comprobar los equipos en los que ha iniciado la sesión y, si descubre que alguno de los dispositivos enumerados no está reconocido, puede cerrar inmediatamente la sesión de su cuenta desde ese dispositivo de forma remota.
But to use Login alerts, you will first have to enable them. To allow login alerts follow the steps mentioned below:
1.Open Facebook using the link facebook.com. The page shown below will open.
2. Login to your Facebook account with your email address or phone number and password. Next, click the Login button next to the password box.
3.Your Facebook account will open. Select Settings from the drop-down menu in the upper right corner.
4.On the settings page, click on the security and login option in the left pane.
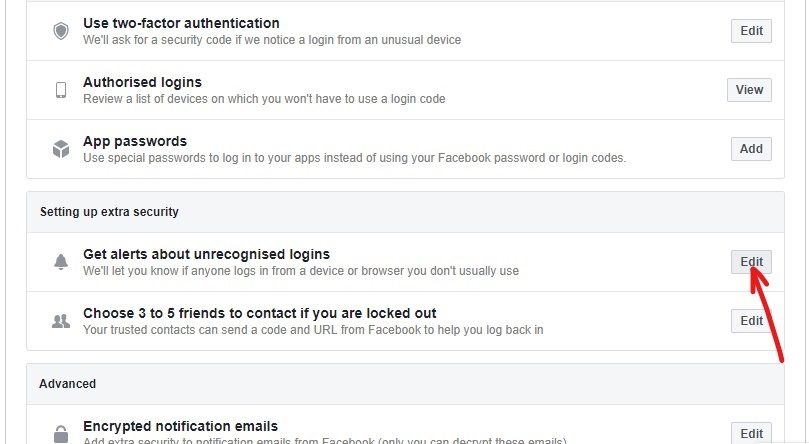
5. Under Configure extra security, click the Edit button next to the Get alerts on unrecognized logins option.
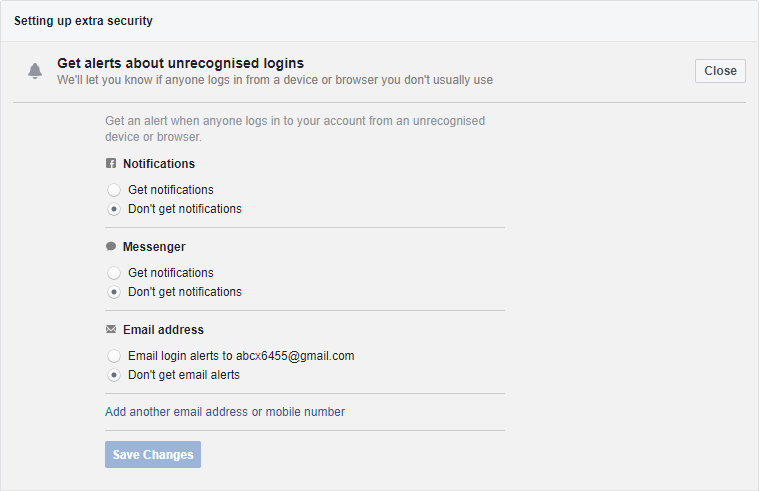
6.You will now have four options to receive notifications. These four options are listed below:
- Get notifications on Facebook
- Get notifications on Messenger
- Get notifications at the registered email address
- You can also add your phone number to receive notifications through text messages
7. Choose any of the options given to get the notifications. You can select the option by clicking the checkbox next to it.
Note: You can also choose more than one option to receive notifications.
8.After choosing the desired option, click the Save Changes button.
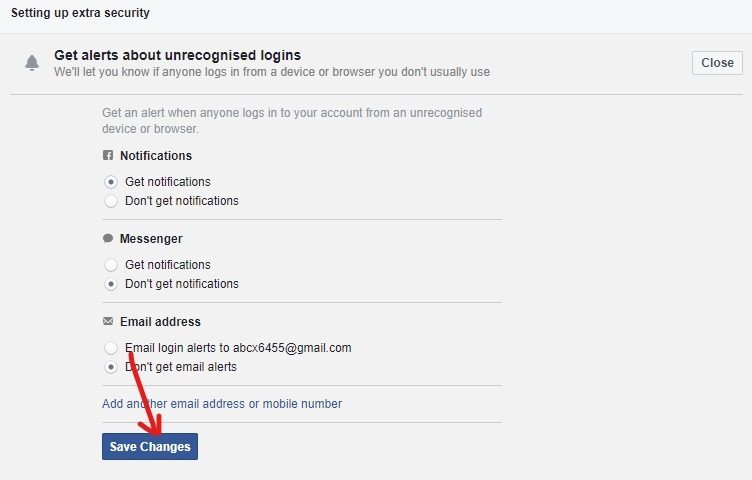
After completing the steps mentioned above, your Login Alerts will be activated.
If you want to check from which devices your account has been logged in, please follow the steps below:
1. Choose settings from the drop-down menu in the upper right corner.
2. Navigate to Security and login and then under the "Where are you logged in" option, you can see the names of all the devices that your account is logged in to.
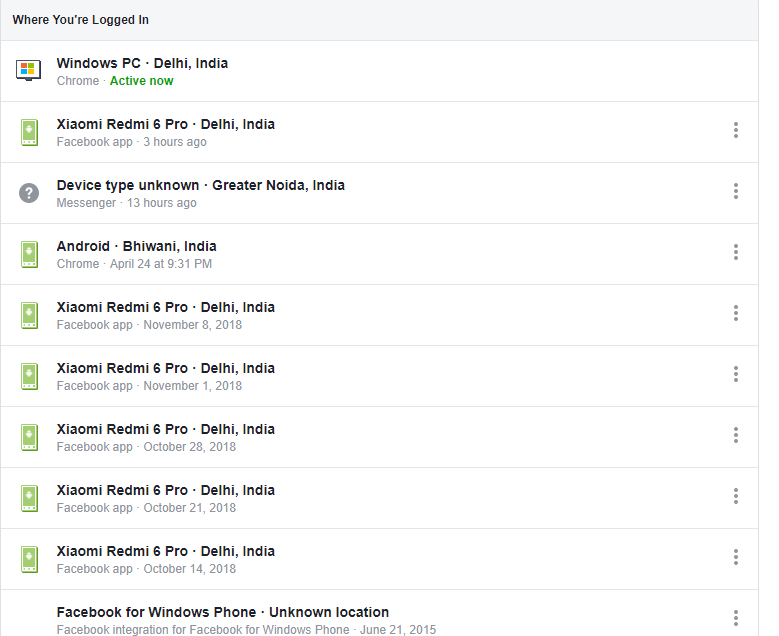
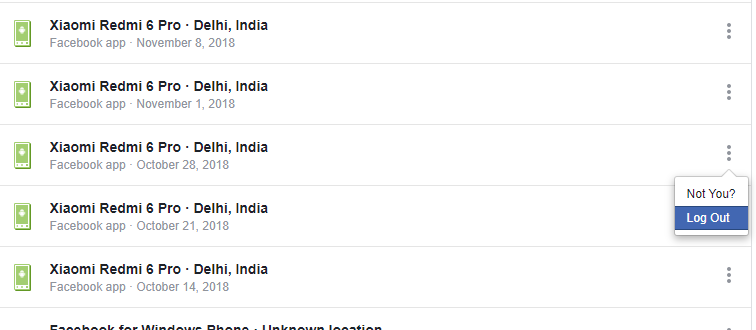
3. If you see an unrecognized device, you can log out of that device by clicking the three-dot icon next to it.
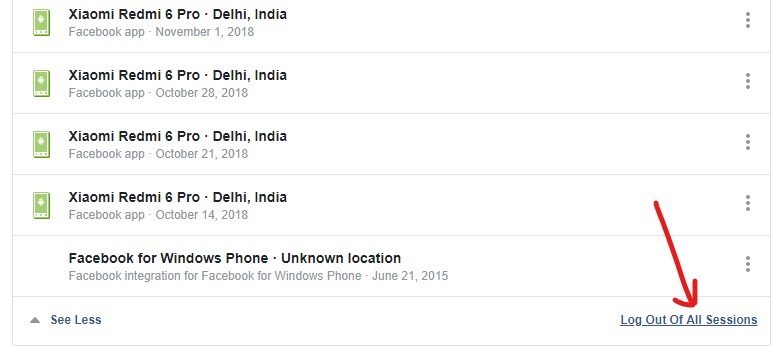
4. If you don't want to check all devices, then sign out of all devices by clicking the Sign out of all sessions option.
Paso 4: Auditar las aplicaciones o sitios Web que tienen permiso para acceder a su cuenta de Facebook
Sometimes when you are using an application or a website, you will be asked to log in by creating a new account or to log in with your Facebook account. This is because such applications or websites have permission to access your Facebook account. But these apps and sites can serve as a means to steal your private data.
To avoid this, you can select which applications or websites can access your Facebook account. To remove suspicious apps or websites, follow the steps mentioned below:
1. Open Facebook using the link www.facebook.com. The page shown below will open.
2. You must access your Facebook account by entering your email address or phone number and password.
3. Your Facebook account will open. Select your settings from the drop-down menu in the upper right corner.
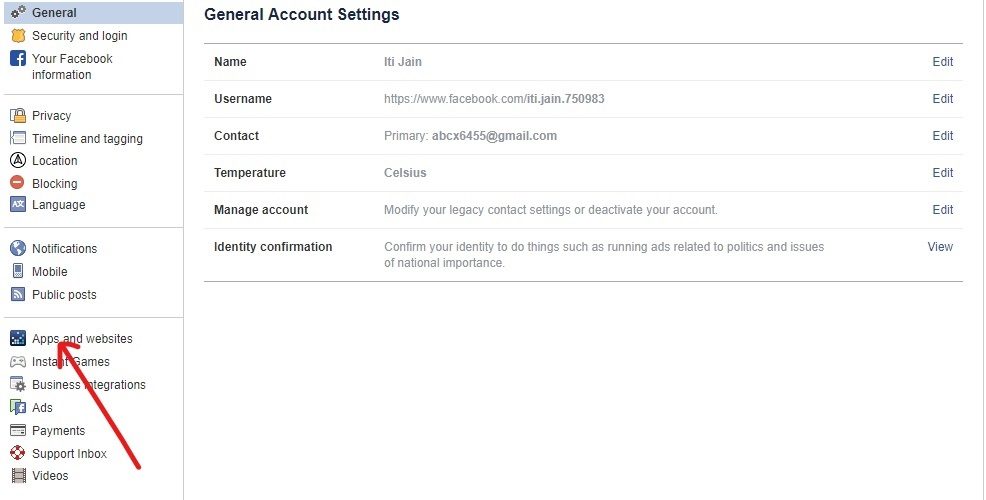
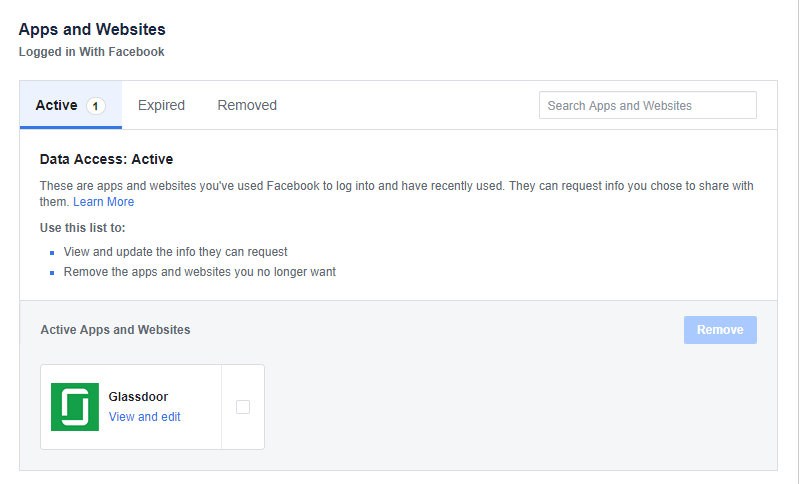
4.On the Settings page, click on the Apps & Websites option from the left panel.
5. You will see all the applications and active websites that use your Facebook account as an access account.
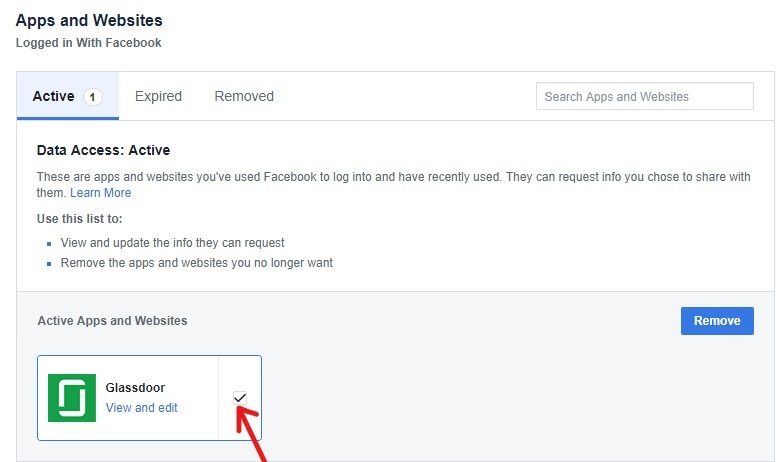
6. If you want to remove any application or website, check the box next to that application or website.
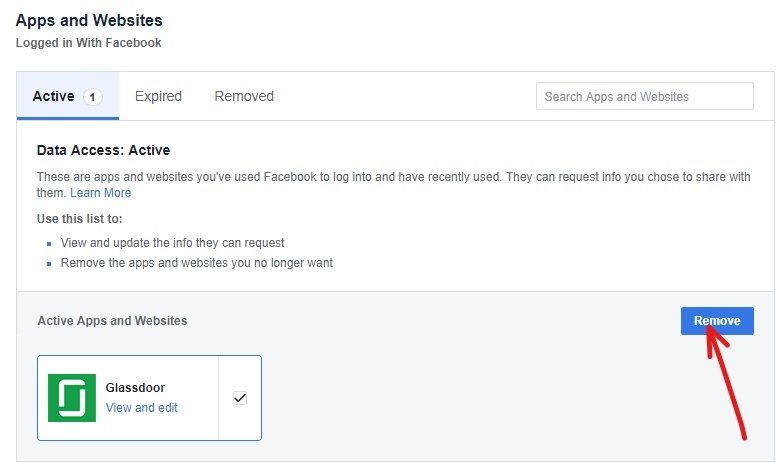
7.Finally, click the delete button.
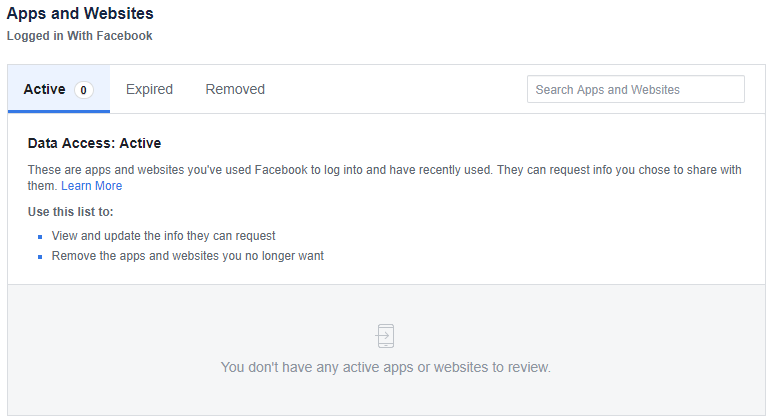
8.After completing the steps mentioned above, all the apps or websites that you have chosen to remove will be removed.
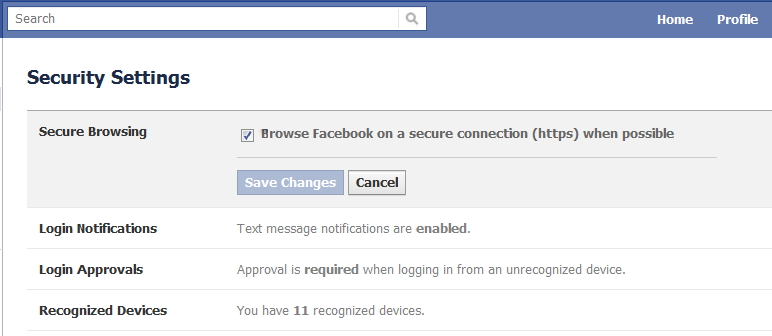
Step 5: Safe browsing
La navegación segura juega un papel vital para asegurar tu cuenta de Facebook. Al habilitar la navegación segura, estarás navegando por tu Facebook desde un navegador seguro, lo que te ayudará a mantener tu cuenta de Facebook a salvo de spammers, hackers, virus y malware.
You need to enable a secure browser by following the steps mentioned below:
1.Open Facebook using the link www.facebook.com. The page shown below will open.
2. You will have to enter your Facebook account by entering your email address or phone number and password.
3.Your Facebook account will open. Select Settings from the drop-down menu in the upper right corner.
4.Click on the security option in the left pane.
5. Check the Safe Browsing option and then click the Save Changes button.
After completing all the steps, your Facebook account will always open in a secure browser.
Recommended: The Ultimate Guide to Managing Facebook Privacy Settings
That's it, I hope this article was useful and that now you can make your Facebook account more secure to protect it from hackers.