RECOMMENDED: Click here to fix Windows errors and get the most out of your system performance
“Advanced display settings” is a convenient alternative in Windows operating system that helps us to change text size or adjust screen resolution. But after updating Windows 10 Fall Creators, many users notice that “Advanced display settings” is missing from Settings or Control Panel, making it extremely inconvenient for users to make changes to their computer display.
There are several reasons why the advanced display settings are missing. First of all, the Windows installation files may be corrupted. Another reason is if you have bad video (* 10 *) drivers installed on your computer. Some functions have also been removed during the update. Your embedded graphics may be accessed in conflict with your drivers.
What to do when advanced display settings are missing
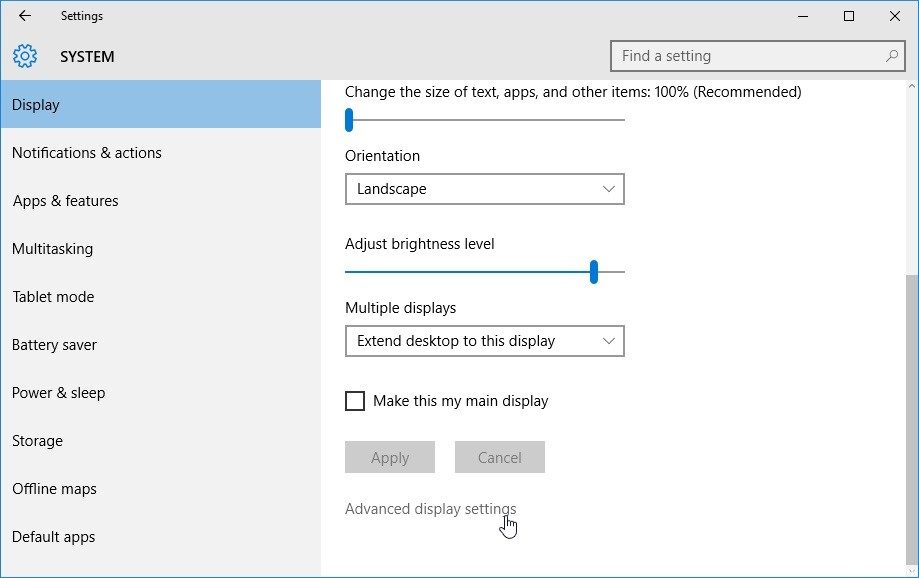
Use display adapter properties to find display settings

- Press the Windows logo button and I simultaneously to enter the application settings.
- Click on System.
- Click Show Left.
- If you want to change the size of your text and apps, click Advanced Scaling Settings or Scale and Layout, you should be able to customize your settings.
- If you want to change your screen resolution, click the drop-down menu under Screen resolution and select the desired resolution.
- If you want to change the color management, type Calibrate screen color in the search box under Settings and open the Color Management panel, then you can configure the screen color settings.
Run the Hardware and Devices troubleshooter

- Right-click the Windows icon at the bottom left of the screen or press Windows button + X and select Control Panel. If this doesn't work, press Windows + S and type "Control Panel" in the dialog box and press Access.
- Click View from at the top right of the screen and select Large Icons from the list of available options.
- Select Troubleshooting in the Control Panel.
- In the left part of the window, select View All to see all the troubleshooting software available on your computer.
- Select 'Hardware and Devices' or 'Display' from the list of available options and click on it.
- In the new window that appears in front of you, select Next.
- Windows starts looking for hardware problems and fixes them if it finds any. This procedure can take some time as it checks all of your equipment. Be patient and let the procedure finish successfully.
- Windows may ask you to restart your computer to fix the problems. Don't delay the request, save your work and click Apply this fix.
Perform system restore

- Open start.
- Find Create a restore point and click the top result to open the System Properties experience.
- In the Protection Settings section, select the main drive “System” and click the Configure button.
- Select Enable system protection.
- Click the Apply button.
- Click on the OK button.
Disable integrated graphics
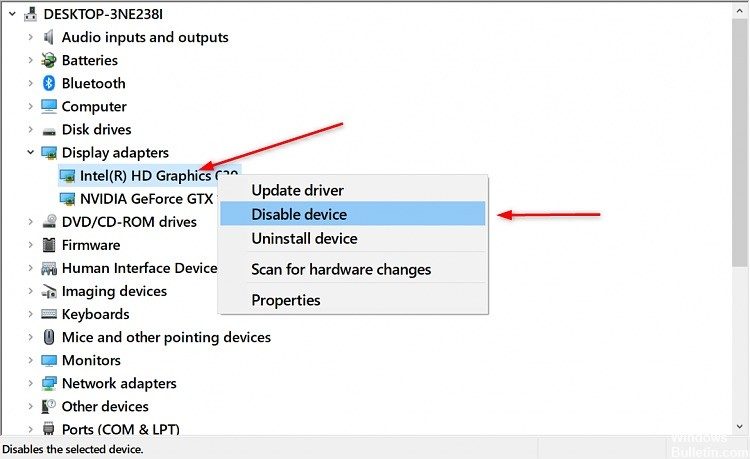
- Press Windows + R simultaneously and enter devmgmt.msc in the dialog box, then press OK to open Device Manager.
- Then navigate to Display Adapter and right-click on the embedded graphic and select Disable Device.
- Restart your computer and check if the problem is resolved.
RECOMMENDED: Click here to fix Windows errors and get the most out of your system performance