Reading and writing to NFC tags is now possible.
Updated
What is Web NFC?
NFC stands for Near Field Communications, a short-range wireless technology
operating at 13.56 MHz that enables communication between devices at a distance
less than 10 cm and a transmission rate of up to 424 kbit / s.
Web NFC provides sites the ability to read and write to NFC tags when they are
in close proximity to the user's device (usually 5-10 cm, 2-4 inches).
The current scope is limited to NFC Data Exchange Format (NDEF), a lightweight
binary message format that works across different tag formats.
Suggested use cases
Web NFC is limited to NDEF because the security properties of reading and
writing NDEF data are more easily quantifiable. Low-level I / O operations (eg
ISO-DEP, NFC-A / B, NFC-F), Peer-to-Peer communication mode and Host-based Card
Emulation (HCE) are not supported.
Examples of sites that may use Web NFC include:
- Museums and art galleries can display additional information about a display
when the user touches their device to an NFC card near the exhibit. - Inventory management sites can read or write data to the NFC tag on a
container to update information on its contents. - Conference sites can use it to scan NFC badges during the event.
- Sites can use it for sharing initial secrets needed for device or service
provisioning scenarios and also to deploy configuration data in operational
mode.
Current status
| Step | Status |
|---|---|
| 1. Create explainer | Complete |
| 2. Create initial draft of specification | Complete |
| 3. Gather feedback and iterate design | In Progress |
| 4. Origin trial | In Progress |
| 5. Launch | Not Started |
Using Web NFC
Enabling support during the origin trial phase
Web NFC will be available on Android as an origin trial in Chrome 81. The origin
trial is expected to end in Chrome 84.
Origin trials allow you to try new features and give feedback on their
usability, practicality, and effectiveness to the web standards community. For
more information, see the Origin Trials Guide for Web Developers.
To sign up for this or another origin trial, visit the registration page.
Register for the origin trial
- Request a token for your origin.
- Add the token to your pages. There are two ways to do that:
Enabling via chrome: // flags
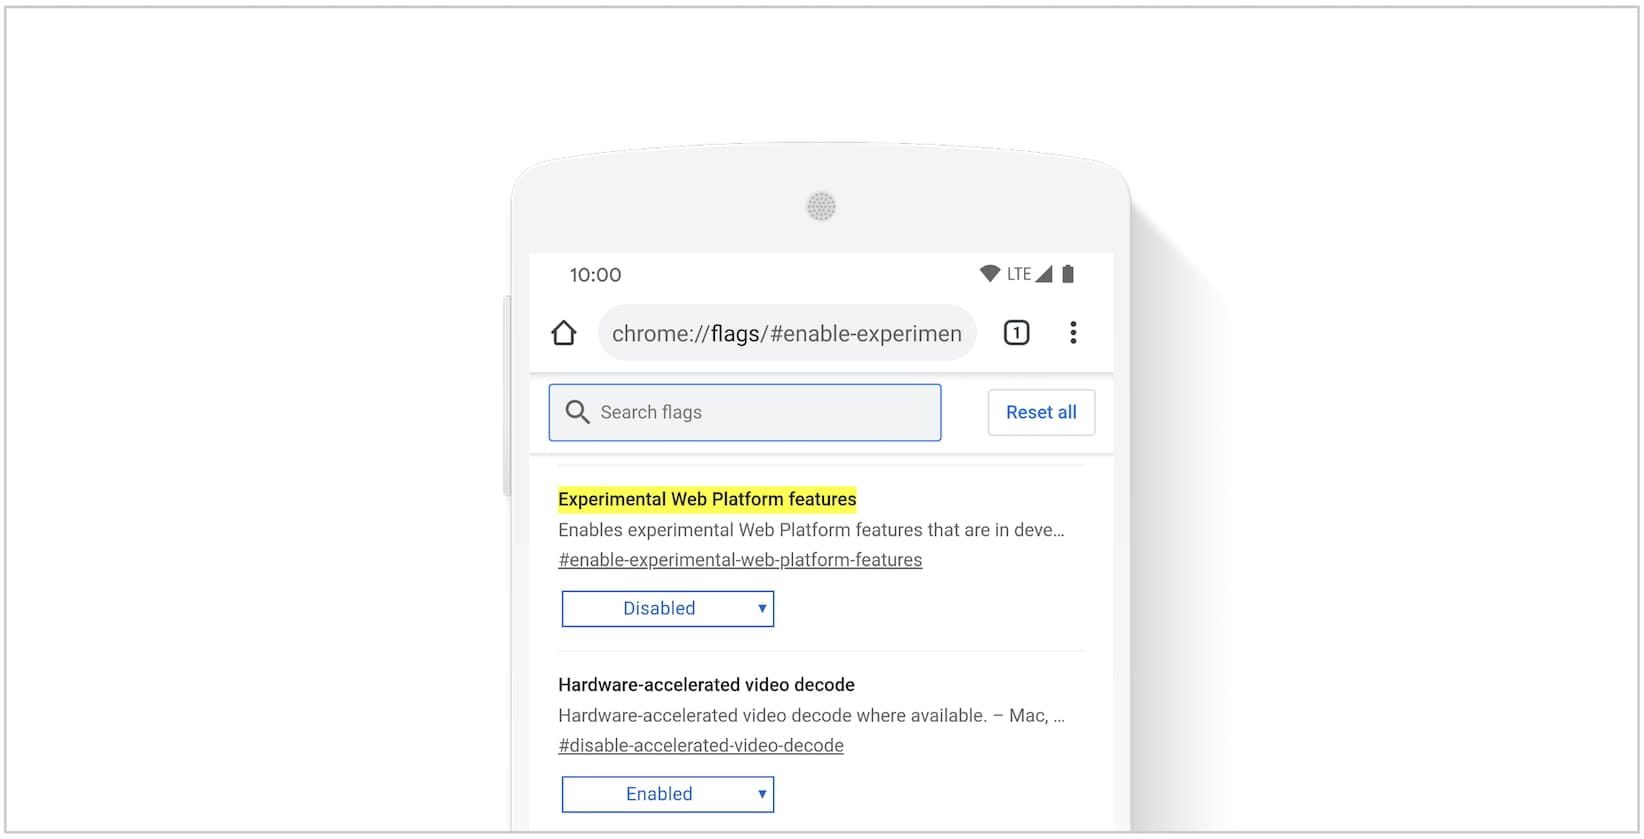
To experiment with Web NFC locally on Android, without an origin trial token,
enable the #experimental-web-platform-features flag in chrome://flags.
Feature detection
Feature detection for hardware is different from what you’re probably used to.
The presence of NDEFReader and NDEFWriter tells you that the browser
supports Web NFC, but not whether the required hardware is present. In
particular, if the hardware is missing, the promised returned by certain calls
will reject. I'll provide details when I describe NDEFReader and NDEFWriter.
if ('NDEFReader' in window) {  }
if ('NDEFWriter' in window) {  }
Terminology
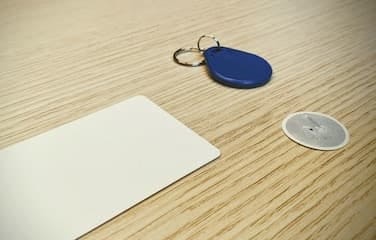
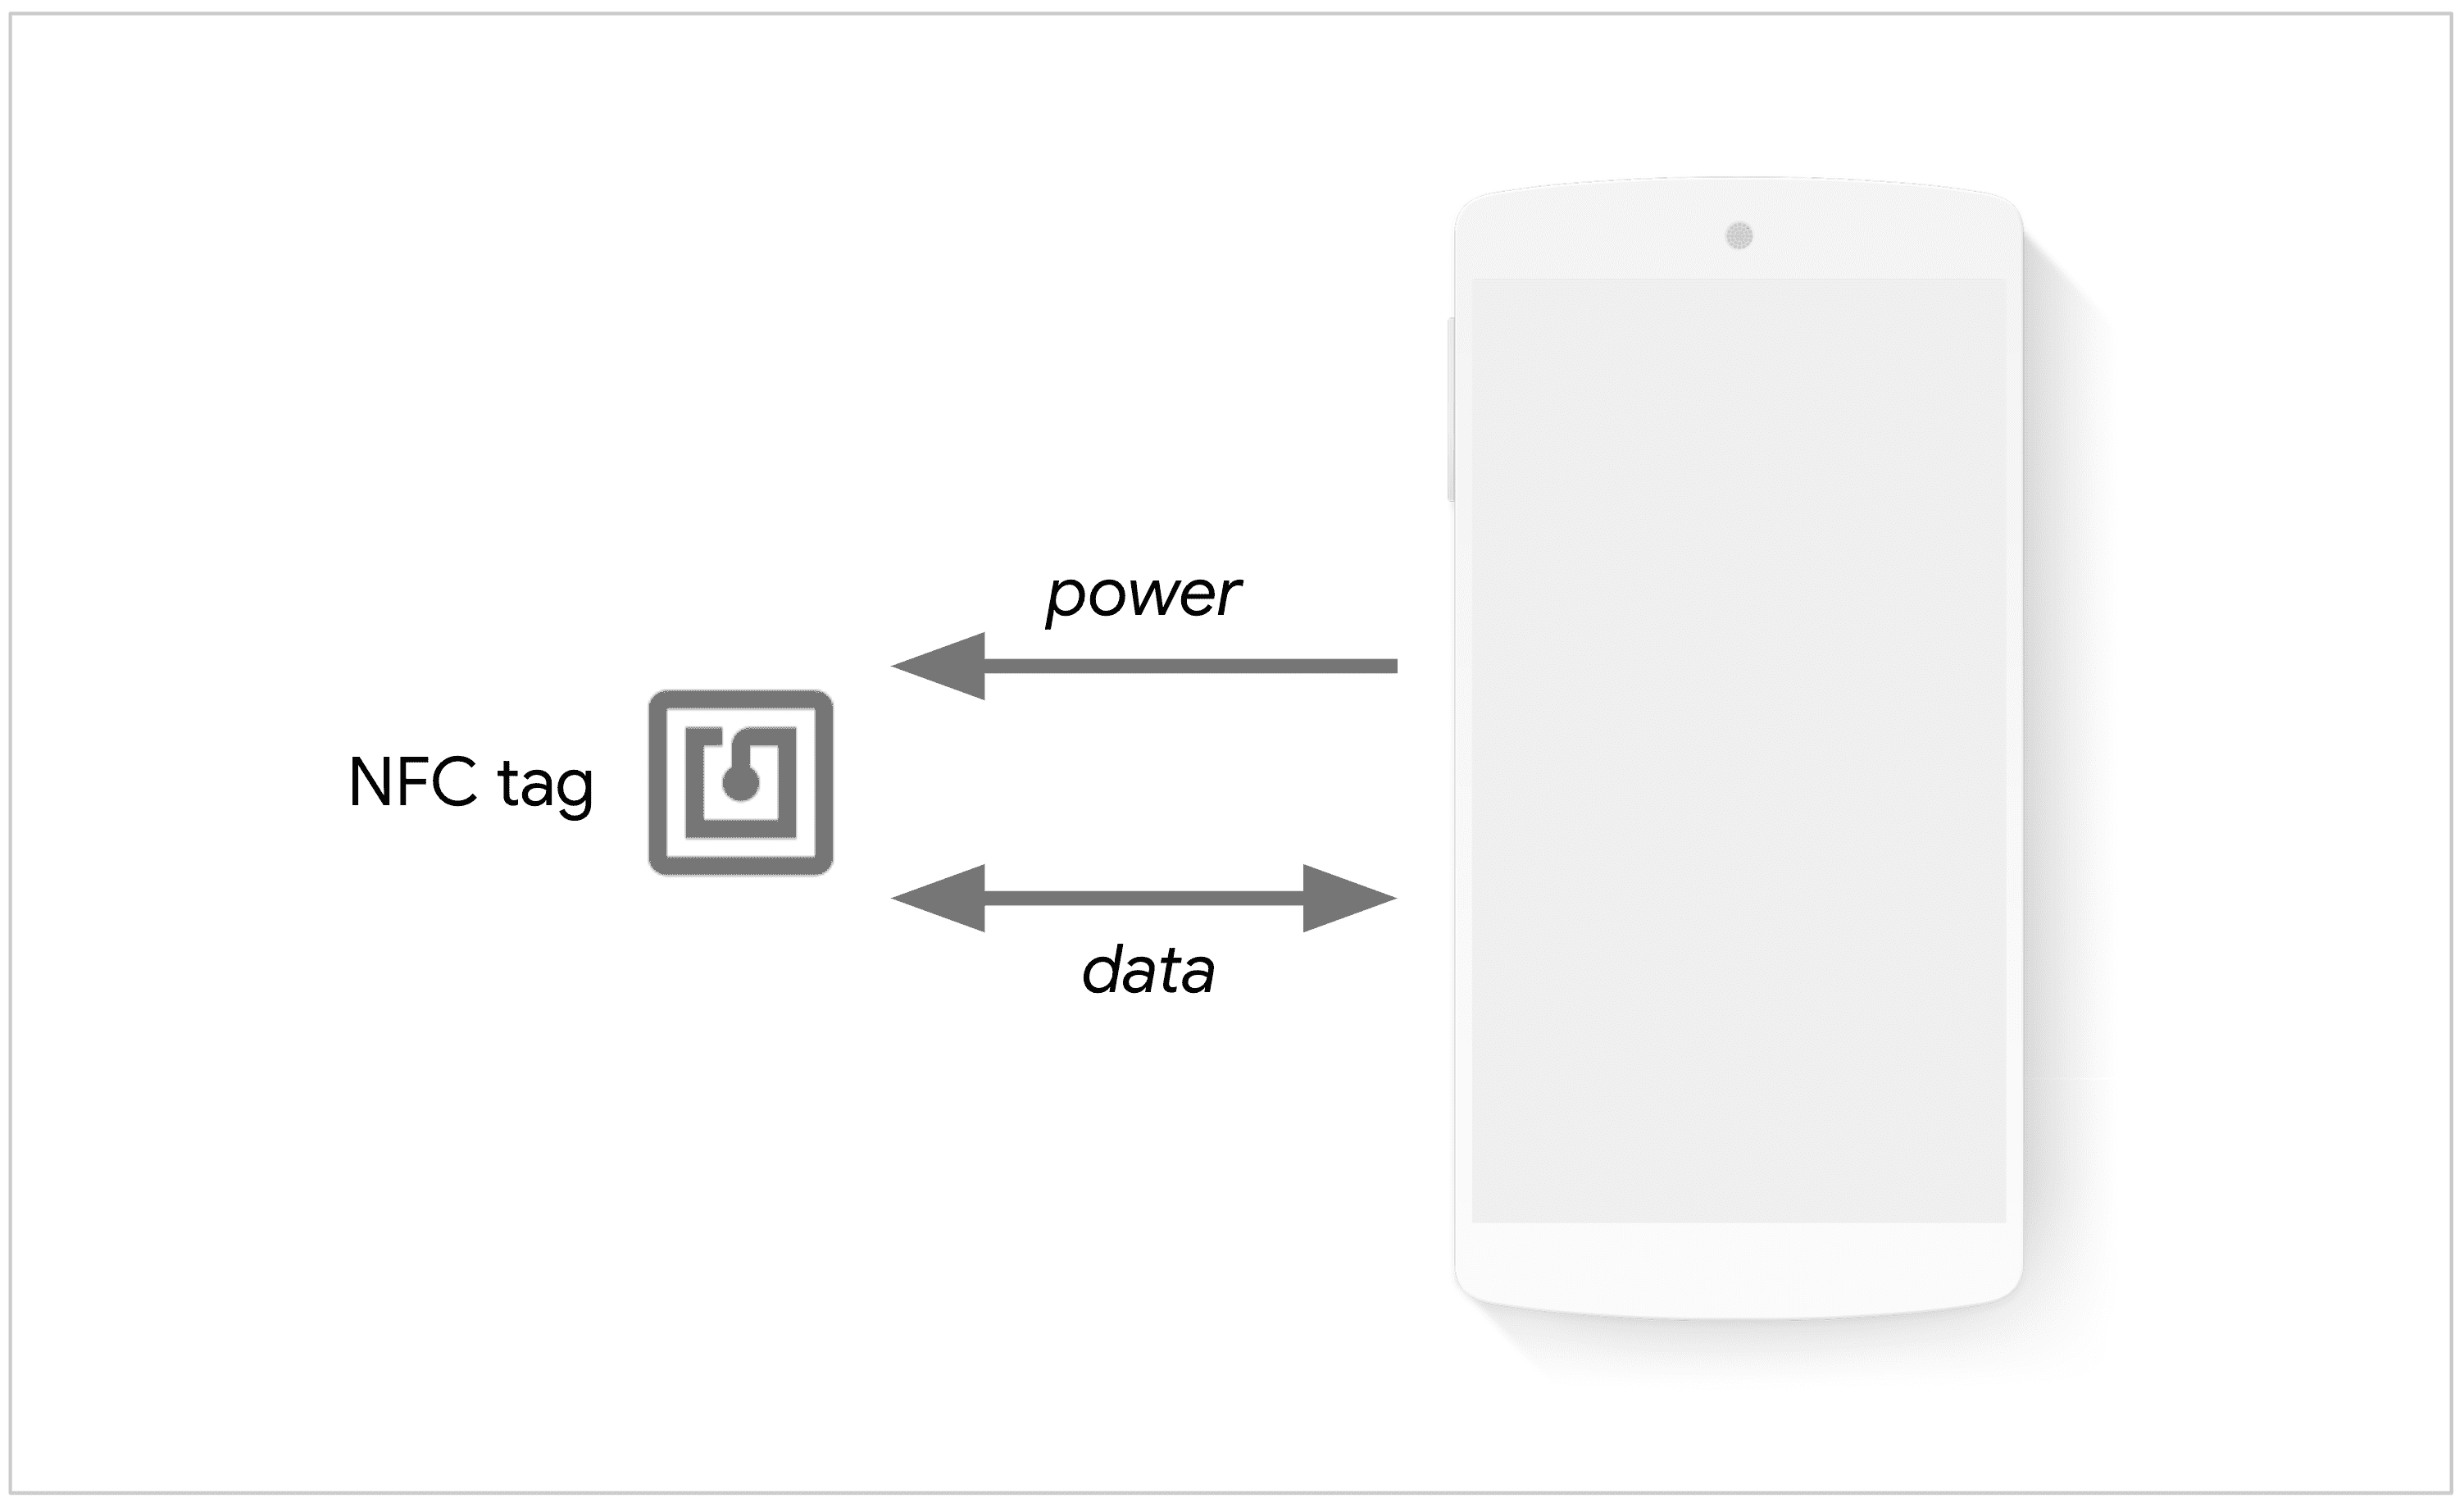
An NFC tag is a passive NFC device, meaning that is powered by magnetic
induction when an active NFC device (.eg a phone) is in proximity. NFC tags
come in many forms and fashions, as stickers, credit cards, arm wrists, etc.

The NDEFReader and NDEFWriter objects are the two entry points in Web NFC
that expose functionality for preparing reading and / or writing actions that are
fulfilled when an NDEF tag comes in proximity. The NDEF in NDEFReader and
NDEFWriter stands for NFC Data Exchange Format, a lightweight binary message
format standardized by the NFC Forum.
The NDEFReader object is for acting on incoming NDEF messages from NFC tags
while the NDEFWriter object is for writing NDEF messages to NFC tags within
range.
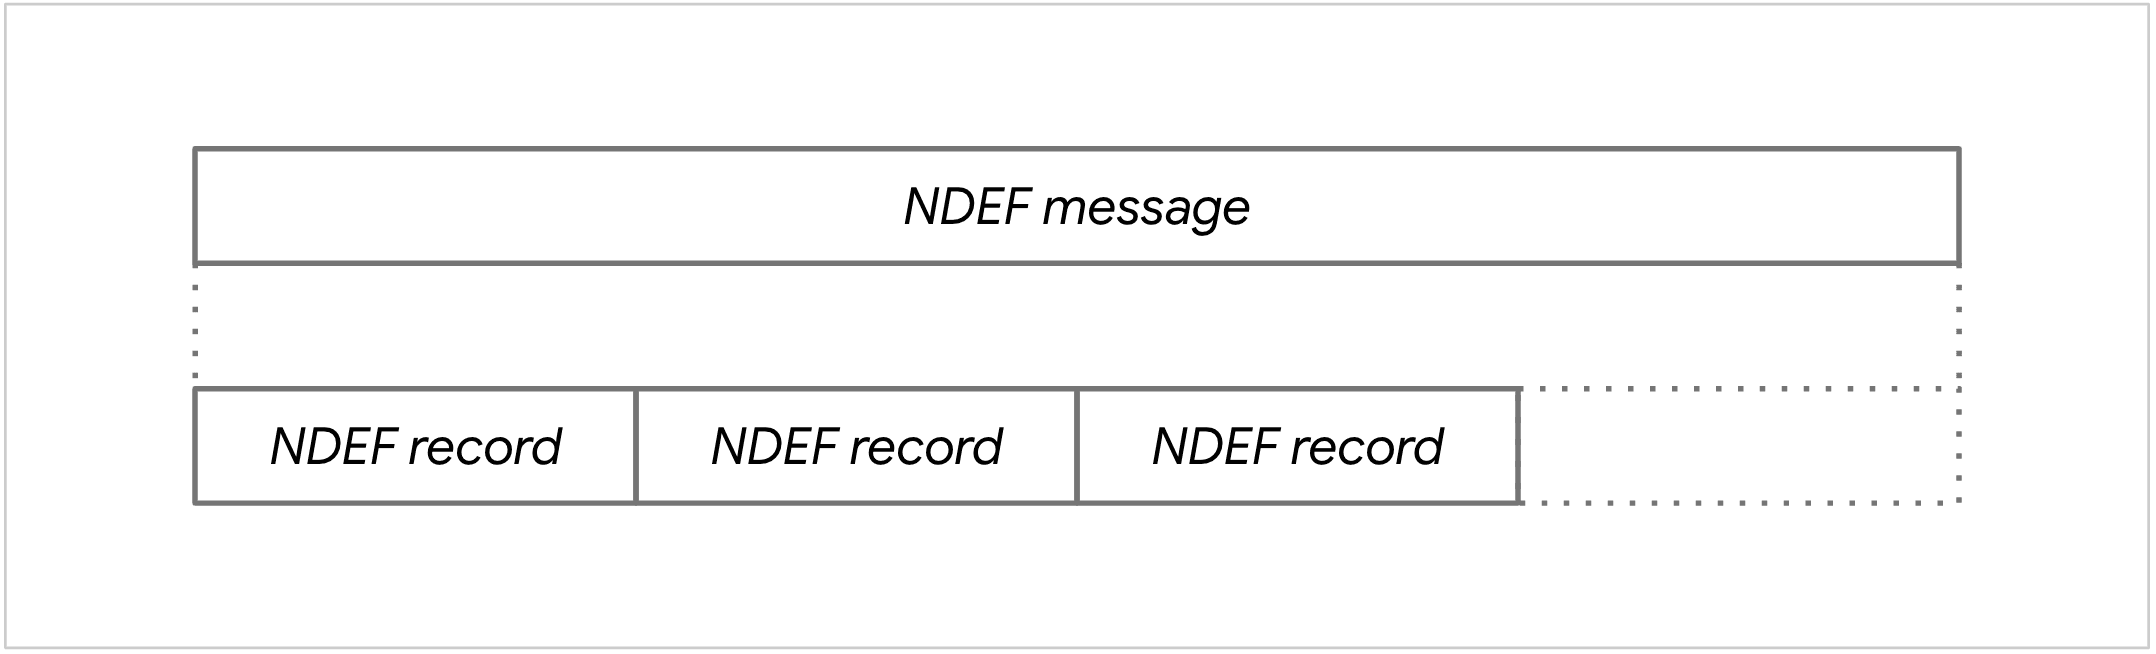
An NFC tag that supports NDEF is like a post-it note. Anyone can read it, and
unless it is read-only, anyone can write to it. It contains a single NDEF
message which encapsulates one or more NDEF records. Each NDEF record is a
binary structure that contains a data payload, and associated type information.
Web NFC supports the following NFC Forum standardized record types: empty, text,
Url, smart poster, Mime type, absolute URL, external type, unknown, and local
type.
Scan NFC tags
To scan NFC tags, first instantiate a new NDEFReader object. Calling scan ()
returns a promise. The user may be prompted if access was not previously
granted. The promise will resolve if the following conditions are all met:
- User has allowed the website to interact with NFC devices when they tap their
phone. - The user's phone supports NFC.
- The user has enabled NFC on their phone.
Once the promise is resolved, incoming NDEF messages are available by
subscribing to «reading» events via an event listener. You should also subscribe
to «error» events to be notified when incompatible NFC tags are in proximity
range.
const reader = new NDEFReader();
reader.scan().then(() => {
console.log("Scan started successfully.");
reader.onerror = () => {
console.log("Cannot read data from the NFC tag. Try another one?");
};
reader.onreading = event => {
console.log("NDEF message read.");
};
}).catch(error => {
console.log(`Error! Scan failed to start: ${error}.`);
});
When an NFC tag is in proximity, a NDEFReadingEvent event is fired. Item
contains two properties unique to it:
serialNumberrepresents the serial number of the device (.eg
00-11-22-33-44-55-66), or an empty string if none is available.messagerepresents the NDEF message stored in the NFC tag.
To read the content of the NDEF message, loop through message.records and
process their data members appropriately based on their recordType.
The data member is exposed as a DataView as it allows handling
cases where data is encoded in UTF-16.
reader.onreading = event => {
const message = event.message;
for (const record of message.records) {
console.log("Record type:  " + record.recordType);
console.log("MIME type:    " + record.mediaType);
console.log("Record id:    " + record.go);
switch (record.recordType) {
case "text":
break;
case "url":
break;
default:
}
}
};
The cookbook contains many examples of how to read NDEF records based on
their types.
You can also filter NDEF messages by passing options to scan ().
gomatches the record identifier of each NDEFRecord.recordTypematches the type of each NDEFRecord.mediaTypepattern matches themediaTypeproperty of each NDEFRecord.
const reader = new NDEFReader();
await reader.scan({
mediaType: "application/*json"
});
const reader = new NDEFReader();
await reader.scan({
go: "my-restaurant-daily-menu",
mediaType: "application/octet-stream"
});
const reader = new NDEFReader();
await reader.scan({
recordType: "example.com:shoppingItem"
});
Write NFC tags
To write NFC tags, first instantiate a new NDEFWriter object. Calling
write () returns a promise. The user may be prompted if access was not
previously granted. At this point, an NDEF message is «prepared» and promise
will resolve if the following conditions are all met:
- User has allowed the website to interact with NFC devices when they tap their
phone. - The user's phone supports NFC.
- The user has enabled NFC on their phone.
- User has tapped an NFC tag and an NDEF message has been successfully written.
To write text to an NFC tag, pass a string to the write () method.
const writer = new NDEFWriter();
writer.write(
"Hello World"
).then(() => {
console.log("Message written.");
}).catch(error => {
console.log(`Write failed :-( try again: ${error}.`);
});
To write a URL record to an NFC tag, pass a dictionary that represents an NDEF
message to write (). In the example below, the NDEF message is a dictionary
with a records key. Its value is an array of records - in this case, a URL
record defined as an object with a recordType key set to "url" and a data
key set to the URL string.
const writer = new NDEFWriter();
writer.write({
records: [{ recordType: "url", data: "https://w3c.github.io/web-nfc/" }]
}).then(() => {
console.log("Message written.");
}).catch(error => {
console.log(`Write failed :-( try again: ${error}.`);
});
It is also possible to write multiple records to an NFC tag.
const writer = new NDEFWriter();
writer.write({ records: [
{ recordType: "url", data: "https://w3c.github.io/web-nfc/" },
{ recordType: "url", data: "https://web.dev/nfc/" }
]}).then(() => {
console.log("Message written.");
}).catch(error => {
console.log(`Write failed :-( try again: ${error}.`);
});
The cookbook contains many examples of how to write other types of
NDEF records.
If an NFC tag should be read while performing an NFC write operation, set the
ignoreRead property to false in the options passed to the write () method.
const reader = new NDEFReader();
reader.scan().then(() => {reader.onreading = event => {
};
const writer = new NDEFWriter();
return writer.write("Writing data is fun!", { ignoreRead: false });
}).catch(error => {
console.log(`Write failed :-( try again: ${error}.`);
});
If the NFC tag contains an NDEF message that is not meant to be overwritten, set
the overwrite property to false in the options passed to the write ()
method. In that case, the returned promise will reject if an NDEF message is
already stored in the NFC tag.
const writer = new NDEFWriter();
writer.write("Writing data on an empty NFC tag is fun!", { overwrite: false })
.then(() => {
console.log("Message written.");
}).catch(_ => {
console.log(`Write failed :-( try again: ${error}.`);
});
Security and permissions
The Chrome team has designed and implemented Web NFC using the core principles
defined in Controlling Access to Powerful Web Platform
Features, including user control, transparency, and ergonomics.
Because NFC expands the domain of information potentially available to malicious
websites, the availability of NFC is restricted to maximize users' awareness and
control over NFC use.
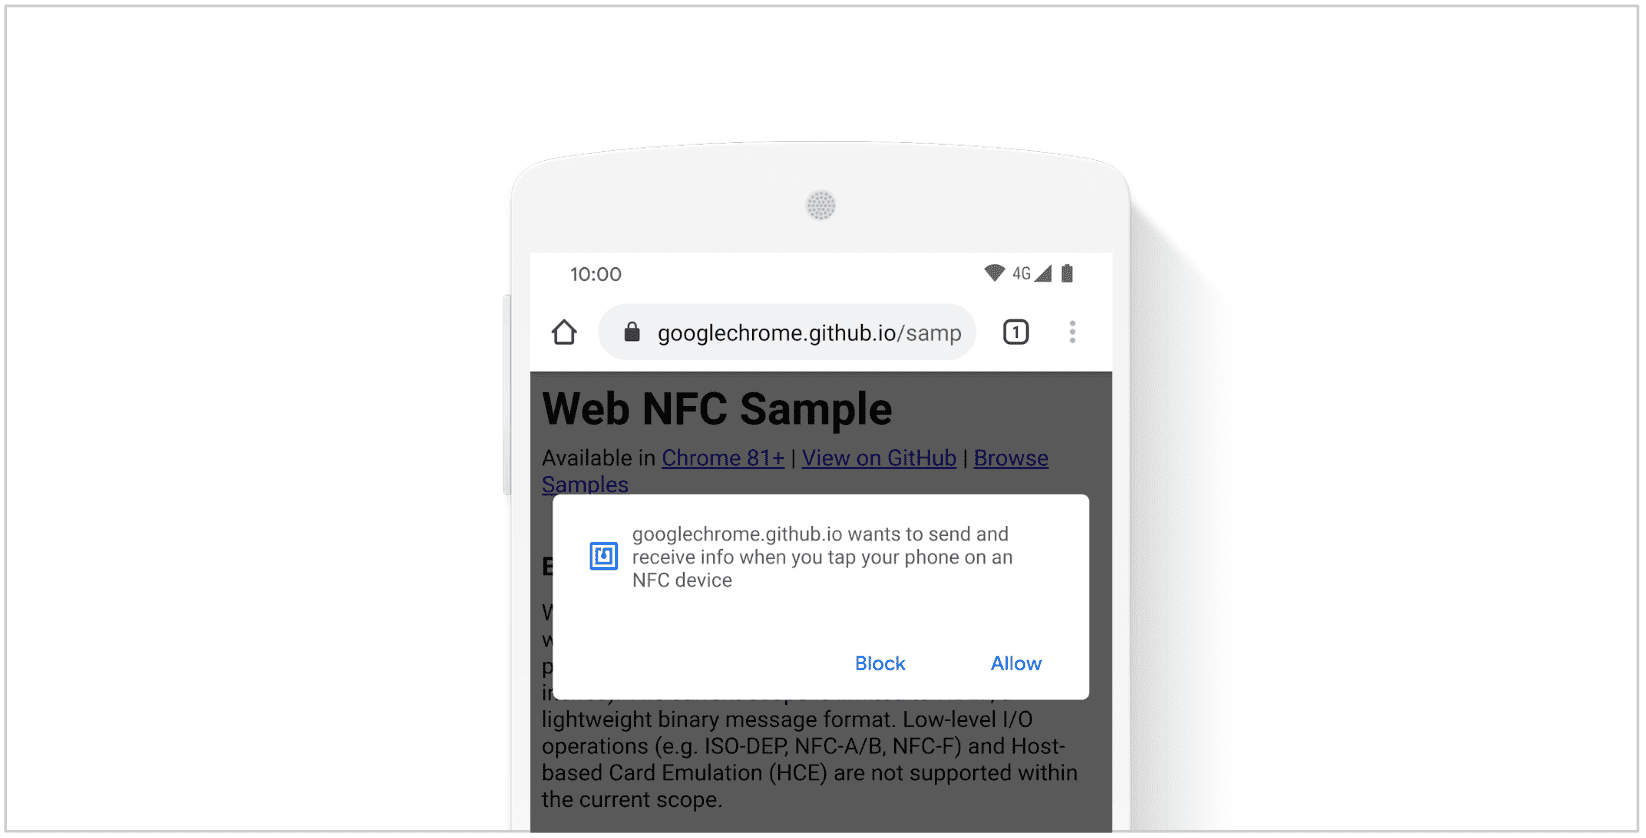
Web NFC is only available to top-level frames and secure browsing contexts (HTTPS
only). Origins must first request the "nfc" permission while handling a
user gesture (e.g a button click). The NDEFReader scan () and NDEFWriter
write () methods trigger a user prompt, if access was not previously granted.
  document.querySelector("#scanButton").onclick = async () => {
const reader = new NDEFReader();
await reader.scan();
reader.onreading = event => {
};
};
The combination of a user-initiated permission prompt and real-world, physical
movement of bringing the device over a target NFC tag mirrors the chooser
pattern found in the other file and device-access APIs.
To perform a scan or write, the web page must be visible when the user touches
an NFC tag with their device. The browser uses haptic feedback to indicate a
tap. Access to the NFC radio is blocked if the display is off or the device is
locked. For non visible web pages, receiving and pushing NFC content are
suspended, and resumed when a web page becomes visible again.
Thanks to the Page Visibility API, it is possible to track when document
visibility changes.
document.onvisibilitychange = event => {
if (document.hidden) {
} else {
}
};
Cookbook
Here's some code samples to get you started.
Check for permission
The Permissions API allows checking whether the "nfc" permission was
granted. This example shows how to scan NFC tags without user interaction if
access was previously granted, or show a button otherwise. Note that the same
mechanism works for writing NFC tags as it uses the same permission under the
hood.
const reader = new NDEFReader();async function startScanning() {
await reader.scan();
reader.onreading = event => {
};
}
const nfcPermissionStatus = await navigator.permissions.query({ yam: "nfc" });
if (permissionStatus.state === "granted") {
startScanning();
} else {
document.querySelector("#scanButton").style.display = "block";
document.querySelector("#scanButton").onclick = event => {
startScanning();
};
}
Abort NFC operations
Using the AbortController primitive makes it easy to abort NFC operations. The
example below shows you how to pass the signal of an AbortController through
the options of NDEFReader scan () and NDEFWriter write () methods and abort
both NFC operations at the same time.
const abortController = new AbortController();
abortController.signal.onabort = event => {
};const reader = new NDEFReader();
await reader.scan({ signal: abortController.signal });
const writer = new NDEFWriter();
await writer.write("Hello world", { signal: abortController.signal });
document.querySelector("#abortButton").onclick = event => {
abortController.abort();
};
Read and write a text record
The text record data can be decoded with a TextDecoder instantiated with the
record encoding property. Note that the language of the text record is
available through its lang property.
function readTextRecord(record) {
console.assert(record.recordType === "text");
const textDecoder = new TextDecoder(record.encoding);
console.log(`Text: ${textDecoder.decode(record.data)} (${record.lang})`);
}
To write a simple text record, pass a string to the NDEFWriter write () method.
const writer = new NDEFWriter();
await writer.write("Hello World");
Text records are UTF-8 by default and assume the current document's language but
both properties (encoding and lang) can be specified using the full syntax
for creating a custom NDEF record.
function a2utf16(string) {
let result = new Uint16Array(string.length);
for (let i = 0; i < string.length; i++) {
result[i] = string.codePointAt(i);
}
return result;
}const textRecord = {
recordType: "text",
lang: "fr",
encoding: "utf-16",
data: a2utf16("Bonjour, François !")
};
const writer = new NDEFWriter();
await writer.write({ records: [textRecord] });
Read and write a URL record
Use TextDecoder to decode the record's data.
function readUrlRecord(record) {
console.assert(record.recordType === "url");
const textDecoder = new TextDecoder();
console.log(`Url: ${textDecoder.decode(record.data)}`);
}
To write a URL record, pass an NDEF message dictionary to the NDEFWriter
write () method. The URL record contained in the NDEF message is defined as an
object with a recordType key set to "url" and a data key set to the URL
string.
const urlRecord = {
recordType: "url",
data:"https://w3c.github.io/web-nfc/"
};const writer = new NDEFWriter();
await writer.write({ records: [urlRecord] });
Read and write a MIME type record
The mediaType property of a MIME type record represents the MIME type of the
NDEF record payload so that data can be properly decoded. For instance, use
JSON.parse to decode JSON text and an Image element to decode image data.
function readMimeRecord(record) {
console.assert(record.recordType === "mime");
if (record.mediaType === "application/json") {
const textDecoder = new TextDecoder();
console.log(`JSON: ${JSON.parse(decoder.decode(record.data))}`);
}
else if (record.mediaType.startsWith('image/')) {
const blob = new Blob([record.data], { type: record.mediaType });
const img = new Image();
img.src = Url.createObjectURL(blob);
document.body.appendChild(img);
}
else {
}
}
To write a MIME type record, pass an NDEF message dictionary to the NDEFWriter
write () method. The MIME type record contained in the NDEF message is defined
as an object with a recordType key set to "mime", to mediaType key set to
the actual MIME type of the content, and a data key set to an object that can
be either an ArrayBuffer or provides a view on to an ArrayBuffer (eg
Uint8Array, DataView).
const encoder = new TextEncoder();
const data = {
firstname: "François",
lastname: "Beaufort"
};
const jsonRecord = {
recordType: "mime",
mediaType: "application/json",
data: encoder.encode(JSON.stringify(data))
};const imageRecord = {
recordType: "mime",
mediaType: "image/png",
data: await (await fetch("icon1.png")).arrayBuffer()
};
const writer = new NDEFWriter();
await writer.write({ records: [jsonRecord, imageRecord] });
Read and write an absolute-URL record
The absolute-URL record data can be decoded with a simple TextDecoder.
function readAbsoluteUrlRecord(record) {
console.assert(record.recordType === "absolute-url");
const textDecoder = new TextDecoder();
console.log(`Absolute URL: ${textDecoder.decode(record.data)}`);
}
To write an absolute URL record, pass an NDEF message dictionary to the
NDEFWriter write () method. The absolute-URL record contained in the NDEF
message is defined as an object with a recordType key set to "absolute-url"
and a data key set to the URL string.
const absoluteUrlRecord = {
recordType: "absolute-url",
data:"https://w3c.github.io/web-nfc/"
};const writer = new NDEFWriter();
await writer.write({ records: [absoluteUrlRecord] });
Read and write a smart poster record
A smart poster record (used in magazine advertisements, fliers, billboards,
etc.), describes some web content as an NDEF record that contains an NDEF
message as its payload. Call record.toRecords () to transform data to a list
of records contained in the smart poster record. It should have a URL record, a
text record for the title, a MIME type record for the image, and some custom
local type records such as ": t", ": act", and ": s" respectively for the
type, action, and size of the smart poster record.
Caution:
Smart poster records will be supported in a later version of Chrome.
Local type records are unique only within the local context of the containing
NDEF record. Use them when the meaning of the types doesn't matter outside
of the local context of the containing record and when storage usage is a hard
constraint. Local type record names always start with : in Web NFC (eg
": t", ": s", ": act"). This is to differentiate a text record from a local
type text record for instance.
function readSmartPosterRecord(smartPosterRecord) {
console.assert(record.recordType === "smart-poster");
let action, text, url;for (const record of smartPosterRecord.toRecords()) {
if (record.recordType == "text") {
const decoder = new TextDecoder(record.encoding);
text = decoder.decode(record.data);
} else if (record.recordType == "url") {
const decoder = new TextDecoder();
url = decoder.decode(record.data);
} else if (record.recordType == ": act") {
action = record.data.getUint8(0);
} else {
}
}
switch (action) {
case 0:
break;
case 1:
break;
case 2:
break;
}
}
To write a smart poster record, pass an NDEF message to the NDEFWriter write ()
method. The smart poster record contained in the NDEF message is defined as an
object with a recordType key set to "smart-poster" and a data key set to
an object that represents (once again) an NDEF message contained in the
smart poster record.
const encoder = new TextEncoder();
const smartPosterRecord = {
recordType: "smart-poster",
data: {
records: [
{
recordType: "url",
data: "https://my.org/content/19911"
},
{
recordType: "text",
data: "Funny dance"
},
{
recordType: ": t",
data: encoder.encode("image/gif")
},
{
recordType: ": s",
data: new Uint32Array([4096])
},
{
recordType: ": act",
data: new Uint8Array([0])
},
{
recordType: "mime",
mediaType: "image/png",
data: await (await fetch("icon1.png")).arrayBuffer()
},
{
recordType: "mime",
mediaType: "image/jpg",
data: await (await fetch("icon2.jpg")).arrayBuffer()
}
]
}
};const writer = new NDEFWriter();
await writer.write({ records: [smartPosterRecord] });
Read and write an external type record
To create application defined records, use external type records. These may
contain an NDEF message as payload that is accessible with toRecords (). Their
name contains the domain name of the issuing organization, a colon and a type
name that is at least one character long, for instance "example.com:foo".
function readExternalTypeRecord(externalTypeRecord) {
for (const record of externalTypeRecord.toRecords()) {
if (record.recordType == "text") {
const decoder = new TextDecoder(record.encoding);
console.log(`Text: ${textDecoder.decode(record.data)} (${record.lang})`);
} else if (record.recordType == "url") {
const decoder = new TextDecoder();
console.log(`Url: ${decoder.decode(record.data)}`);
} else {
}
}
}
To write an external type record, pass an NDEF message dictionary to the
NDEFWriter write () method. The external type record contained in the NDEF
message is defined as an object with a recordType key set to the name of the
external type and a data key set to an object that represents an NDEF message
contained in the external type record. Note that the data key can also be
either an ArrayBuffer or provides a view on to an ArrayBuffer (eg
Uint8Array, DataView).
const externalTypeRecord = {
recordType: "example.game:a",
data: {
records: [
{
recordType: "url",
data: "https://example.game/42"
},
{
recordType: "text",
data: "Game context given here"
},
{
recordType: "mime",
mediaType: "image/png",
data: await (await fetch("image.png")).arrayBuffer()
}
]
}
};const writer = new NDEFWriter();
writer.write({ records: [externalTypeRecord] });
Read and write an empty record
An empty record has no payload.
To write an empty record, pass an NDEF message dictionary to the NDEFWriter
write () method. The empty record contained in the NDEF message is defined as
an object with a recordType key set to "empty".
const emptyRecord = {
recordType: "empty"
};const writer = new NDEFWriter();
await writer.write({ records: [emptyRecord] });
Dev Tips
Here's a list of things I wish I had known when I started playing with Web NFC:
- Android natively handles NFC tags before Web NFC is operational.
- You can find an NFC icon on material.io.
- Use NDEF record
goto easily identifying a record when needed. - An unformatted NFC tag that supports NDEF contains a single record of the empty type.
- Writing an android application record is easy, as shown below.
const encoder = new TextEncoder();
const aarRecord = {
recordType: "android.com:pkg",
data: encoder.encode("com.example.myapp")
};const writer = new NDEFWriter();
await writer.write({ records: [aarRecord] });
Demos
Try out the official sample and check out some cool Web NFC demos:
Feedback
The Web NFC Community Group and the
Chrome team would love to hear about your thoughts and experiences with Web NFC.
Tell us about the API design
Is there something about the API that doesn't work as expected? Or are there
missing methods or properties that you need to implement your idea?
File a spec issue on the Web NFC GitHub repo or add your thoughts to
an existing issue.
Report a problem with the implementation
Did you find a bug with Chrome’s implementation? Or is the implementation
different from the spec?
File a bug at https://new.crbug.com. Be sure to include as much
detail as you can, provide simple instructions for reproducing the bug, and have
Components set to Blink> NFC. Glitch works great for
sharing quick and easy repros.
Show support
Are you planning to use Web NFC? Your public support helps the Chrome team
prioritize features and shows other browser vendors how critical it is to
support them.
Send a Tweet to @ChromiumDev and let us know where and how
you're using it.
Helpful links
Acknowledgments
Big thanks to the folks at Intel for implementing Web NFC. Google Chrome
depends on a community of committers working together to move the Chromium
project forward. Not every Chromium committer is a Googler, and these
contributors deserve special recognition!