
Si administra sitios Web from WordPress durante mucho tiempo, entonces es consciente de la relevance de realizar copias de seguridad periódicas. Las copias de seguridad le ahorran muchos problemas en caso de cualquier desastre imprevisto.
As well as making regular backups, at the same time it is important to manage them safely. Why? Because a number of things can go wrong, such as:
- The server se queda sin espacio de almacenamiento
- Backups may become inaccessible
- Las copias de seguridad pueden estar dañadas o infectadas con malware
- The backup may be incomplete, etc.
All of these problems make backups useless.
Imagine que su sitio se cae y después las únicas copias de seguridad que tiene están dañadas o incompletas. Suena frustrante, ¿verdad? Luego de todo, el target de realizar copias de seguridad es poder restaurarlas cuando surja la necesidad.
Aquí es donde las copias de seguridad de prueba resultan útiles. Probar sus copias de seguridad antes de restaurarlas podría evitarle muchos problemas en el futuro. Se recomienda que haga de las pruebas una parte integral de su strategy general de respaldo. Las pruebas de respaldo de su sitio web deben realizarse de vez en cuando, en lugar de guardarlas para cuando ocurra un desastre. De esa manera, estará preparado y podrá restaurar rápidamente una copia de seguridad funcional para que su sitio esté en funcionamiento.
How does testing WordPress backups help?
WordPress is a complex ecosystem consisting of multi-core files along with plugins and themes. Life is good when your site is working properly. But when a problem does arise, discovering the root cause can be a huge pain. All you want to do is restore your site to normal as soon as possible. A quick fix like restoring your site seems tempting. But restoring a backup without testing it first can make things worse if the backup is corrupted or incomplete.
Taking the time to test your backups first will:
- Diagnose why your website crashed (using the backup that was taken just before the site went down).
- If you discover an error in the backup, you can skip that backup and find a better one.
- Backups at the same time allow users to test modifications without affecting the live site.
- You can check for incompatibility issues, etc.
While there are many advantages to testing backups, the process can be time consuming and difficult to implement. Let's take a look at the top challenges associated with performing backup testing.
WordPress Backup Testing Challenges
You must first create a test environment. This can get quite technical, especially if you have multiple backup versions that need to be tested. You may need to create different test environments. Tools like WampServer or DesktopServer can help you create a local environment on your system. Or if you are using a good managed WordPress hosting plan, you may be able to create test sites to test.
But once you've set up a test environment, you need to test your backups. You can do it manually or with a plugin. Let's take a look at both!
How to test your backups manually
Your first option is to manually test WordPress site backups yourself. There are two main steps you will need to take.
1. Create and download a backup of your site.
Para hacer una copia de seguridad de su sitio de WordPress, esencialmente necesita hacer una copia de todos sus archivos. Puede hacer una copia de seguridad de su sitio manualmente usando el Administrador de archivos de cPanel para descargar su carpeta de WordPress o vía SFTP para ver y descargar sus archivos. Esta guía acerca de cómo hacer una copia de seguridad de WordPress cubre todos los pasos y herramientas para hacer el trabajo.
2. Upload the backup to your local site.
Now, on your local system, you will need to create a temporary WordPress website to upload and test your backup.
Utilice Desktopserver o software idéntico para crear un sitio web de WordPress localmente. Una vez que esté listo, cargue la copia de seguridad en el sitio local usando la opción ‘Exportar o importar un sitio web’. (Tenga en cuenta que esta función está disponible exclusivamente para los usuarios de DesktopServer Premium).

Once you have uploaded the backup and the website is ready, you can start testing the local site.
More about DesktopServer
As you can see, testing manually is not exactly easy and requires the use of tools. In addition to all of this, you must have the technical knowledge to handle any issues that arise during testing. It is much easier to use a plugin.
How to test your backups with a plugin
Manually testing your backup can be tricky. This is why many users prefer to use a tool or plugin to test backups. By using plugins, you can create a test environment with the click of a button. If your WordPress backup plugin offers a test environment that is even better because then you don't have to download and then upload your backups to your test environment over and over again.
In this section, we will show how to test backups using BlogVault Backup Services.
Get BlogVault
Even though there are many backup services to choose from, BlogVault is the only one that creates a test environment on its own server. The load from running processes is borne by BlogVault's servers and not yours, which means your live site is not affected. And with his Restore test functionality, BlogVault automatically restores the backup in a test environment (generally called staging). The test environment expires in a week during which you can browse your backups and, when satisfied, restore the backup of your choice without breaking a sweat.
In this way we are going to test!
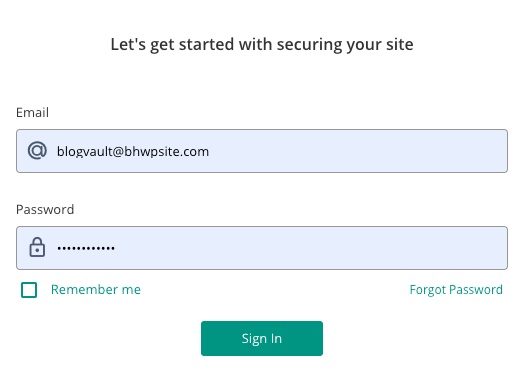
1. Create and configure your Blogvault account.
Create an account and add your website to the dashboard.
Once you add a website to the BlogVault dashboard, the plugin will back up your website. This may take a while and you will be notified once it is done.
2. Select your backup to test.
Next, select the website of your choice (in case you have added more than one website) and from the panel click on the Backups section.
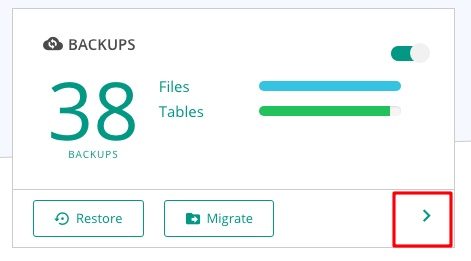
Then, on the next page, click on an option that looks like a cloud. That's it Restore test button.
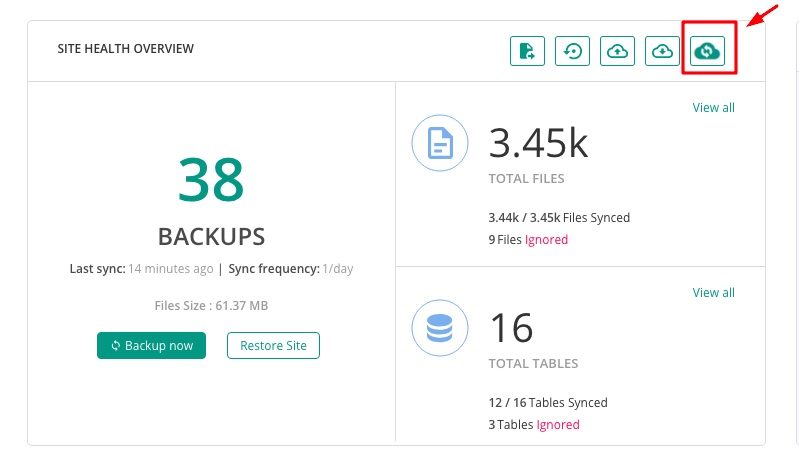
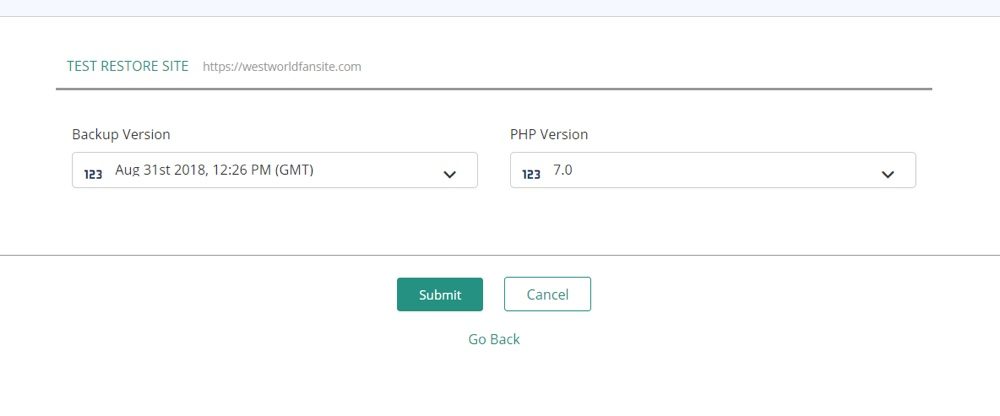
At the same time you must select the Backup version and the Versión PHP you want to try. Don't forget to press Submit.
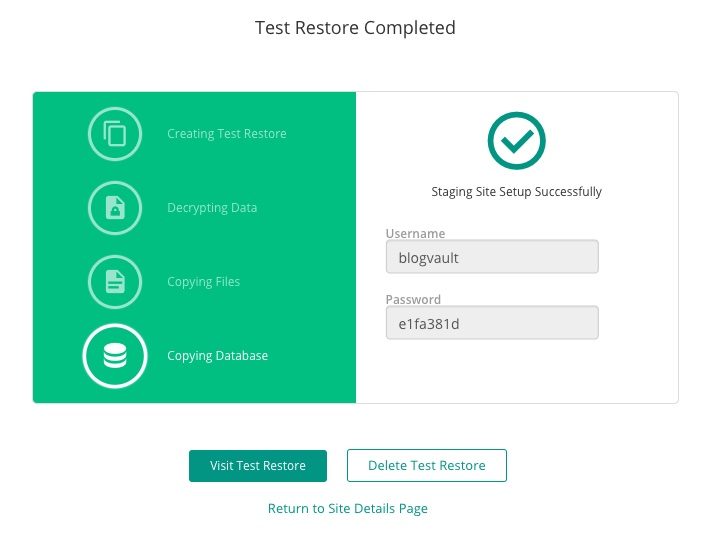
The test backup restores in a few minutes and now is the time to check if the backup is working properly.
3. Start testing!
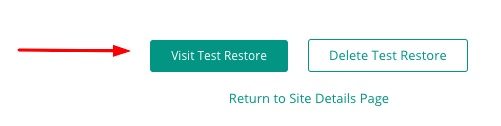
Click on the Visit Restore Test button.
You will be asked to enter your credentials from the previous page.
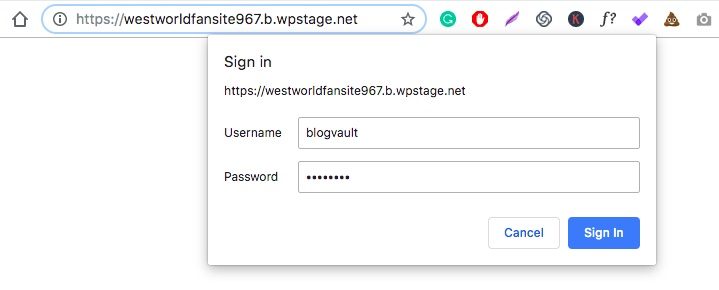
After logging in, you should be able to see the restored backup on your website.
If you want to try a different backup, just delete the test site and create a new one. Start from scratch and simply select a different backup version to try.
When you find the backup you are looking for, click to activate and restore that specific version.
Automated tools like BlogVault eliminate the hassles and risks associated with manual test backups. It's as simple as clicking a few buttons! And as previously mentioned, there is no stress on your server (since everything is done at the end of Blogvault).
LEARN MORE ABOUT BlogVault
Disaster happens when you least expect it. Better safe than sorry, right?
It is highly recommended to test your backups from time to time. When things go wrong, you know you have a safety net to fall back on. And you can be sure that it is one without holes.
Have more tips for testing site backups? Or other tools that you would recommend? Let us know in the comment section!


