Este artículo es la segunda parte de mi tutorial para hacer un pequeño juego con Javascript. Realizando tu primer juego en JavaScript – Primera parte.
In this second part we are going to start the operation of our game, giving it more animation, versatility and movement. Without more to say, let's start with this second part!
Let's catch up
Como ya sabrás, tenemos mucho adelantado de este tutorial. Sigue el siguiente link and see the full source code of this tutorial . Absolutamente todo lo conseguirás siguiendo esa Url. Así que no esperes mas y continuemos con nuestro tutorial.
Creating our amazing spaceship
Now that the background is done, we can finally start putting our spaceship together!
Let's create a file Player.js and add it to index.html as a script (just like we did with CloudManager).
Here is a (beautiful) spaceship designed in a few minutes, plus you can add it to your assets folder and in the loader function from main.js:
Basically, we want this ship to appear near the left edge of the screen. We also need its anchor (object position point) to be in the center of the sprite, and since it is perhaps too big, we can rescale it as I show you below:
class Player {constructor () {this.sprite = new PIXI.Sprite (PIXI.loader.resources ["assets / spaceship.png"]. texture); this.sprite.interactive = true; this.sprite.anchor.set (0.5, 0.5); this.sprite.position.set (renderer.width * 0.2, renderer.height * 0.4); this.sprite.scale.set (0.4, 0.4); stage.addChild (this.sprite); }}
Of course, we have to declare this object as a global variable from the file main.js, so it can be instantiated in the game:
var stage = new PIXI.Container (); var cloudManager; var player; ...
… and in the init function from the same file (right after CloudManager):
player = new Player ();
Now you should see the shiny spaceship sailing.
However, if you wait a few seconds, you should have some problems:
The spaceship is flying behind the clouds!
Yes, because in fact the last created object moves behind the previous one. The clouds are spawning after the spaceship has been instantiated, so we need the cloud manager to generate clouds at the bottom of the object list. To do this, we just have to update the addChild of the class CloudManager:
stage.addChildAt (this.cloud, 0);
addChildAt allows us to pass a second parameter, which is the position in the list of objects on the stage. The further away you are, the further away the sprite will be on the screen.
"0" means the first index in the object list, so every time we create a new cloud, we add it to the top of the list, ensuring that it will appear behind the spaceship.
Now that it's done, we can start the spaceship controls.
Move the spaceship
Let's go back to the class of Player.js and let's add some lines in the constructor:
window.addEventListener ('keydown', this.onKeyDown.bind (this)); window.addEventListener ('keyup', this.onKeyUp.bind (this));
This allows the game to detect keyboard events (when a key is pressed and released). When one of these events occurs, the method is executed at the end of each line.
Note: By adding ".bind (this)" to the end of the function, we pass the object's context to it, which means that we can still access its properties by calling "this". If we do not write it this way, the callback function is not able to determine what object we are working with. Just remember that if one of your callback functions receives an "undefined this" error, you may have to bind your object this way.
We are going to define 2 empty methods in the same class (we will fill them in a bit):
onKeyDown (key) = {}; onKeyUp (key) = {};
We also need 3 variables to move the spaceship: its horizontal and vertical directions (X and Y) and the speed (all of them in the constructor):
this.directionX = 0; this.directionY = 0; this.speed = 8;
this.keyCodes = {37: -1, 38: -1, 39: 1, 40: 1};
This object is basically an association of key codes and address values:
- 37 is the left arrow key, to move our spaceship to the left we need to decrease its position in X.
- 38 is the up arrow key, to move our spaceship to the top we need to decrease its position in Y.
- 39 is the right arrow key, to move our spaceship to the right we need to increase its position in X.
- 40 is the down arrow key, to move our spaceship to the background we need to increase its position in Y.
Each time a key is pressed, the corresponding address is recalled:
onKeyDown (key) {if (key.keyCode == 37 || key.keyCode == 39) this.directionX = this.keyCodes [key.keyCode]; else if (key.keyCode == 38 || key.keyCode == 40) this.directionY = this.keyCodes [key.keyCode]; }
It looks pretty weird, but let's explain that: if the key code is 37 or 39 (which means left or right arrow key), then we just set the direction of the X. If it's 38 or 40, you can guess what what's happening (yes, it's actually the vertical direction). That's all!
Let's add the player update method (like the Cloud Manager, remember?):
update () {this.sprite.position.x + = this.directionX * this.speed; this.sprite.position.y + = this.directionY * this.speed; }
... and of course, don't forget to call it in the loop function of main.js
player.update ();
If you save and reload the game, it (should) work fine, except the ship keeps moving when we release the arrow keys. It is obvious because we have not completed the onKeyUp function, which is capturing the key that has just been released. So this way we can stop it by setting directionX or directionY to 0.
There is only one small problem: what happens if we set the address to 0 because we have released the left key, but the right key is still pressed?
Yes, the spaceship is going to stop, and we would have to press the right key again to move, which is not very logical.
So why not check if the right or left key is still pressed, so that we can readjust the address to this previously pressed key?
That is what we are going to do. And for this we need to store the state of each key in a boolean, pressed or released (true or false). Let's put all these states into an object variable in the player constructor:
this.keyState = {37: false, 38: false, 39: false, 40: false};
If a key (identified by its own code) is pressed, then we simply change its state to true, and if it is released we set it to false. Easy right?
Let's add this line to the beginning of onKeyDown:
this.keyState [key.keyCode] = true;
... and this in onKeyUp:
this.keyState [key.keyCode] = false;
Now we can continue with the logic onKeyUp: if one of the horizontal or vertical keys is released but the opposite one continues to be pressed, we change the direction to the last one. If both are released, we will stop the ship:
if (! this.keyState [37] && this.keyState [39]) this.directionX = this.keyCodes [39]; else if (this.keyState [37] &&! this.keyState [39]) this.directionX = this.keyCodes [37]; else this.directionX = 0; if (! this.keyState [38] && this.keyState [40]) this.directionY = this.keyCodes [40]; else if (this.keyState [38] &&! this.keyState [40]) this.directionY = this.keyCodes [38]; else this.directionY = 0;
Note: There are multiple ways to handle the movement of the spacecraft, this is certainly not the cleanest, but I think it is one of the simplest to understand.
We are ready, save and reload and enjoy!
Upgrade: The spaceship can leave the screen! Try to check your position before updating it. You can check the result here.
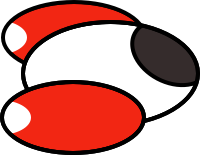
Rocket launch
Now that we can control the ship, we want it to fire rockets.
Let's start by adding the sprite in the assets folder:
![]()
PIXI.loader.add (["assets / cloud_1.png", "assets / cloud_2.png", "assets / spaceship.png", "assets / rocket.png"]). Load (init);
Create a new file called Rocket.js on the src folder and add it in index.html with the other types:
<script src="../src/lib/pixi.min.js"></script>
<script src="../src/Player.js"></script>
<script src="../src/CloudManager.js"></script>
<script src="../src/Rocket.js"></script>
<script src=“../src/main.js"></script>
Volvamos a la clase de Jugadores. Queremos que be capaz de disparar un cohete si pulsa el botón de la barra espaciadora. La onKeyDown function It is already catching these events, so we only need to make a condition with the keycode we want (space bar in this example):
onKeyDown (key) {this.keyState [key.keyCode] = true; if (key.keyCode == 32) {let rocket = new Rocket (this.sprite.position.x, this.sprite.position.y); } if (key.keyCode == 37 || key.keyCode == 39) this.directionX = this.keyCodes [key.keyCode]; else if (key.keyCode == 38 || key.keyCode == 40) this.directionY = this.keyCodes [key.keyCode]; }
We're giving the position of the spaceship in the rocket constructor, so inside we just fix its position to that of the spaceship (with an offset so that it appears in front of the ship instead of in the center).
So come on, initialize Rocket.js with the constructor:
class Rocket {constructor (x, y) {this.sprite = new PIXI.Sprite (PIXI.loader.resources ["assets / rocket.png"]. texture); this.sprite.anchor.set (0.5, 0.5); this.sprite.position.set (x + 40, y); stage.addChild (this.sprite); }}
Alright, if you save and reload, you can fire rockets (static) by pressing the space bar!
In order for them to move, we need to create an array variable that contains all the existing rockets in the game (we don't know how many of them are on the stage):
let _list = new Array (); class Rocket {static get list () {return _list; } static set list (value) {_list = value; } ...
The variable _list it is outside the class because it is static, which means that its value is unique and it is not just the property of an object (as opposed to this). However, we can get it and configure it however we want (with the first two lines of the class).
We can push the current object inside this list (inside the constructor) and declare the speed variable at the same time:
this.speed = 20; Rocket.list.push (this)
…. and also add update method:
update () {this.sprite.position.x + = this.speed; if (this.sprite.position.x> renderer.width * 1.1) {this.sprite.destroy (); Rocket.list.splice (Rocket.list.indexOf (this), 1); }}
This is basically the same as before, we update the position x of the rocket (and not the and because it doesn't move vertically) and just like clouds we remove it when it goes out of the bounds of the screen, except this time it's the right edge.
After that, in the loop main.js, we just have to parse the rocket list and call the update function for each item:
function loop () {cloudManager.update (); player.update (); Rocket.list.map ((element) => {element.update ();}); requestAnimationFrame (loop); renderer.render (stage); }
Now save, reload, and test it!
It's firing, but it's not automatic. You have to press the key for each rocket and when you're not moving it's kind of weird because it's firing so fast. What we want is to be able to shoot automatically when the key is held down, with an adjustable speed.
We are going to define two new variables in the Player constructor: the rate of fire (which can be modified) and the Cooldown, which will be the value of the timer:
this.fireSpeed = 10; this.fireCooldown = 0;
We also need to update keyState to add the space key, because we want to know if it is pressed or not:
this.keyState = {32: false, 37: false, 38: false, 39: false, 40: false};
This is the function we are using to fire (we have to call it in the player update):
updateFire () {if (this.fireCooldown <this.fireSpeed) this.fireCooldown ++; if (this.keyState [32] && this.fireCooldown> = this.fireSpeed) {let rocket = new Rocket (this.sprite.position.x, this.sprite.position.y); this.fireCooldown = 0; }}
It's pretty simple: we just increase the timer from 0 to the firing rate we set and if the key is pressed and the timer has reached the value, we spawn a rocket and reset the timer to 0.
This function runs permanently in the player update loop:
update () {this.sprite.position.x + = this.directionX * this.speed; this.sprite.position.y + = this.directionY * this.speed; this.updateFire (); }
Work done! If you want it faster, just decrease the shooting speed (and increase it for a slower speed).