

In this guide we are going to introduce you to one of the best tools to mejorar el rendimiento de tu Blog in WordPress. The plugin WP Super Cache It is one of the most powerful and you can download it for free. You will learn what it is for, how to install and configure it.
Qué es el cache
To understand the relevance de este plugin debes saber su área de ejecución. Es aquí donde entra el término caché. De manera general y directa, el caché es una vía para entregar información que ya está almacenada y no requiere solicitarla a la fuente de origen. WordPress es ligero pero a veces se vuelve un poco pesado y un plugin de esta categoría le viene bien.
What is the WP Super Caché plugin for
Ahora bien, esta herramienta ejecuta una copia de cada página creada en tu blog, de esa manera sirve esa copia a cada visitante que llegue. Esto es beneficioso puesto que en lugar de pedir la información requerida al server, entrega una que ya tienen almacenada y evitas cargar tu hosting.
This tool is equivalent to several plugins that exist in the WordPress.org library. Pero pronto descubrirás que es más sencillo y efectivo. A la vez posibilita configurarlo según los requerimientos de cada Web.
Install and configure WP Super Caché
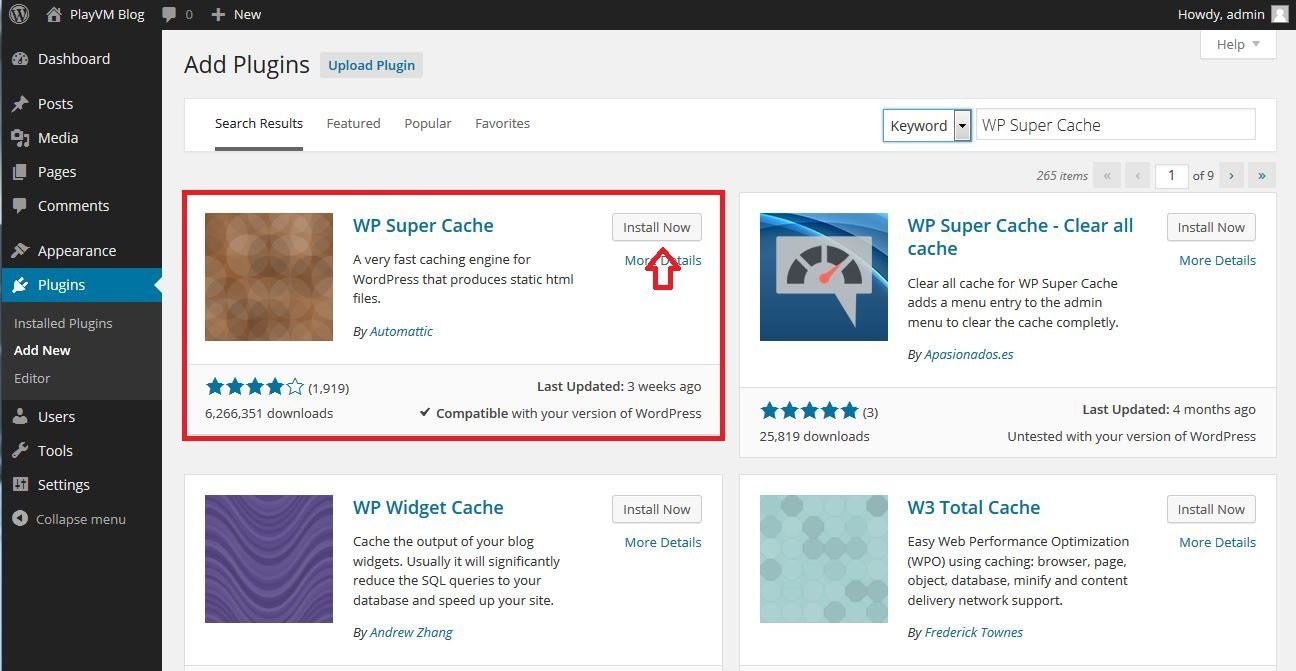
Step No. 1: start by going to your WordPress panel, while there go to Plugins> Add new. Search for WP Super Caché and click install and then you will only have to activate.
Step No. 2: it's time to configure. Go to Settings> WP Super Cache, open it and you will find a panel with several options, to activate it you must click on Caching On and then click on Save Changes.
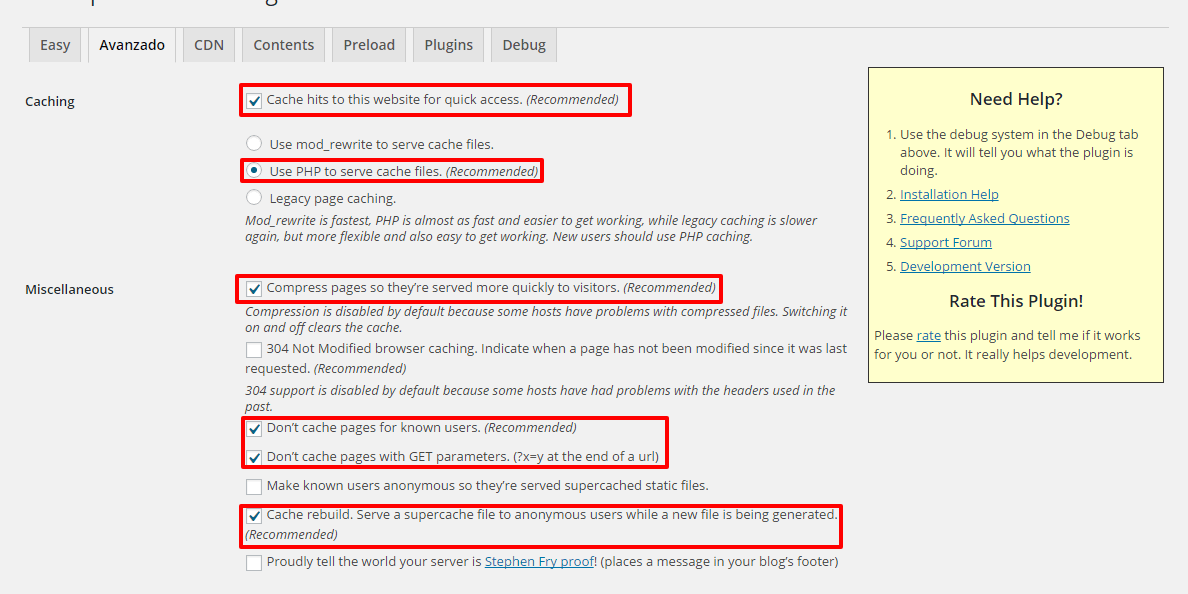
Step No. 3: immediately go to the Advanced tab and activate the following boxes.
- Cache hits to this website for quick Access: you will activate an improvement from its root configuration.
- Use mod_rewrite to serve cache files: this way you will use the server module to compress.
- Compress pages so they're served more quickly to visitors - ideal for each page to be compressed.
- Don't cache pages for known users: it will prevent you from caching user generated pages.
- Cache rebuild. Serve a supercache file to anonymous users while a new file is being gnerated: to display some files while generating others.
- Mobile device support: this is already activated, but if not, do it so that there is compatibility with mobiles.
Checking these options saves the changes in Update status. When you do this step las reglas se guardarán en el htaccess. Right afterwards you will see the appearance of a green window. This means that the configuration was successful.
Step No. 4: go to tab CDN. To use it you must register in a CDN service. Here we recommend activating it and leaving the options that come by default. To modify any other option you must understand well what you want to apply so as not to cause internal problems.
Step No. 5: go to the Content tab. In it you will see all the web pages that have been cached. If after activating the plugin you make any changes, immediately go to this tab and then to Regenerate cache starts, that way the data is updated.
We suggest not modifying the other tabs since they have a very good default configuration. We hope this guide on how to install and configure the WP Super Cache plugin.


