Formatting our PC is something that sooner or later, we will always have to do. That is why, in this tutorial we are going to clarify in detail how to format Windows 10 yourself through different opportunities. Choose the one you like the most.
 <>
<>
Format Windows 10 without using an external copy
The first way we have to format our equipment is from within the operating system itself. This option is highly recommended if we do not have an installation CD or a USB device with a copy of the operating system. Certain errors that existed with this operation have been resolved in some versions of Windows 8, so it is a safe and very comfortable option.
From our configuration panel
The first thing we will do is open the Start tab and click on "Settings". Once inside, we go to the option of "Update and security "and within this to" Recovery ". Basically we will have to give the button "Begin" under the Reset Computer option.
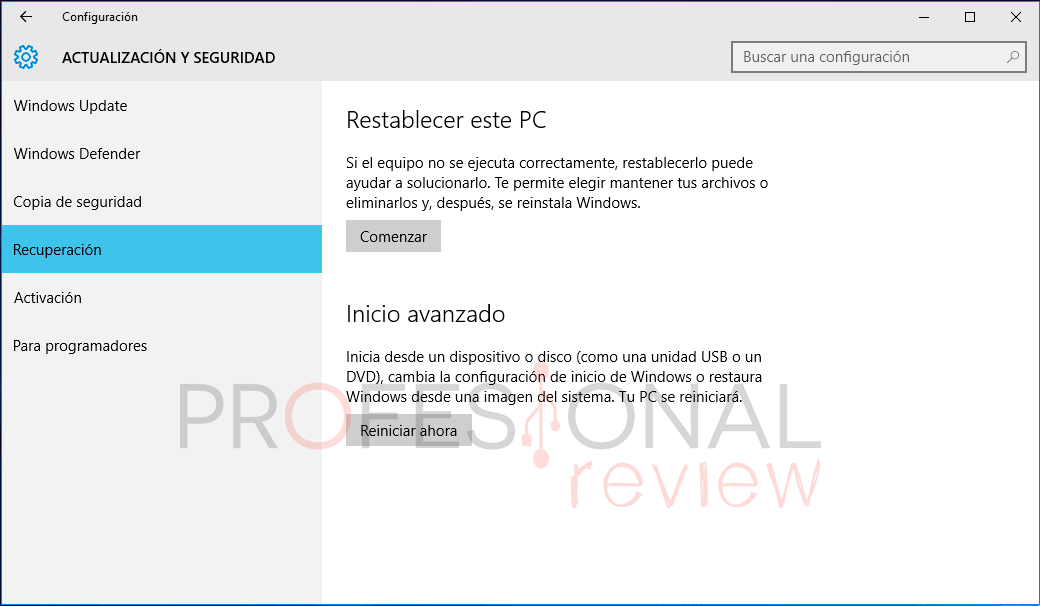
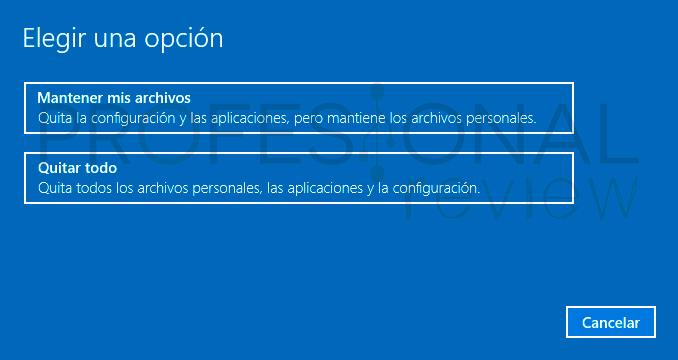
After pressing, two screens will appear asking us for different options to format Windows 10:
- It asks us if we want to keep the files or remove everything, such as a full formatting we will choose this second option.
Deleting everything means losing all the files, programs and the configuration that we have.
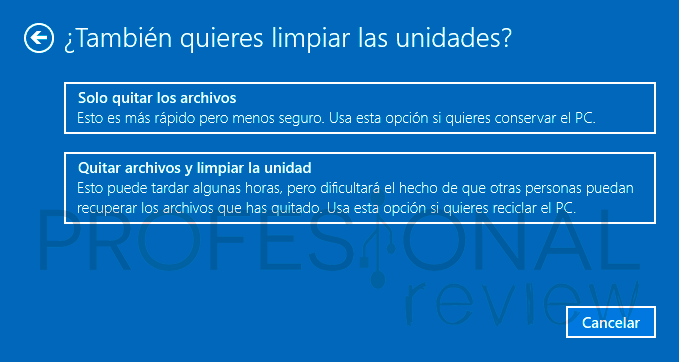
- It will then ask if we want to clean the drives. The first option will be the fastest but least secure, dado que solo se borrará la tabla de archivos del disco duro. La segunda opción sí que realizará un borrado físico de todo el contents del disco duro (esto podría tardar bastante tiempo).
Choosing the first option would give you the opportunity to recover these files through computer programs, so a complete format is better from a security point of view. Choose the one you want.
- To finish, we will be shown a screen offering us a summary of the actions that will be executed and asking us to confirm our desire to continue with the formatting.
From here you will lose all your files, so you should save what you consider important before continuing.
After this, the PC will restart and begin to reinstall Windows 10.
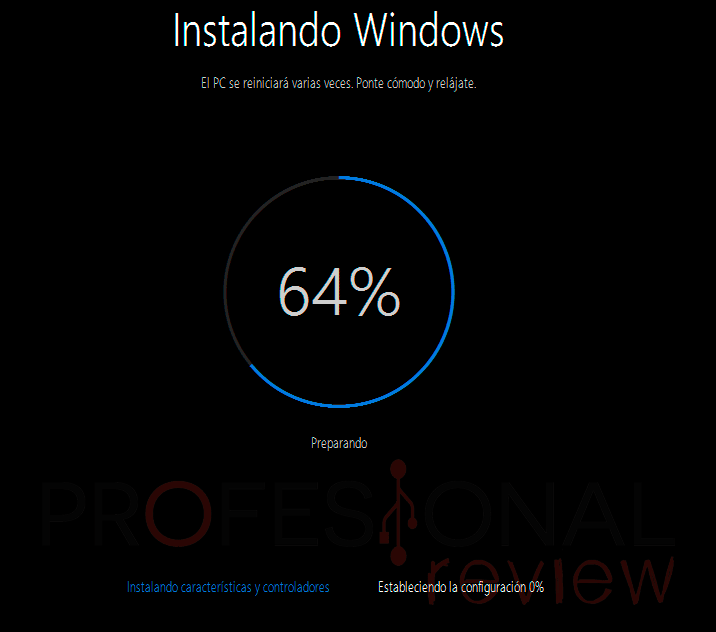
Completing the installation
After completing the installation, the system setup wizard where we can select "Use quick settings" (recommended for inexperienced users) or customize the settings, to configure different privacy options.
Tras esto, el PC se regresará a reiniciar y ya estaremos en disposición de configurar nuestro Username. Para esto podemos introducir de forma directa una cuenta que tengamos con algún producto de Microsoft (Hotmail, bing, one drive, etc)
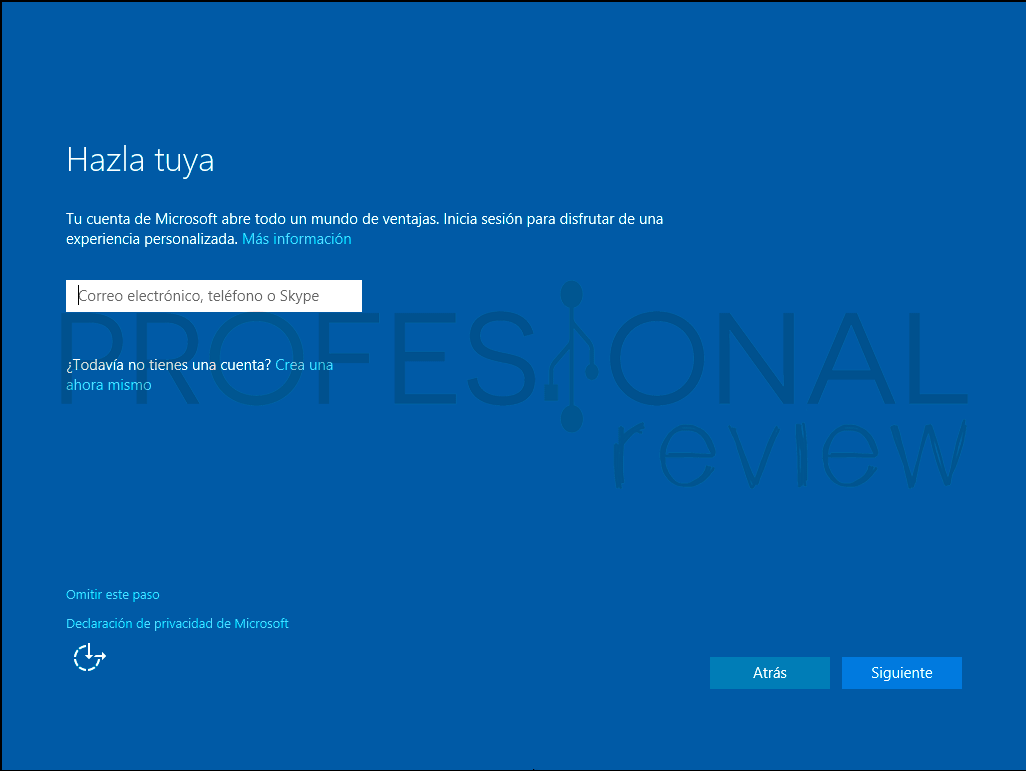
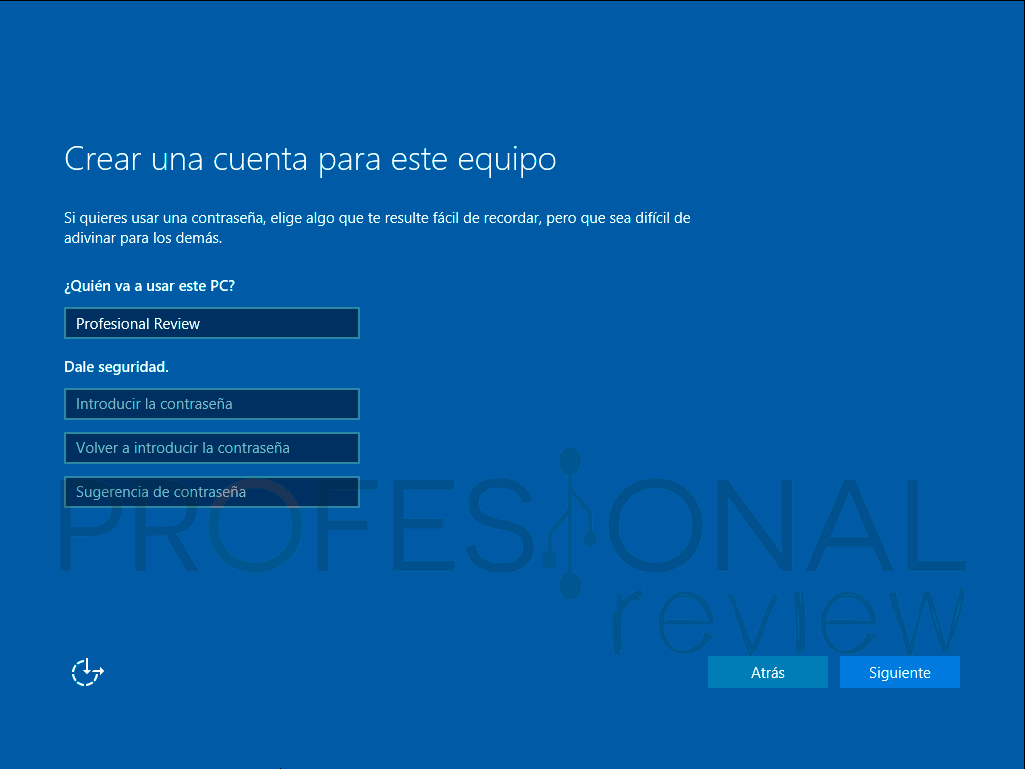
Or if we skip this step, create a normal user and current without the need to use any mail.
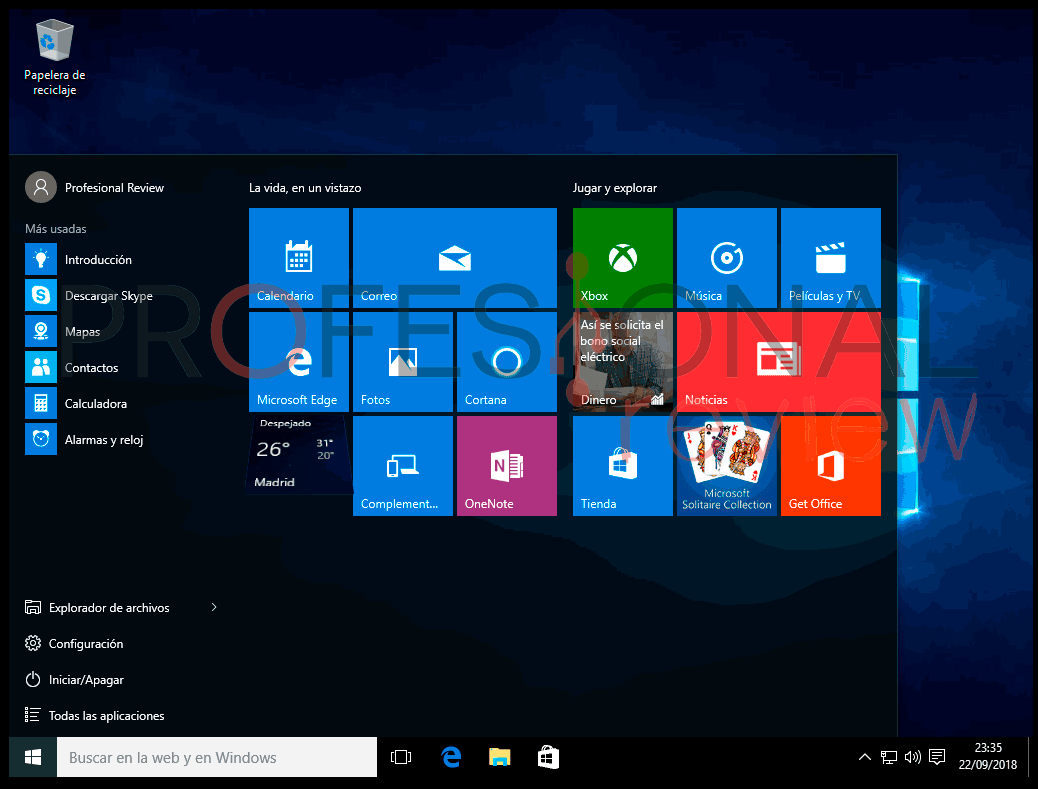
Para terminar, el sistema operativo ultimará todos los detalles con respecto a configuración de dispositivos hardware y aplicaciones y we will finally have Windows 10 installed. Extremely simple!
From our Start menu
What's more We will be able to reinstall Windows 10 in a more direct way by going to the start menu and at the same time that we press the SHIFT key we choose the restart option and we will access the Windows recovery menu.
On this screen we will choose "solve problems".
(*10*)
Once inside, we will choose the option "Reset this computer" and then we will be able to select whether to keep our files or delete them completely. We will choose the second option.
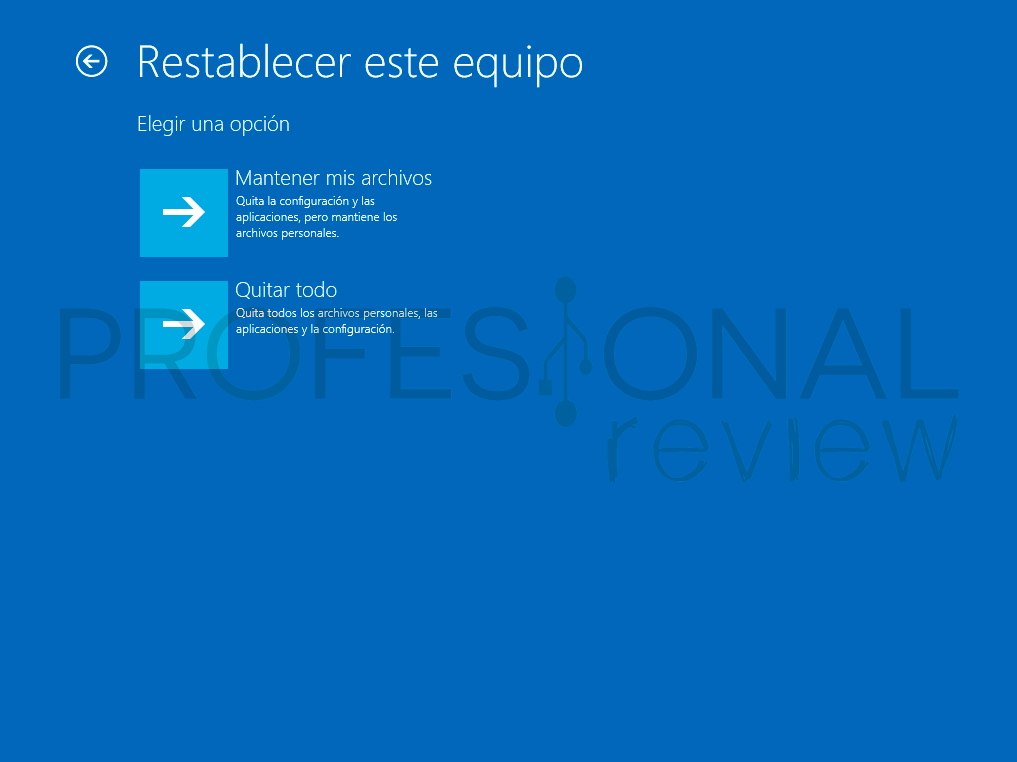
The PC will restart and enter the installation wizard. It will return to ask us something that we already saw in the first method, and it is to do a quick format or instead physically remove all the files from the hard disk. Choose the option you want again.
From here on, the process will be practically equivalent to method 1, so we will not repeat the process.
Format Windows 10 using a DVD
To use the traditional method of formatting using a DVD We will need to create a bootable drive that contains a copy of Windows 10 for installation.
Creating the installation DVD
To create this unit we are going to use the Microsoft tool, Windows Media Creation Tool, that we will achieve it download from the Microsoft website for free.
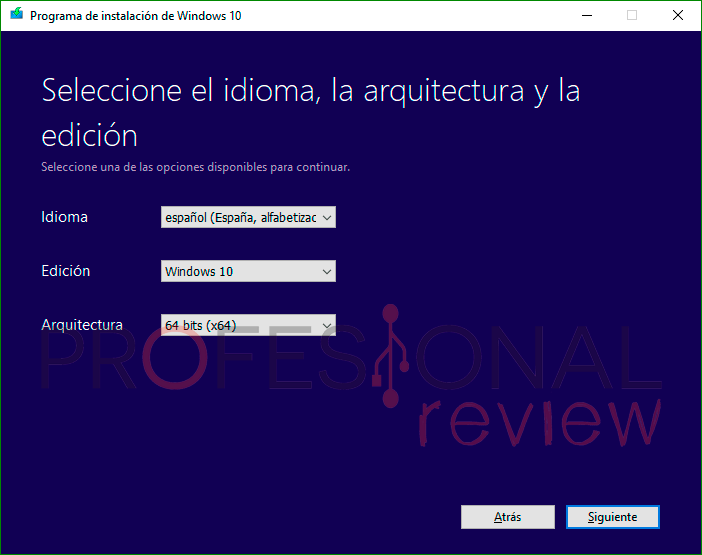
Once downloaded, we run the application and choose "Create installation media". Moving on to the next screen we will choose the language, the Windows version and its architecture.
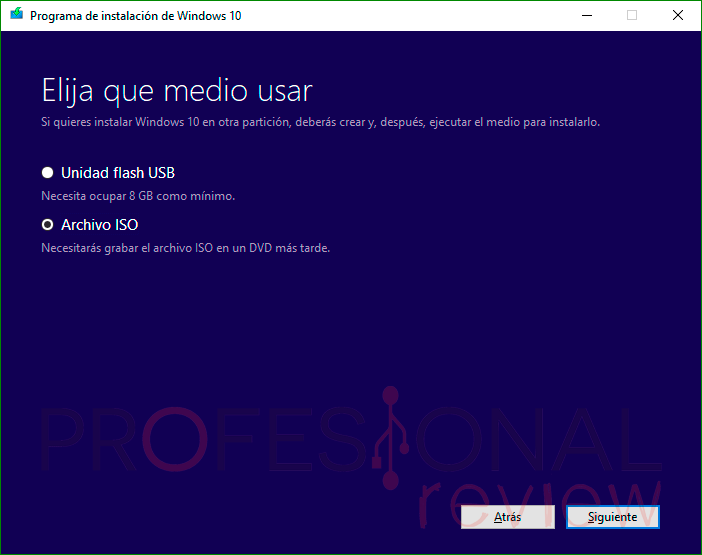
Next, we will choose from the next screen the option of "ISO file" for the program to download Windows 10 from the company's repositories.
In this point, the program will ask us to choose the directory inside our PC to store the ISO image that it is going to download.
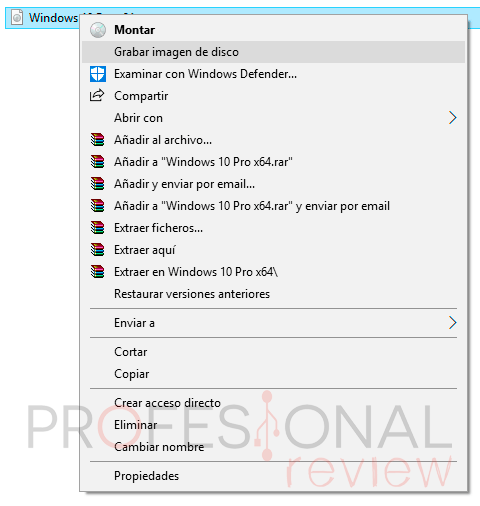
Once the ISO image download procedure is finished, we will close the program and go to the directory where we have saved our copy of Windows 10. We introduce our DVD in the recorder and press the right button on the file to click "Burn disc image" and thus create our installation DVD.
Booting from CD / DVD drive
The first thing we will have to do is asegurarnos de que nuestro PC be capaz de arrancar desde un CD antes de arrancar desde la instalación de Windows what's on the hard drive.
For this you just have to restart the PC and repeatedly press the "Del", "F2" key or the respective key of access to our BIOS.
When starting up, it looks for a message similar to this one on the screen: Press [key] to enter BIOS Setup
Within this and with the help of the keyboard dates, we will go to "Boot" and with the "+" and "-" key, we will be able to change the priority of the device boot sequence. We want the CD to boot before the hard drive so the result should be this.
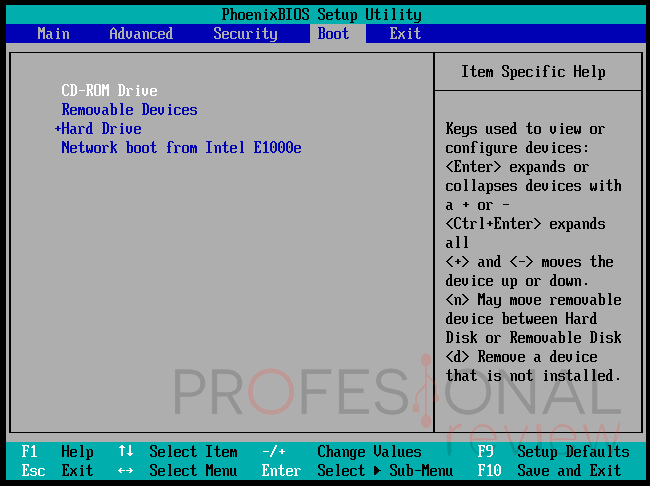
To accept the changes and save we press F10. The PC will then restart and boot the Windows installation CD, thus starting the Windows 10 installation wizard.
In most PC's, pressing the F8 key throughout the boot will show a menu with the connected devices and we will be able to select from which one to boot without having to configure the BIOS.
Installation procedure
From here, the procedure is almost as easy as installing an application in Windows itself, so we press "Next" to take a step forward.
The screen that will come out to us will allow you to directly install Windows or Repair the computer. If we press on this last option, we will get a menu practically equivalent to the one we saw in the process of formatting Windows 10 without using an external copy.
We basically we will choose the option "Install now".
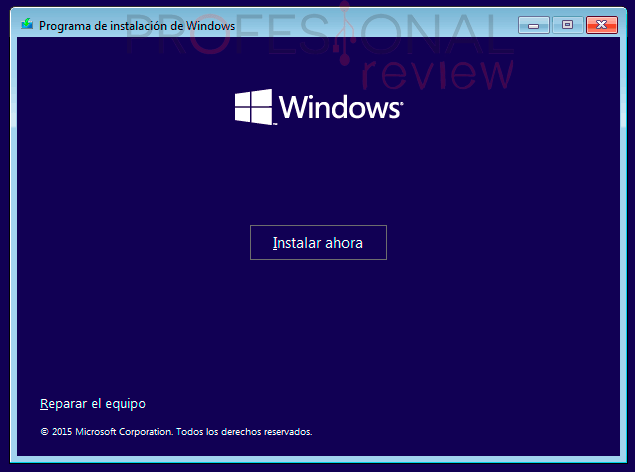
After selecting the install option, the product key insertion window will open. We can write it right now or select the skip option to validate Windows once the installation is complete. In our we will click on skip.
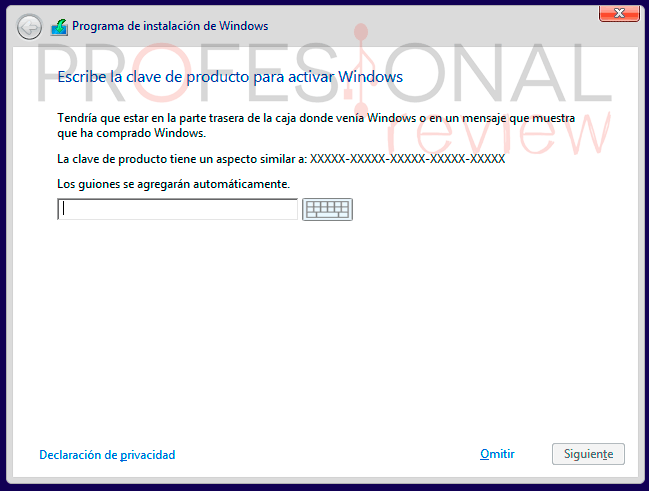
We click on "next" and accept the license terms and conditions. We will then arrive at the next screen where we are presented with two options:
- The first suggests that we perform a Windows update while preserving the files, which we do not want.
- And the second suggests a custom installation, which is the one that interests us to do a complete format and install the virgin operating system.
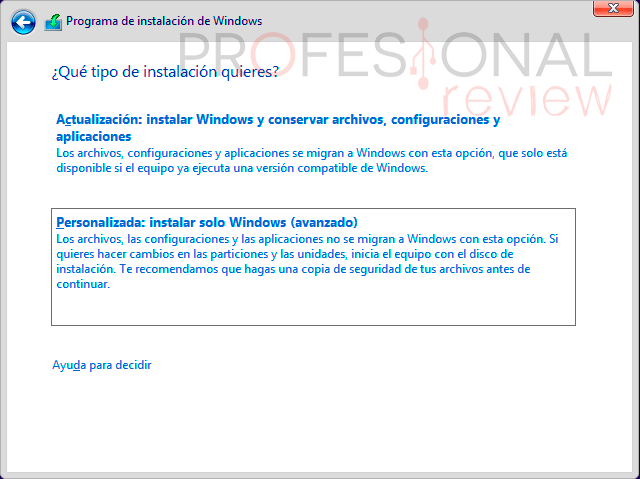
After selecting this option, a partition wizard will open for our hard drive, and the same as before we can do several things:
- (Quick option) Press the button "Erase", which will delete all the existing partitions one by one, leaving only an “unallocated space” that corresponds to the entire hard disk. (This option does not delete the physical data on the hard drive, it will only overwrite it). In this point We can click on next and Windows will start the installation with a single partition visible on the hard drive.
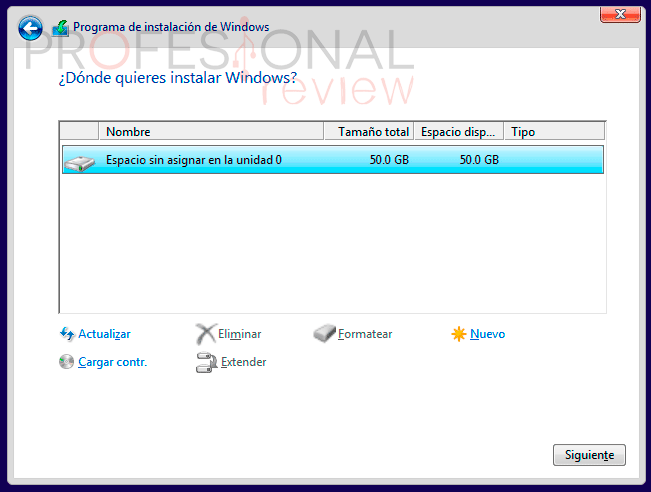
- (Slow option) We can also format each of the partitions that have been created with the button "Format", thus leaving the data hard disk absolutely clean.
After this, we can do the steps in the previous point, or create new partitions of the size we want. We suggest enable a partition to install the system and programs between 100 and 200 GB and another partition to save documents. Windows will create an extra 500MB partition for the exclusive use of the system.
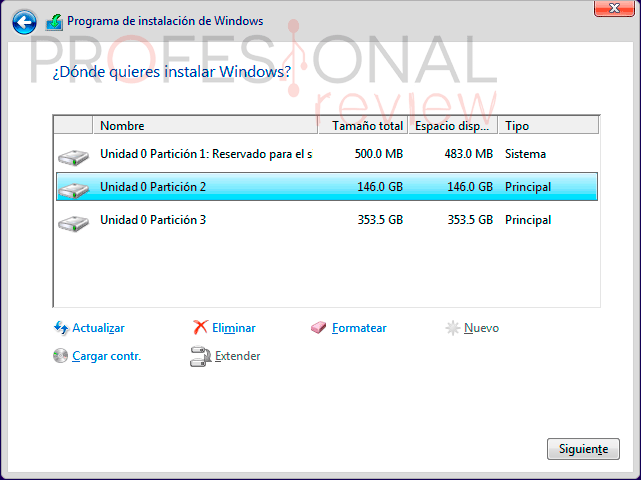
After selecting in which partition we want to host Windows, the installation will begin. Hereinafter no need to touch anything, the PC will restart repeatedly until I show you the system setup wizard, a sign that the installation has finished.
From here on, the Windows setup procedure will be practically the same as that shown in the previous section of Completing the installation.
Format Windows 10 using a USB device
Creating the USB installation drive
In this circumstance what we need is to create a USB installation device, and for this we are going to use again Windows Media Creation Tool.
Following the previous steps in the execution of this tool let's select “Unidad flash USB” instead of "ISO file". We will need to have the USB storage device inserted in the PC, so that the device detects us on the next screen. (in case of having several devices inserted, select the one that best suits us)
The device must have a storage capacity greater than 4 GB
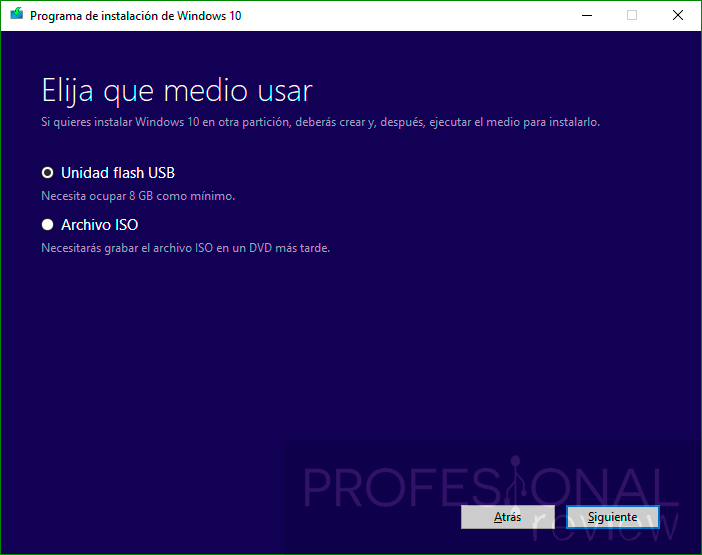
This will start the USB creation procedure with Windows 10. It will be downloaded from Microsoft's website and stored on the USB device.
Boot from USB devices
In this circumstance, as with the DVD, the PC will need to be able to boot from a USB device rather than from the installation of Windows on the hard drive.
We will restart our PC EYE: with the USB device connected, and we will access the BIOS again by pressing the respective key (Del, F2, etc). In this circumstance we will select as the first option "Removable Devices" or a similar option depending on the type of BIOS.
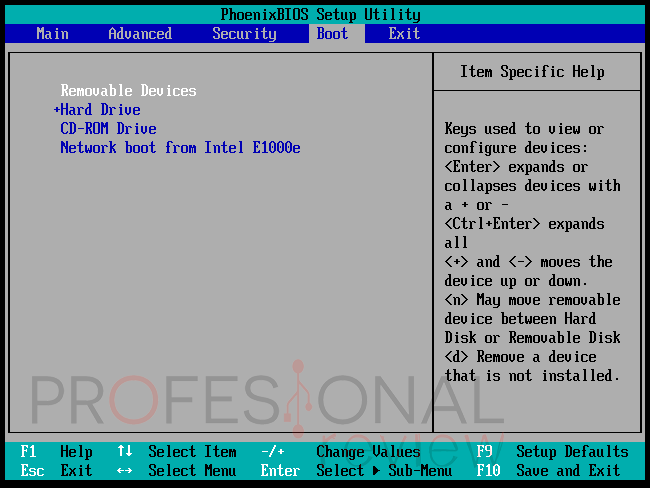
We press F10 to save the changes made and restart the PC. From here on, the process will be equivalent to that of the installation through DVD.
Windows validation
In any method to format Windows 10 product validation will be required during or at the end of the installation. For this, it will be necessary to obtain a Windows 10 license and you still do not have one at your disposal. It is a good way to avoid legal problems and always keep your Windows 10 active and updated.
So that you can find a cheap Windows license we suggest our tutorial
Do you dare to format the PC yourself and install Windows 10 if you don't have it yet? If you have a problem, you just have to leave a comment.

