
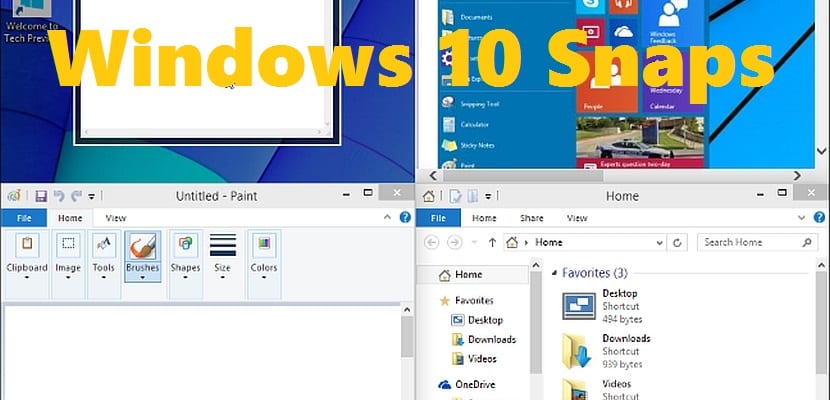


Windows 10 It has tried from the beginning to take care of the small details that its users end up liking. One of them is the classic window mosaic function, or as they are now called within the system, the popping desk. This feature is not new, since was originally introduced in Windows 7 with Aero Snap, but it has been polished throughout the successive versions of the operating system until it reaches a highly developed evolution at this time in Windows 10.
The function of popping originated the experience of multitasking through double windows and it is a feature that is present in both the tablet and desktop versions. Knowing it thoroughly is an important step if we want to get the most out of our work at the desk.
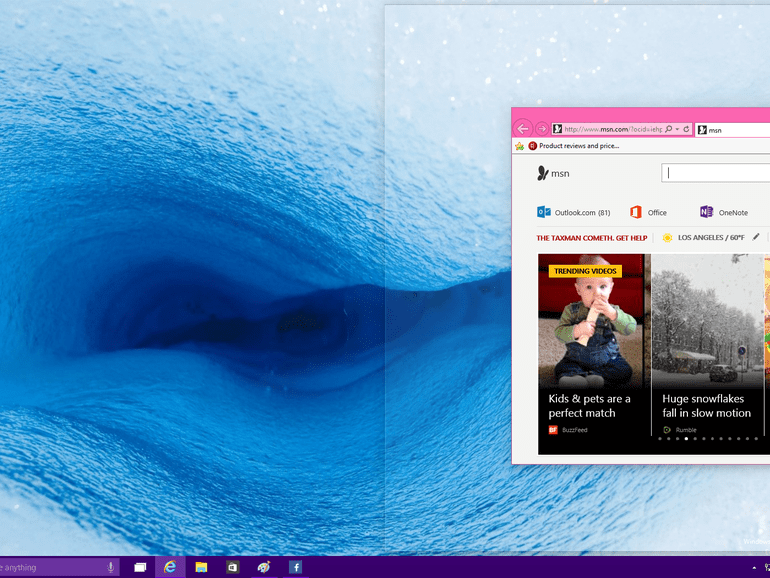
The popping Las ventanas nos posibilitan ajustar las ventanas dentro de nuestra pantalla para poder compartir la distribución de la misma entre varias de un solo vistazo. Hacer un clic en uno de ellos y moverlo a un margen nos posibilita activar esta función, ya be on each side of the screen. Inclusive we can use the top edge or the corners to activate other combinations in quarter-screen layouts.
Keyboard setting functions
We can use the keyboard of our equipment to adjust the windows of our system. Using the key combination Windows + left cursor or Windows + right cursor, we can adjust the windows to either side of the screen. We can also use the other cursors and do break through Windows + cursor up to restore or maximize a window or Windows + cursor down to cause the opposite effect. Once adjusted, we can use the same keys to move it through each of the Hot spots from the screen.

Adjust functions with the wizard
Whether we use the mouse or keyboard to effect window stacking with popping the wizard will try to show us the final result by a line on the screen that will show the settings. As an example, if we move the window to the left we will see that a line appears in the middle of the screen and it will highlight the area where the window will dock. If there are other windows open, the wizard will open a series of thumbnails to position the one we choose in the free zone. For this, we just have to click on the thumbnail we want and it will fit in your area.
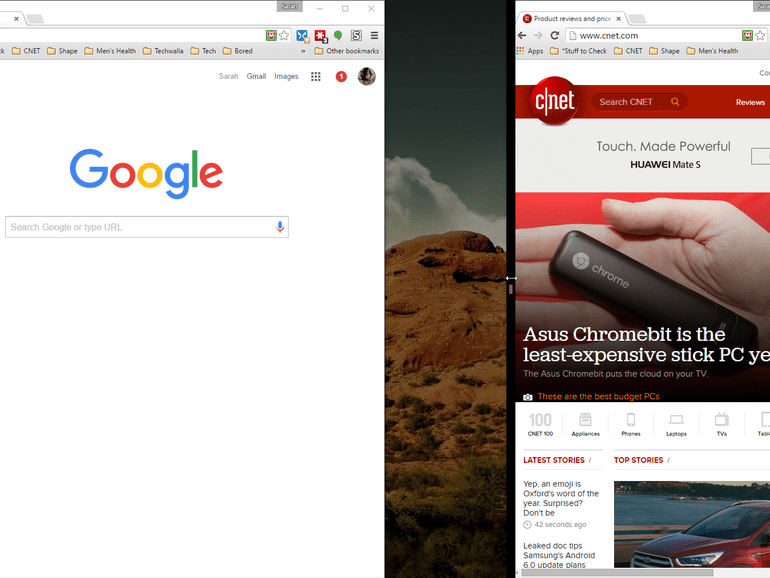

In short, once we have done the break of a window in the middle of the screen, we can resize it if we click with the mouse and drag its dividing line. From this dynamic we will be able to make an absolutely personalized adjustment of the windows depending on our work area. The rest of the screen will be empty, so it is feasible to leave it free if we want to.


