
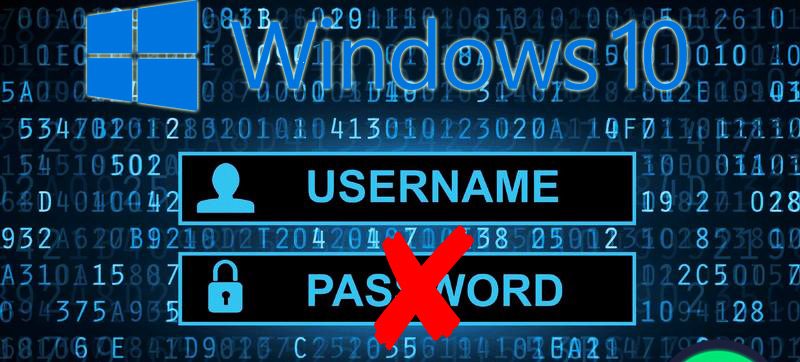
For sure, Windows 10 it is one of the most used operating systems worldwide. Since, it stands out for its high level of customization, maximum fluidity, great use of the virtual cloud technology and for its absolutely modern universal applications.
Apart from that, this renowned operating system also stands out for the security and reliability it provides to users. Thanks to the fact that it manages to minimize the different vulnerabilities that tend to wreak havoc on a computer equipment, providing an experience with total privacy.
However, even when it guarantees a lot of security, the truth is that it is also relevant that W10 users take certain measures to improve this aspect. Reason why, it is important to know what are the different methods to remove the OS password.
Index:
Is it convenient to remove the password to access my operating system?
It is no secret to anyone that, currently, keep any PC protected it is a necessity of all users in the digital environment. Pues, a pesar de que los sistemas operativos implementan diferentes soluciones para disminuir las vulnerabilidades, lo cierto es que las persons they are never sufficiently protected in computer terms.
As a result, it is advisable to use a password to access the operating system, in order to reduce the chances that any malicious third party can access it and carry out untrustworthy actions. Which, as well as impact the operation of the PC, in addition negatively influence the integrity of users.
However, for reasons of convenience and ease, many people choose to delete the access password on their computer in order to save some simple steps when accessing the operating system and starting the experience. Since, this operation consumes a certain time that, for multiple users, it is annoying and unnecessary.
Now, in view of this, many people wonder whether in fact it is appropriate to remove said password from your operating system or not. Therefore, we highlight that, not convenient in terms of security and privacy, because this fact reduces the security of your data and increases the existing vulnerabilities in the environment. But, for other reasons, can be useful to get the most out of each user's experience, according to your needs.
We tell you step by step all the methods to remove the user password from Windows 10 easily and quickly
As we indicated at the beginning of the article, there are many methods or techniques that Windows 10 users can freely implement if they want to remove the user password on their computer.
In this way, if you are one of them, pay attention to the following steps with which it is really easy to remove said password in W10, in an effective way:
No programs

<>
Due to its simplicity, the most used method to suppress the password on the computer when you find yourself working with Windows 10, it's based on go to the Windows settings menu in order to carry it out without having to use additional software.
In this circumstance, the process to be executed is the following:
- First of all, from the OS desktop, go to the lower left corner and click the start button.
- Next, among the alternatives that are located in the left sidebar, find the gear icon and select it in order to open the Windows 10 Settings window.
- Next, you must click on "Accounts", within the menu Setting.
- From the Accounts window, select "Login Options" on the left side.
- Then it's time to click on "Password" through the Manage how you log into the device section.
- Done the above, you must press the "Change" button to enter the current password where applicable, without typing a new password and so on, click on "Finish".
Once you complete this operation, automatically, your Windows 10 password will be removed. Which, you will be able to verify it in the same Password chapter, where they will now indicate the following message: “Your account does not have a password. You must add a password in order to use the other login options. ".
With CMD

If you are looking to follow this method, debes tomar en cuenta que, hace falta tener a la mano el software de instalación from Windows 10.
«UPDATED ✅ Do you intend to remove your user's password in Windows 10? ⭐ ENTER HERE ⭐ and Learn Everything FROM SCRATCH! ⭐ »
Since, the step by step required to remove the password from the OS, it is about:
- To begin, before proceeding to restart the PC, you must introduce the original Windows 10 program to your computer so that the system reads the CD or DVD in question so you can continue.
- Once you enter the device, the software will run and on the screen, you will be able to view the respective window to the Windows Installation Program. There, you only have to select language and press on "Next".
- Next, under Program Solutions, you must access advanced options to be able to select "System symbols". To do so, replace the virtual keyboard with the command console.
- When you log in, it's time to add "C:" to the operating system "X: Sources>" to access the hard drive. If Windows is not in this, you must try a different path.
- Then upon appearing "D:> d:" you must insert "Dir" at the end and thanks to this, you will later view the Windows folder.
- At this point, you continue with
D:> cd Windows / system32and you must press the Enter key (to see D: Windows / system32>). - After that, change the on-screen keyboard to the command console, with the help of the following path:
D: Windows / system32> rename osk.exe.old. - Now, when accessing the console, you must Add "
D: Windows / system32> rename cmd.exe osk.exe”. - To finish, close the operating system and turn off the computer. With this, the password will be deleted and you will have added the command console in the function "On-screen keyboard".
With the command netplwiz

Since it is the original program that offers Microsoft to remove the password in Windows 10, the command Netplwiz it is considered the best technique to perform this operation, thanks to the safety and reliability guaranteed by being from the company itself. In addition to this, it is also recommended because it generates a remarkable speed for this.
Without further ado, we tell you what to do to remove the W10 password with netplwiz:
- Turn on your PC and log in to Windows 10 by entering the passwordIn other words, as you do regularly.
- Then, by means of Cut, you must search for the command "netplwiz" (without using quotes).
- When you get the results, you must choose the first option in the list (or the best match). This, says the following: "netplwiz - Run command".
- Next, in the User Accounts box, it is time to uncheck the option that says "Users must enter their name and password to use the equipment".
- Once you do the above, in order to apply this change, enter the password you used to open the operating system, both in the Password and Confirm fields, to click OK again.
- By last, you must restart Windows 10 to save the changes made.
Therefore, when you log in again in the operating system, you will have the option to see that you have removed the access password and it is no longer necessary to write it as before.
From USB

Generally, this method is used when the user has escaped the Windows 10 passkey. Which, simply, you need a W10 boot media o bien, un USB desde el cual be factible instalar este sistema operativo.
Thanks to this, you should not use a third-party program and here, we show you how:
- Start by create a bootable or install USB with the official Windows 10 ISO que, además es conocido como USB bootable. Esto, con tan solo descargar la imagen ISO del SO en el portal Web oficial del mismo y con la ayuda de un programa para elaborar un pendrive de arranque.
- After getting the bootable USB, proceed to connect it to the computer you intend to access without entering the required password.
- Following, change boot alternatives, so that the PC can do it from the connected USB memory, instead of the hard disk of the equipment. For this, restart the same.
- Then, throughout the beginning, when you can see the logo of the machine manufacturer, press the F2, F8 or F12 key to access the BIOS.
- After that, with the keyboard arrows, scroll through the alternatives and between them, go to the one that says "Boot". Well, it is the respective one at the start of your team.
- Now, you must press the Enter key and thus, you will enter the Configuration. In it, you must look for the option "Hard Drives Devices".
- In the list that is ordered according to the boot priority, you will be able to find the USB memory that is connected to your computer and, with the arrows, you must choose it to press Enter. That way, you will change the order of preferences.
- Once you see that the USB memory option is located in the first place, it is time to save changes and exit BIOS. So, when the PC restarts, the boot will be carried out from the USB memory.
Therefore, every time your PC starts up, will do it from the connected bootable USB device automatically. Which will show a window on the screen in blue that is similar to the W10 installation.
With hirens boot

Simply, Hiren's BootCD refers to an ISO image of a collection of utilities dedicated to Windows 10 PE x64 that is compatible with UEFI systems and only needs 2GB of RAM to run. Being this, a fast and ideal alternative to be able to log in to W10 when you have trouble doing it because you forgot the password. Now, to put this solution into practice, you need to make use of an extra program known as "Rufus" which makes it easy to create a bootable USB.
Next, we show you everything you need to do:
- Download and install Rufus to run it. Then plug a USB device into your computer and enter it.
- Next, go to the path where you downloaded the ISO image of Hirens Boot PE.
- Later, choose the "Open" button and sets the following parameters: In "Partition scheme" place "MBR" and in "System or destination" you must choose "BIOS or (UEFI-CSM)".
- Then, if you intend, write a tag name (optionally). For thus, click on "Start" and on "Accept".
- Once you start the bootable USB media creation procedure with Hirens Boot PE, just wait for it to end.
- Followed by this, access the BIOS of the computer where you intend to log in and from the Boot tab, proceed to click on "Removable-Devices".
- Done the above, restart the computer and when you turn it on, the system will start with Hirens Boot PE environment which is similar to Windows.
- From the desktop, click on the "Utilities" folder and within it, seek and select the option "Security".
- Now open the cape "Passwords" and there, run the utility "NT Password Edit". Inside it, press the button "Open".
- Now, choose your Windows user and in it, click on "Unlock". To later click on said user again, choose the option "Change Password" and leave blank the boxes that request the new password.
- Then, click on "Okay" and click on "Save changes". To restart the computer and be able to access in the original Windows 10 no access password.
If you have any questions, leave them in the comments, we will answer you as soon as possible, at the same time it will surely be of great help to more members of the community. Thanks! 😉


