
 es un protocolo que permite determinar una conexión segura entre el servidor y el cliente, que no puede ser interceptada por personas no autorizadas. En resumidas cuentas, es la versión segura de el http (Hyper Text Transfer Protocol) Cómo funciona Una conexión HTTP estándar en Internet puede ser fácilmente secuestrada por partes no autorizadas. El propósito de una conexión HTTPS es evitar esto: encriptar<span class="glossaryai-more-link"> <a href="https://rmarketingdigital.com/en/wiki/https/" data-wpel-link="internal">más</a></span></span></span></span></span>://rmarketingdigital.com/wp-content/uploads/2021/04/windows-10-logo-830x400-2972775.jpg)
<noscriptNoScript es un complemento del navegador para Mozilla Firefox, que impide que se cargue en las páginas web contenido como JavaScript, Flash o iFrames. Su objetivo es incrementar la seguridad durante la navegación y quitar la promoción comercial más molesta al cargar sitios web. El términoNoScript tiene un significado distinto en la programación HTML. Cuando JavaScript está desactivado, la etiqueta <noscript> o </noscript> asegura que el usuario pueda ver el plus>

One of the functions that has lost importance over time has been screen protectors. Very useful in the past, when using CRT monitors that were exposed to the use of too static screens, Today with technologies such as LCD or LED they are more of an energy expense than an aid in our teams.
Anyway, screensavers present a certain nostalgia to some users as a tool of the past, since they were very present in each and every operating system. With the arrival of Windows 10, this feature has been largely hidden within the system and relegated to the system's home screen, which displays notifications from the computer. With this tutorial we will learn to find the menu and configure any of the screensavers included in Windows 10.
With the arrival of Windows 10, the screensaver function seems to have been wiped from the system. Nothing else, has been relegated to a small, hard-to-find menu within the Control Panel. While they may be more of a distraction or hobby today than a truly useful feature within the team, they represent a linchpin of an era where monitors were ruled not by flat screens but by oversized CRT monitors.
Even though in Windows 8 / 8.1 the screensaver can be configured from the Personalization, inside of Control Panel, in Windows 10 Microsoft decided to provide us a new access to customize the system sleep screen, even though it might be something less intuitive find. A search within the corresponding menu would seem to indicate that this function has been removed from the system, since the shortcut for Personalization it continues with the same options as previous editions of this operating system.
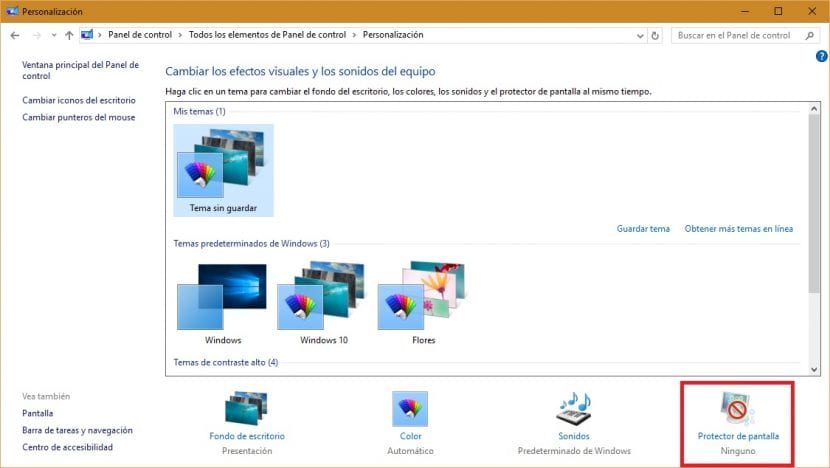

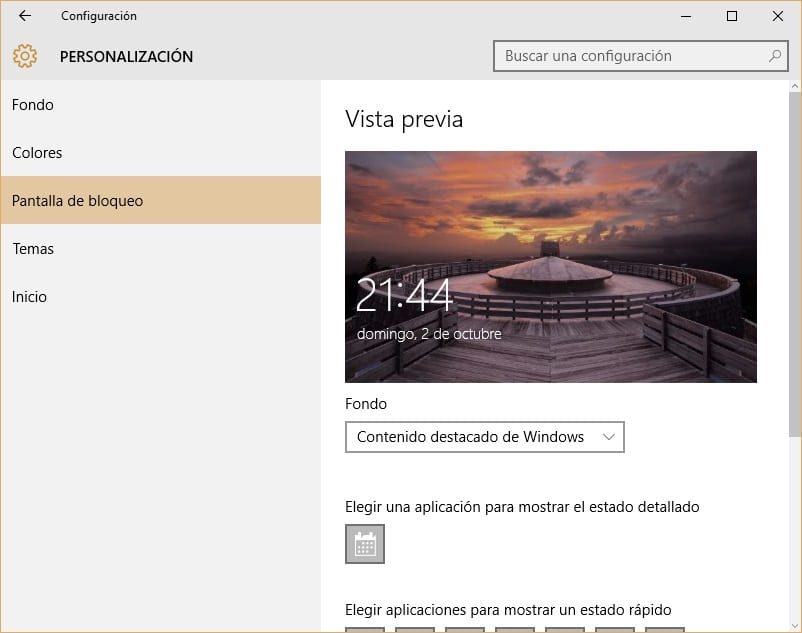
Now, on the other hand, with Windows 10, we can access it from the new menu Settings> Personalization to a new section where to configure the alternatives of the computer's sleep screen.
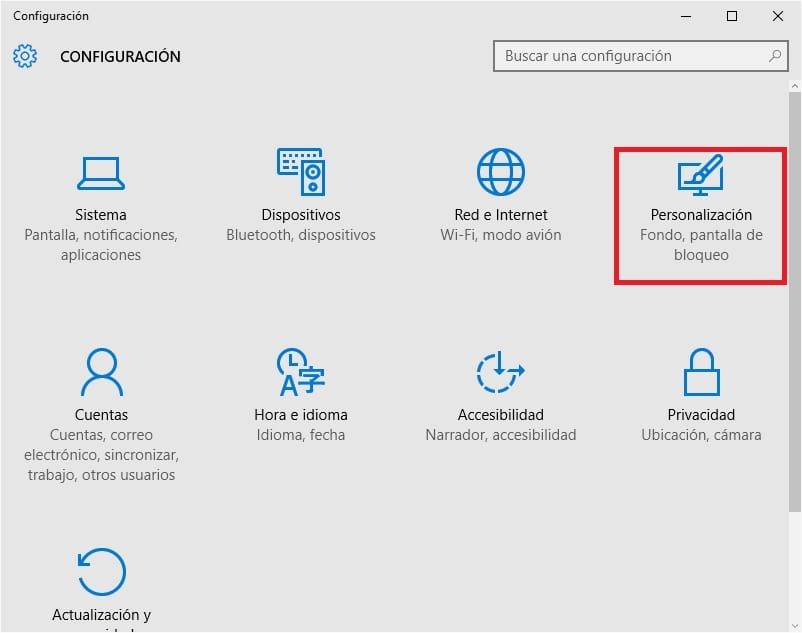

The next menu to review is Themes> Settings of topics, to select within its different sections what background image we intend to visualize what system items will show their notifications or what dead times must be applied to activate this function.
(*10*)

As you can see, there are several options that we can configure within this menu, all of them very intuitive and easy to apply, thanks to a preview screen that will help us select the most appropriate functions for our tastes and needs.

If, on the other hand, you access the Classic screensaver settings menu, as shown in the next picture, you can check that little has changed compared to previous versions of this same section. The protectors available are the same as those introduced since Windows 7 and have little to clarify for any Windows user.
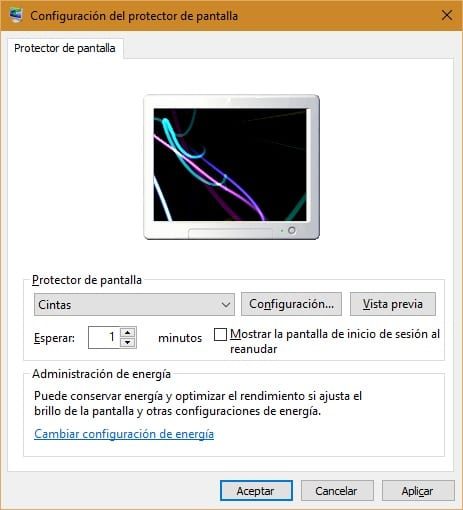

With this tutorial, we hope we have shown you the two ways that exist in Windows 10 to configure the screensaver, either in classic screen or in sleep.