
![]()
<>
![]()
Managing computer storage in Windows 10 isn't always easy. It is essential to have enough space to be able to store all the programs and files that we want. Even when sometimes this is not feasible, and we resort to programs that help us remove those files that we do not need. But the reality is that we do not need any program for this.
Options like CCleaner are popular with Windows 10 users. But the operating system itself has a method that allows us to manage storage easily. This is the storage sensor. We explain how it is activated and what it is for.
The storage sensor comes natively in Windows 10. It is a sensor that helps us manage the storage space we have on our PC in a very efficient way. What it will do is periodically search the computer and remove files that we do not need. Mostly they tend to be temporary files, which only take up space.
(*10*)
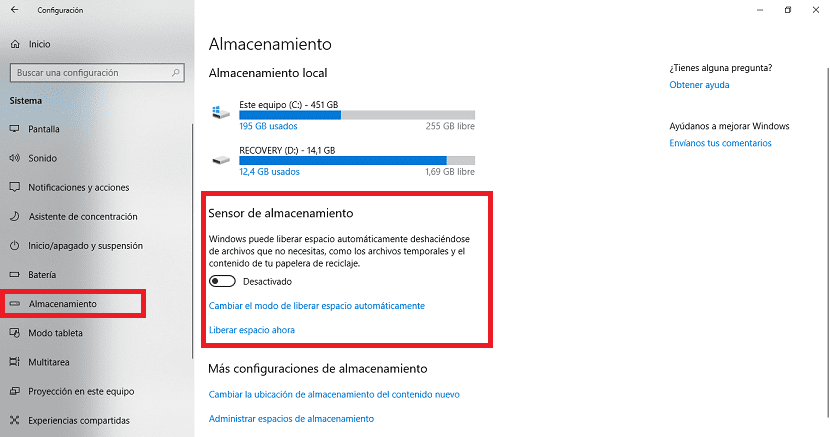
To activate it, we have to open the Windows 10 configuration. Once opened we must go to the system chapter, which is the first in the list. Next, we have to look at the column that appears on the left side.
There, one of the alternatives that appears in the list is storage. We click on it, and then the alternatives that refer to the storage of the PC appear on the screen. Among them the aforementioned sensor. By default, it is disabled.
All we will do is activate the switch that comes out under it. From this dynamic, the Windows 10 storage sensor has already been activated. Therefore, it will periodically erase those files that we do not need on our computer. A very simple trick.


