RECOMMENDED: Click here to fix Windows errors and get the most out of your system performance
When users try to run a Java application, for example: Minecraft, some of them get a dialog box: “Java binary (TM) Platform SE has stopped working. Something went wrong. of the program.” This message is accompanied when the application stops responding. Clicking “Close Program” closes the application and closes the application window.
In several cases, this may be due to a graphic driver issue, which causes the Java application to crash on your Windows computer.
Update your video card driver

To fix this issue, check the video card driver installed on your system and update it accordingly.
Updating the graphics card driver will resolve the issue on the most vulnerable systems as follows:
- Cierre todas las sesiones de conferencias Web activas o las ventanas de grabación de Blackboard Collaborate.
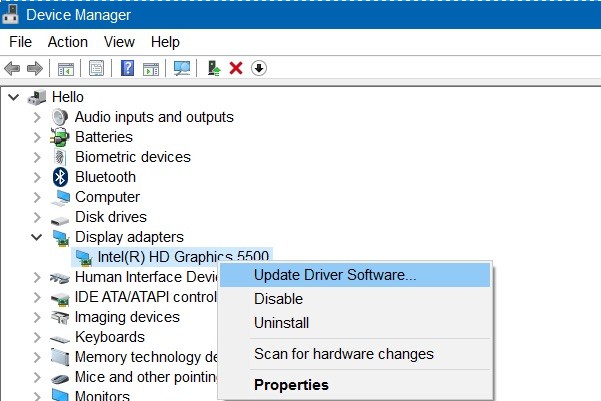
- Right-click the Start button in Windows.
- Select Device Manager.
- Click Chevron next to Show Adapters to expand the list of adapters.
- Haga clic con el botón derecho en el adaptador Intel (R) HD Graphics 520 y seleccione “Actualizar software del controlador.
- Select “Automatically check for updates” drivers»Option.
Windows will search for, update, and install the updated driver automatically. Please note that this procedure may take several minutes, depending on your system. When the procedure is completed, Windows will display a notification on the screen.
- Make sure the driver is updated by repeating steps 2 to 4 above. Afterwards, right-click on Intel (R) HD Graphics 520 and select Properties.
- Select the “Driver” tab at the top of the Properties window.
- Asegúrese de que la versión del controlador especificada be superior a 21.20.16.4534.
- En el momento de redactar este post, el número de versión actualizado era 21.20.16.4550.
- In this phase, users should start a web sharing session and test the application sharing functionality.
Problem with MPLAB 3.51
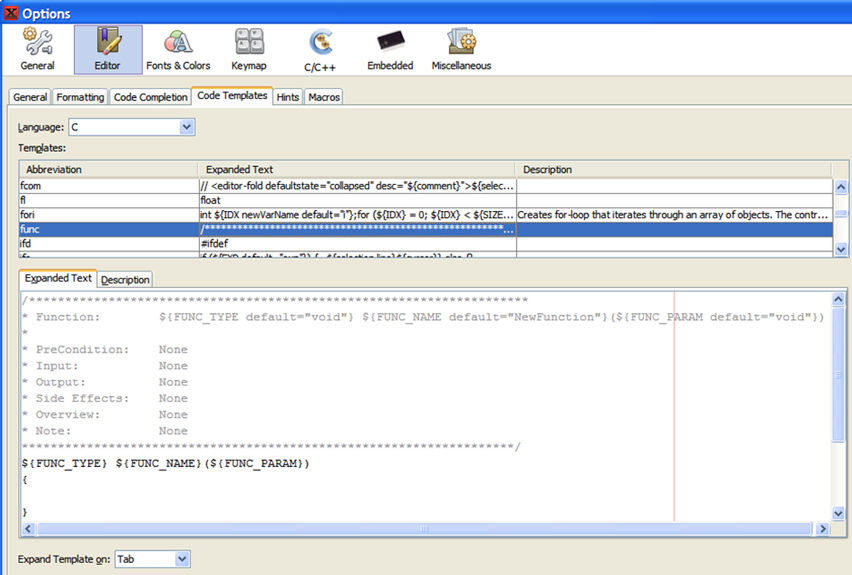
If reinstalling Java or updating/releasing the driver does not resolve the issue, it is possible that the application you are trying to run uses MPLAB 3.51. Please note that MPLAB 3.51 comes with Java 8. Therefore, you must configure it manually. You will need to do the following:
Changes to Mplab_ide.conf in C: Program Files (x86) Microchip MPLABX v3.51 mplab_ide etc. Д.
The default settings are -J-Xmx1024m and -J-Xmx4079.
default_options = “-J-Dcrowning.stream.verbosity = very quiet -J-Xss2m -J-Xms256m -J-Xmx1024m -J-Dapple.awt.graphics.UseQuartz = true -J-XX: + CMSClassUnloadingEnabled -J-Dapt. limit.expanded.params = 1000 -J-Dplugin.manager.check.interval = EVERY_STARTUP -J-Dsun.java2d.noddraw = true -J-Dorg.netbeans.modules.extbrowser.UseDesktopBrowse = true “.
jdkhome = «C: Program Files (x86) Microchip MPLABX v3.51 sys java jre1.8.0_91 «.
jdkhome = «C: Program Files (x86) Microchip MPLABX v3.51 sys java jre1.8.0_121 «.
In conclusion, copy Java to jre1.8.0_121 folder.
From C: Program Files (x86) Microchip MPLABX v3.51 sys java
IN C: Program Files (x86) Microchip MPLABX v3.51 sys java
Note that the upgrade also works without copying the Java directory. The mplab_ide.conf file points to the Java 8… 121 directory in the default Java location and not to the MPLAB Java installation site. The first method, which is to copy the Java directory, is the best solution because it allows you to update Java on your computer without changing the mplab_ide.conf file.
Configure environment variables
- Open the Windows Search Service program with the Windows + S key combination.
- Enter information about the system in the search field.
- Click System to open the registration window just below.
- Click Advanced System Settings to open the System Properties window.
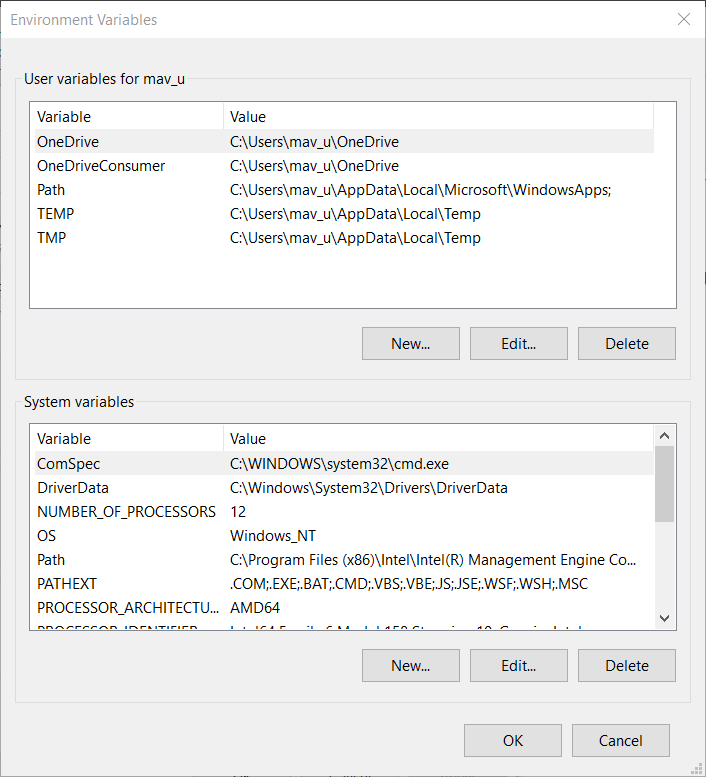
- On the Advanced tab of the System Properties window, click Environment Variables.
- Then click on the “Create” button in the “System Variables” section to open the window below.
- Enter _JAVA_OPTIONS in the “Variable Name” text box.
- Enter -Xmx256M in the variable value field.
- Click OK to close the New System Variable window.
- Click OK in the environment variables window.
RECOMMENDED: Click here to fix Windows errors and get the most out of your system performance