
Fix desktop icons keep reorganizing in Windows 10: If you are facing this issue where desktop icons are rearranged or arranged automatically after each reboot or even when updating, then you are in the right place, as we are going to discuss how to fix this issue today. Well, in most cases, if Windows keeps moving the desktop icons automatically and rearranging them, the auto-arrange feature is most likely ON. But if even after disabling this option, the desktop icons are organized automatically, then you are in big trouble, since something is seriously wrong with your computer.
![]()
No hay ninguna razón en particular por la que se cause este problema, pero en la mayoría de los casos, parece ser provocado por controladores desactualizados, corruptos o incompatibles, tarjeta de video defectuosa o un controlador desactualizado para la tarjeta de video, perfil de Username corrupto, cache de iconos corruptos, etc. Por tanto, el problema depende de la configuración y el entorno del sistema del usuario. Desde luego, sin renunciar tiempo, veamos cómo solucionar verdaderamente los iconos del escritorio y seguir reorganizándose en Windows 10 con los pasos de solución de problemas que se enumeran a continuación.
Fix desktop icons keep reorganizing in Windows 10
Make sure that create a restore point in case something goes wrong.
Method 1: disable the grid alignment icons and auto-arrange icons
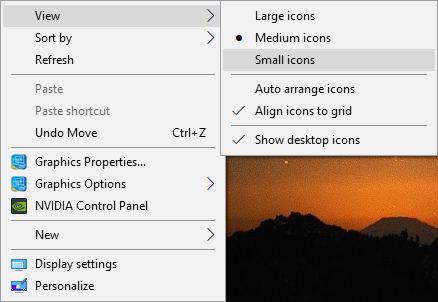
1.Right-click on an empty space on the desktop, then select View and uncheck Align icons to grid.
![]()
2.If not, then from the View option uncheck auto organize icons and everything will work out.
3. Restart your computer and see if the previous settings are retained or if they are changing automatically.
Method 2: change the icon view
1.Right-click on the desktop and then select Sight and change the view from your chosen view at this time to any other. As an example, if "Medium" is selected at this time, click "Small".
2.Now select again the same view that was previously selected, as an example, we would select Medium again.
3.Then select «Small”In the View option and you will immediately see the changes on the desktop icon.
![]()
After this, the icon will not be rearranged automatically.
Method 3: remove the icon cache
1. Make sure to save all your work and close all applications or folder windows present.
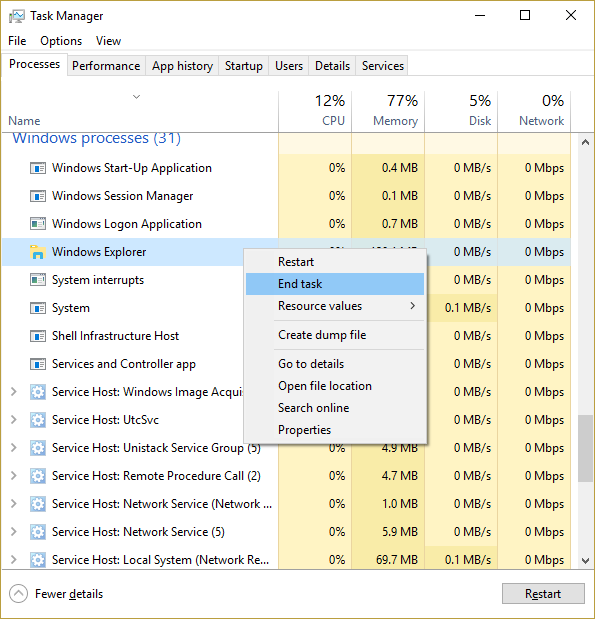
2.Press Ctrl + Shift + Esc at the same time to open Task Manager.
3.Right click on Windows Explorer and select Final task.
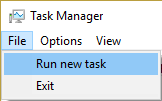
4.Click Proceedings then click on Run a new task.
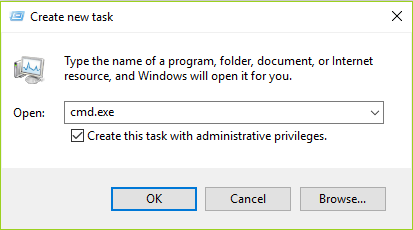
5.Type cmd.exe in the value field and click OK.
6.Now type the following command in cmd and hit Enter after each one:
CD / d% user profile% Local AppData
DEL IconCache.db / a
EXIT
![]()
7. After all the commands have run successfully, close the command prompt.
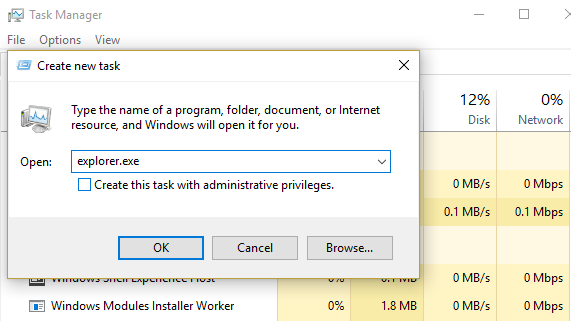
8.Now reopen Task Manager if you have closed and then click File> Run New Task.
9. Type explorer.exe and click OK. This would restart your Windows Explorer and Fix desktop icons keep reorganizing in Windows 10.
Method 4: uncheck Allow themes to change desktop icons
1.Right-click on an empty area on the desktop and then select Personalize.

2.In the menu on the left, select Topics and then click Desktop icon settings.
![]()
3. Now, in the Desktop Icon Settings window, uncheck the «Allow themes to change desktop icons" on the bottom.
![]()
4. Click Apply followed by OK.
5.Restart your computer to save the changes and see if you can Repair desktop icons keep rearranging automatically.
Method 5: uninstall the graphics card drivers
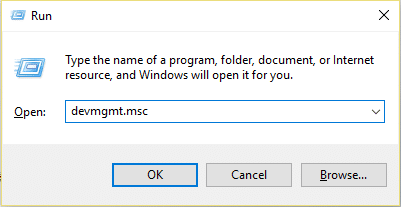
1.Press Windows Key + R, then type devmgmt.msc and press Enter to open Device Manager.
2. Expand Display Adapters and then right-click on your NVIDIA graphics card and select Uninstall
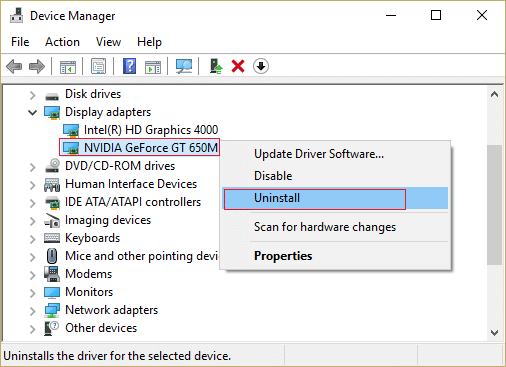
2.If you are prompted for confirmation, select Yes.
3.Press Windows Key + X and then select Control Panel.
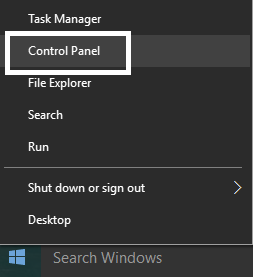
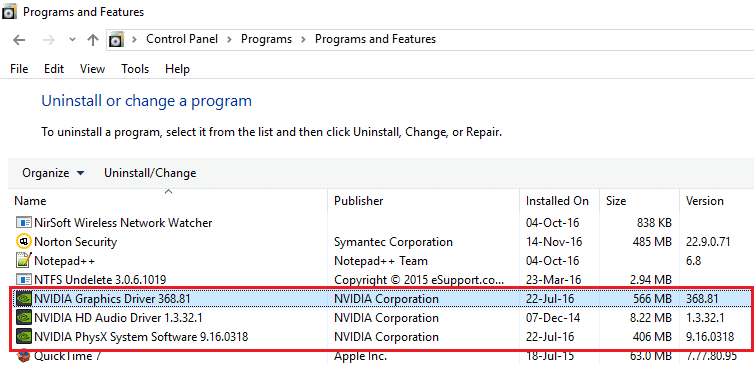
4.From the Control Panel, click Uninstall a program.
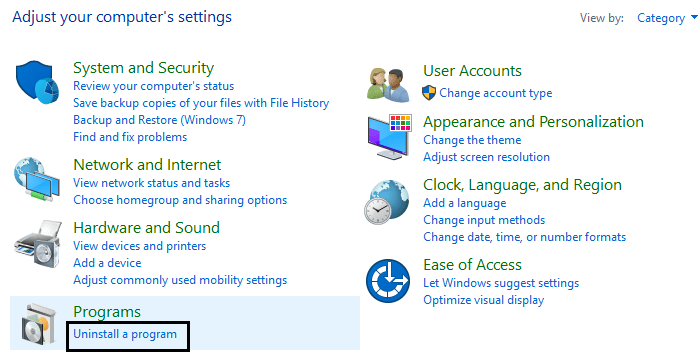
5.Next, uninstall everything related to Nvidia.
6.Restart your system to store the changes and again download the configuration desde el portal Web del fabricante.
5.Once you are sure you have removed everything, try installing the drivers again. The setup should work without a hitch and you can Fix desktop icon rearrangement issue in Windows 10.
Method 6: Update display drivers (graphics card)
1.Press Windows Key + R and then type “devmgmt.msc”(No quotes) and hit enter to open Device Manager.
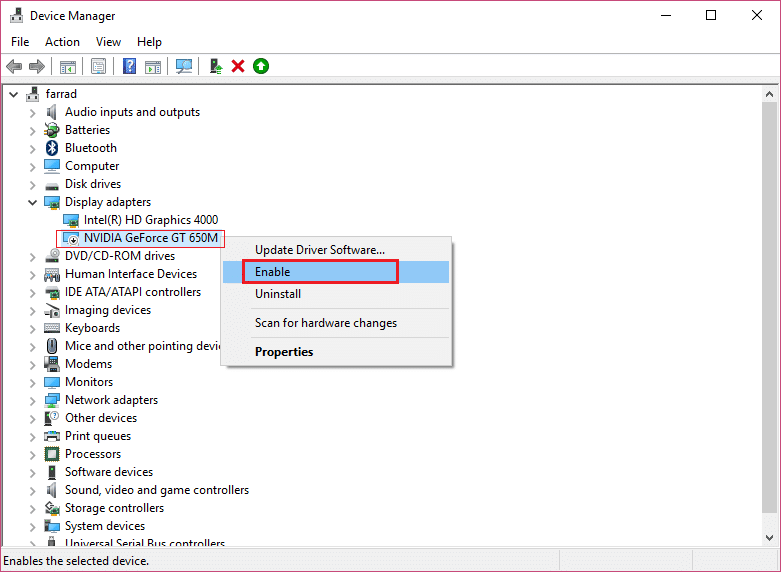
2.Then expand Display adapters and right click on your Nvidia graphics card and select Let.
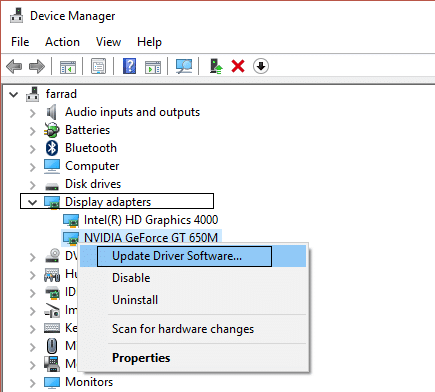
3. Once you have done this again, right click on your graphics card and select «Update the software del controlador.«
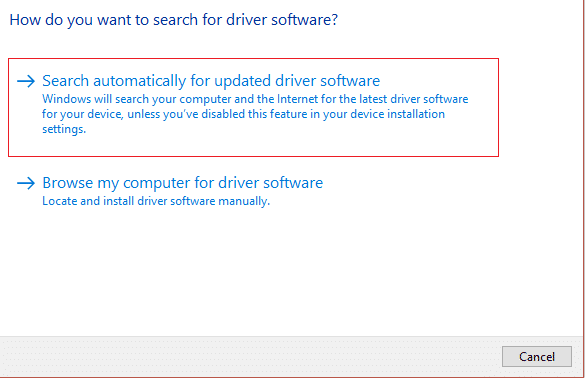
4.Select «Automatically search for updated driver softwareAnd let the procedure finish.
5.If the above step was able to solve your problem, then fine, if not, please continue.
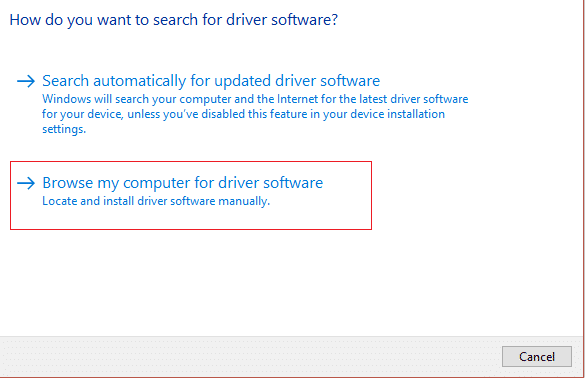
6.Select «Update the driver software"But this time on the next screen select"Search my computer for driver software.«
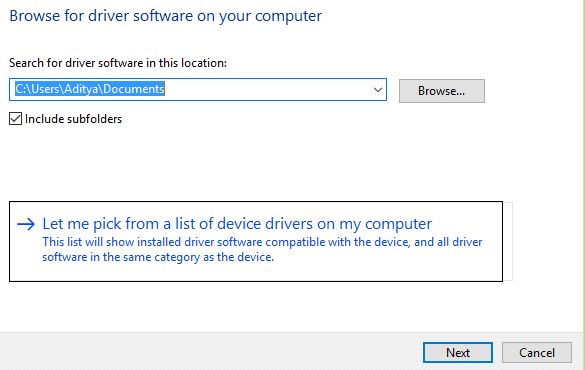
7.Now select «Let me select from a list of device drivers on my computer. «
8.To finish, select the compatible driver from the list for your Nvidia graphics card and click Next.
9. Allow the above procedure to finish and restart your computer to store the changes. After updating the graphics card, you may be able to Fix desktop icons keep reorganizing in Windows 10.
Method 7: update DirectX
To solve this problem, you should always try to update your DirectX. The best way to make sure you have the latest version installed is to download DirectX Runtime web installer from the official Microsoft web portal.
Method 8: run SFC and DISM commands
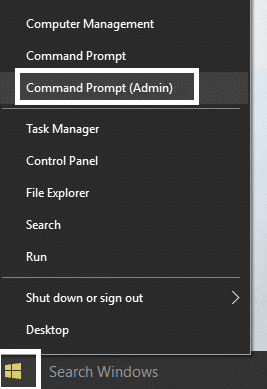
1.Press Windows Key + X and then click Command prompt (administrator).
2.Now type the following in the cmd and hit enter:
Sfc / scannow sfc / scannow / offbootdir = c: / offwindir = c: windows (If above fails then try this one)
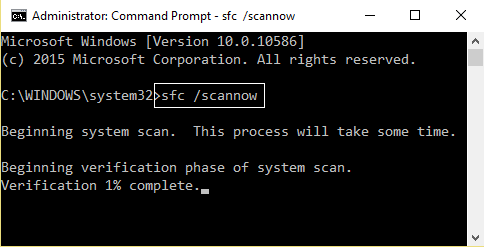
3.Wait for the above procedure to finish and, once done, restart your computer.
4.Then type the following command in cmd and hit enter after each one:
a) Dism / Online / Cleanup-Image / CheckHealth b) Dism / Online / Cleanup-Image / ScanHealth c) Dism / Online / Cleanup-Image / RestoreHealth

5. Let the DISM command run and wait for it to finish.
6. If the above command doesn't work, try the following:
Dism / Image: C: offline / Cleanup-Image / RestoreHealth / Source: c: testmountwindows Dism / Online / Cleanup-Image / RestoreHealth / Source: c: testmountwindows / LimitAccess
Note: Replace C: RepairSource Windows with the location of your repair source (Windows Install or Recovery Disc).
7. Restart your computer to save the changes.
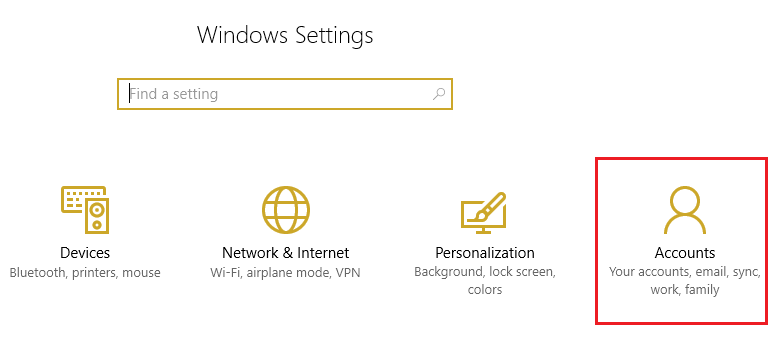
Method 9: create a new user account
1.Press Windows Key + I to open Settings and then click Accounts.
2.Click Pestaña Familia y otras persons in the left menu and click Add someone else to this computer under Other People.
(*10*)
3.Click I do not have the login information for this person on the bottom.

4.Select Add a user without a Microsoft account on the bottom.

5.Now enter the username and password for the new account and click Next.
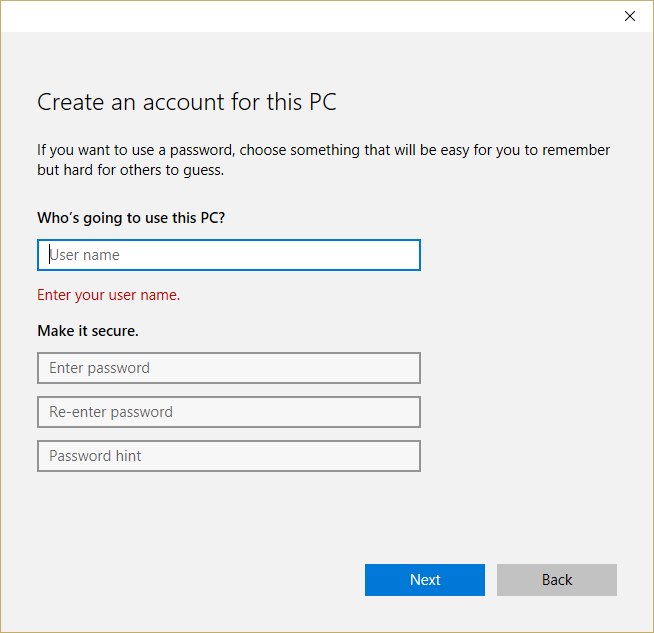
Log in to this new user account and see if you can solve the problem with the icons. If you have the ability to Fix the issue of desktop icons that keep reordering automatically in this new user account the problem was with your old user account which might have been corrupted. Of course, transfer your files to this account and delete the old account to complete the transition to this new account.
Method 10: for users using ESET NOD32
1.Press Windows Key + R and then type regedit and click Get Access to open Registry Editor.
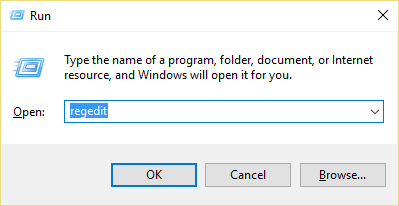
2.Go to the next registry key:
HKEY_CLASSES_ROOTWow6432NodeCLSID {42aedc87-2188-41fd-b9a3-0c966feabec1} InProcServer32 HKEY_CLASSES_ROOTCLSID {42aedc87-2188-41fd-b9a3-0c966feaerbec1} InProcServer32
3.Double-click (Default) and replace «% SystemRoot% SysWow64 shell32.dll" with "% SystemRoot% system32 windows.storage.dll"In both destinations.
4. Restart your computer to save the changes.
Method 11: Repair Install Windows 10
Este método es el último recurso debido a que si nada funciona, ciertamente este método reparará todos los problemas de su ordenador. Repair Install solo usa una actualización en el lugar para reparar problemas con el sistema sin quitar los datos del usuario presentes en el sistema. Por lo tanto siga este post para ver Cómo reparar la instalación de Windows 10 fácilmente.
.
That's all you have with success Fix desktop icons keep reorganizing in Windows 10 But if you still have any questions regarding this guide, feel free to ask in the comments section.


