

Activar o desactivar la tecla de bloqueo de mayúsculas en Windows 10: Casi todos hemos activado accidentalmente el bloqueo de mayúsculas mientras escribimos un artículo de palabra o enviamos algunos trabajos a la Web y esto se vuelve molesto ya que tenemos que volver a escribir todo el artículo. De todos modos, este tutorial describe una forma sencilla de deshabilitar el bloqueo de mayúsculas hasta que lo habilites de nuevo y con este método, la tecla física del teclado no funcionará. No te preocupes, aún podrás mantener pulsada la tecla Shift y pulsar una letra para escribir en mayúsculas si Bloqueo de mayúsculas está desactivado. Así que sin perder tiempo veamos cómo activar o desactivar la tecla de bloqueo de mayúsculas en Windows 10 con la ayuda de la guía que aparece a continuación.

Enable or disable Caps Lock key in Windows 10
Make sure to create a restore point in case something goes wrong.
Method 1: Enable or disable Caps Lock key in registry editor
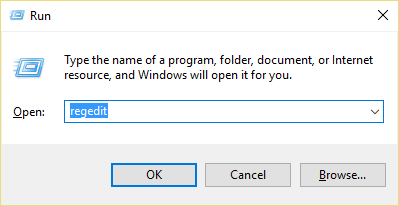
1.Press Windows key + R, then type regedit and press Enter.
2.Navigate to the following registry key:
HKEY_LOCAL_MACHINEN-SYSTEMN-Keyboard Layout Current Control
3. Right-click on Keyboard Layout and select New> Binary Value.
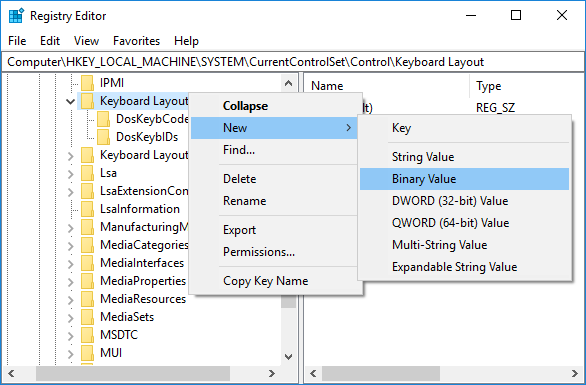
4.Name this newly created key Scancode Map.
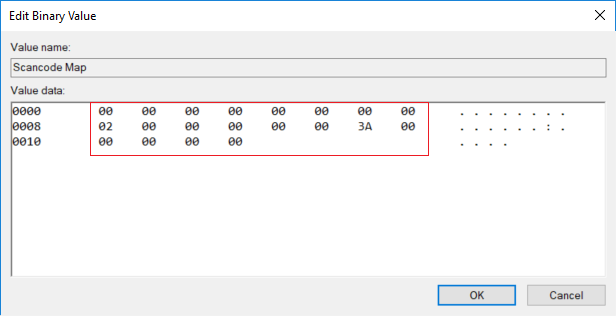
5.Double click on Scancode Map and to disable Caps Lock change its value to:
00.00.00.00.00.00.00.00.00.02.00.00.00.00.00.3a, 00.00.00.00.00.00.00
Note: If you find it very difficult to follow, just open the file from notepad and copy and paste the text below:
Windows Registry Editor Version 5.00 [HKEY_LOCAL_MACHINENSYSTEMN-Current Keyboard Layout Control] "Scancode Map" = hex: 00,00,00,00,00,00,00,00,00,00.00, 00.00.3a, 00.00.00.00.00.00.00.00.00
Press Ctrl + S to open the Save As dialog box, then under the name type disable_caps.reg (the .reg extension is very important) and then in the Save As drop down select "All Files" and click Save. Now right click on the file you just created and select Merge.

6.If you want to turn Caps Lock back on, right-click the Scancode Map key and select Delete.
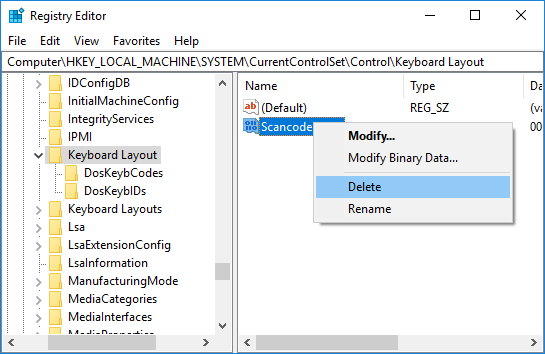
7.Close Registry Editor and restart your PC to save the changes.
Method 2: Enable or disable Caps Lock key using KeyTweak
Download and install the KeyTweak program which is a free utility that allows you to disable Caps Lock on your keyboard and re-enable it. This program is not limited to the Caps Lock function, as any key on your keyboard can be disabled, enabled or reset according to your preferences.
Note: Make sure to skip any adware installation during installation.
1.Run the program after installing it.
2.Select the Caps Lock key on the keyboard diagram. To make sure you've selected the correct key, look at which key it is currently assigned to and it should say Caps Lock.
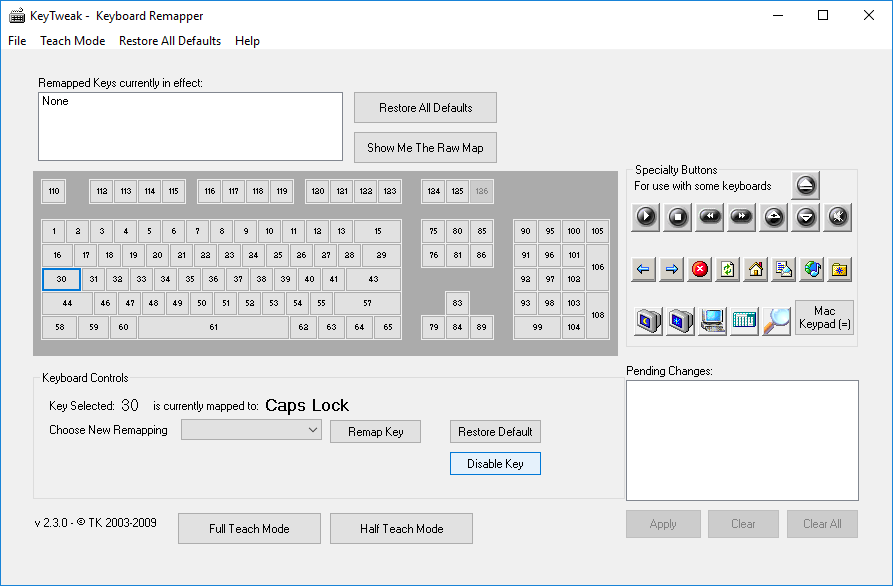
3.Now next to it there will be a button that says "Disable Key", you just have to click on it to deactivate the caps lock.
4.Restart your PC to save the changes.
5.If you want to enable Caps Lock again, select the key and click the "Enable Key" button.
You have already learned how to activate or deactivate the Caps Lock key in Windows 10, but if you still have any questions about this guide, do not hesitate to check it in the comments section.


