
![Reparar Ethernet que no funciona en Windows 10 [SOLVED]](https://rmarketingdigital.com/wp-content/uploads/2021/04/Fix-Ethernet-Not-Working-in-Windows-10-SOLVED-2530146.png)
Fix Ethernet not working in Windows 10: Si no puede ingresar a Internet mediante un cable Ethernet, debe resolver este problema. Si abre el Centro de redes y recursos compartidos, verá que la ordenador no reconoce la conexión Ethernet. Pero si intenta ingresar a Internet cuando está conectado mediante WiFi con la misma conexión, podrá navegar por Internet, lo que significa que el problema puede deberse a una configuración de red incorrecta, controladores de red corruptos u obsoletos, cable Ethernet dañado o defectuoso, problemas de hardware, etc.

Users who prefer Ethernet over WiFi are having a disaster due to this problem as they cannot access the Internet using an Ethernet cable. If you have upgraded or upgraded to Windows 10, Ethernet not working in Windows 10 is a common roadblock. Luckily, there are many solutions available that seem to solve this problem. So without giving up time, let's check out How to Fix Not Working Ethernet in Windows 10 with the help of the troubleshooting tutorial listed below.
Fix Ethernet not working in Windows 10 [SOLVED]
Make sure to create a restore point in case something goes wrong.
Before proceeding, be sure to follow these basic steps to resolve the issue:
- Try connecting the Ethernet cable to another port on the router, as the particular port is likely bad.
- Try using another cable, as the cable itself could be damaged.
- Try unplugging the cable and then reconnecting it.
- Try connecting ethernet to another computer to see if the problem is resolved. If ethernet works on the other computer, then your computer hardware may be damaged and you should send it in for repair.
Method 1: run the network troubleshooter
1.Press Windows Key + I to open Settings and then click Update and security.
![]()
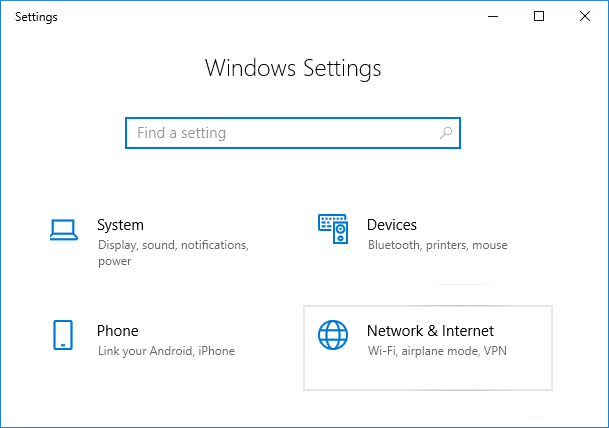
2.In the menu on the left, select Solve problems.
3.In Troubleshoot, click Internet connections and then click Run the troubleshooter.
4. Follow further instructions on the screen to run the troubleshooter.
5. Restart your computer to save the changes.
Method 2: reset the Ethernet adapter
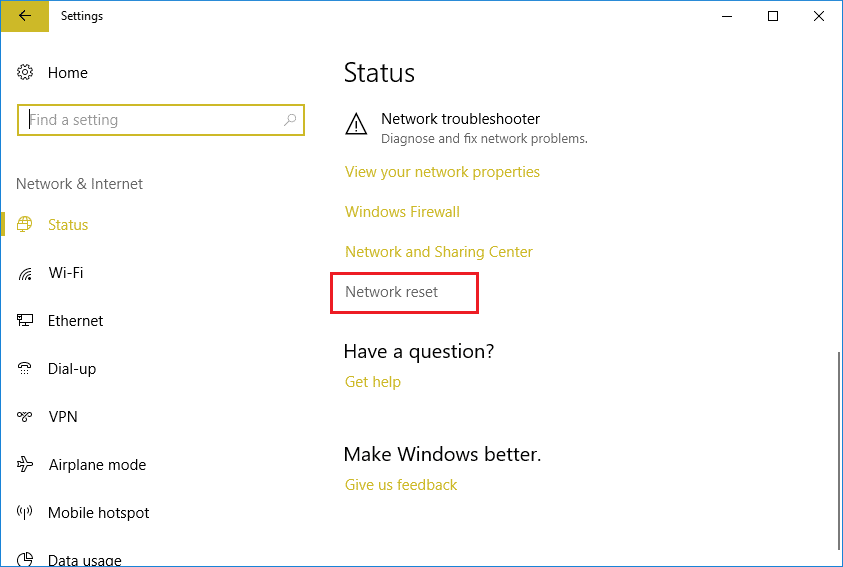
1.Press Windows Key + I to open Settings then click on the Network and Internet icon.
2.In the menu on the left, click Condition.
3.Now low Condition scroll down and click Network reset link.
4. On the network reset page, click «Restart now" button.
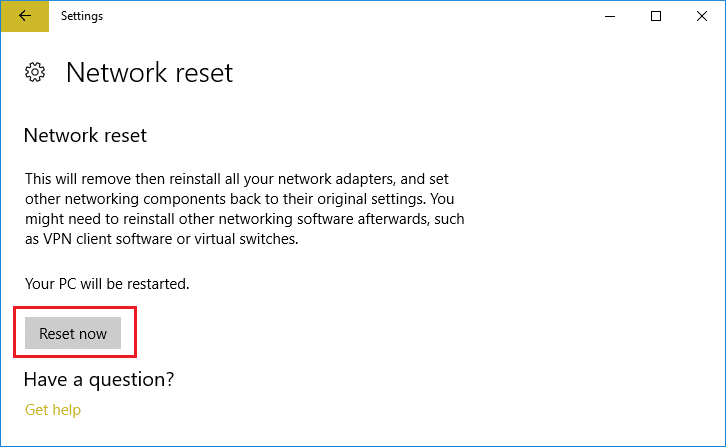
5. Now try again to connect Ethernet to the computer and see if you can Fix Ethernet not working in Windows 10.
Method 3: enable the Ethernet device and update the drivers
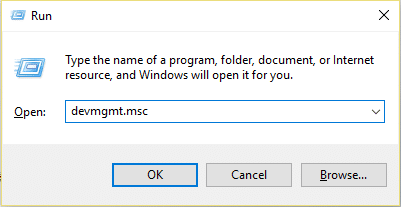
1.Press Windows Key + R, and then type devmgmt.msc and press Enter to open Device administrator.
2. Expand Network Adapters, then right click on your ethernet device and select Let.
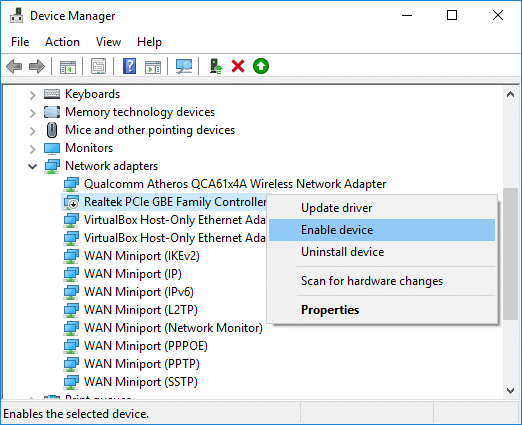
Note: If it is already enabled, skip this step.
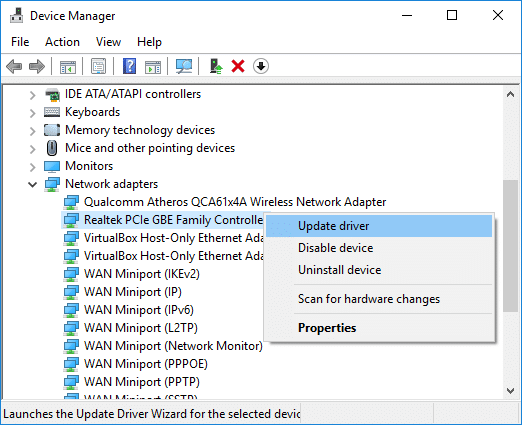
3.Right click on it again and select Update driver.
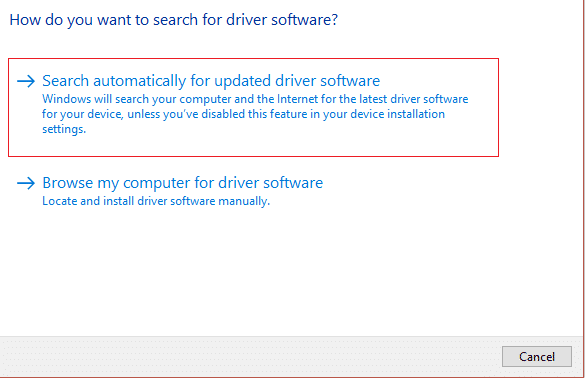
4.Select «Busque de forma automática el software del controlador actualizadoAnd let it automatically install the new available drivers.
5.Restart your computer to store the changes and check again if you can Fix Ethernet Not Working in Windows 10 or not.
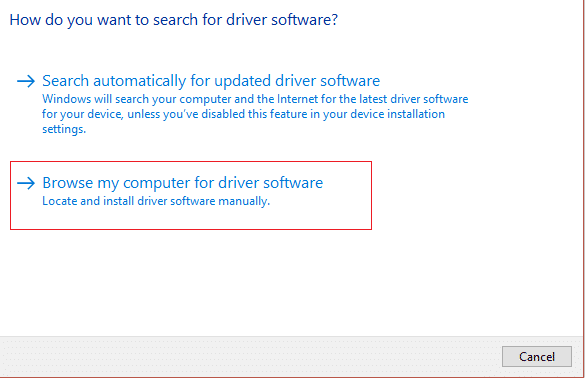
6.If not, go to Device Manager again, right-click on your Ethernet device and select Update driver.
7.This time select «Search my computer for driver software.«
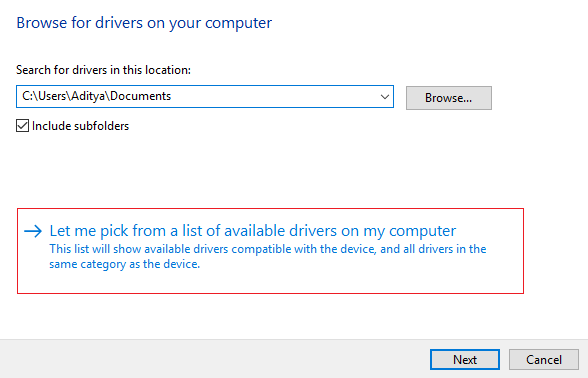
8.Now click on «Let me select from a list of drivers available on my computer.«
9.Select the latest Realtek PCIe FE Family Controller Driver and click Next.
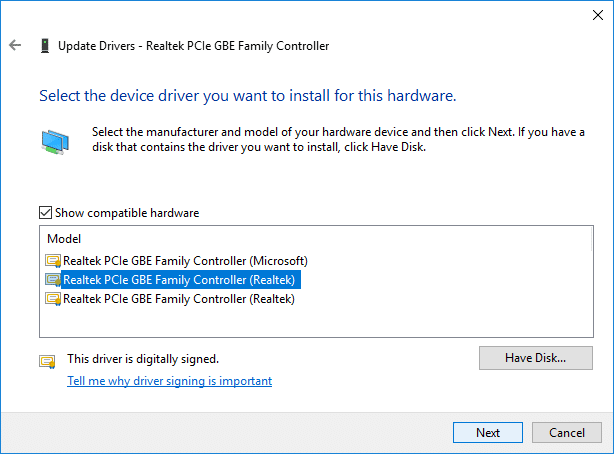
10. Let it install the new drivers and restart your computer.
Method 4: enable the Ethernet connection
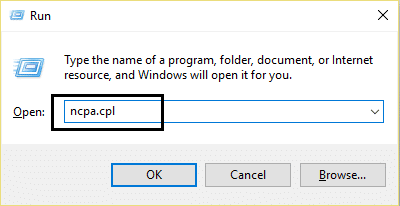
1.Press Windows Key + R, and then type ncpa.cpl and press Enter to open Network connections.
2.Right-click on the Ethernet connection and select Allow.
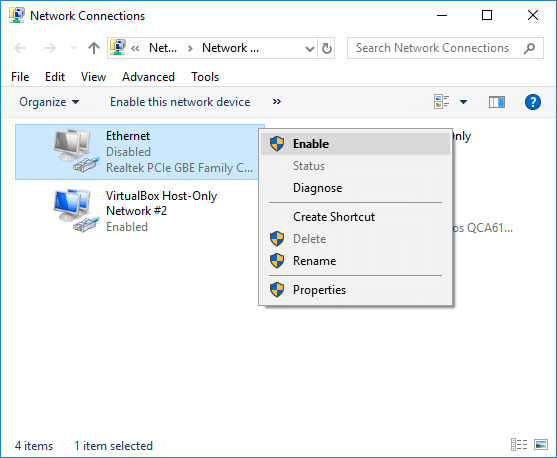
3.This will enable the Ethernet connection, please try again connect to the Ethernet network.
Method 5: Temporarily disable antivirus or firewall
1.Right click on the Antivirus program icon in the systray and select Deactivate.
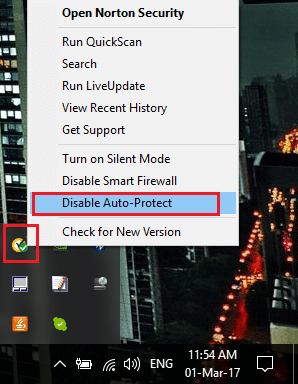
2.Then select the time period for which The antivirus will remain disabled.
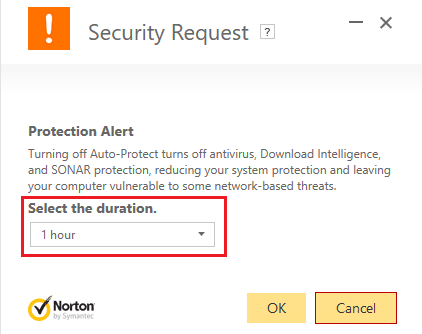
Note: Choose the shortest amount of time feasible, for example 15 minutes or 30 minutes.
3.Once done, try again to enter the internet and check if the error is resolved or not.
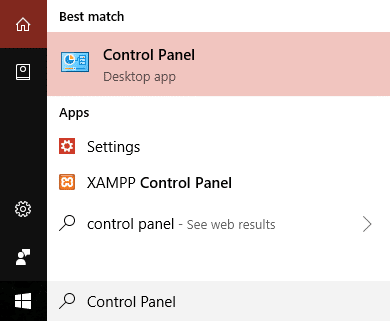
4.Type control in Windows search, and then click Control Panel in the search result.
5.Then click System and security and then click Firewall Windows.
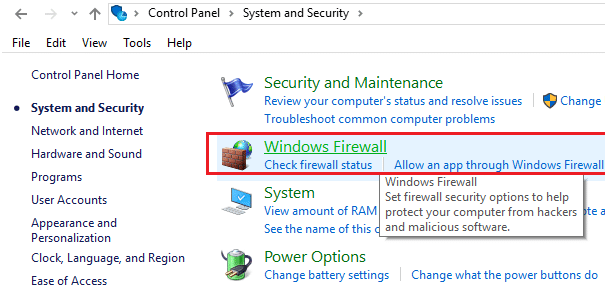
6.Now, from the left window pane, click Enable or disable Windows Firewall.
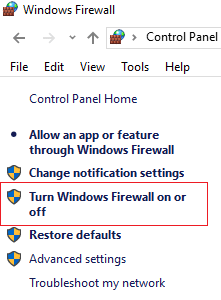
7.Select Disable Windows Firewall and restart your computer. Try to go online again and see if you can Fix Ethernet not working in Windows 10.
If the above method doesn't work, make sure to follow precisely the same steps to turn your Firewall back on.
Método 6: Vaciar DNS y restablecer TCP / IP
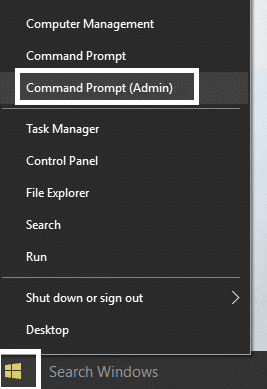
1.Right-click the Windows button and select «Command prompt (administrator).«
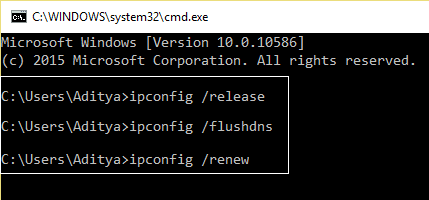
2.Now type the following command and hit Enter after each one:
ipconfig / release
ipconfig / flushdns
ipconfig / renew
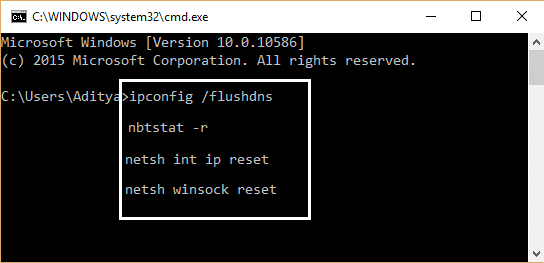
3. Reopen the administrator command prompt, type the following and press Enter after each:
ipconfig / flushdns
nbtstat –r
netsh int ip reset
netsh winsock reset netsh winsock reset catalog netsh int ipv4 reset reset.log
4. Reboot to apply the changes. Clean DNS seems Fix Ethernet not working in Windows 10.
Method 7: change power management settings for Ethernet
1.Press Windows Key + R, and then type devmgmt.msc and press Enter to open Device administrator.
2. Expand network adapters, then right-click your Ethernet device and select Properties.
(*10*)
3.Switch to Power management tab under the Ethernet Properties window.
4.Next, uncheck «Allow the computer to turn off this device to save power".
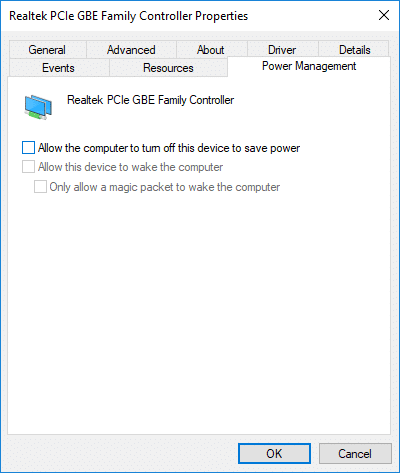
5. Click Apply followed by OK.
6. Restart your computer to save the changes.
Método 8: usar DNS de Google
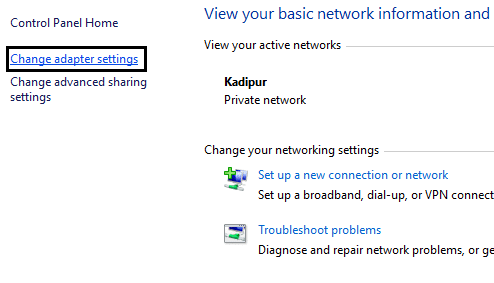
1.Open Control Panel and click Network and Internet.

2.Then click Networks and shares then click Change adapter settings.
3.Select your Wi-Fi, then double-click it and select Properties.
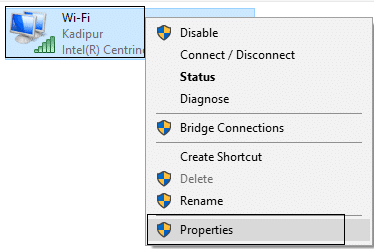
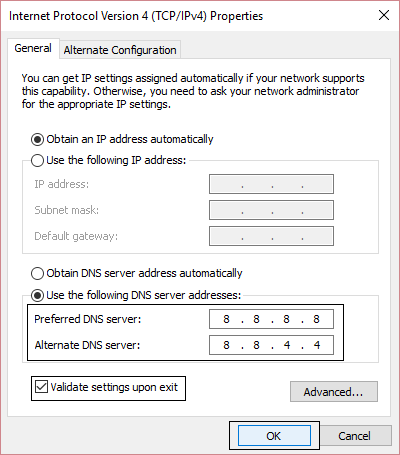
4.Now select Internet Protocol version 4 (TCP / IPv4) and click Properties.

5. Check the box «Utilice las siguientes direcciones de server DNSAnd write the following:
Preferred DNS server: 8.8.8.8
Alternate DNS server: 8.8.4.4
6.Close everything and it is feasible that you can Fix Ethernet not working in Windows 10.
Recommended:
That's all you have with success Fix Ethernet Not Working in Windows 10 but if you still have any questions regarding this tutorial, feel free to ask in the comments section.


