


<>

Sin ninguna duda, hoy Spotify es uno de los servicios de transmisión de música más populares en la actualidad. Es por ello que es muy probable que lo uses en tu computadora con Windows para disfrutar de tu música favorita. Ahora bien, el caso es que incluye algunas opciones bastante curiosas que en algunos casos pueden resultar de utilidad para los usuarios.
One of them is the opportunity to enable the known crossfade between songsIn other words, a small fade effect that causes that when a song is ending the last seconds the volume is progressively lowered so that the next one begins and rises little by little until the previous one ends. You don't need to install anything to enable it, and we'll show you how you can do it..
Then you can enable the effect crossfade without installing anything on Spotify
As we already mentioned, in this case it is feasible enable the fading effect for the transition, better known as crossfade, among the songs in the Spotify play queue. This helps give it a bit more pizzazz and can be useful on many occasions.
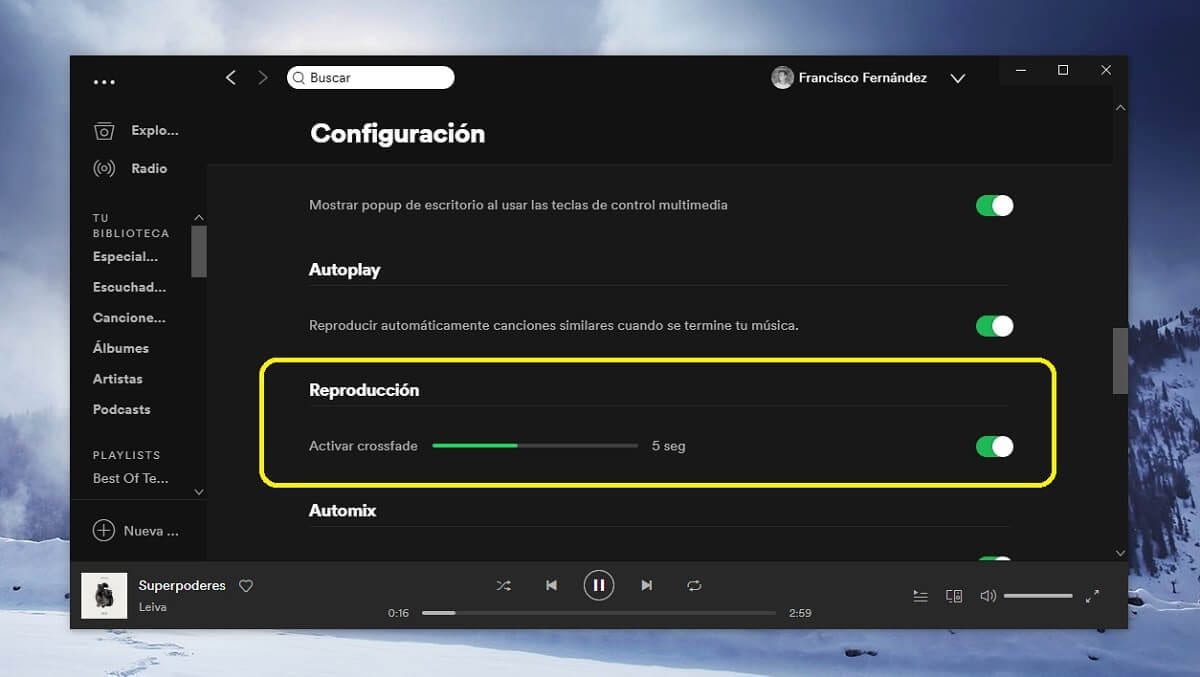
To activate it in Spotify for Windows, you must click on it top settings button of the application, available in the arrow that will appear next to the name of your profile. Within the settings menu, you need to scroll down until you see a button called "Show advanced configuration"and click on it. Lastly, swipe until you get to the playback settings, as this is where you can find the 'Enable crossfade' slider.

![]()
Post relacionado:
Here's How You Can Prevent Spotify From Opening When You Turn On Your Computer
As soon as you have enabled that option, you will have the crossfade enabled on your device. At the same time, in addition You have the opportunity if you need to modify the duration once activated, in case the default setting of 5 seconds doesn't convince you. In the same way, remember that the option is available by device and not by account.


