
How to change the drive icon in Windows 10: Windows 10 is the latest offering from Microsoft and comes packed with features where you can customize your settings to improve the look and performance of your PC. But there is a certain limitation with what you can and cannot change regarding the look and feel of Windows, one of those exceptions being the Windows drive icons. Windows 10 doesn't offer an option for a drive icon, but again, this limitation can be bypassed with a simple registry tweak.
![]()
De forma predeterminada, Windows utiliza un icono para la unidad según el tipo de unidad que be, como unidad de red, unidad USB, etc. pero en este artículo, vamos a ver cómo cambiar el icono de la unidad de una unidad en particular o establecer un nuevo icono para todas las unidades de disco. La única excepción aquí es que si se activa el BitLocker para la unidad, el icono de BitLocker siempre se mostrará para la unidad sin importar qué. De todos modos, sin perder tiempo, veamos cómo cambiar el icono de la unidad en Windows 10 con la ayuda del tutorial que aparece a continuación.
How to change the drive icon in Windows 10
Make sure to create a restore point in case something goes wrong.
Method 1: How to change the drive icon in Windows 10 using the autorun.inf file
Note: This method will not work for a mapped network drive, but the other two methods will. In case you need to change the drive icon for drive C: (where Windows is installed), you will need to log in as administrator. Also, for the C: drive you need to perform the steps below on the desktop and then move the autorun.inf file to the drive.
1.Press Windows Key + E to open File Explorer and then in the left pane of the window select This PC.
2.Double-click the drive for which you want to change the icon.
![]()
3.Now right-click on an empty area within the drive above and select New> Text Document.
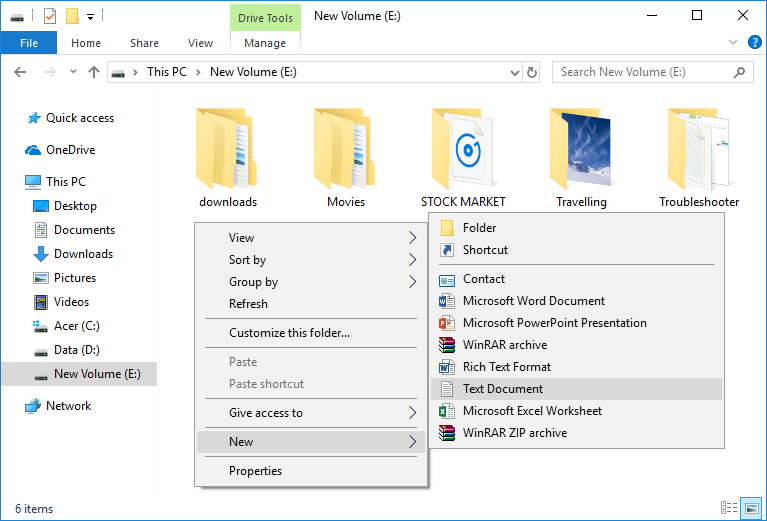
Nota: Si ya tienes el archivo autorun.inf en el root directory, puedes saltarte los pasos 3 y 4.
4. Name this text document autorun.inf (the .inf extension is very important).
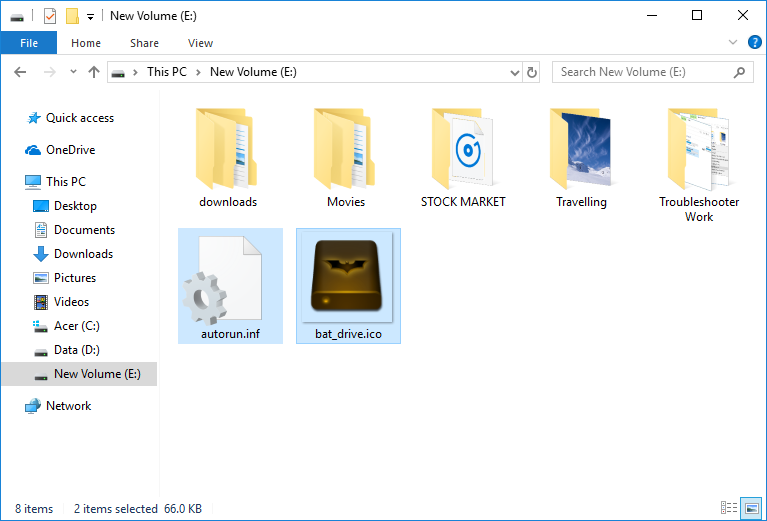
5.Copy the .ico file that you want to use as the icon for the particular disk and paste it into the root of this disk.
6.Now double click on the autorun.inf file and change the text to the following:
[autorun] icon = »filename.ico»
![]()
Note: Replace filename.ico with the actual name of the file like disk.ico etc.
7.Once finished, press Ctrl + S to save the file or save it manually from Notepad menu by going to File> Save.
8.Restart your PC to save the changes and once the PC has restarted you will see that the drive icon has changed according to your preferences.
![]()
Method 2: How to change the drive icon in Windows 10 for all users in the registry editor
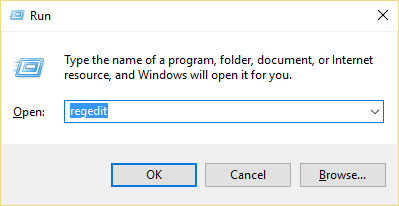
1.Press Windows key + R, then type regedit and press Enter to open Registry Editor.
2.Navigate to the following registry key:
HKEY_LOCAL_MACHINE_SOFTWAREN-MicrosoftWindowsNCurrent VersionN-ExplorerN-DriveIcons
![]()
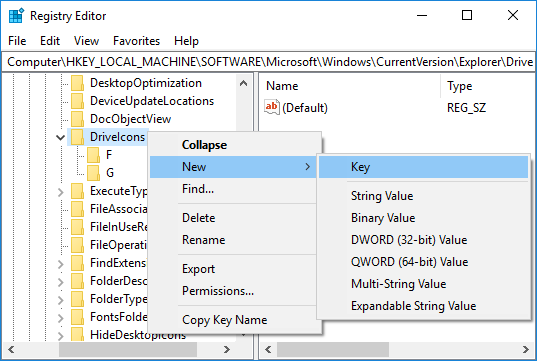
Note: If you don't have the DriveIcons key, right-click in the Explorer and select New> Key and name this key DriveIcons.
![]()
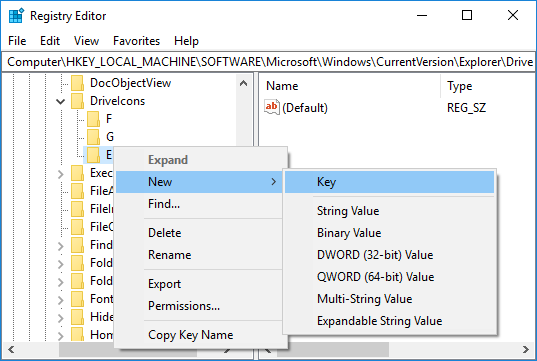
3.Right-click the DriveIcons key and select New> Key and then type the drive letter in uppercase (example - E) for the drive for which you want to change the drive icon and press Enter .
Note: If you already have the above subkey (example - E) then skip step 3, instead go to step 4 directly.
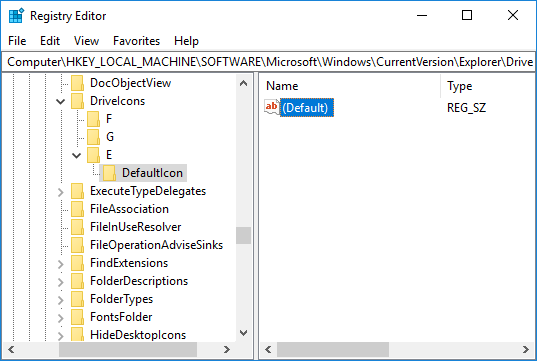
4.Again, right click on the above subkey (example - E) and then click New> Key and name this key DefaultIcon and then hit Enter (Intro).
5.Now make sure to select Defaulticon and then in the right pane of the window double-click the (Default) string.
6.Under the value data field write the full path of the icon file inside the quotation marks and click OK.
![]()
Note: Make sure the icon file is the following location: C: | Users Public Photos Now, for example, you have an icon file called drive.ico in the above location, so the value you are going to write would be: "C: ³³³³³$0027Users³³³$0027Public³³³$0027³$0027Drive.ico³$0027" and click OK.
![]()
7.Once finished, close everything and restart your PC.
This is How to change the drive icon in Windows 10, but in the future, if you need to undo the previous changes, just right-click the subkey (example - E) that you created under the DriveIcons key and then select Delete.
![]()
Method 3: Change All Drive Icons (Default Drive Icon) in Windows 10
1.Press Windows key + R, then type regedit and press Enter to open Registry Editor.
2.Navigate to the following registry key:
HKEY_LOCAL_MACHINE_SOFTWAREN-Microsoft_WindowsNCurrent VersionN-ExplorerN- Cover Icons
Note: If you can't archive Shell Icons, right-click in Explorer, select New> Key, name this key Shell Icons, and hit Enter.
![]()
3.Right-click the shell icons and select New> Expandable String Value. 4.Name this new string 8 and hit Enter.
![]()
![]()
4.Double click on the above string and change its value as follows:
D: ï¿? Iconsï¿? Drive.ico
Note: Replace the above value with the actual location of your icon file.
![]()
5.Close Registry Editor and restart your PC to save the changes.
That's all you've learned about the Drive Change Icon in Windows 10, but if you still have any questions about this tutorial, feel free to ask them in the comment section.


