Create fillable forms in Microsoft Word: Do you intend to create a fillable form without any coding work? Most people find that Adobe and PDF documents create these types of forms. Actually, these formats are very popular. At the same time, there are several online functions available to create forms. Have you ever thought about creating a fillable form in Microsoft word? Yes, Microsoft Word is a powerful tool that not only can be used to write text, but it can also easily create fillable forms. Here we will reveal one of the most hidden secret functions of MS word that we can use to create fillable forms.
Create fillable forms in Microsoft Word
Step 1 - You need to enable the development tab
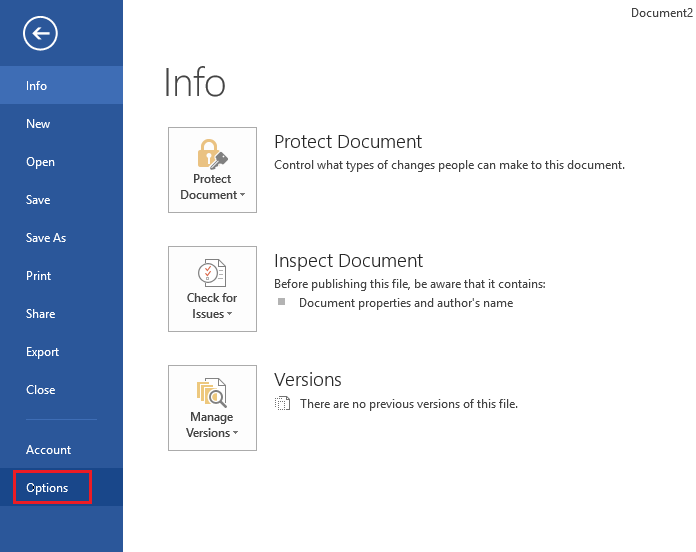
To start creating a fillable form in Word, you must first enable the developer function. When you open the Microsoft Word file, you must go to the File section> Options> Customize the ribbon> Mark the Developer option in the right column to activate the Developer option and click OK to finish.
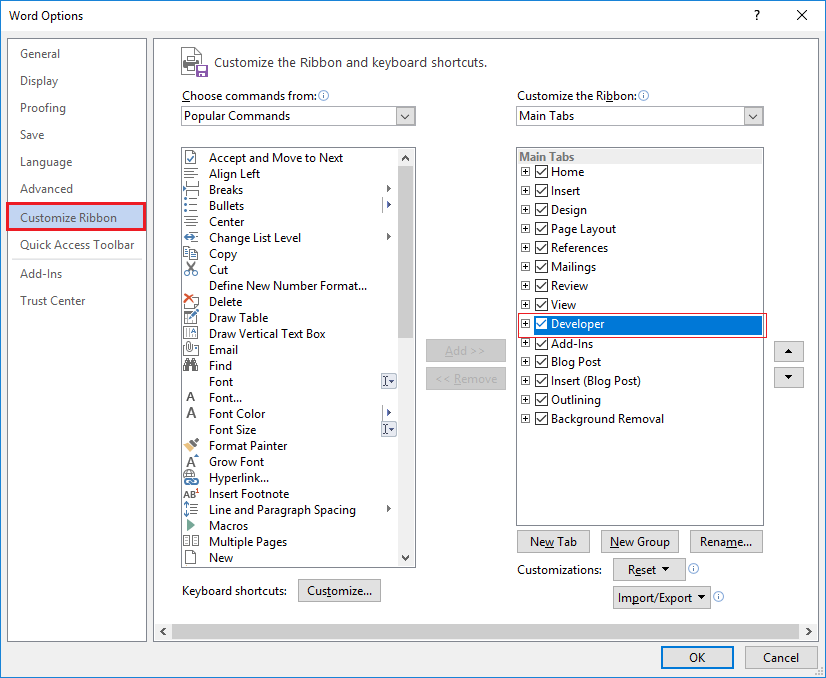
Once you click OK, the developer tab will populate in the header section of MS Word. Under this option, you will be able to get control access to eight options such as Simple Text, Rich Text, Image, Check Box, Combo Box, Drop-down List, Date Picker, and Building Block Gallery.
Step 2 - Start using the alternatives
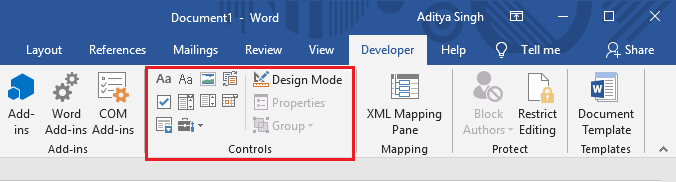
Bajo la configuración de control, tienes acceso a diversos opciones. Para saber lo que significa cada opción, básicamente pasa el ratón por la opción. A continuación se muestra el ejemplo en el que he creado sencillos recuadros con el nombre y la edad en los que he insertado el contents de control de texto simple.

This option will allow you to create a form in which users can fill in their plain text data. All you have to do is click on the «Press or touch here to enter the text».
Step 3 - You can edit the filler text box
You have the authority to make changes to the filler text box according to your preferences. All you have to do is click on the Design Mode option.
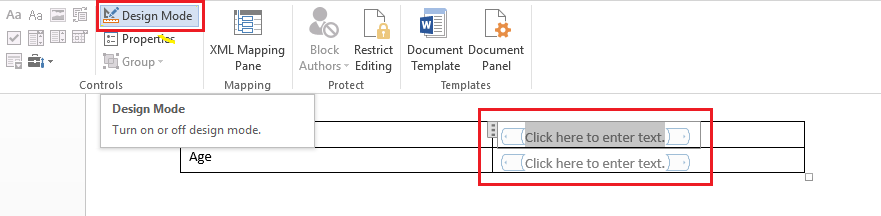
By clicking on this option you can make the changes and to exit this option you need to click on the design mode option again.
Step 4 - Edit the content controls
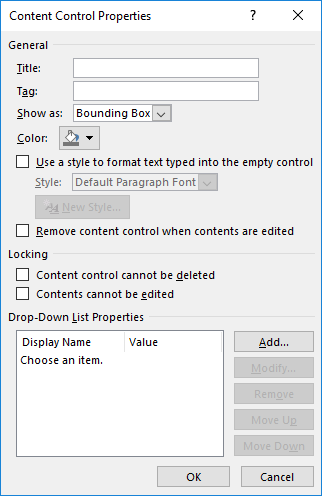
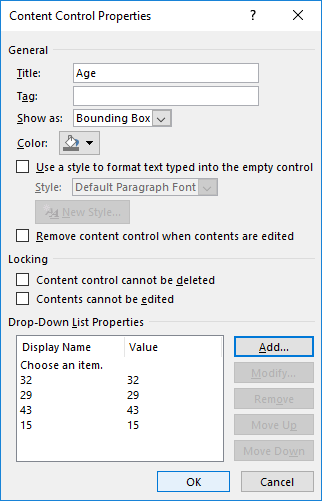
As you can change the design of the padding boxes, in the same way, you have access to the content editing controls. Click on the Properties tab and here you will get options to make the necessary changes. You can change the title, label, color, style and font of the texts. At the same time, you can restrict the control by checking the boxes of whether the control can be deleted or edited or not.
Rich text vs. plain text
You may be confused when choosing either of these two options when creating fillable forms in Word. Let me help you find the difference between the control alternatives. If you select the rich text control you can easily make changes to the style, the font, the color of each word in the sentence individually. On the other hand, if you choose the plain text option, an edit will be applied to the entire lines. However, the plain text option also allows you to make font and color changes.
Do you intend to add the drop-down list in your form?
Yes, you can add a drop down list in your form created in MS word. What else will you ask of this tool? There is a drop-down control box that you must click to add it to your Word file. Once the function is added, you need to click on the properties option to make further edits and add a custom drop down list to select from.

Click the Add button and then type a name of your choice. By default, the name and display values are the same and there is no specific reason to make changes to that further until you are typing Word macros.

In case after adding a custom listing, if you don't see the dropdown items, make sure you are out of design mode.
Date picker
One more option that you can add in your form is the date picker. Like other date selection tools, when you click on it, it will fill in a calendar in which you will be able to select the specific date to fill in the form. Isn't it as simple as ever? However, the novelty is that you are doing all these things in MS Word while creating a fillable form.
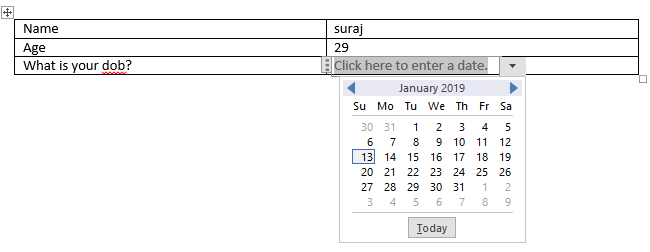
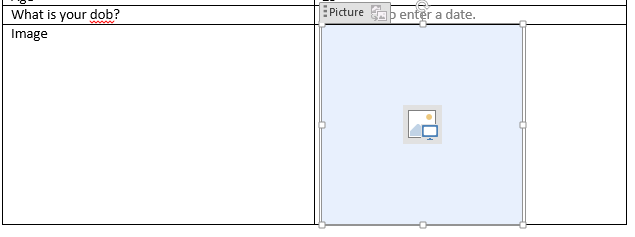
Image Control: This option allows you to add images to your form. You can easily upload the required image file.
If you are trying to create a fillable form in MS Word, it would be nice to use well organized tables to create the form.
Hope the above steps were helpful and now you can easily create fillable forms in Microsoft Word, but if you still have any questions about this tutorial, feel free to ask them in the comments section.