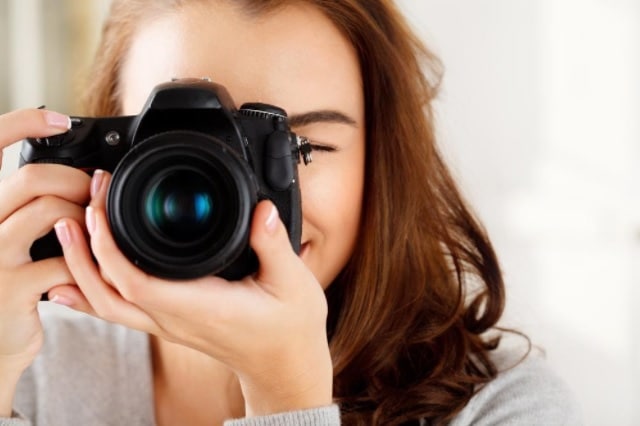
Every aspiring photographer is going to want to progress at some point and set up a home photo studio to take flash photos. A home studio is a great alternative for those who are just starting out and cannot afford to rent space in a professional studio or buy expensive equipment, such as backdrops.
It is much cheaper than renting a place, and you do not need to transport all your equipment anywhere. However, if you’re not prepared or sure where you’re getting into, setting up a home photo studio can be worrisome. We are going to give you some tips on how to set up a photo studio at home. Read on to learn how to take the best portraits and photos in your home studio.
Planning your home photo studio
The first step in setting up a home photo studio is the planning phase. Before you start acquiring equipment and resources, you should plan how you will use the photo studio at home, and what type of images you will take.
First of all, ask yourself why you want to set up the study and what you want to achieve. What are your goals for the study? Is this studio the start of your photography career, or is it your intention to use it just for portraits? Is it a temporary or long-term solution? In addition to identifying the purpose of the study, it is important to also think about what type of photographs you are going to produce.
A home studio is ideal for small-scale photography, such as product photography, or slightly larger subjects, such as newborn photography. In small studios you can also take portraits.
Think about the background that you will need for these photos, because it will greatly influence the amount of space you need to use. You can find inspiration for different types and genres of photography with these royalty-free videos, photos and vectors graphics .
Before you start setting up your studio, you need to understand how you are going to use it, because this will impact how you set it up and the equipment you will need.
Home photo studio design
Once you are clear about what you want to achieve with your home photo studio, you can start shaping it. An important factor to consider is the budget you have to spend on the study. Your budget should be consistent with the purpose and objectives of the study. For example, if your purpose is to use the studio as a launch pad for your photography career, you will need a smaller budget, since you will be starting.
Imagine that you have a small budget and you need a fully equipped professional studio with different backgrounds, including backdrops. In that case, maybe you should rethink your goals or budget. The budget should be realistic and aligned with achievable goals.
You can create a home photo studio with a small budget and minimal equipment. If you have a higher budget, you can also invest in a larger space and more professional equipment, such as glasses and curtains. Think about whether you will need flash in your photos, because this will influence the equipment that you will need.
Lighting is the next critical piece of equipment that will influence the quality of your home photographs. If you have a minimum budget, you can work in natural light and put the studio near windows. Reflectors are also a great and very affordable option. If you have enough money, investing in lighting is a good idea. You can buy good light boxes, because they will make a significant impact in the setup of a small home photo studio. A tripod is also a good and useful tool.
Backdrops and accessories play an important role in the flexibility and capacity of your home studio, as they have many possibilities. If you don’t have a lot of money, you can use what you have at home. Invest in affordable background options that can change your photos. Be creative and imaginative by using your furniture or walls in different ways.
If you have a good budget, you can invest in various backdrops of different colors and special accessories, depending on the nature of your photography. Lighting is an excellent investment for any studio because it improves the quality of the images, so this has to be your priority.
Helpful tips for setting up a home studio
Here are more tips to help you organize your home photo studio:
- Use natural light
Studio lighting is essential, as we’ve already mentioned, but natural light can be beneficial for getting a good photo, particularly with portraits. Think about what time of day you are going to take the photos and how the windows can create light in your space. Also think about the colors of the walls and floors, because they will impact how the light manifests in the room.
As a general rule, white walls are best because they reflect light. On the other hand, if you are using professional lighting or flash, you may need to block out natural light to prevent it from spoiling the shot.
- Get creative with accessories
Unusual things you have at home can work well in your home studio. You will be surprised how much you already have and can use. For example, water is a great photo prop, particularly in product photos, and you can use it in a variety of ways. Mirrors, sheets and fans are things that you already have; They can be very versatile and help you get great photos.
- Camera lenses
When shopping for lenses for your home studio, choose lenses with a shorter focal length, as you will likely be with your subject in a small room. Again, the most important thing is to be creative when using your space.
Conclusion
Hopefully, now you know how to set up your photo studio to take photos at home. First, focus on planning and defining the objectives of your study . Then decide what kind of photos you are going to take. They can be portraits or photos of products.
If you don’t plan carefully, you could end up with equipment you don’t need, or not having adequate space to take your photos. Check your budget and the equipment you need. They must go hand in hand with the objectives of the study. Be creative. You can start with a basic assembly and expand as you grow.