
Arreglar los sleeps de Windows 10 después de unos minutos de inactividad:Los problemas con el último sistema operativo de Microsoft, Windows 10, parecen no tener fin y los usuarios informan de otro fallo crucial que parece poner a Windows 10 en modo de suspensión después de unos minutos de inactividad. Pocas persons experimentan este problema incluso cuando dejan su ordenador inactivo durante 1 minuto y encuentran su PC en modo de suspensión. Este es un problema muy molesto con Windows 10, ya que incluso cuando el Username cambia la configuración para poner su PC en modo de suspensión en un intervalo más largo, parece que no puede solucionar este problema.

Don't worry, the troubleshooter is here to get to the bottom of this problem and fix it through the methods listed below. If your system sleeps after 2-3 minutes of inactivity, then our troubleshooting guide will definitely solve your problem in no time.
Fix Windows 10 sleepings after a few minutes of inactivity
Make sure to create a restore point in case something goes wrong.
Method 1: Reset BIOS Settings to Default Values
1.Shut down your laptop, then turn it on and simultaneously press F2, DEL or F12 (depending on manufacturer) to enter BIOS setup.

2.Now you will have to find the reset option to load the default settings and it can be named as Reset to default, Load factory defaults, Clear BIOS settings, Load setup defaults, or something similar.
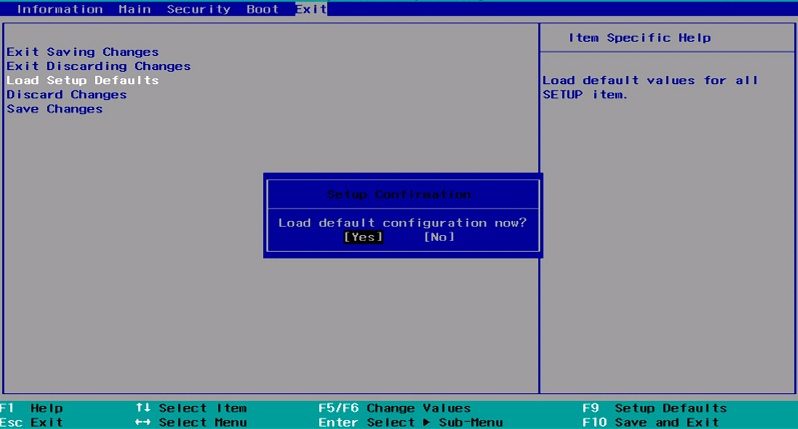
3.Select it with the arrow keys, press Enter and confirm the operation. Your BIOS will now use its default settings.
4.Once you've logged into Windows, check if you are able to fix Windows 10 suspensions after a few minutes of inactivity.
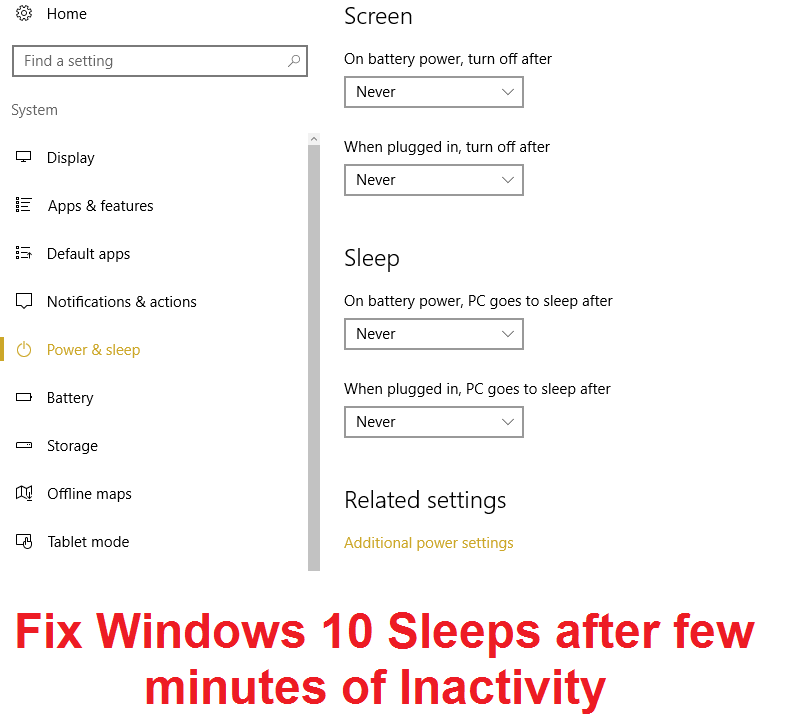
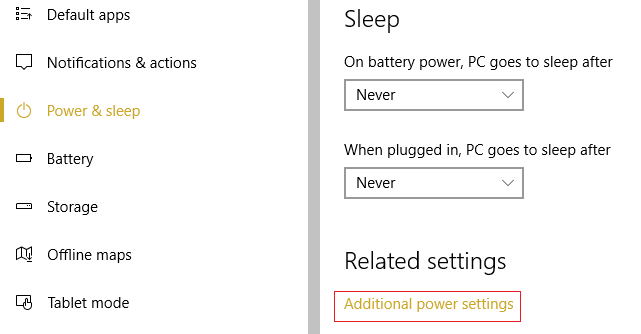
Method 2: Restore Power Settings
1.Press Windows key + I to open Windows settings and then select System.

2.A continuación, seleccione Power & sleep en el menú de la izquierda y haga clic en Additional power settings.
3.Now again from the menu on the left, click on "Choose when to turn off the screen".
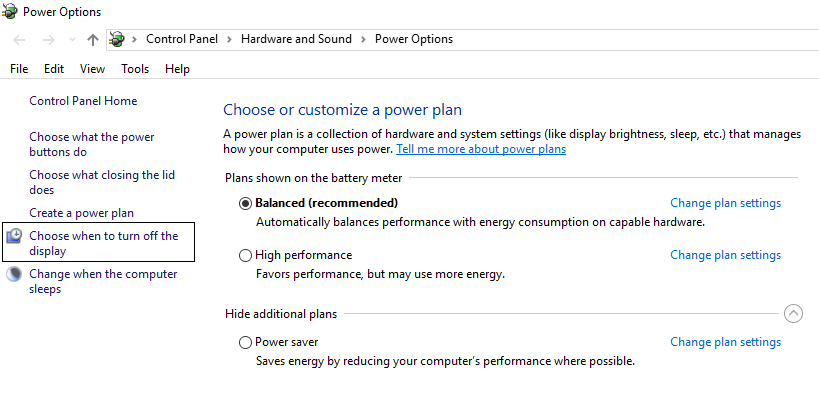
4.Then click Restore default settings for this plan.
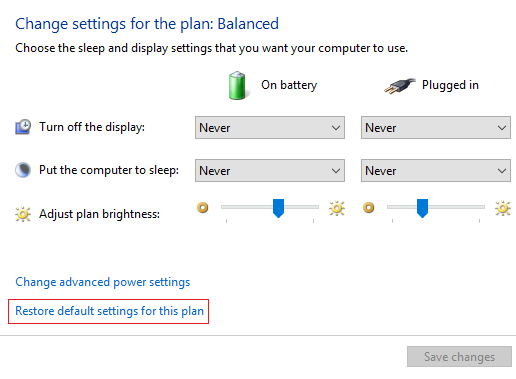
5.If you are prompted for confirmation, select Yes to continue.
6. Restart your PC and your problem will be solved.
Method 3: Registry Fixation
1.Press Windows key + R, then type "regedit" (without quotes) and press Enter.

2.Navigate to the following registry key:
HKEY_LOCAL_MACHINE_SYSTEMN-Current Control and Power Settings 238C9FA8-0AAD-41ED-83F4-97BE242C8F207bc4a2f9-d8fc-4469-b07b-33eb785aaca0
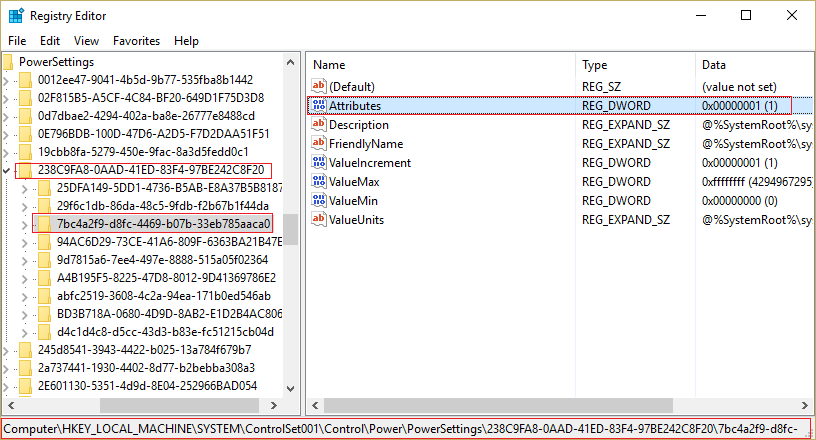
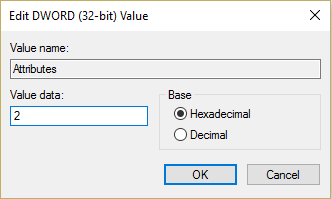
3.In the right pane of the window, double-click Attributes to modify its value.
4.Now enter the number 2 in the value data field.
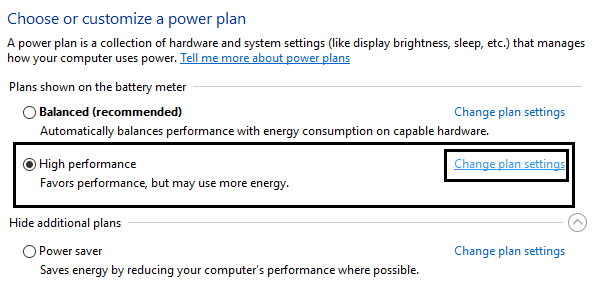
5. Next, right-click the power icon in the system tray and select Power Options.
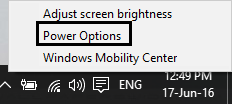
6.Click "Change plan settings" under the chosen power plan.
7. Next, click Change advanced power settings at the bottom.
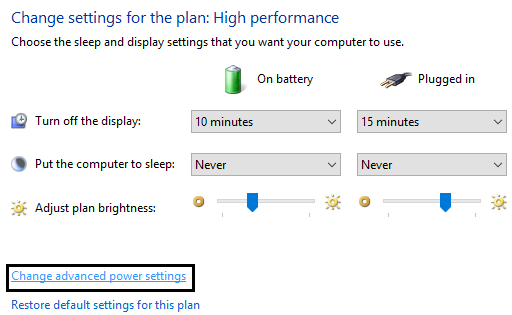
8.Expand sleep in the advanced settings window and then click System unattended sleep timeout.
9.Change the value of this field to 30 minutes (By default it may be 2 or 4 minutes which is causing the problem).
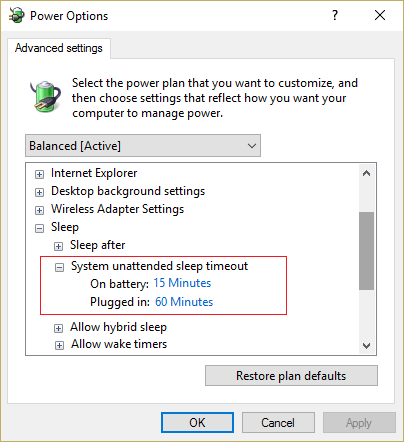
10. Click Apply and then OK. Restart your PC to save the changes.
Method 4: Change the screen saver time
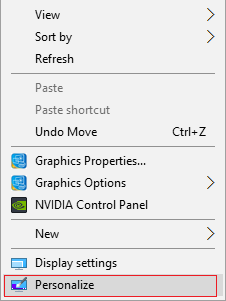
1.Right-click the empty area of the desktop and select Personalize.
2.Now select Lock Screen from the menu on the left and then click on Screen Saver Settings.

3.Now set your screen saver to turn on after a more reasonable time (Example: 15 minutes).
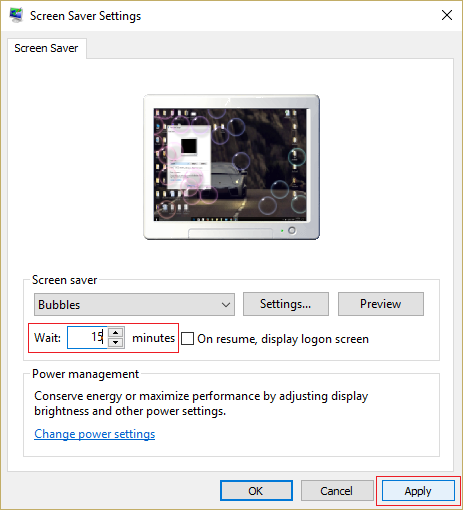
4. Click Apply and then OK. Reboot to save changes.
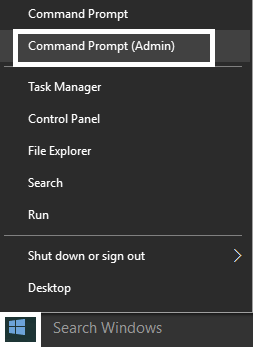
Method 5: Use the PowerCfg.exe utility to configure the disaply timeout
1.Press Windows key + X and then select Command Prompt (Admin).
2. Type the following commands in the cmd and hit Enter after each one: Important: Change the value to a reasonable time before the screen timeout
powercfg.exe / setacvalueindex SCHEME_CURRENT SUB_VIDEO VIDEOIDLE powercfg.exe / setacvalueindex SCHEME_CURRENT SUB_VIDEO VIDEOCONLOCK powercfg.exe / setactive SCHEME_CURRENT
Note: The VIDEOIDLE timeout is used when the PC is unlocked and the VIDEOCONLOCK timeout is used when the PC is on the locked screen.
3.Now the previous commands were for when you are using the charging plugged in for Battery use these commands instead:
powercfg.exe / setdcvalueindex SCHEME_CURRENT SUB_VIDEO VIDEOIDLE powercfg.exe / setdcvalueindex SCHEME_CURRENT SUB_VIDEO VIDEOCONLOCK powercfg.exe / setactive SCHEME_CURRENT
4.Close everything and restart your PC to save the changes.
Recommended for you:
- Fix REGISTRY_ERROR blue screen errors
- How to fix Windows 10 not using all RAM
- 7 Ways To Fix Windows 10 Slow Shutdown
- Fix Windows Update Database Corruption Error
Eso es todo, has arreglado con éxito los sleeps de Windows 10 después de unos minutos de inactividad, pero si todavía tienes alguna duda sobre este post no dudes en preguntar en la sección de comentarios.


