
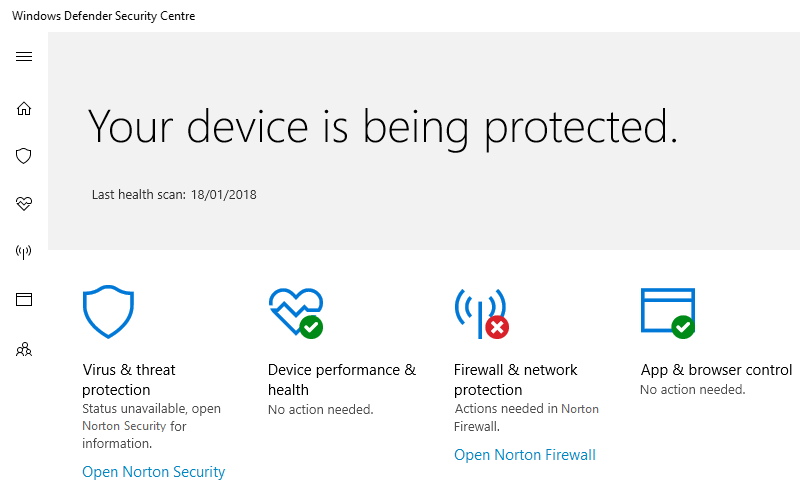
Una de las características incorporadas más importantes de Windows 10 es el Windows Defender, que detiene los virus y programas maliciosos para atacar su equipo. ¿Pero qué sucede cuando el Windows Defender deja de funcionar o de responder de repente? Sí, este es el problema al que se enfrentan muchos usuarios de Windows 10 y no pueden activar el Firewall de Windows Defender. Hay varios problemas que pueden hacer que el Firewall de Windows Defender deje de funcionar.

One of the most common reasons for this problem is if you have installed a third-party Antimalware program. The reason is that Windows Defender shuts down automatically if there is another antivirus program on the same PC. Another reason could be the date and time zone mismatch. Don't worry, we will highlight several probable solutions that will help you activate Windows Defender Firewall on your system in no time.
Fix Cannot enable Windows Firewall in Windows 10
Make sure to create a restore point in case something goes wrong.
Método 1: Desactivar el software antivirus de terceros
1.Right-click the Antivirus Program icon in the system tray and select Disable.
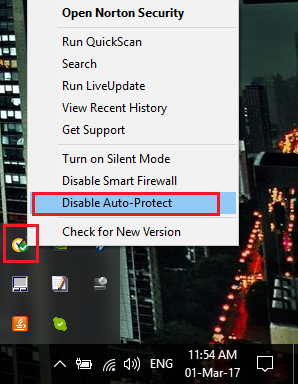
2. Next, select the time during which the Antivirus will remain disabled.
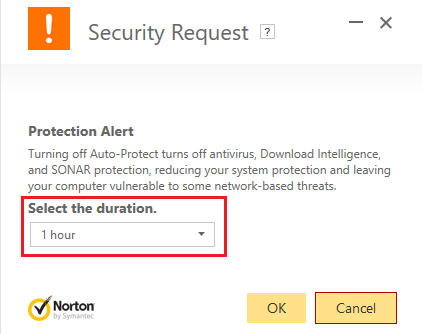
3. Once this is done, try again to enter Windows Defender and see if you can solve the problem of the inability to activate Windows Defender Firewall.
4.If successful, make sure to completely uninstall third-party antivirus software.
Method 2: Restart Windows Defender Firewall Service
Let's start by restarting the Windows Firewall service. It is possible that something has interrupted its operation, so restarting the Firewall service may fix the problem.
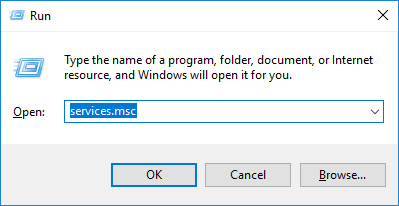
1.Press Windows key + R, then type services.msc and press Enter.
2.Locate the Windows Defender Firewall under the service.msc window.
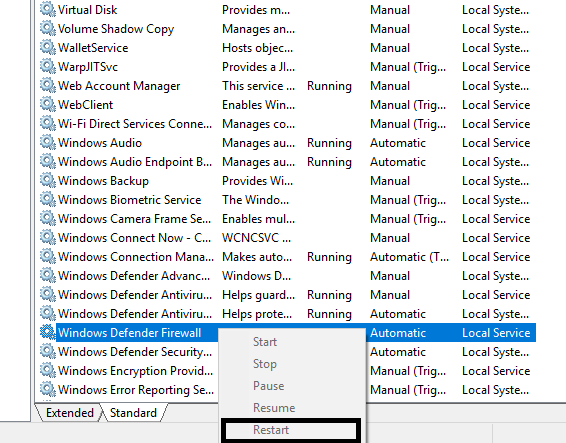
3.Right-click the Windows Defender Firewall and select the Restart option.
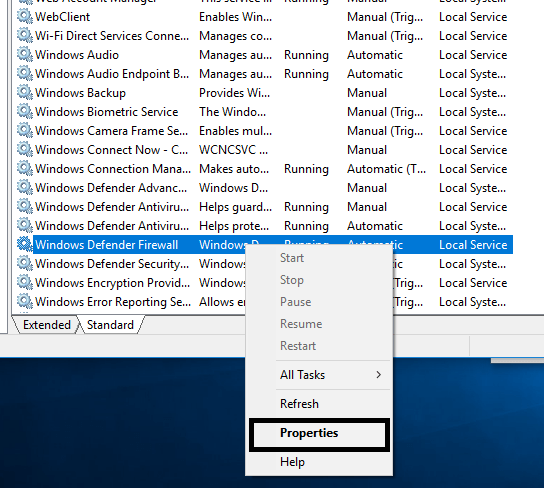
4. Again, right-click on Windows Defender Firewall and choose Properties.
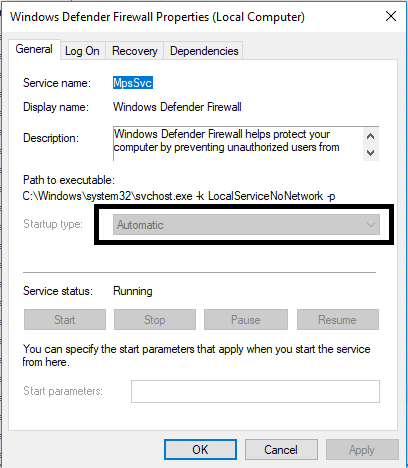
5. Make sure the startup type is set to Automatic.
Method 3: Registry tuning
Making changes to the registry is dangerous, since any wrong entry can damage the registry files, which in turn will damage the operating system. Therefore, before continuing, make sure you understand the risk of making changes to the registry. At the same time, create a restore point and back up your registry before continuing.
You need to adjust some registry files to activate Windows Defender Firewall again.
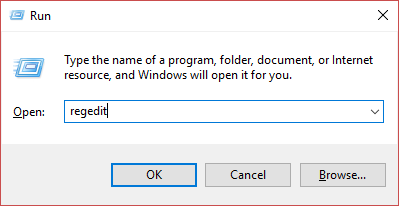
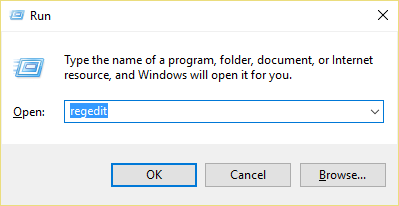
1.Press Windows key + R, then type regedit and press Enter.
2.Navigate to the path mentioned below.
HKEY_LOCAL_MACHINESYSTEM / CurrentControlSet / services / BFE
3.Right click on BFE and choose the Permissions option.
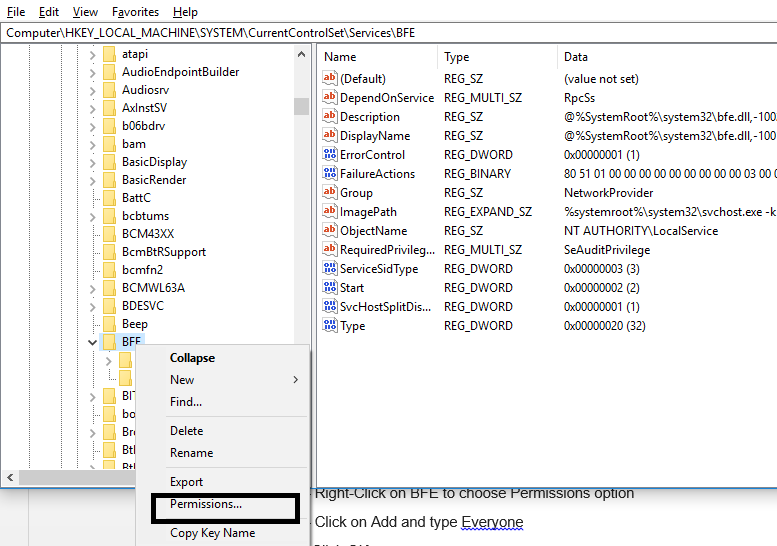
4.Follow this guide to take full control or ownership of the old registry key.
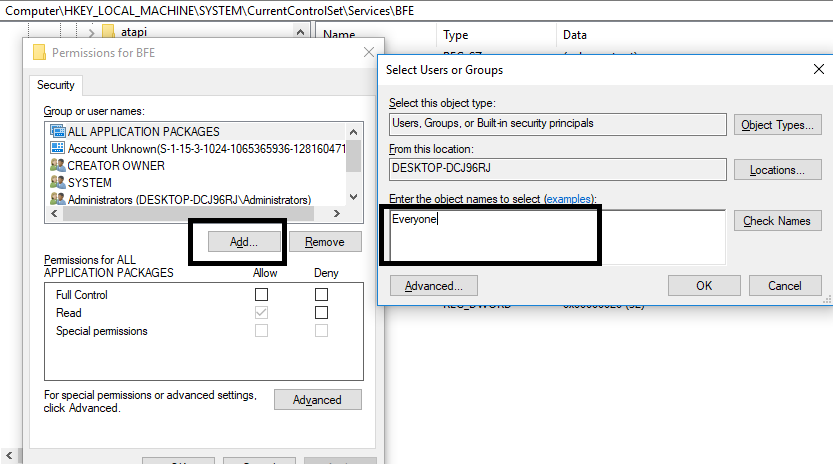
5.Once you have given permission, select Everyone under "Group or user names" and check Full Control under Permissions for everyone.
6. Click Apply and then OK.
7.Restart your computer to store the changes.
Este método funciona para la mayoría de los usuarios, puesto que está tomado del forum oficial de Microsoft, por lo que puedes esperar solucionar el problema de la imposibilidad de activar el Firewall de Windows Defender con este método.
Method 4: Enable Windows Defender through Registry Editor
1.Press Windows key + R, then type regedit and press Enter.
2.Navigate to the following registry key:
HKEY_LOCAL_MACHINE_SYSTEMN-WinDefend Services Stream Control
3.Now right click on WinDefend and select Permissions.
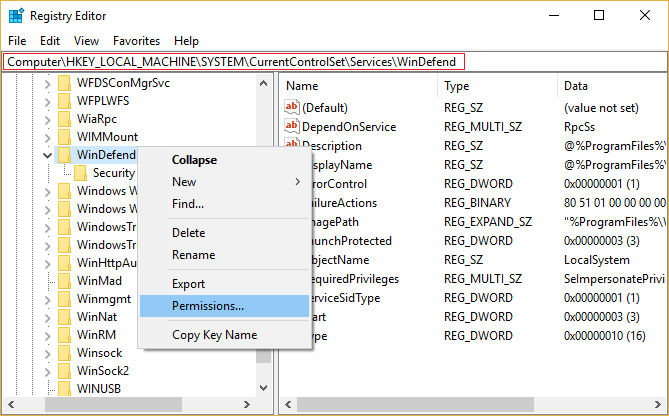
4.Follow this guide to take full control or ownership of the old registry key.
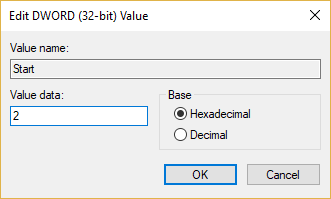
5.After that make sure you have chosen WinDefend and then in the right window double click on Start DWORD.
6.Change the value to 2 in the value data field and click OK.
7. Close Registry Editor and restart your computer.
8.Again try to activate Windows Defender and you should be able to fix the "Cannot activate Windows Defender Firewall" problem.
Method 5: Reset Windows Defender Firewall Settings
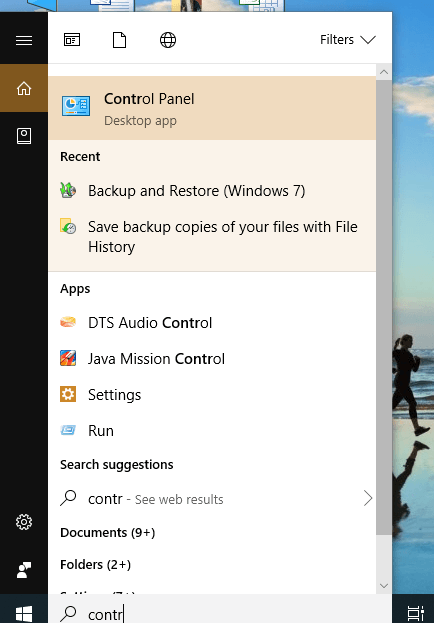
1.Type control panel in the Windows search bar and then click Control Panel from the search result.
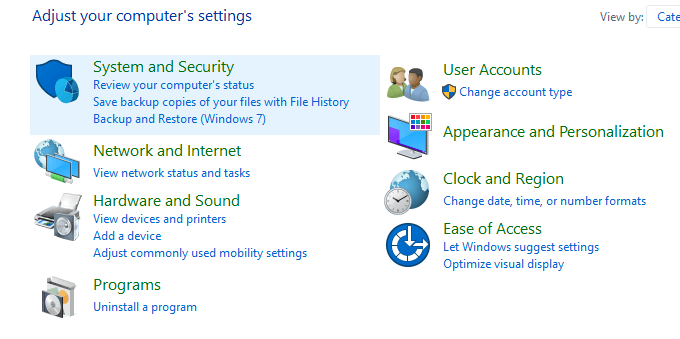
2.Select the System and Security option in the Control Panel window.
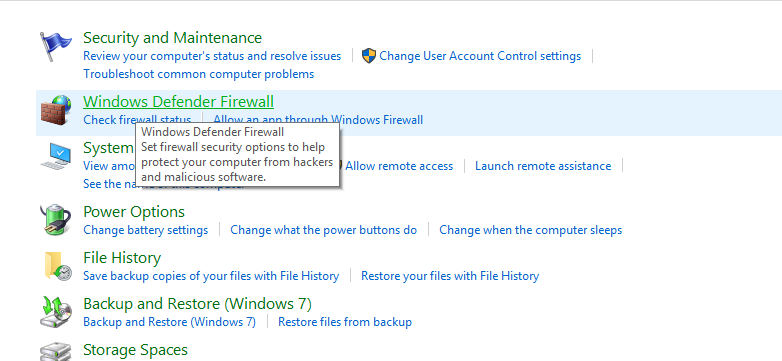
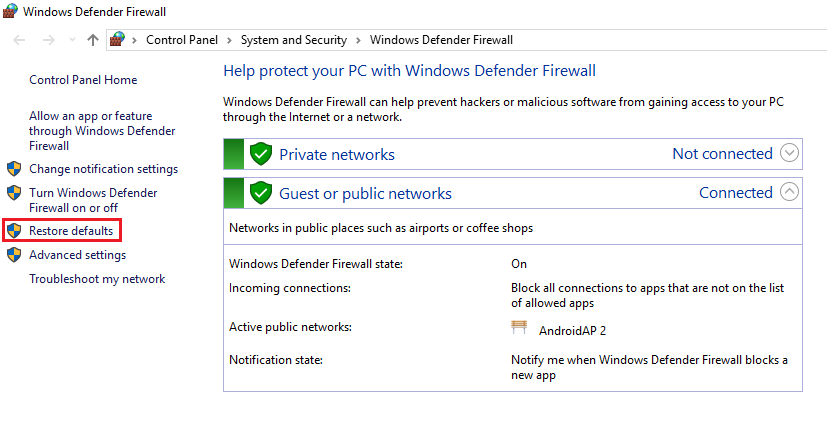
3.Now click on Windows Defender Firewall.
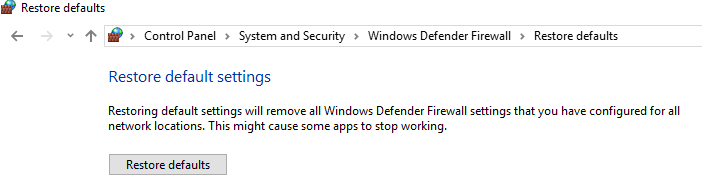
4.Then, in the left pane of the window, click the Restore defaults link.
5.Now again, click the "Restore Defaults" button.
6. Click Yes to confirm the changes.
Method 6: Force Restart Windows Firewall Using Command Prompt
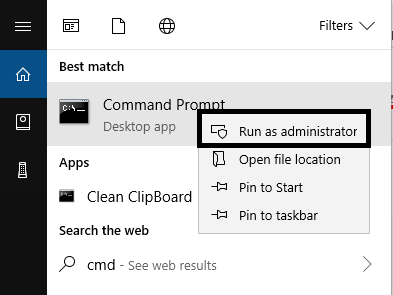
1. Type cmd or the command in Windows search, then right-click on the Command Prompt and select Run as administrator.
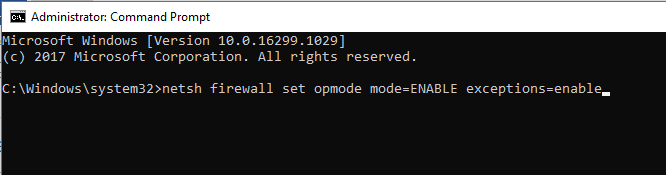
2.Once the elevated command prompt opens, you need to type the following command and hit Enter:
netsh firewall set opmode mode = ENABLE exceptions = enable
3.Close the command prompt and restart the system to store the changes.
Method 7: Install the Latest Windows Updates
Sometimes the problem of not being able to activate the Windows Defender Firewall occurs if your system is not up to date, in other words, if there are pending updates that you need to download and install. Thus, you should check if there are Windows updates available to install or not:
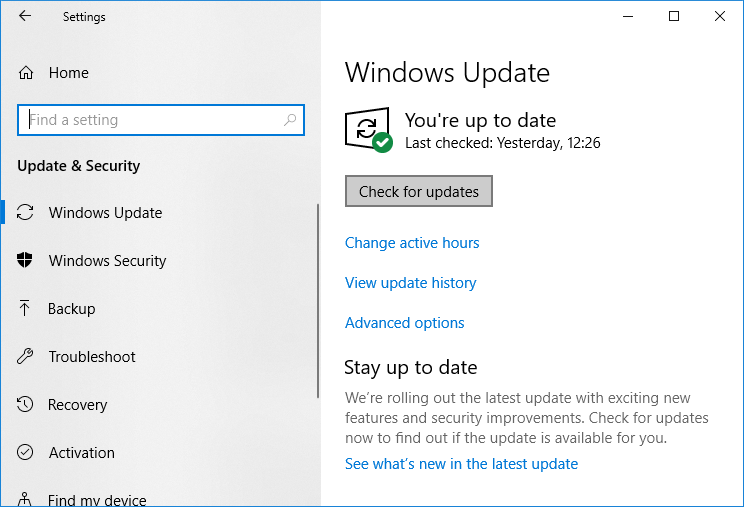
1.Press the Windows key + I to open Settings and then click on the "Update and Security" icon.
![]()
2.Now from the left pane of the window make sure to choose Windows Update.
3. Next, click the "Check for updates" button and let Windows download and install any pending updates.
Method 8: Uninstall the Latest Windows Security Updates
If the problem started after you have updated Windows with the latest security patches, you can uninstall the security update to correct the inability to turn on the Windows Defender firewall.
1.Press the Windows key + I to open Settings and then click on Update and Security.
![]()
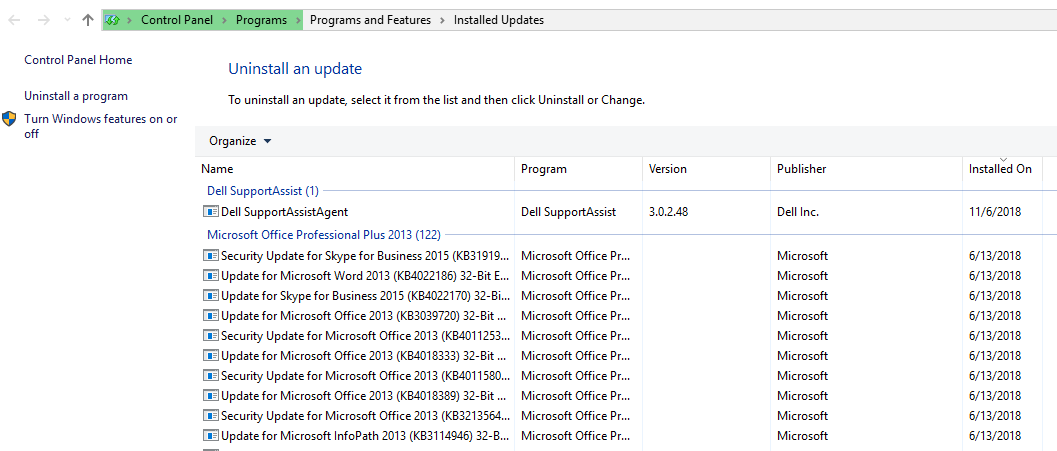
2.Click on View history of installed updates in the Windows Update section.
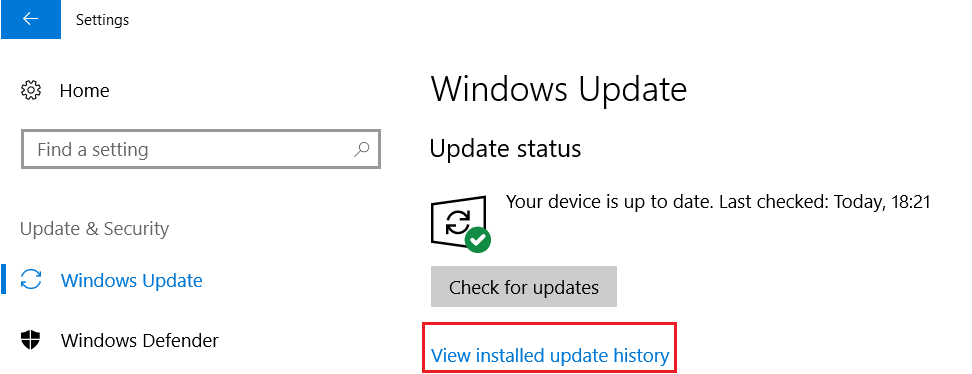
3.Uninstall all the latest updates and restart the device.
Method 9: Update Windows Defender
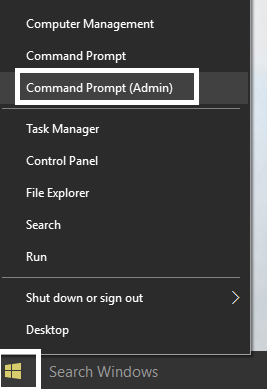
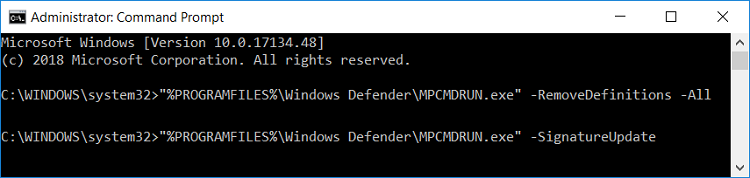
1.Press Windows key + X and then select Command Prompt (Admin).
2. Type the following command in cmd and hit Enter after each one:
«%PROGRAMFILES%NWindows DefenderNMPCMDRUN.exe» -RemoverDefinitions -All
«%PROGRAMFILES%NWindows DefenderNMPCMDRUN.exe» -SignatureUpdate
3.Once the command finishes processing, close the cmd and restart your computer.
Method 10: Determine the correct date and time
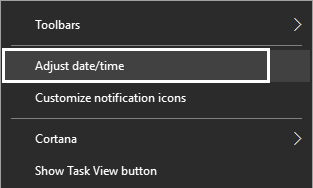
1.Right click on the date and time in the taskbar and then select "Set date / time".
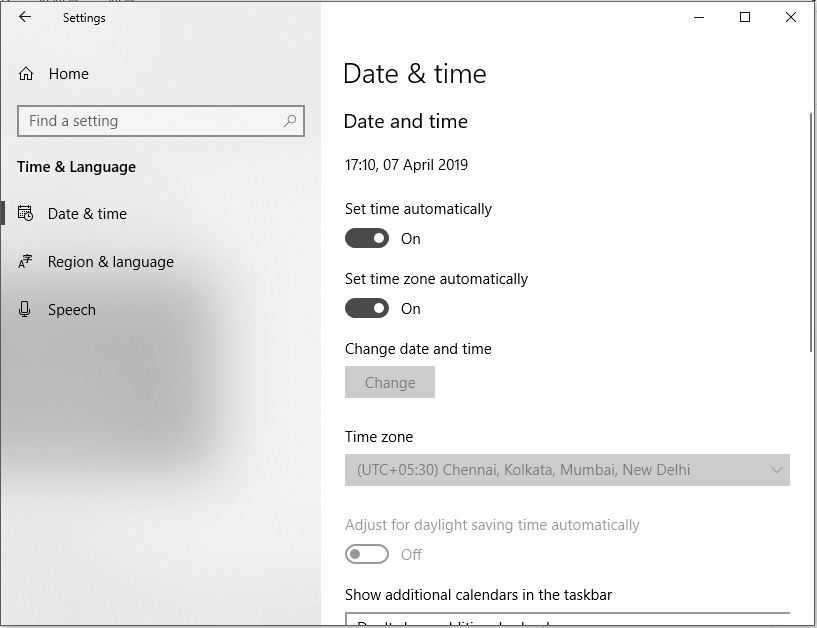
2.If you are on Windows 10, make sure to turn on the switch for "Set time automatically" and "Set time zone automatically".
3.Para otros, haga clic en «Hora de Internet» y marque la casilla «Sincronizar de forma automática con un server de tiempo de Internet».
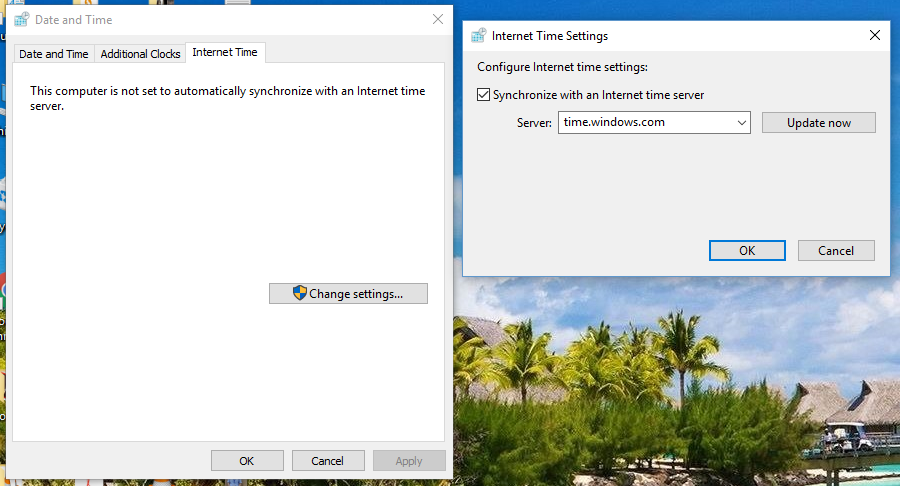
4.Select the server "time.windows.com" and click Update and then OK. You don't need to complete the update, just click OK.
Espero que este post haya sido de utilidad y que ahora puedas corregir fácilmente la imposibilidad de activar el firewall de Windows Defender, pero si aún tienes alguna duda sobre este tutorial, no dudes en hacerla en la sección de comentarios.


