RECOMMENDED: Click here to fix Windows errors and get the most out of your system performance
Some users may see the error message 0x6100004a on the screen of their HP printer when they try to use it. This issue is not limited to a specific model and has been shown to affect 6962 6968, 6830 and 6810 (there may be other models that behave equivalently).

If you find an error, you can correct it by following the instructions. Basically follow the steps below to fix and remove the printer error code 0X6100004A.
Set printer to default settings
- If your printer is not turned on, turn it on first and then return to the “home screen” by clicking the “OK” or “Hide” button.
- Now locate the “Back” button on the left side of the corner.
- You will then see a blank screen with a "help menu" at the top of the screen.
- After clicking on the support menu, you will see a message and at the bottom of the screen a large "X" and square brackets to the right and left.
- Double click on the right bracket “>” and you will see the “Reset Menu”.
- Now click on the “OK” button, which is there with the right parenthesis.
- Press the right bracket and you will see “Soft Reset”. And when you press it again, you will immediately see the message “Semi-complete reset”.
- After performing the “Semi Hard Reset”, the printer settings will be reset to the default settings and the paper jam will be cleared.
- Finally, the printer automatically turns off and you must turn it back on. Now try to print again.
Make sure the carriage moves freely across the width of the printer.
- Turn on the printer if it is not already on.
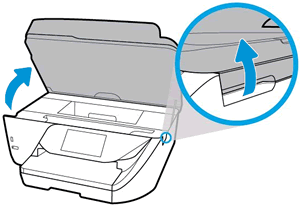
- Open the cartridge access door.
- Wait until the car is idle and quiet before proceeding.
- When the printer is on, unplug the power cord at the back of the printer.
- Unplug the power cord from the power source or electrical outlet.
- Use a flashlight to check that the carriage is prepared for the paper or objects that could obstruct it and then remove any paper or objects that you find.
- Enter the printer through the ink cartridge access door, then move the carriage manually.
- Remove any loose paper or obstructions you find.
- Make sure the carriage can move freely across the width of the printer. Slide the carriage firmly to the left side of the printer and then to the right side.
- Close the ink cartridge access door.
- Reconnect the power cord at the back of the printer.
- Reconnect the power cord to the power source or electrical outlet.
- Turn on the printer.
Reset the entire printing mechanism

The universal troubleshooting step generally recommended by HP technicians when the printer stops working is to reset the entire print mechanism. Carrying out this operation does not require technical knowledge and does not expose your machine to the risk of further damage.
For printers, resetting the print mechanism is equivalent to power cycling computers and game consoles. Many affected users have confirmed that the procedure is corrected after performing the following steps.
The following is a brief step-by-step guide to resetting the print mechanism:
- Turn on the printer (if it is not already on) and wait for the startup sequence to complete.
- Note: If you hear noise, wait until the printer enters sleep mode and turns off before proceeding to the next step.
- Unplug the power cord from the back of your printer (when your printer is on but in sleep mode). Once it turns off, unplug the power cord from the wall outlet.
- Wait 60 seconds or more before plugging the power cord back into the outlet. Then reconnect the power cord to the back of your printer.
- Turn on your printer and wait until it has completed its first warm up.
- When your printer turns off and goes into sleep mode, try printing something and see if the issue is resolved.
RECOMMENDED: Click here to fix Windows errors and get the most out of your system performance