RECOMMENDED: Click here to fix Windows errors and get the most out of your system performance
The most common complaint from Sony Vegas Pro or Sony Vegas Movie Studio HD Platinum users is delayed playback in the preview window that causes choppy video.
En este tutorial, explicaré las principales razones y propondré algunas soluciones. Este post es en realidad uno de los cuatro que he difundido en línea para ofrecer la mejor solución viable a este problema común. Los siguientes tres tutoriales de esta serie se enumeran al final de este post.
Check the quality settings of the Sony Vegas preview window.
The easiest way to decrease the lag in the preview window is to take a closer look at your Sony Vegas settings. The preview window contains four combinations of quality and size settings that have a significant impact on playback quality. If you set everything to the highest setting, this is a recipe for an error, so try lowering the quality setting until the lag is gone. In the next video, I'll show you precisely what to do.
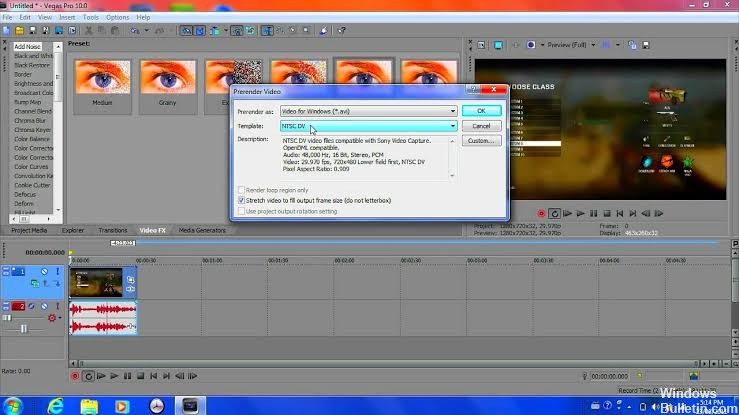
Use the built-in proxy video maker tool.
In Vegas Pro 13 and Movie Studio Platinum 13, you can create video proxies in the Project Media tab. This feature makes it easy to play video versions of all your video clips, making them much easier to edit.
- Right-click a video in the project's Media tab and select Create Video Proxy.
- To make proxy versions easier to read, it is essential to set the preview window to Draft or Preview, so that Vegas / Movie Studio will only play proxy versions.
- Set the preview window to Good or Better and the original HD versions of your videos will play.
Change the dynamic RAM preview value
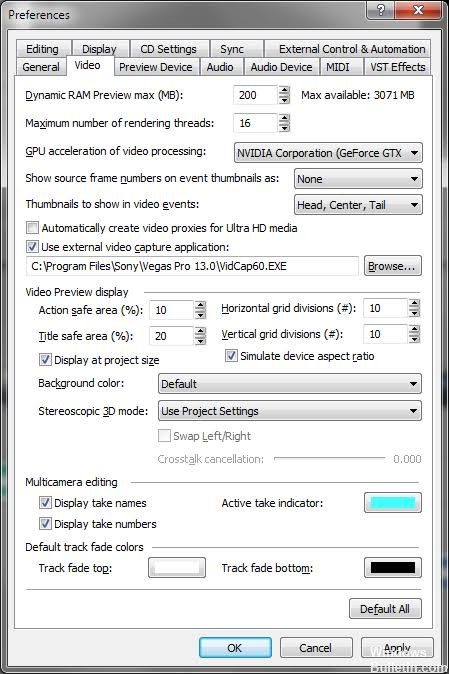
For whatever reason, it's possible that the RAM preview settings don't match your project media, which can cause this error. Follow these steps to fix the problem:
- Click Start, search for and run Vegas Pro.
- Import a video file by clicking File > Import > Media.
- Select any video file you want to edit.
- Drag the video file to the video track.
- Click Options > Settings.
- Select the Video tab.
- Change the Max Dynamic RAM Preview (MB) value to 0 (zero).
- Note: Usually set to 200.
- Click Apply and OK.
Close media files while the app is idle
By default, Sony Vegas keeps your files open when the app isn't even working. You can adjust the settings to quit files when your app is idle.
- Click on the Options menu, then Settings.
- Click on the General tab.
- Then select the Close media files if the app is not active check box.
- Click OK to save the changes and exit the configuration dialog.
(*10*)Disabling the GPU acceleration feature
Sony Vegas uses graphics processing unit acceleration, which leads to a significant performance improvement in file processing, object enhancements, simulation, and other associated tasks. However, it also causes program lag and other performance issues. It is recommended to disable this feature, but you can still use it if you are using a high-end computer system.
- Go to the Options menu and select Settings.
- Clear the GPU acceleration checkbox.
- Click OK.
https://steamcommunity.com/app/528200/discussions/0/135514823816634720/
RECOMMENDED: Click here to fix Windows errors and get the most out of your system performance