RECOMMENDED: Click here to fix Windows errors and get the most out of your system performance
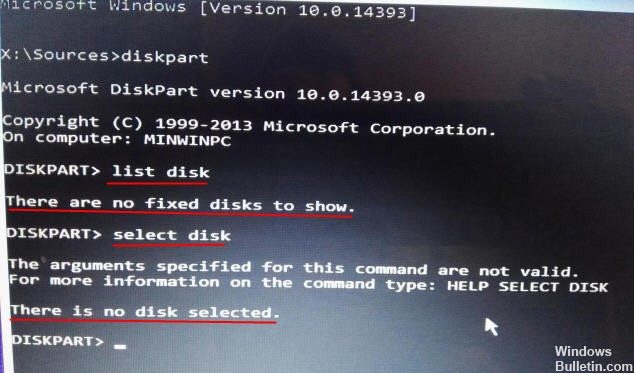
The "No fixed disks to display" error is generated when some Windows 7, Windows 8.1, or Windows 10 users try to run the DiskPart utility. Most affected users report that the computer cannot boot from a connected hard drive (but can boot from Windows installation media).
Hay tantas razones que podrían causar el problema que no hay discos duros que muestren Windows 10/8/7. Puede ser provocado por la conexión entre el disco duro y su computadora, o por un obstáculo de hardware u otras causas. Si ocurre el problema, puede volver a conectar el disco duro a su computadora y reiniciar su computadora para ver si el problema está resuelto. Si el problema persiste, puede intentar los siguientes pasos para resolverlo.
What is DiskPart?
DiskPart is a command line that runs on Windows operating system to manage space, such as create partition, merge partition, expand partition, format partition, erase partition, determine active partition, etc.
Performing Windows Startup Repair
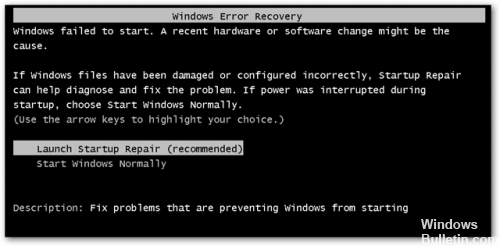
If bad things happen, you can try Windows Boot Repair and see if it helps.
1> Insert the Windows installation DVD into the DVD-ROM and restart the computer.
2> After starting the computer with the Windows DVD, a black screen appears with the gray text "Press any key to start from CD or DVD". Press any key.
3> Select the correct time and keyboard type.
4> Click "Repair Computer" at the bottom left.
5> Select "Troubleshooting" under "Choose an option screen".
6> Click Advanced Options on the Troubleshooting screen.
7> On the Advanced Options screen, click Start Repair.
8> Then select the operating system by clicking its button.
9> Windows will check hard drives for problems and make sure all necessary files are intact.
Change device transfer mode
If the transfer mode is set incorrectly, Windows cannot transfer data between devices and computers. In this way, the I / O device error can be fixed after switching to the correct transfer mode.
Step 1 Open Device Manager. Right click "This computer" and select "Manage", then you can click "Device Manager" in the computer management window.
Step 2 Expand “IDE ATA / ATAPI Controller” and you can view one or more ATA / ATAPI IDE channel lists.
Paso 3 Haga clic con el botón derecho en el channel de la unidad que causó el error del dispositivo de E / S, seleccione la pestaña «Propiedades y configuración avanzadas». Si no puede elegir qué canal IDE elegir, puede elegir el canal marcado como «Canal IDE secundario».
Step 4 Select the “PIO only” option in the Transfer mode field and you can see that the device (generally device 0) is the cause of the error. Then click OK and close all windows.
Step 5 Restart the computer and test if the error is fixed.
BCD data repair
It turns out that this problem may also be due to the fact that your system is experiencing logic errors or even system corruption in boot configuration data. If this scenario applies, you should be able to fix the problem by rebuilding the BCD files with a series of CMD commands.
Several affected users have confirmed that this procedure allowed them to get to the DiskPart screen and complete the operation without getting the "No fixed disks to display" error.
RECOMMENDED: Click here to fix Windows errors and get the most out of your system performance