RECOMMENDED: Click here to fix Windows errors and get the most out of your system performance
TeamViewer ha demostrado ser un buen software de vez en cuando. Pero, muchos usuarios lo utilizan desde la versión 5 hasta la última versión v12 en Linux, OSX y, desde luego, en Windows.
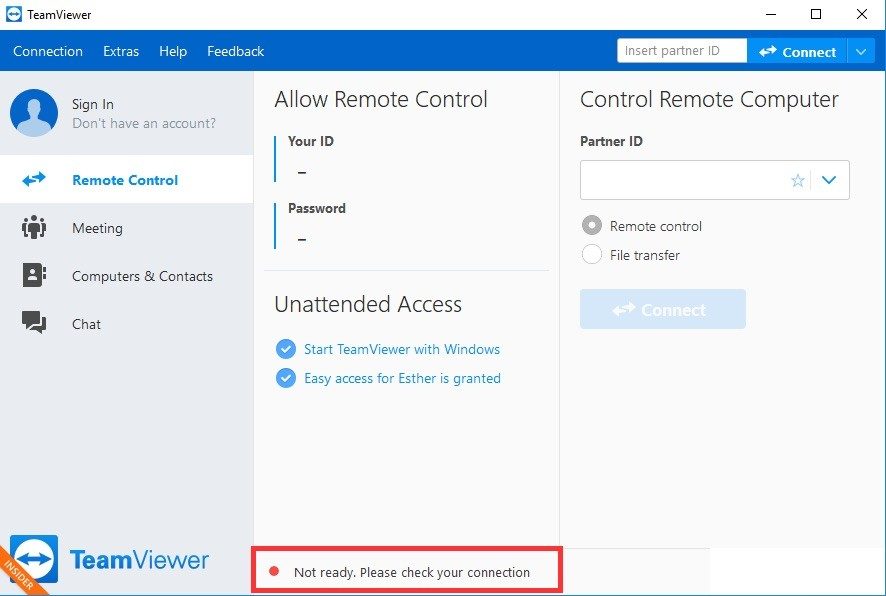
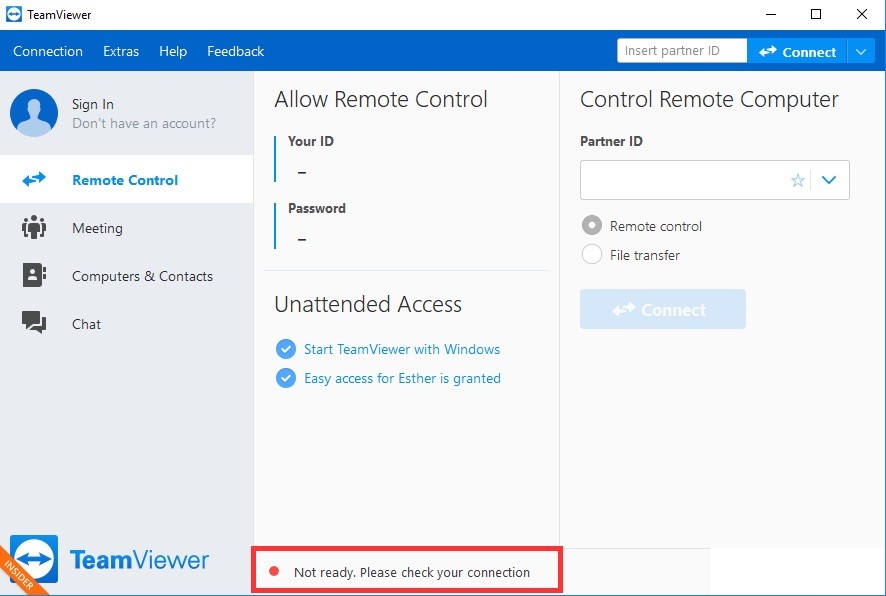
Users of Windows 7 64-bit, TeamViewer v12 refused to connect to their backend; the error:
It is not ready. Check your connection.
Delete TeamViewer from Hosts file
The TeamViewer entry in your computer's hosts file is most likely corrupted. It may show totally incorrect addresses and data, and we suggest that you remove the entry. Once you have reopened it, the entry will be recreated and we hope the problem does not happen again!
- Navigate to the location C >> Windows >> System32 >> Driver >> Etc accessing after opening the file explorer. First click on This Computer or My Computer on the left side of the page to find and open your local hard drive C.
- If you can't see the Windows folder, you may need to enable the option to see hidden files and folders. Click the View tab in the File Explorer main menu and select Show / Hide
- Hidden items in File Explorer checkbox to view hidden files and save these settings until you change them again.
- Find the Hosts file in the Etc folder, right-click and choose Open with Notepad. Use Ctrl + F and be sure to type "teamviewer" in the Find what field before clicking Next Search.
- In the archive, find the TeamViewer section. You should start with "#TeamViewer" and make sure you choose everything that goes with it, right-click the selection and select the Delete button from the context menu.
- Click File >> Save to save the changes or use the Ctrl + S key combination. Exit Notepad and restart your computer. Check if the problem comes from TeamViewer “Not Ready. Error message «Check connection».
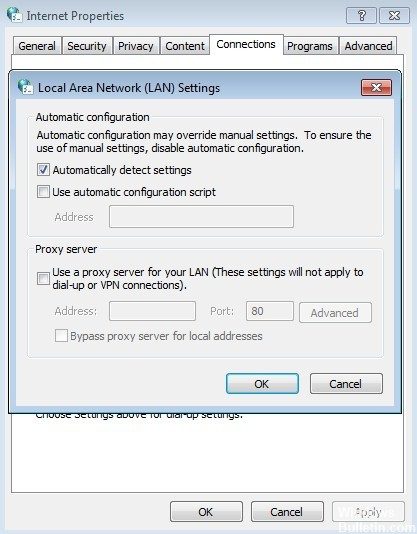
Check your proxy settings
Si no utiliza un proxy o firewall, pero todavía tiene un problema de conexión, es viable que deba cambiar la configuración de Internet. Luego de chequear que no funciona ningún proxy, vaya a Panel de control> Red e Internet> Opciones de Internet> Conexiones> Configuración de LAN y desactive todas las alternativas.
Cambia tu dirección DNS
Los usuarios dijeron que podrían solucionar el problema básicamente cambiando el DNS proporcionado por su ISP (Proveedor de servicios de Internet) y comenzando a utilizar otro. Puede ser un DNS de una computadora en la que el problema no existe, pero muchos usuarios básicamente han usado el DNS de Google para solucionar el problema.

Repair TeamViewer in Windows 10
Si el problema persiste y su sistema Windows 10 se ve afectado, tenemos varias soluciones adicionales que puede probar. Para conseguir más información, consulte esta guía de solución de problemas. Recuerde ejecutar un análisis antivirus completo del sistema, puesto que el malware además puede evitar que abra ciertas aplicaciones y programas. Tenga en cuenta que su programa antivirus a veces puede bloquear Teamviewer.
De esta manera, siga las sugerencias anteriores para solucionar sus problemas de Teamviewer en Windows 8.1, 10 o Windows 7. Inclusive si tiene alguna duda sobre este post, utilice la sección de comentarios a continuación para hacérnoslo saber.
RECOMMENDED: Click here to fix Windows errors and get the most out of your system performance