

Detener Windows 10 de Borrado Automático de la Cache de Miniaturas:Al abrir una carpeta que contiene archivos multimedia como un archivo de imagen jpeg, se puede ver una pequeña vista previa de ese archivo en el Explorador de Windows. Esto es posible en Windows generando las imágenes en miniatura que luego se almacenan en la base de datos en el directorio de perfiles de Username. La razón principal para almacenar el archivo en caché en la base de datos es que el sistema no necesita regenerar la pequeña vista previa (miniatura) de la imagen o el archivo cada vez que se abre la carpeta.
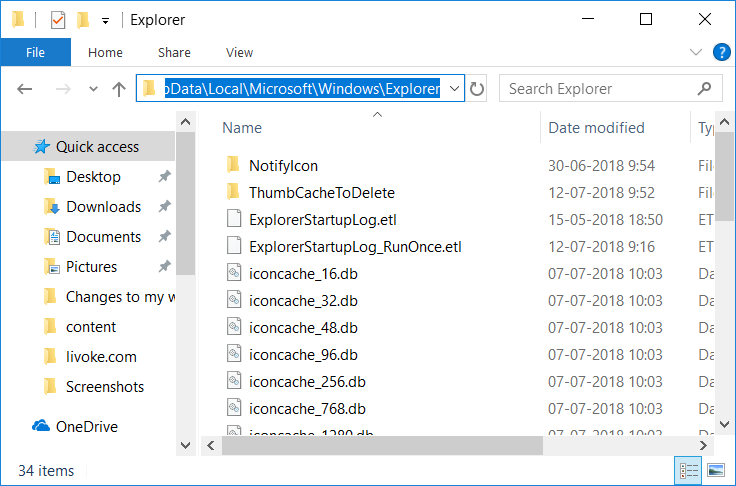
The thumbnail cache (as well as the icon cache) are stored in the following folder:
C: | Users_Your_user_name_ApData_Local_Microsoft_Windows_Explorer
Note: Replace your_username with the actual username for the account.
Now the problem is that Windows seems to automatically clear the thumbnail cache file after every reboot or shutdown, which creates a problem for users. When opening a folder containing hundreds of files, it takes a long time to generate the thumbnails, as the old thumbnail cache file may have been deleted when shutting down the system. The main problem seems to be caused by Automatic Maintenance, in which a task called SilentCleanup causes the thumbnails to be removed at every boot.
It is also possible that the problem is due to other reasons such as corrupted thumbnail cache folder, Disk Cleanup utility, etc. Also, some third-party apps may delete thumbnail cache files at every startup, so let's not waste any time let's see how to stop automatic thumbnail cache deletion in Windows 10 with the help of the tutorial below.
Stop Windows 10 from auto-clearing thumbnail cache
Make sure to create a restore point in case something goes wrong.
Method 1: Prevent Windows 10 from automatically clearing the thumbnail cache
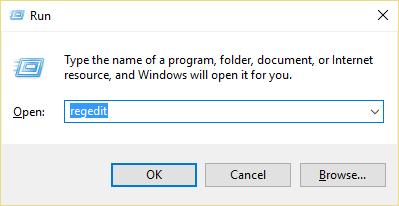
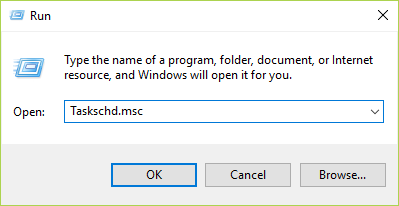
1.Press Windows key + R, then type regedit and press Enter to open Registry Editor.
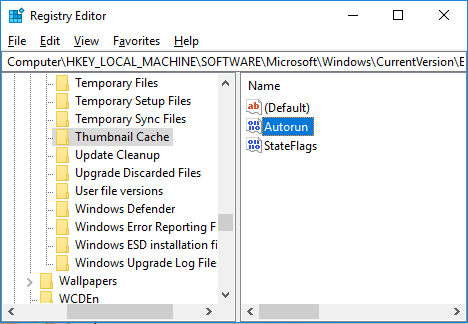
2.Navigate to the following registry key:
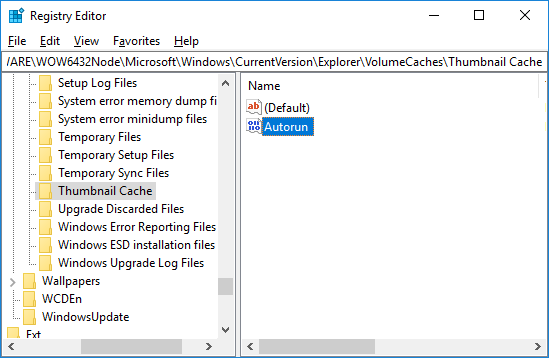
HKEY_LOCAL_MACHINE_SOFTWARE_Microsoft_Windows_CurrentVersion_Explorer_VolumeCaches_Thumbnail Cache
3.Now select Thumbnail cache and in the right window double click on Autorun.
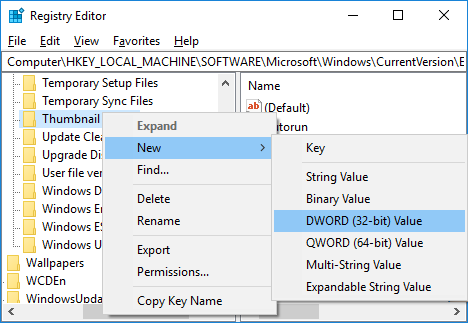
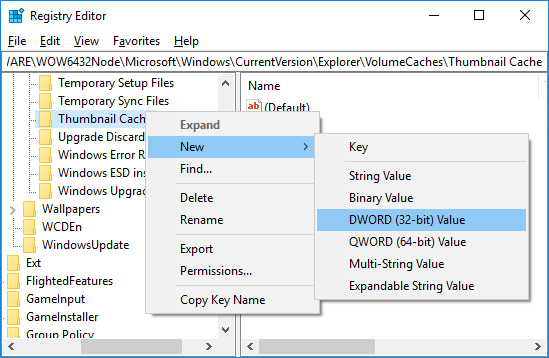
Note: If you can't find the Autorun DWORD, then right-click on the thumbnail cache, select New> DWORD (32-bit) value, and name this DWORD Autorun. Even if you are on a 64-bit system, you need to create a 32-bit DWORD.
4.If the Autorun DWORD value is set to 1, it means that the SilentCleanup function is enabled, which automatically clears the thumbnail cache on every boot.
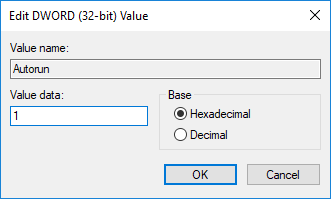
5.To fix this problem, just double click Autorun and change its value to 0 and then click OK.

6.In the same way, navigate to the following registry key:
HKEY_LOCAL_MACHINE_SOFTWARENWOW6432NodeNMicrosoftWindowsNCurrent VersionN-ExplorerN-Volume Cache
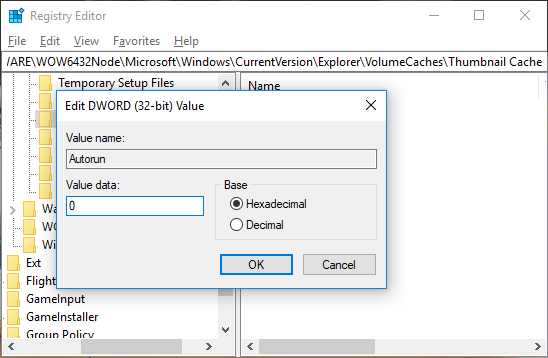
7.Double click Autorun DWORD and change its value to 0 and then click OK.
Note: If you can't find the Autorun DWORD, just create one like you did in step 3.
8.Close Registry Editor and restart your PC.
9.You can still clean the thumbnail cache using Disk Cleaner manually.
Método 2: Deshabilitar la tarea de limpieza silenciosa en el programmer de tareas
Note: This will prevent disk cleaning from working as part of automatic maintenance. If you want to run Disk Cleaner as part of scheduled maintenance, but don't want it to clear the thumbnail cache, then method 1 is preferable.
1.Press Windows key + R, then type taskschd.msc and press Enter.
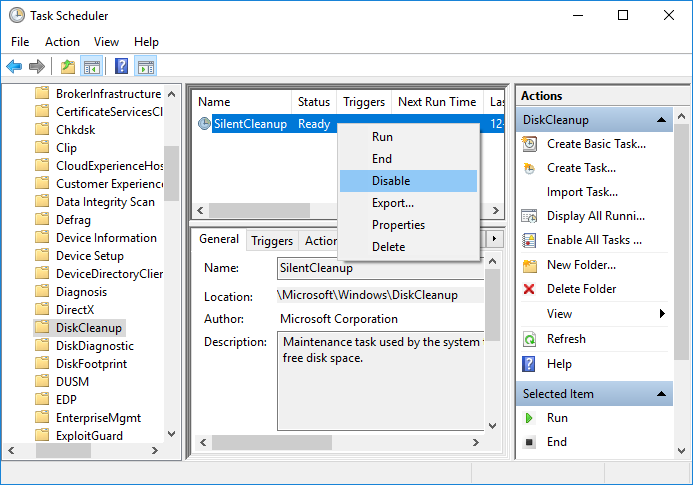
2.Navigate to the following location:
Task Scheduler> Task Scheduler Library> Microsoft> Windows> DiskCleanup
3. Make sure to select DiskCleanup and then in the right pane of the window, right-click on the SilentCleanup task and select Disable.
4.Close everything and restart your PC to save the changes.
Method 3: Try to reset the thumbnail cache folder
Run Disk Cleanup on the disk where the icons do not have their specialized image.
Note: This would reset all your customization in Folder, so if you don't want that then try this method at last as this will definitely fix the problem.
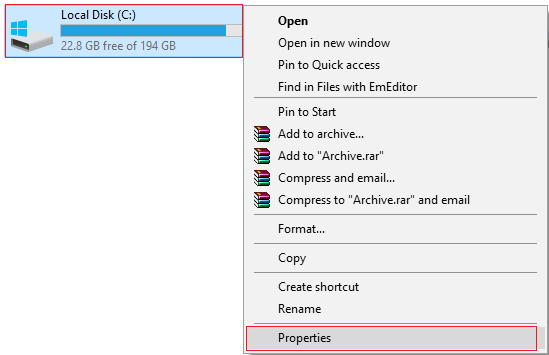
1.Go to This PC or My PC and right-click the C: drive to select Properties.
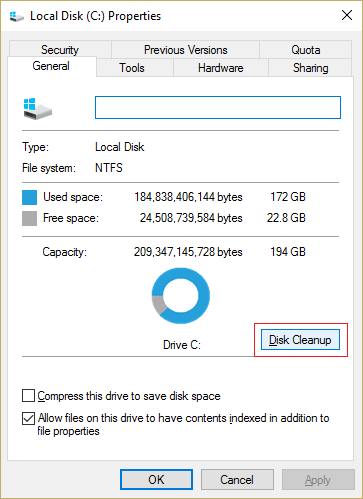
3.Now from the Properties window click on Low Capacity Disk Cleanup.
4. It will take some time to calculate how much space Disk Cleanup can free up.
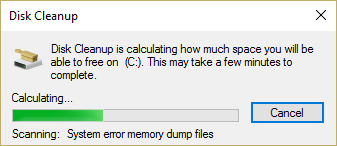
5. Wait until Disk Cleanup analyzes the drive and provides you with a list of all files that can be deleted.
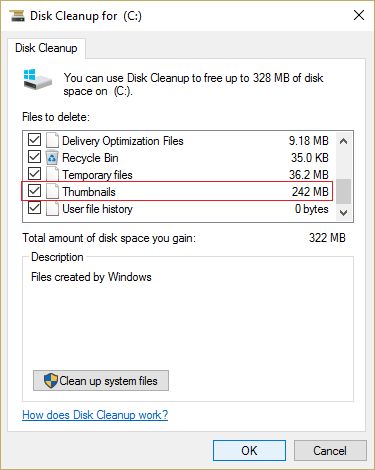
6. Check the Thumbnails in the list box and click Clean up system files at the bottom under Description.
7.Wait for the disk cleanup to finish and see if you can reset the thumbnail cache folder.
Método 4: Evitar que el software de terceros elimine la caché de las miniaturas
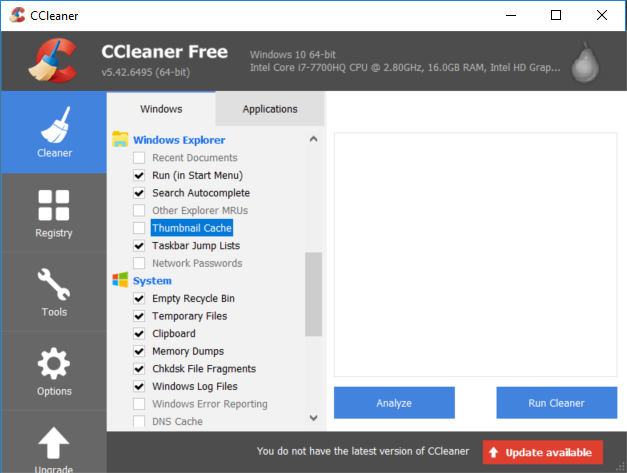
If you use CCleaner frequently, you may clear the thumbnail cache every time you run it. To avoid this make sure to uncheck the "Thumbnail cache" option when running the Cleaner.
That's it, you've learned how to stop Windows 10 from auto thumbnail removal cache, but if you still have any questions about this tutorial, feel free to ask them in the comment section.


