

WordPress is formidably awesome and provides several benefits that you might not expect from a content management system (CMS). It's very easy to manage everything in WordPress, from a new blog to posting news. This is why it is so popular on so many different channels. At the same time, there are additional functions for any niche thanks to easy-to-use plugins and tools.
When it comes to running WordPress on your website, you are left with a few options. Managed hosting companies like WP Engine make things easy and install WordPress for you. But for those who use shared hosting, they frequently have the option of cPanel, Ubuntu, or Plesk.
Plesk is a web hosting control panel that can be installed on both Linux and Windows servers. If you use Media Temple VPS, you may have seen it before. But at the same time you can install it yourself and use it to manage WordPress installations more easily on your own server.
WordPress Plesk Toolkit 17 is a Plesk extension to add a range of WordPress functionality. It's a useful (and easy) option to manage your WordPress themes, plugins, security, updates, and more in an easy way.
WordPress Toolkit on Plesk
Plesk is a comprehensive, versatile and secure toolkit for WordPress that provides a single dashboard to easily manage multiple instances of WordPress. Plesk makes it easy to sandbox new plugins, features, and design ideas before publishing them on your live website. For this, you won't need any additional plugins or a separate server - the WordPress Toolkit in Plesk manages it all.
At the same time you can use the WordPress Toolkit to take some of the complexity out of managing WordPress websites. Prepare, clone, sync, upgrade, migrate and other complex tasks - it's easy to do it with a simple click.
The WordPress Toolkit provides a single admin interface to easily install (one-click installer), configure, and manage WordPress. You need to install the WordPress Toolkit extension in Plesk and you can start working with it.
The WordPress Toolkit requires Plesk (of course), as well as a PHP server version 5.3 or higher. If your server still uses a PHP version below this, you will need to add a custom PHP controller. To enable this, you will need to specify the path to the PHP binary and change the subscription with the WordPress Toolkit to the custom PHP driver.
At the same time, WordPress Toolkit is free for owners of Plesk Web Host and Plesk Web Pro editions. Plesk Web Admin users are offered a different SE version with fewer features.
Now let's see how you can use the WordPress Toolkit in Plesk.
Installing WordPress with Plesk
You must first log in to your Plesk panel. From here you should have the following installation options available:
- Websites and Domains> WordPress> Install
- Apps> WordPress> Install
- Subscription> WordPress> Install
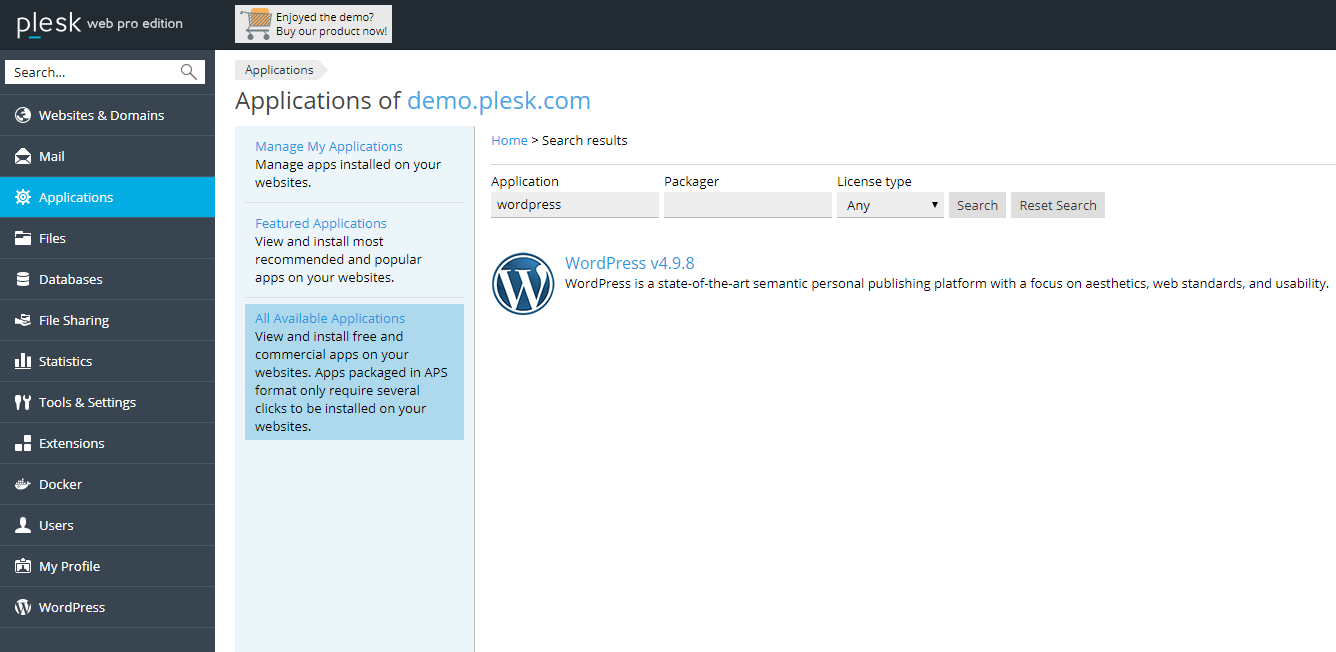
Click on the Websites and domains tab and you should see a WordPress icon in the top right of your Plesk dashboard. Click on the WordPress icon and click Install on pc to install a WordPress in your Plesk panel.
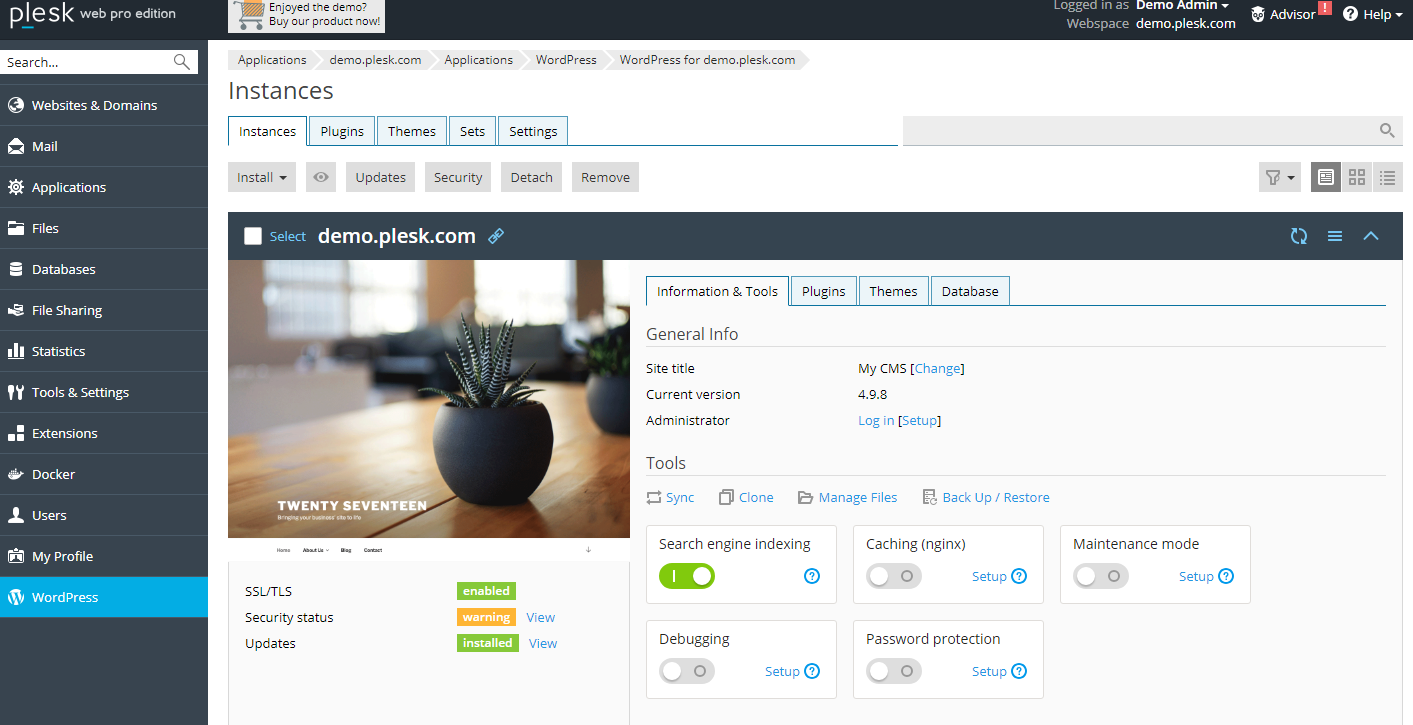
Manage WordPress installations
After successfully installing WordPress with Plesk (or importing a site via de Websites and Domains> WordPress> Import), your next step is to go to the WordPress Toolkit dashboard to get a broad view of the WordPress websites running on your server. From this main page you can see all your installations at a glance.
You can easily switch between cards, lists, or tiles based on your visual preferences.
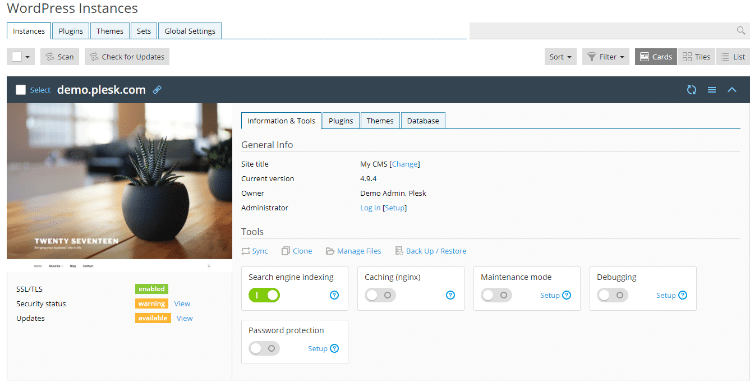
From the Information and tools Card tab will have access to your site's controls and tools. Use the switches to quickly disable search engine indexing, enable debug and maintenance mode, enable caching, or restrict public access by turning on password protection.
At the same time you will find quick links to sync, clone, manage files and backup / restore your files.
Tip: use the Clone to quickly activate a staging site for your testing target.
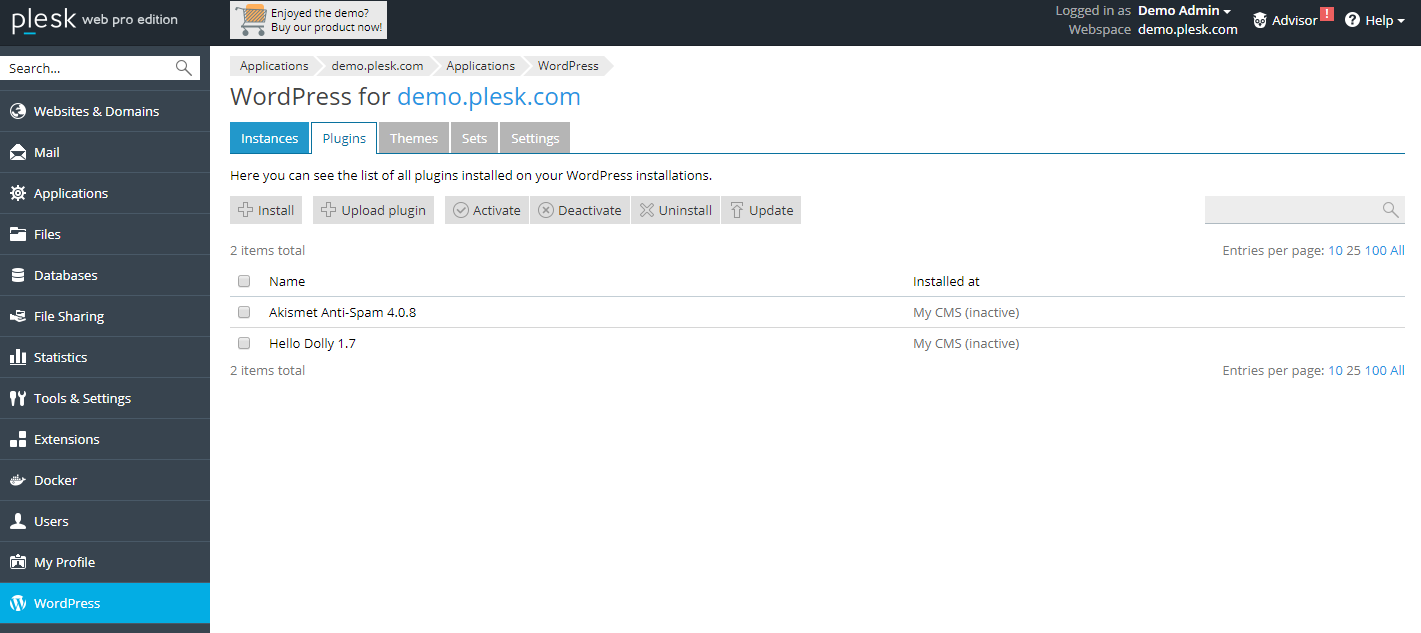
Manage WordPress Plugins
With the WordPress Toolkit on Plesk, managing plugins at the same time is easy. You can install, activate and remove plugins from your control panel.
Install plugins
there are two options to install plugins. Add a plugin to a specific site, go to: WordPress> the Plugins tab of a site> Install
Or if you want to install a new plugin on all your WordPress sites, navigate to the most general one: WordPress> Plugins> Install
Whatever the case, click the search icon and search for a plugin. By default, when you install a plugin with the WordPress Toolkit, it is activated automatically.
At the same time you can upload a third party plugin (like one you bought from CodeCanyon or a new WooCommerce extension). Just go to: WordPress> Plugins> Upload Plugin
Then select your plugin zip file and click Upload. To install and activate the plugin, go to: WordPress> Plugins
Click to install your new plugin, then select the WordPress sites you'd like to add it to.
Remove add-ons
However, you can choose any plugin to remove from your WordPress by selecting and clicking the remove icon to remove it from the selected installation.
Now, choose the WordPress installation you want to activate and deactivate any installed plugins.
Go to the Server Management> WordPress> Plugins tab and select the plugin you want to enable or disable.
Manage WordPress themes
With Plesk, it is very easy to add, remove, activate or deactivate any WordPress theme.
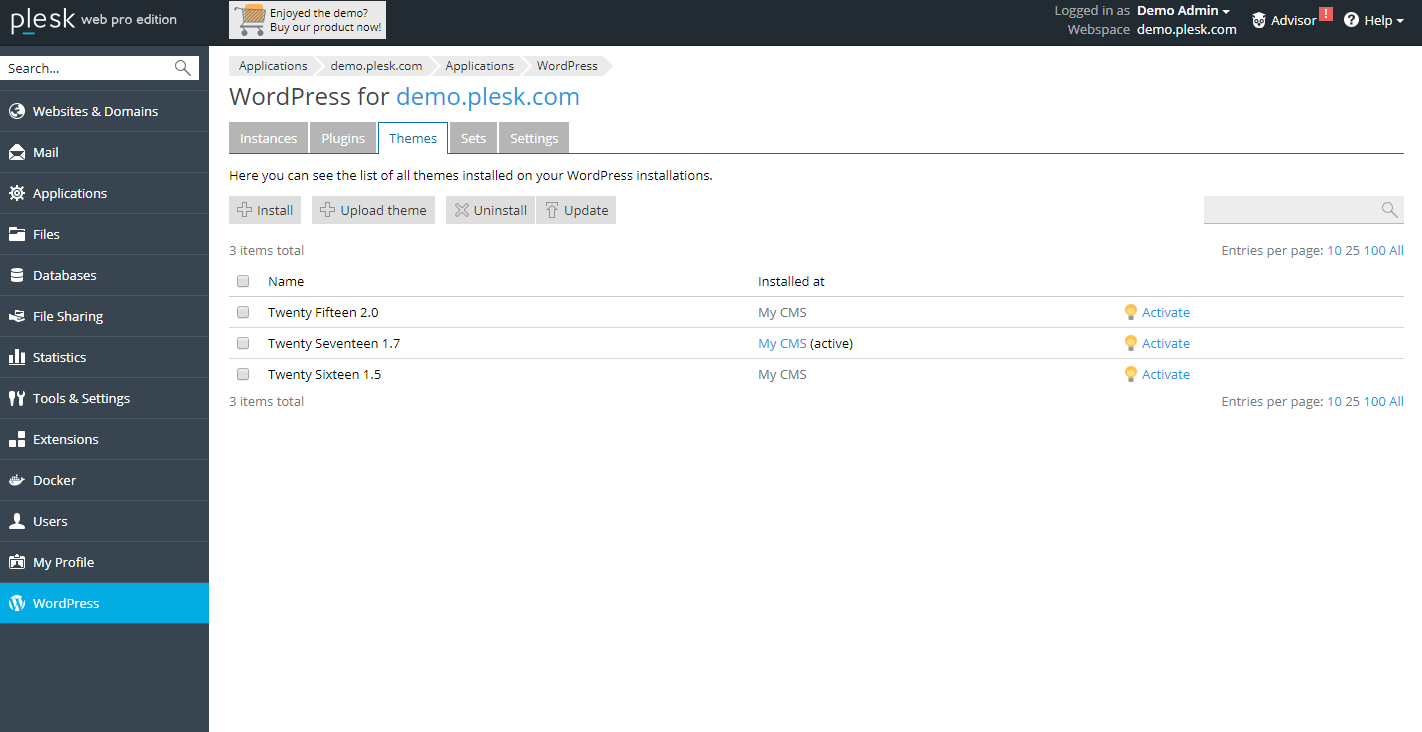
Install themes
Go WordPress> Themes tab> Install to add a new topic. Use search to find a theme and check the checkbox of the theme you want to add.
As with plugins, you can add the same theme for all WP instances or add a specific theme to just one specific instance (or more). To do so, you need to click on the drop-down menu and then select the instances that you want to add or remove a theme.
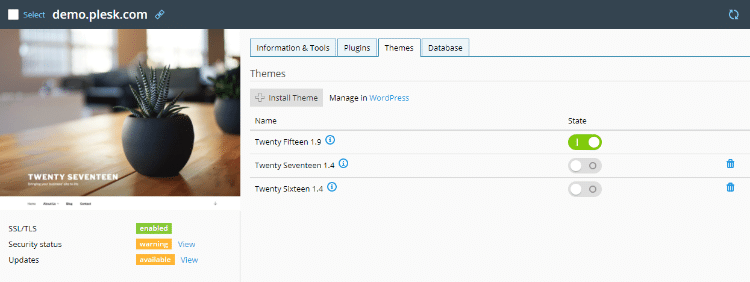
At the same time, at the same time you can easily update any theme from the WordPress> Themes tongue. Just select the theme you want to update for your installs (although we always recommend updating for security - if you're using a WordPress child theme for customizations, you shouldn't have to worry).
WordPress security
You can perform a security check for your website with the Plesk WordPress Toolkit. You will be able to see if all the / readme.html / files are empty. At the same time you can easily change your security settings and view your security status. For that you need to go to column S in section Websites and domain> WordPress.
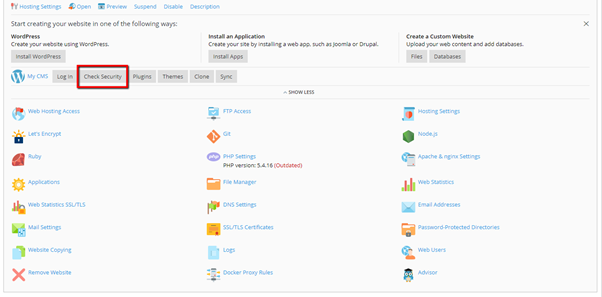
Click the "check security" link to see the status of all your WordPress installations. Select the check boxes with the security enhancement you want to perform, and then click the secure button.
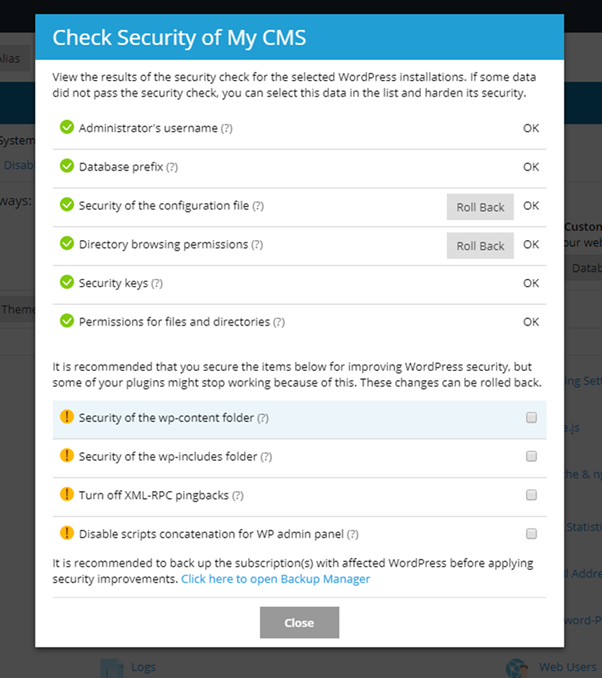
This is how you can dramatically decrease the chances of someone breaking into your site by ensuring the highest level WordPress website security.
Restore backup
Along with overall WordPress site security, the WordPress toolkit in Plesk can at the same time be used to backup your site.
Plesk Toolkit for WordPress makes it easy to create scheduled backups for your website. Follow the steps to make sure you have up-to-date data to restore from where you can back up when needed:
- First log in to the Plesk dashboard
- Click on domains
- Then click on Manage Domain or Manage Hosting
- Now click on Websites and Domains
- Click Backup Manager
- Click on Scheduled Backup Settings

Here you can choose your options in the Backup Settings, including adding a prefix to your backup name, selecting a multi-volume backup, the backup storage location, and setting a limit for the backup. backup. (the number of copies of your backup) on your server. You can even set a notification alert.
If you go to Calendar section, at the same time you can activate and automate your backup task. Choose a backup frequency for your website as you have regular site backups made for your website. Just select the time to start the backup process and save.
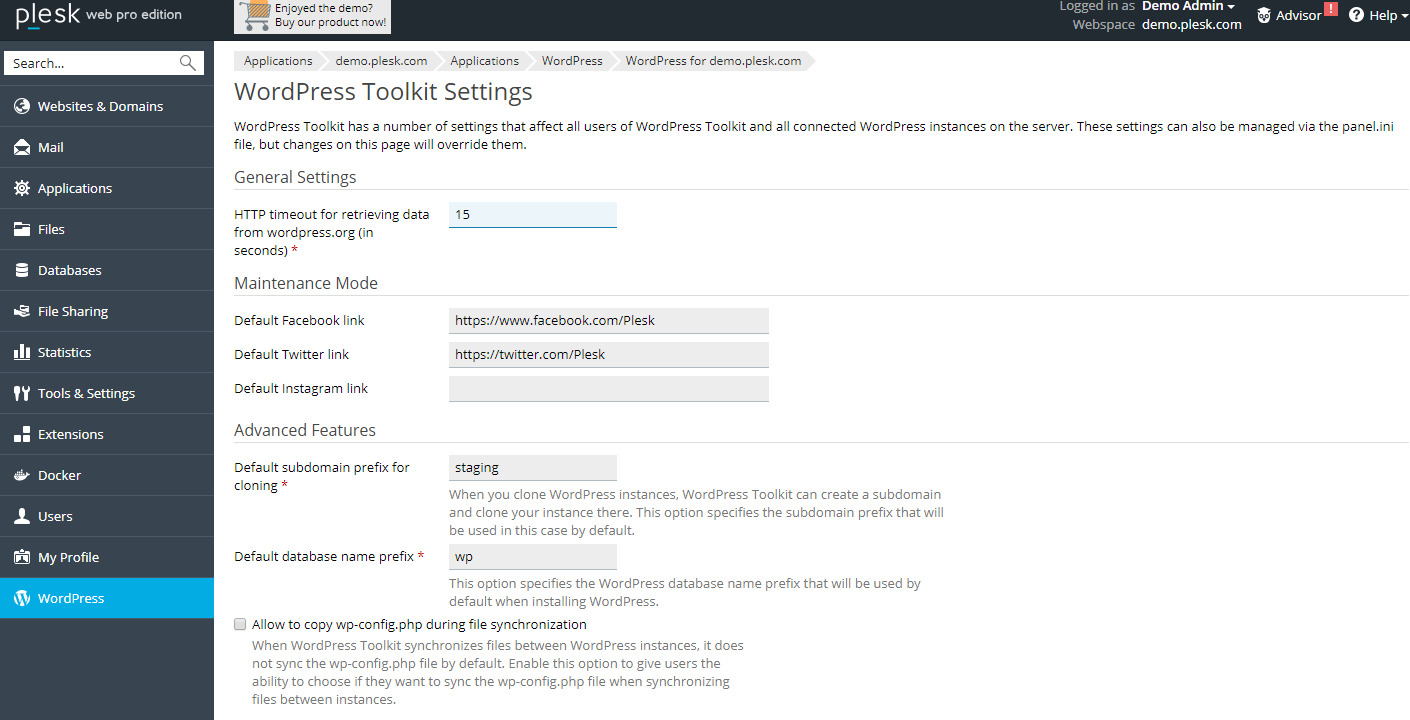
Edit global settings
Finally, in the Global setting You can set your maintenance page and default subdomain prefix for cloning, which will allow you to change the staging site URL.
conclusion
Manually managing WordPress sites can be quite complex. A powerful control panel like Plesk makes it easy, and with the WordPress Toolkit in Plesk you can manage all your sites from a single management panel.
If you are an agency hosting multiple client sites, or an avid writer with a blog in each niche, the WordPress Toolkit in Plesk is one of your best options for managing all of your sites. Work smarter, not harder, and manage your WordPress sites effectively without any hassle.
What do you think about the WordPress Toolkit in Plesk? Or do you have a question about how to get started? Leave us a comment below!


