


When interacting with the devices that we have installed on our computer, it is always advisable to try to have only those that we have connected to our team, eliminating all those that are no longer connected to our computers, either because they have stopped working or we have disconnected them permanently.
Windows registers all the devices that we have connected to our PC, so that when we have to use them, we just have to turn them on and that's it. no need to install drivers and others again. If you think that the time has come to clean the device that you do not use, I invite you to continue reading.
Printers are one of the items, especially if we work in an office, the items whose life cycle, generally short (depending on quality), so you will probably come across more than one printer when printing a document. In order not to have to wait forever for the document to appear on a printer that does not exist, the best we can do is remove it from the devices configured and available on our PC.

- First, we must enter the Windows configuration alternatives through the Windows key + i, or through the start menu by clicking on the cogwheel.
- Then click Devices.
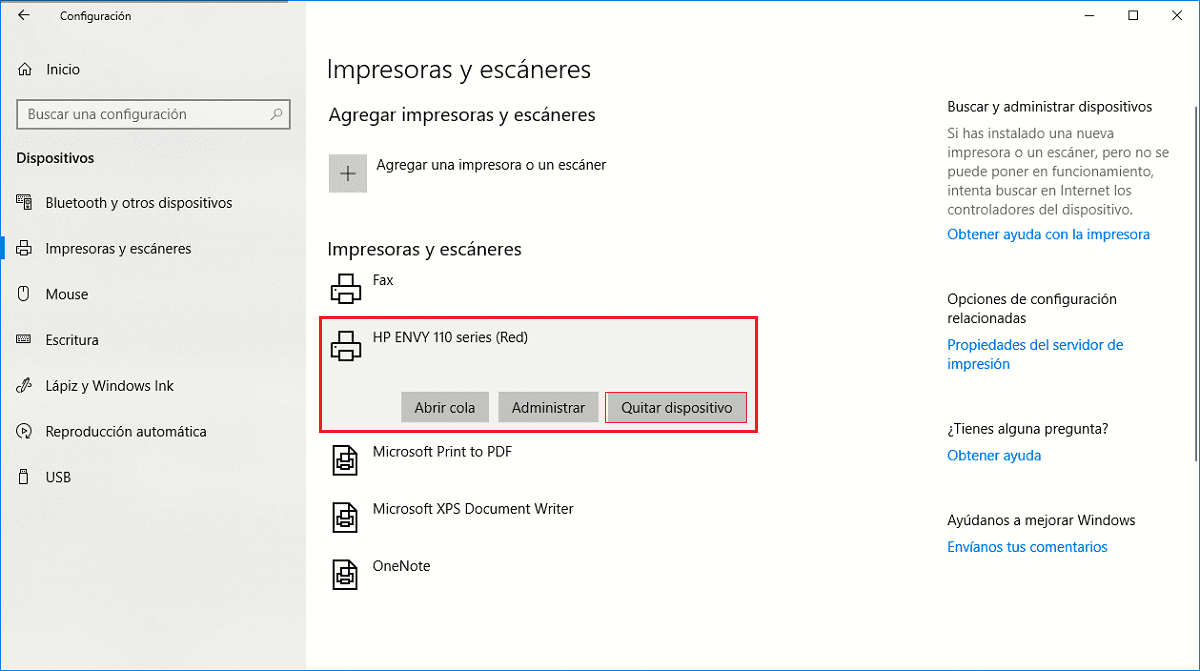
- Then, in the left column, click Printers and scanners.
- In the right column we go up to Printers and scanners, where all the printers and scanners that we have associated with our team will be displayed.
- To remove the printer that we do not use, for whatever reason, we just have to click on it and click on Remove Device in the options box that appears.


