


The opportunities that Windows 10 offers us, compared to previous versions, are very great. But if we talk about the Pro version, the number of functions and features increases considerably. One of the most striking is the one that enables us move apps to an external hard drive, once installed.
This function is very equivalent to that offered by the Android operating system for mobile devices. This function of Windows 10 has the same limitations as Android, so we are going to find different applications that we will never be able to transfer to an external disk. To avoid this little problem, we can configure Windows so that future applications are installed on an external drive.
Installing applications on an external disk allows us to always have free space on our main hard drive, so that the administration of the operating system is always the most optimal. For change the installation drive for future applications which we plan to install on Windows 10, we will proceed as follows.
First we must have access to the Windows settings, through the keyboard shortcut Windows key + io or through the start menu by clicking on the cogwheel shown on the left side of the menu. Then click System> Applications.
(*10*)
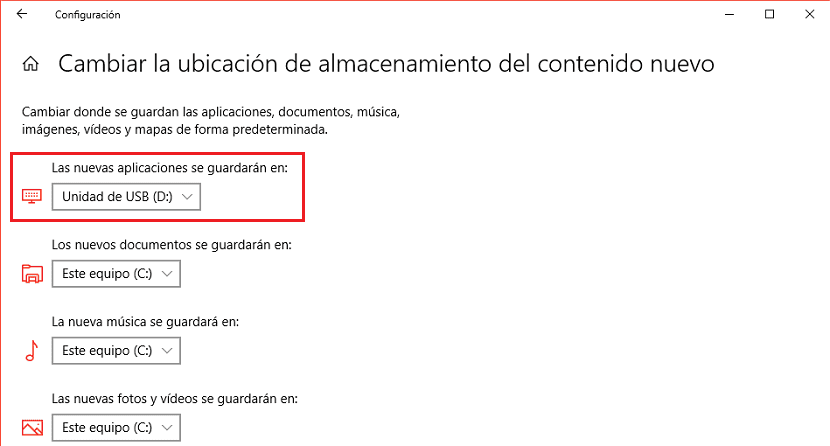
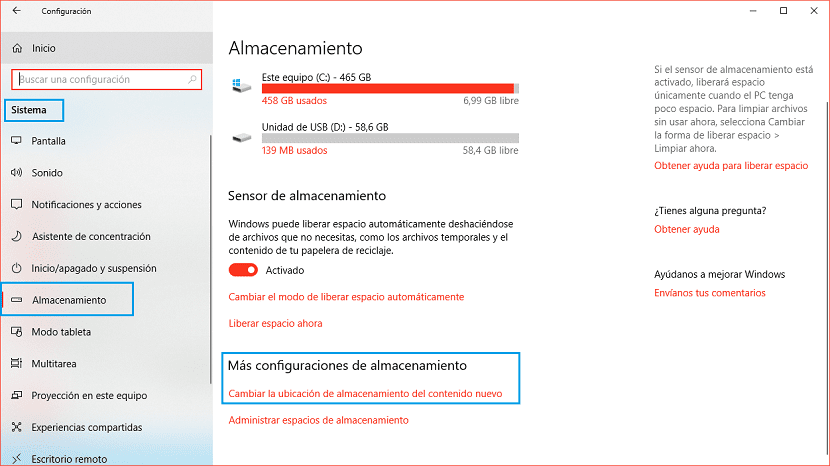
Within the Storage option, we scroll to the bottom right, to the More storage settings section. Then click on the first available option: Change the storage location for new content. Next, we must click on The new applications will be saved in: and click on the drive connected to our computer with NTFS format where they will be installed.
This change, just it will affect all the applications that we install after this change, it will not affect those that are already installed in our equipment. If we want to move the applications that are installed on our computer, in Windows News we also have a tutorial prepared where we explain how to do it.


