

If you are trying to fix Netflix app not working on Windows 10 problem then don't worry as thousands of people have faced similar situation where their Netflix app is not working and they have no choice. You opt for other methods to watch the Netflix videos or movies on your PC. But don't worry, as today in this guide we will discuss various ways to solve this problem easily. But before we move on, let's understand a little more about Netflix and the underlying problem.
Netflix: Netflix is an American media service provider founded in 1997 by Reed Hastings and Marc Randolph. The main business model of the company is its subscription streaming service that allows customers to stream a large number of movies, television series, documentaries, including those produced in the company. All Netflix content is ad-free and all that is required to use Netflix is a good internet connection, as long as you are a paying member.
Netflix is one of the most popular and best video streaming services out there, but nothing is perfect, so there are several issues that arise when streaming Netflix on your PC. There are various reasons behind the Windows 10 Netflix app not working, crashing, not opening, or unable to play any video, etc. Also, customers have complained about a black screen on their TV when they start Netflix and because of this, they are unable to stream anything.

If you are among these users who are facing any of the above mentioned issues then don't worry as we will fix the Netflix app not working properly on Windows 10 PC.
Why doesn't the Netflix app work on Windows 10?
There are several reasons why Netflix is not working, but some of them are listed below:
- Windows 10 is out of date
- Issuance of date and time
- The Netflix app could be corrupted or out of date
- Graphics drivers are outdated
- DNS problems
- Netflix could be down
But before attempting any troubleshooting methods beforehand, it is always recommended to make sure of the following:
- Restart your PC
- Always try to restart the Netflix app when you run into any problem
- Check your internet connection as you need a good internet connection to stream Netflix
- The date and time settings on your PC must be correct. If they are not correct, follow this guide.
After doing the above, if your Netflix app still doesn't work properly, then try the following methods.
How to fix Netflix app not working on Windows 10
Below are different methods by which you can fix your Netflix app not working problem on Windows 10:
Method 1: Check for updates
It may be possible that the Netflix app is not working because your Windows is missing some crucial updates or because the Netflix app is out of date. Updating the Windows and updating the Netflix application your problem can be solved.
To update the window, do the following:
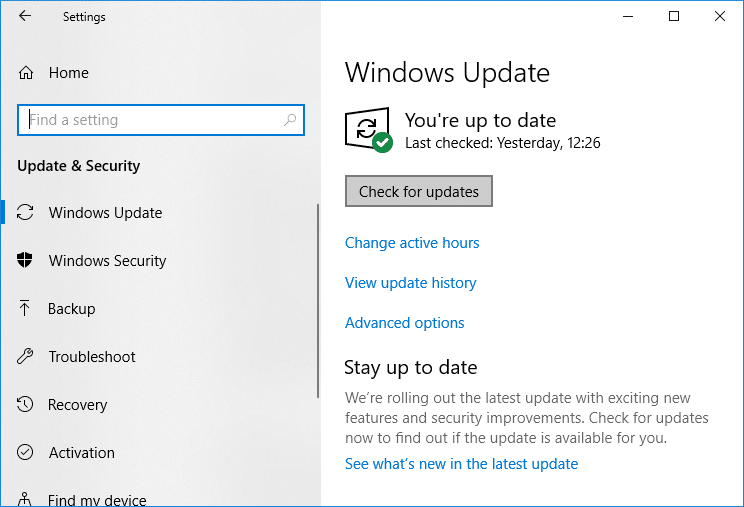
1.Press Windows key + I to open Settings and then click Update & Security.
![]()
2.In the menu on the left, click Windows Update.
3.Now click the "Check for updates" button to check for available updates.
4.If there are any pending updates, click Download and Install Updates.
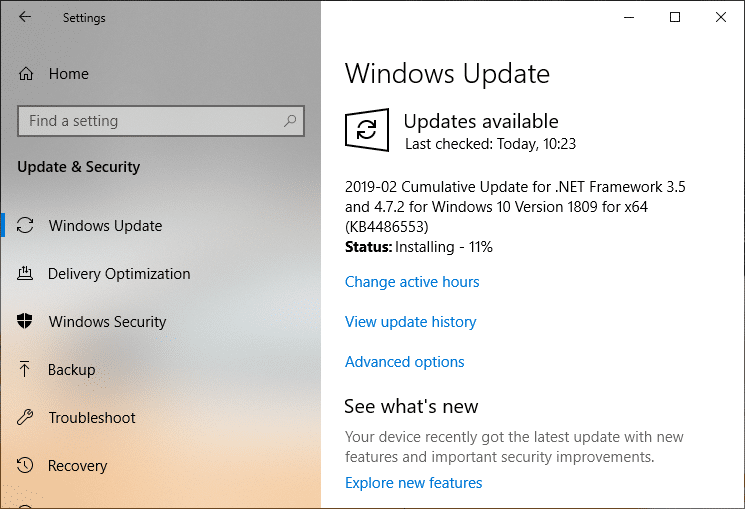
5.Once the updates are downloaded, install them and your Windows will be up to date.
To update the Netflix application follow these steps:
1.Open the Microsoft store by searching with the search bar.
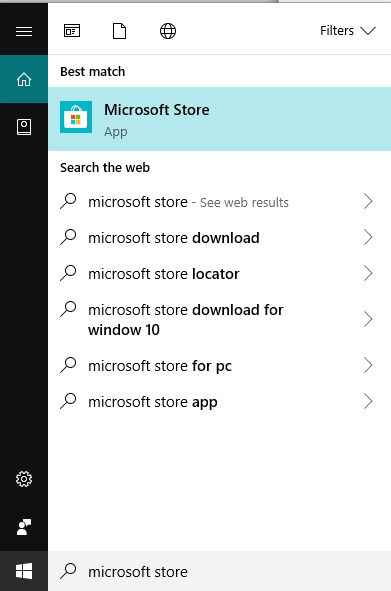
2. Press "enter" in the top result of your search and the Microsoft store will open.
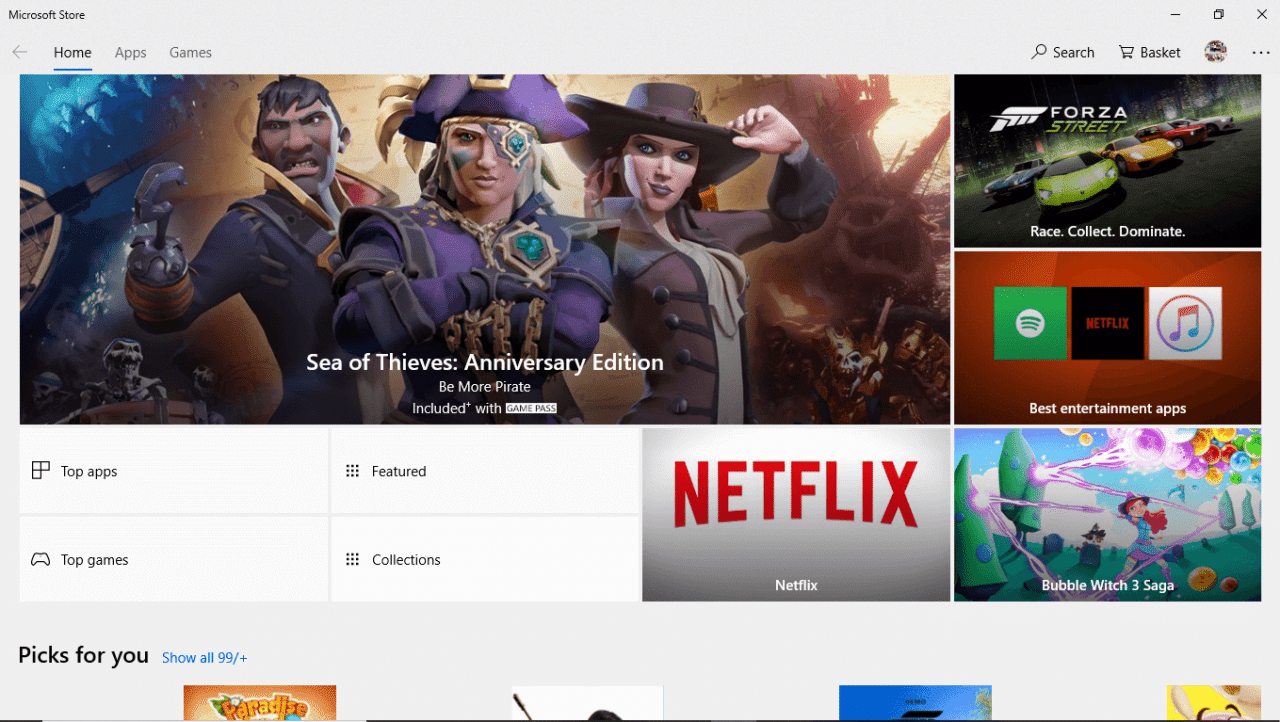
3.Click on the three dots icon available in the upper right corner.
![]()
4.Now click on Downloads and Updates.
5.Then click the Get Updates button.
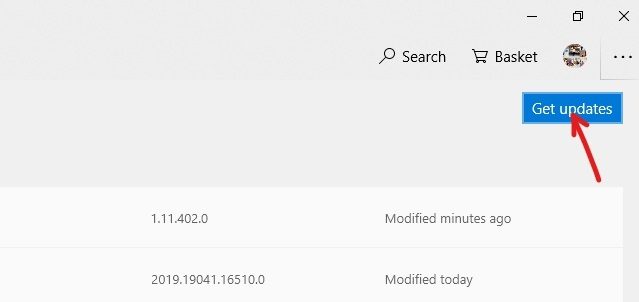
6.If an update is available, it will be downloaded and installed automatically.
After updating your Windows and Netflix app, check whether your Netflix app is working properly or not.
Method 2: Restart the Netflix app in Windows 10
If the Netflix app is reset to its default settings, the Netflix app may start working properly. To reset the Netflix app for Windows, follow these steps:
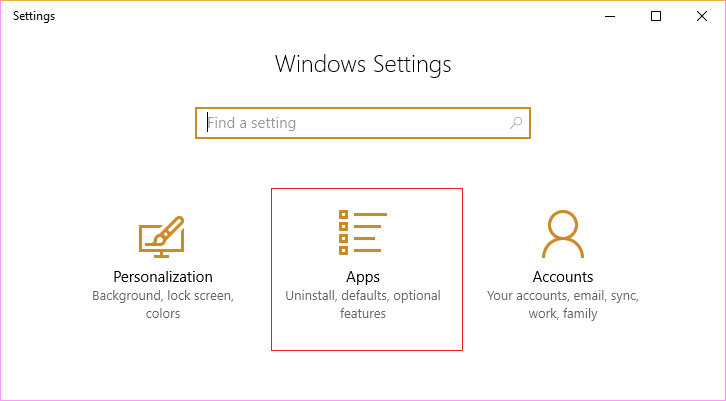
1.Press Windows key + I to open Settings and then click Applications.
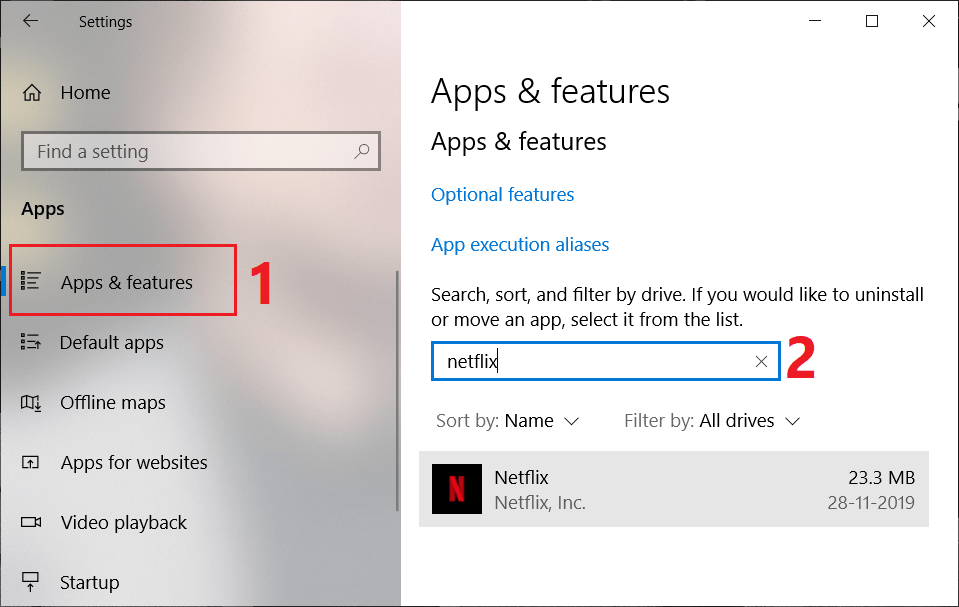
2.In the menu on the left, select Apps & features and then search for the Netflix app in the search box.
3.Click on the Netflix app and then on the advanced options link.
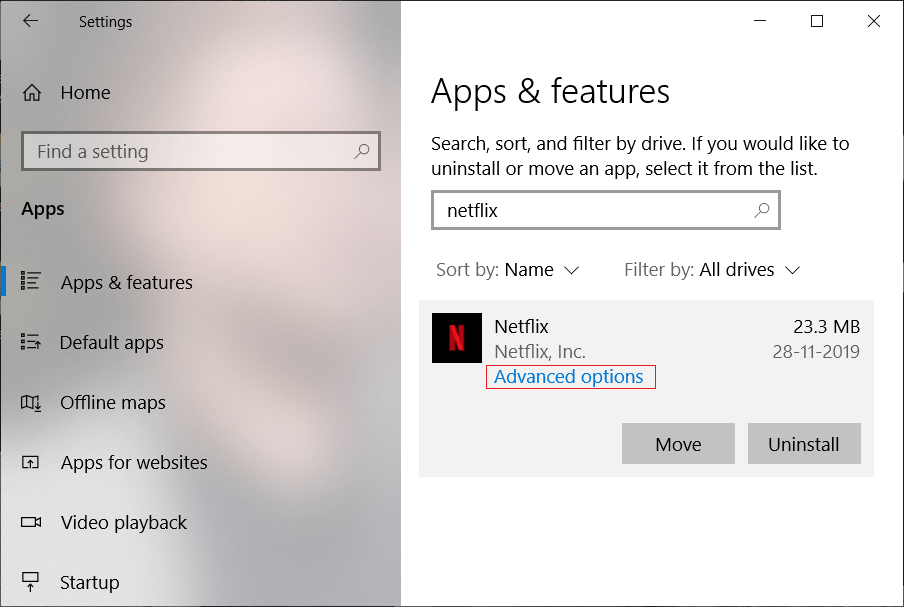
4.In the advanced options, scroll down and look for the Reset option.
5.Now click the Restart button under the Restart option.
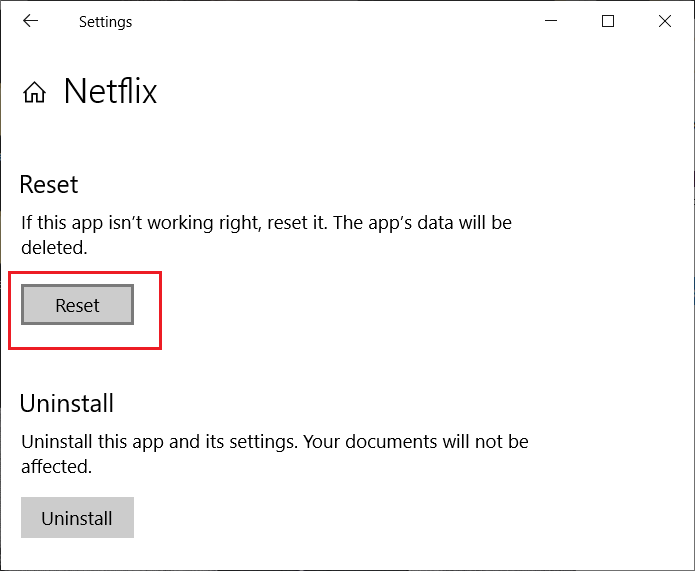
6.After restarting the Netflix app, your problem can be fixed.
Method 3: Update the graphics drivers
If you are facing the Netflix app not working problem, then the most likely cause of this error is that the graphics card driver is corrupt or out of date. When you update Windows or install a third-party application, it can corrupt your system's video drivers. If you are facing any of these problems then you can easily update your graphics card drivers and solve the Netflix app problem.
Once you've updated the graphics driver, restart your PC and see if you can fix the Netflix app not working on Windows 10.
Reinstall the graphics card driver
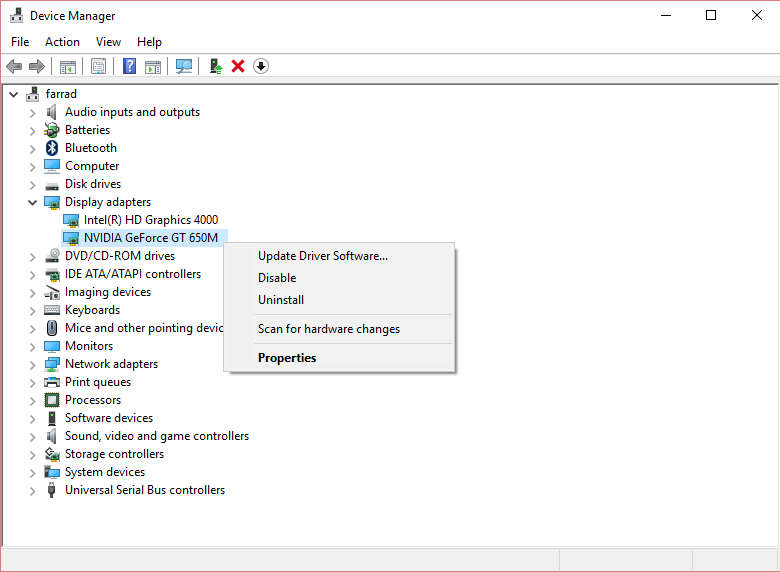
1.Press Windows Key + R, then type devmgmt.msc and hit Enter to open Device Manager.
2. Expand Display Adapters and then right-click on your NVIDIA graphics card and select Uninstall.
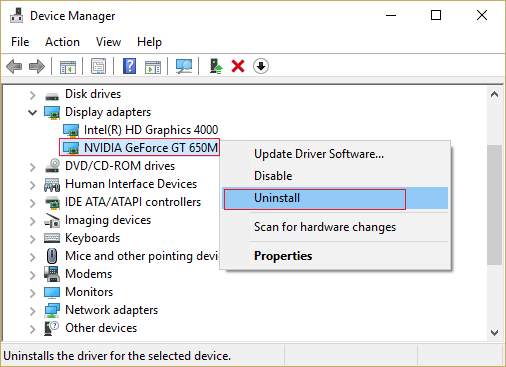
2.If you are prompted for confirmation, select Yes.
3.Press Windows key + X and select Control Panel.
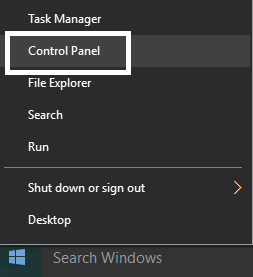
4.From the Control Panel click Uninstall a program.
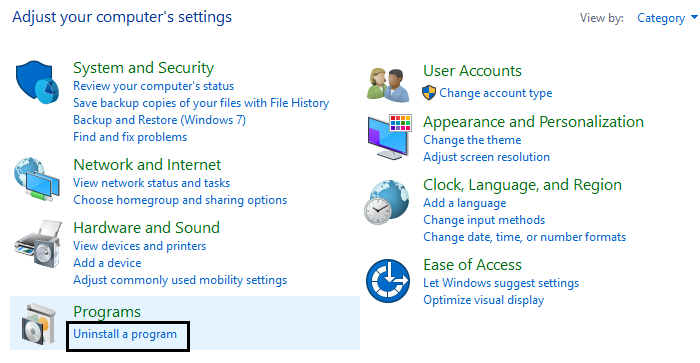
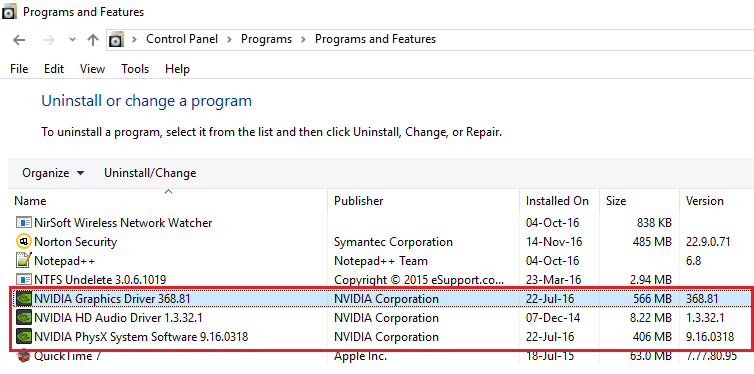
Next, uninstall everything related to Nvidia.
6.Restart your system to save the changes and re-download the configuration from the manufacturer's website.
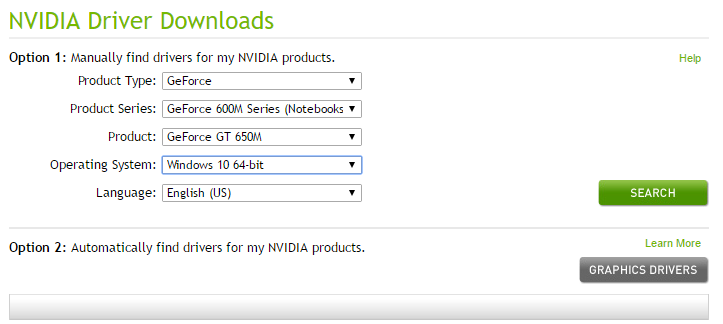
5.Once you are sure you have removed everything, try installing the drivers again.
Method 4: Delete the mspr.hds file
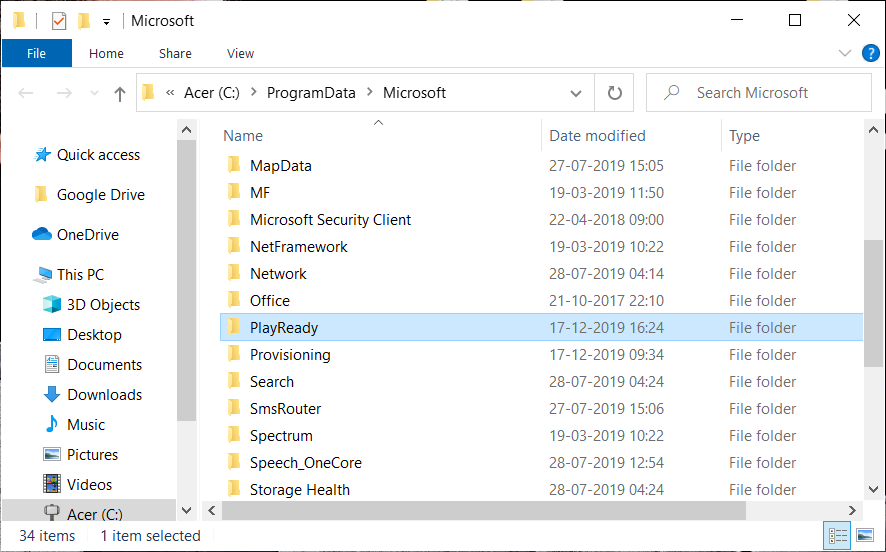
The mspr.hds file is used by Microsoft PlayReady which is a Digital Rights Management (DRM) program used by most online streaming services including Netflix. The name of the mspr.hds file itself implies the Microsoft PlayReady HDS file. This file is stored in the following directories:
For Windows: C: N-Microsoft Program Data N-Ready to Play for MacOS X: / Library / Application Support / Microsoft / PlayReady /
Deleting the mspr.hds file will force Windows to create a new one that will be free of errors. To delete the mspr.hds file, follow these steps:
1.Press Windows Key + E to open Windows File Explorer.
2.Now double click the C: drive (Windows drive) to open.
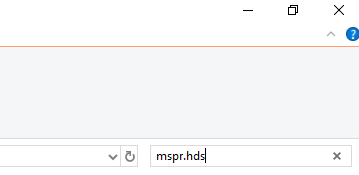
3.From the search box that is available in the upper right corner, search for the file mspr.hds.
Note: Or you can navigate directly to C: N-ProgramDataN-MicrosoftN-PlayReadyN
4. Type mspr.hds in the search box and press Enter. Wait until the search is completely over.
5.Once the search is complete, select all the files under mspr.hds.
6.Press the delete button on your keyboard or right-click on any file and select the delete option from the context menu.
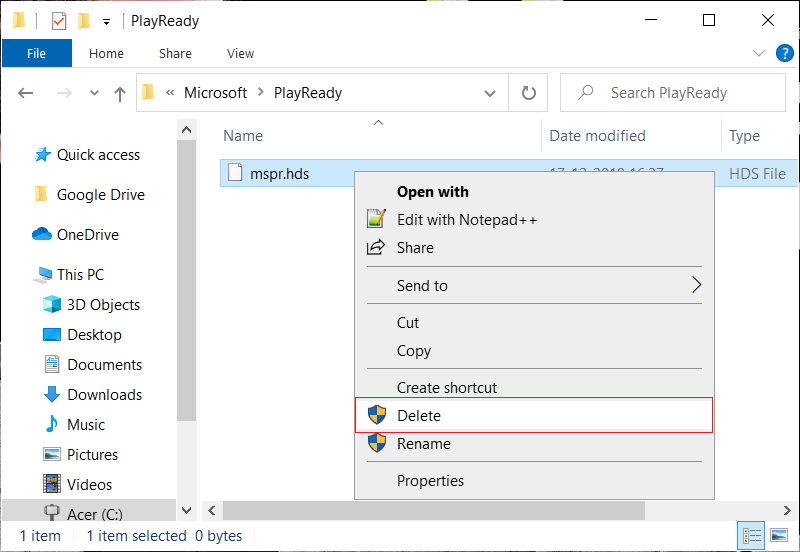
7.Once all the files related to mspr.hds have been removed, restart your computer.
After the computer restarts, try running the Netflix app again and it may work without problems.
Method 5: Clear DNS and restart TCP / IP
Sometimes the Netflix application does not connect to the Internet because it is trying to resolve the server IP address for the entered URL which may no longer be valid and therefore cannot find the corresponding valid server IP address. So by clearing DNS and restarting TCP / IP your problem can be fixed. To clean the DNS follow the following steps:
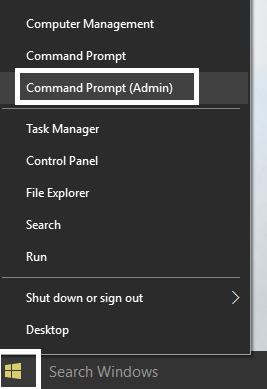
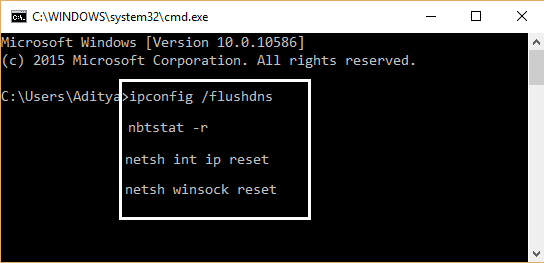
1.Right-click the Windows button and select "Command Prompt (Admin)". Or you can use this guide to open the Elevated Command Prompt.
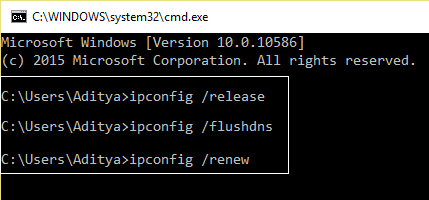
2.Type the following commands one by one and hit Enter after typing each command:
ipconfig / release ipconfig / renew netsh winsock reset netsh int ip reset ipconfig / flushdns ipconfig / registerdns netsh int tcp set heuristics disabled netsh int tcp set global autotuninglevel = disabled netsh int tcp set global rss = enabled netsh int tcp show global
3.Restart your PC to save your changes, and you are good to go.
After completing the steps above, the TCP / IP address will be reset. Now, try to run the Netflix app and the problem can be solved.
Method 6: Change the DNS server address
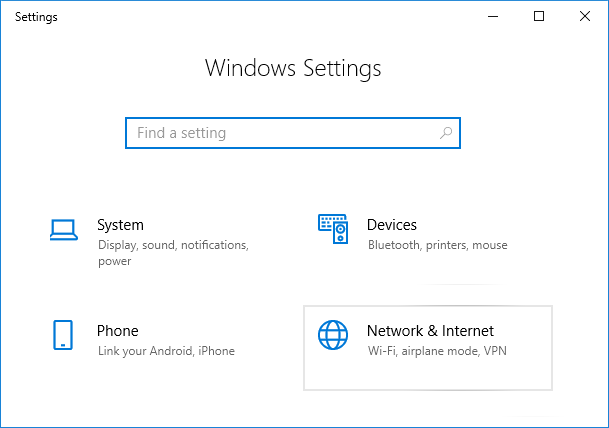
1.Press Windows key + I to open Settings and then click Network & Internet.
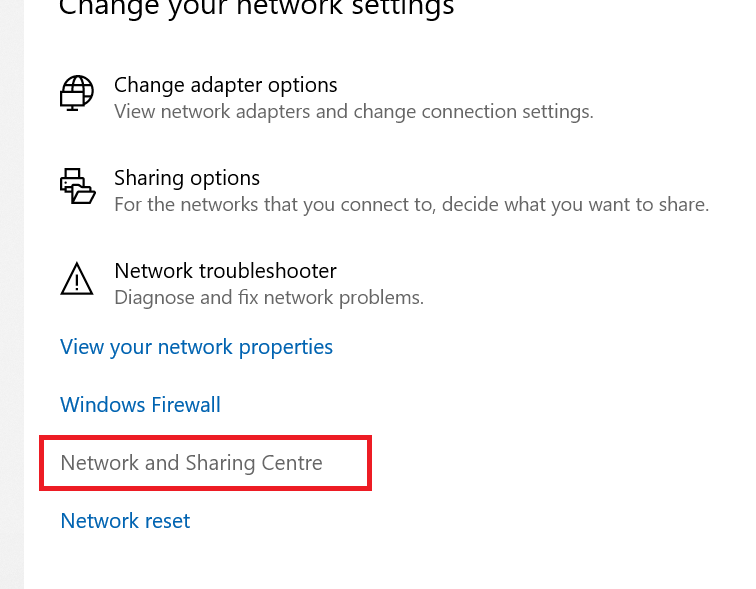
2. Make sure you click on Status and then scroll down to the bottom of the page and click on the Network and Exchange Center link.
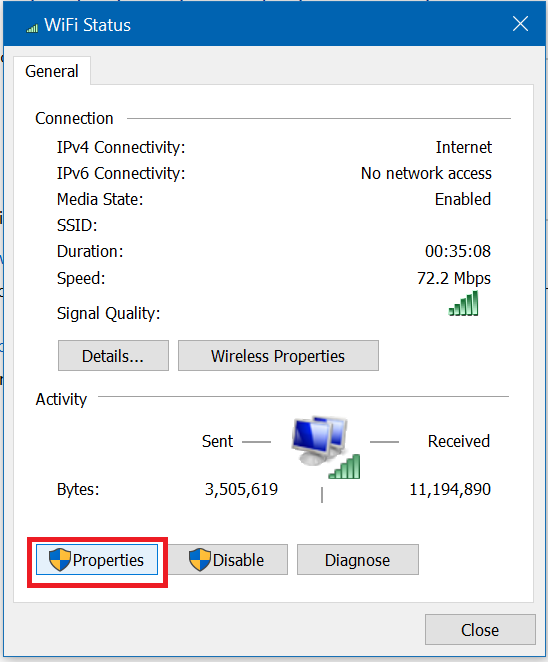
3.Click on your network connection (Wi-Fi), and click the Properties button.
4.Select Internet Protocol Version 4 (TCP / IPv4) and click the Properties button again.
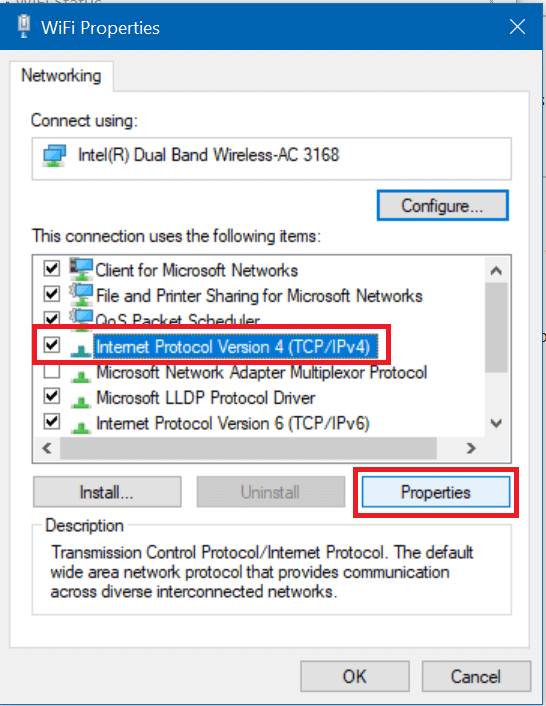
5.Check the "Use the following DNS server addresses" box and enter the following in the appropriate fields:
Preferred DNS server: 8.8.8.8 Alternate DNS server: 8.8.4.4
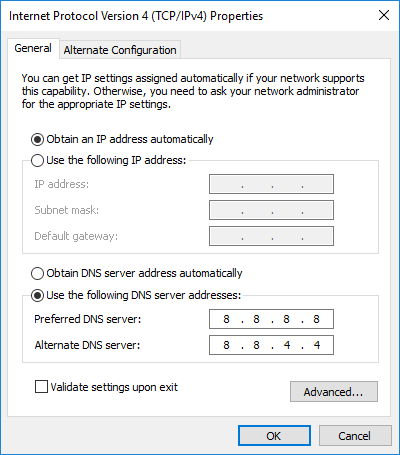
6.Save the settings and reboot.
Method 7: Install the latest version of Silverlight
To be able to stream videos in Windows 10, the Netflix application uses Silverlight. Generally, Microsoft Silverlight is automatically updated to the latest version during Windows update. But you can also update it manually by downloading it from Microsoft's website and then installing it. Once the installation is complete, restart your computer and check if your problem has been solved or not.
Method 8: Reinstall the Netflix app
If none of the above methods work, then uninstall your Netflix app and reinstall it. This method may be able to solve your problem.
To uninstall the Netflix application follow these steps:
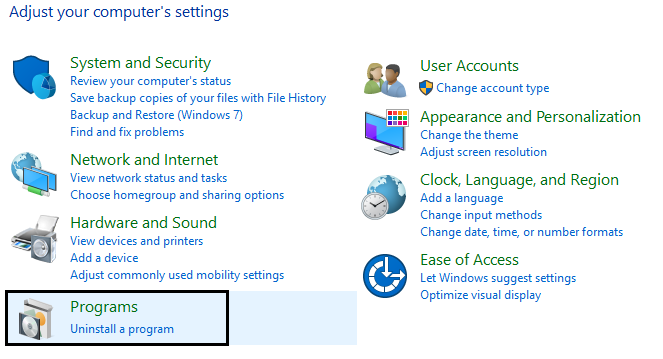
1.Type control in the Windows search bar and then click on the top result to open the Control Panel.
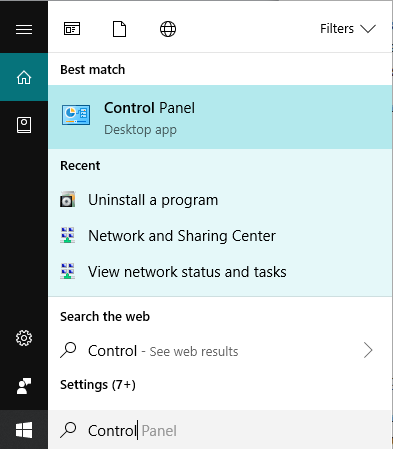
2. Click Uninstall a program link under Programs.
3.Scroll down and find the Netflix app in the list.
4.Now right-click on the Netflix app and select Uninstall.
5.Click Yes when it asks for confirmation.
6.Restart your computer, the Netflix application will be completely removed from your device.
7.To reinstall Netflix, download it from the Microsoft store and install it.
8.Once you install the Netflix app again, the problem can be solved.
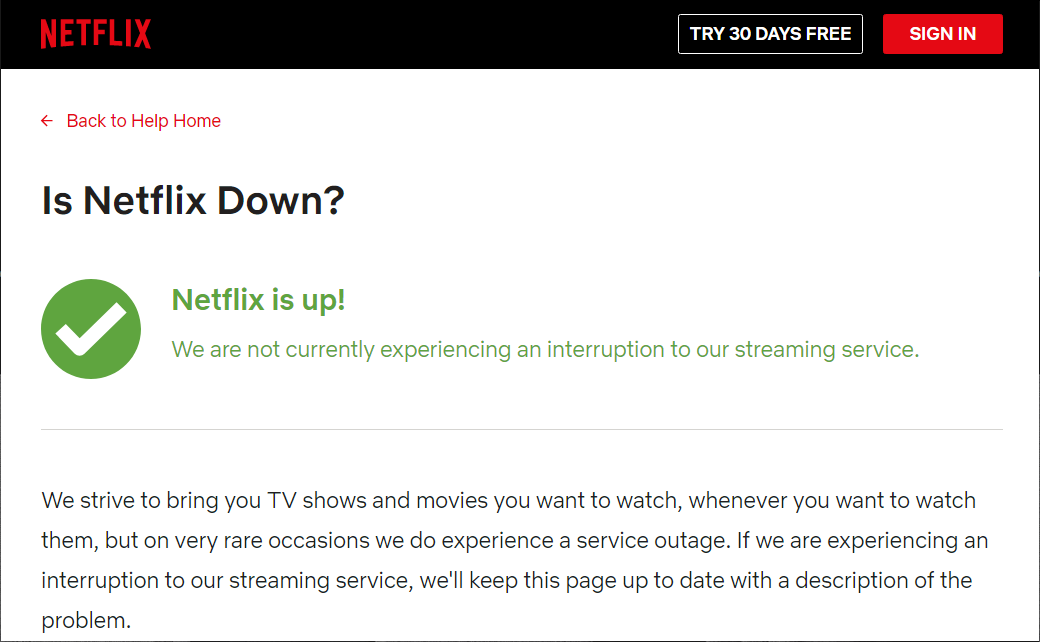
Method 9: Check Netflix Status
Lastly, check if Netflix has dropped this way. If you have an error code, you can also look for it here.
Hopefully, using one of the above methods you will be able to fix the Netflix app not working on Windows 10 and you will be able to enjoy Netflix videos again without any interruption.


