

If you really want that your website is successful and reaches the top positions in the search engines search (and who doesn't), getting a well-optimized premium WordPress theme just isn't enough; you should also consider brushing up on SEO basics. It is a widely known fact that the SEO (Search Engine Optimization) is an instrumental factor in building a website. If you can't optimize your website, you run the risk of not being noticed by search engines. And that can be a fatal blow to any site.
If you own a WordPress website, there are many free SEO tools to help you with your SEO strategy. But when it comes to optimizing your content, Yoast SEO is hands down one of the best WordPress plugins for the job. Not only do you have extensive SEO options, but most of them are also available for free. Therefore, we have decided to create a comprehensive guide on how to install and use the Yoast SEO plugin on your WordPress site.
What does the Yoast SEO plugin do for your website?
Yoast SEO helps you properly optimize your pages and posts for search engines. This includes inserting keywords and key phrases into your post or any other type of content, as well as changing your titles and meta descriptions on any page or post, all with the goal of getting the highest possible ranking in search engines.
Based on the length of your post, as well as your focus keyword / phrase, Yoast calculates the best ways to optimize the post in question. For example, it determines how many times you need to add a keyword to meet SEO standards and ensure your site is searchable. This should be taken as a guide, not a science.
However, it not only calculates if you have enough keywords in your content, but also if there are keywords in your headings, meta description, and in your post URL. Furthermore, Yoast also notifies you if there are no images on your page or post, if your meta description is too short or too long, if you have enough internal and outgoing links, etc.
Another great thing about Yoast SEO is that it improves the overall readability of your content. Whether you're producing content to get more sales or simply to gain credibility in your niche, readability is extremely important to your on-page SEO. The rules are pretty simple - if your content isn't clean or readable enough, people won't consider your site a trustworthy source, and most likely, they won't be inclined to buy from you. Consequently, your chances of getting a higher ranking may decrease.
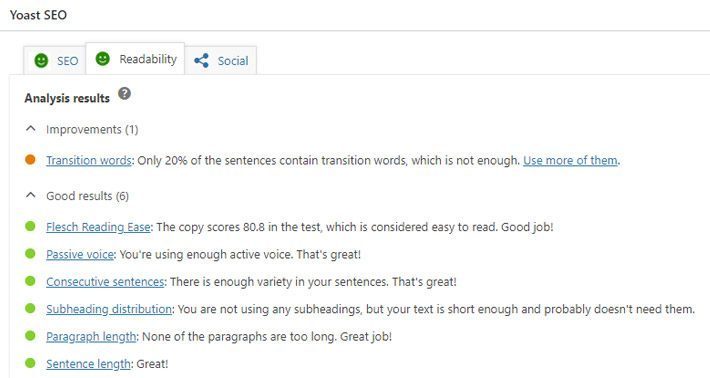
Yoast increases your readability by offering suggestions on how to improve certain parts of your writing. This includes pointing out places where your sentences or paragraphs may be shorter and notifying you if you use too much passive voice, if you must use a greater variety of transition words, etc.
This plugin will help you on-page seo of your web, achieving improve organic positioning from your website
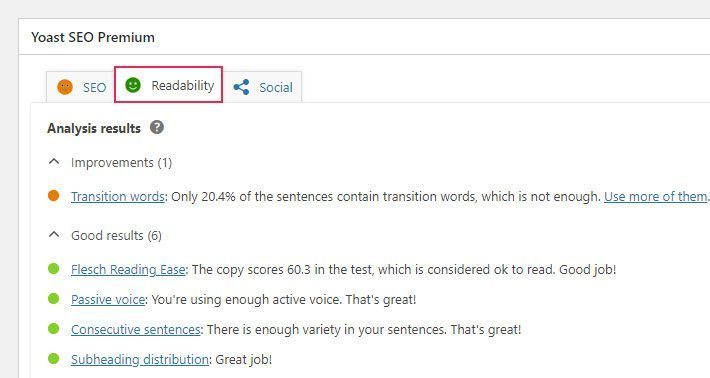
What is also characteristic of Yoast is that it works on the principle of traffic lights. That is, if the light for your readability or SEO score is red, that means you need more work. If it's orange, that means your optimization is acceptable, but there are still more than a few improvements you can make. For best results, your goal should be to turn the light green.
In addition to these useful features that allow you to optimize your keywords and readability, Yoast also offers you the option of generating an XML sitemap, as well as indexing (or not indexing) specific segments of your site. Last but not least, it allows you to import all your data and settings from other SEO plugins.
How to install Yoast SEO plugin?

The Yoast SEO plugin can be easily installed from the WordPress plugin directory in your admin panel, or you can download the plugin from Yoast website.
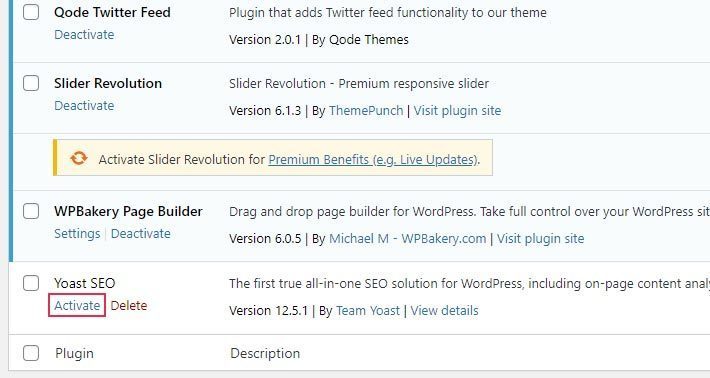
If you choose the first option, all you need to do is click Plugins> Add new , and then write Yoast SEO in the search box. After it appears in the results, just hit the Install button. Once you have finished installing the plugin, click the button Activate .
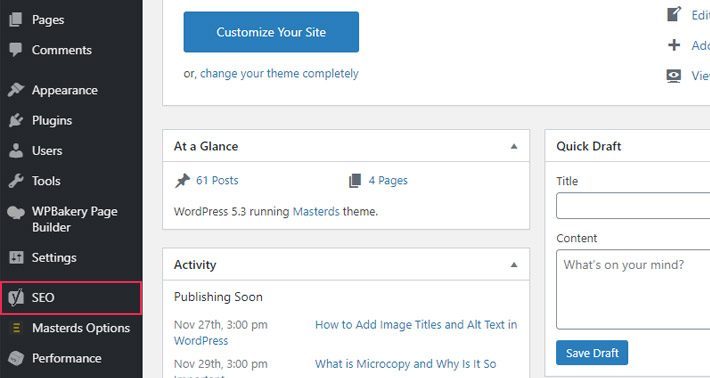
Now that Yoast has been installed and activated, a new option will appear called SEO in the sidebar of your Administrator.
How to configure Yoast SEO plugin
This plugin has many settings that may seem complicated to configure at first glance, but you will soon realize that it is not as difficult as it seems.
Yoast SEO settings contain multiple tabs. We will review them in more detail.
The general screen
When we go to SEO settings, the screen will open General - Yoast SEO .
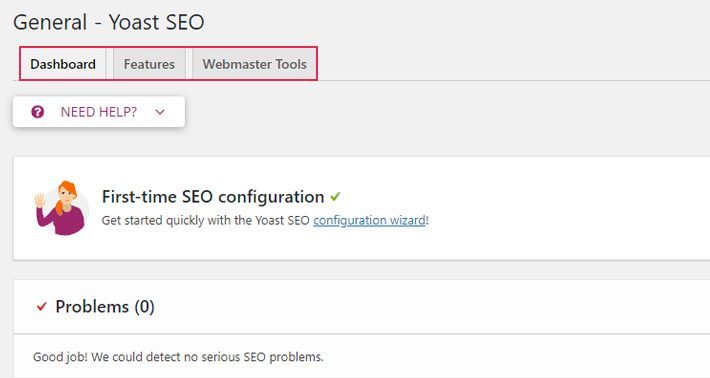
Control Panel : in this tab, we will see the assistant SEO setup for the first time . The wizard will guide us through some steps that will be presented to you in the form of questions and answers. These steps will help you get started with Yoast and adjust it to your website preferences.
characteristics - This tab contains many features that are enabled by default. We can enable or disable each of them according to your preferences.
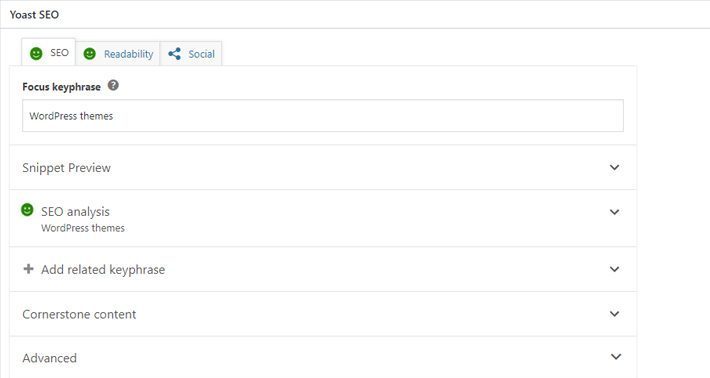
- SEO analysis: this is the option that we mentioned at the beginning. By activating it, you will allow Yoast to analyze your posts and pages, display your overall SEO score, and help you optimize them for search engines.
- Readability Analysis - We've touched on this before, too. The readability analysis option shows the readability score of your page / post and offers you suggestions in case you need to improve its readability.
- Cornerstone Content - This is your most important content, that is, the pages or posts that you want to rank higher in search engines. This option allows you to bookmark and filter this type of content on your site.
- Text link counter: the option that improves the structure of your site by displaying the number of internal links in your publications .
- XML sitemaps - Enables the generation of XML sitemaps on your site. These are particularly important because they hierarchically list the pages on your site and help search engines crawl them faster.
- Ryte Integration: Ryte is a third-party service that monitors, analyzes and optimizes the most important elements of your website to improve its overall performance. In case you have Ryte installed on WordPress, it will integrate with Yoast. Ryte will check if your site is still indexable by search engines on a weekly basis. If your site is not indexed, Yoast SEO will inform you.
- Admin Bar Menu: The function that allows a menu item called "SEO" to appear (or not appear) in the admin bar. Since it contains some convenient SEO settings, as well as the ability to quickly research keywords, this feature may be useful to some, but others may prefer to hide it.
- Security - No Advanced Settings for Authors - This option ensures that advanced SEO settings are hidden from authors. Only editors and administrators can use advanced settings unless this option is disabled.
Webmaster tools - By using this tab, you can verify your website with different webmaster tools. Once you do this, your home page will receive a verification meta tag from different search engines. You can get verification codes for Google, Yandex, Bing, and Baidu by following the links provided in the tab, and then add them in the fields marked for that particular search engine.
Search appearance
The screen Search aspect It has quite a few tabs with settings that let you define what your website will look like when it appears in search engine results.

general - This tab contains three different options: Title Separator, Home Page and Knowledge Graph & Schema.org .
- Title Separator - You can separate your site title and your post name with a symbol. There are several symbols that you can use as a title separator, with the hyphen being the default.
- Homepage - This is where you can set the meta title and meta description for your website's home page.
- Knowledge Graph & Schema.org: Yoast automatically generates structured data about your website. To ensure that the structured data is correct, you must define whether your site represents an organization or an individual. You can also enter your organization's name and avatar / logo here.
Types of content - The options you can find on this tab will allow you to configure the search appearance for different types of content. You can choose whether your posts and pages will appear in search results and whether to show or hide the publication date in the snippet preview and / or Yoast SEO Meta Box. Of course, you can also edit the SEO title and meta description variables for each of these categories, but we suggest that you always write custom meta titles and meta descriptions for each individual page or post.
Media - Media upload to WordPress is that it not only saves your media, but also creates an attached URL for the media in question. However, these attachment pages are often empty and can be detrimental to your page's SEO. Therefore, we recommend that you disable attached URLs if you do not plan to use them. The default option is recommended (that is, redirect the URLs of the attachments to the attachment itself).
Taxonomies - Here you can configure whether you want tags, categories and formats to appear in search results (if they do not appear, it means that they will not be part of the XML sitemaps). You can also define meta title and meta description variables for each taxonomy. Additionally, you can also choose to remove (or keep) the category prefix from the category URL (usually visible in the URL as / category /).
Records - Here, you can modify the search appearance for different archive pages on your site, such as those that list all posts with a specific date or author, as well as the search result and 404 pages. We recommend that you disable author files in search results if your blog has only one author.
Crumbs of bread: crumbs pan show the precise path to a specific page on your site. As such, they also have the role of a landmark, in turn enhancing the user experience and helping with the overall site navigation. What's great about them too is that they show up in search results too, which automatically gives your website a boost when it comes to search engine rankings. You should have breadcrumbs enabled as this will allow you to access additional breadcrumb settings.
- Breadcrumb Separator - This option is self explanatory. You can choose to put (or not put) a separator between the breadcrumbs. The separator is usually some kind of symbol, like the two arrows (>>) that are already placed by default.
- Anchor text for the home page: You can change the name of the anchor text for the home page here, although we recommend that you leave it as the default (Home).
- Breadcrumb prefix: This is the name of your prefix that comes before the breadcrumb. Once again, we recommend that you leave this field blank.
- Prefix for Archive Breadcrumbs: This option allows you to define a prefix for archive breadcrumbs.
- Search page breadcrumbs prefix: You can add a prefix to search page breadcrumbs.
- Navigation path for 404 page - You can determine what will be displayed in the path when users come across a 404 page.
- Show blog page (optional) - This setting will appear if you have set a custom blog and home page. In that case, we recommend enabling this setting.
- Bold Last Page: Choose whether to make the last page bold or not. We recommend that you choose Regular here.
- Taxonomy to display in breadcrumbs for post types - Unless you are an advanced user, we suggest that you select Category for the taxonomy.
- Content type file to display in breadcrumbs for taxonomies - Here you can enter Category, Label and Format.
RSS - RSS feed settings allow you to define how your blog posts will be displayed in RSS feeds. You can add a link to the author's file, to the post, to your site with your site's name as an anchor, and a link to your site's name and description.


![SEO Guide for WordPress + SEO Tutorial for Ecommerce [SEO On Page Video Tutorial]](https://rmarketingdigital.com/wp-content/uploads/2020/11/guia-seo-para-wordpress-4887479-e1620380188678-600x294.png)


